Loading ...
Loading ...
Loading ...
9
OPERATING INSTRUCTIONS
1
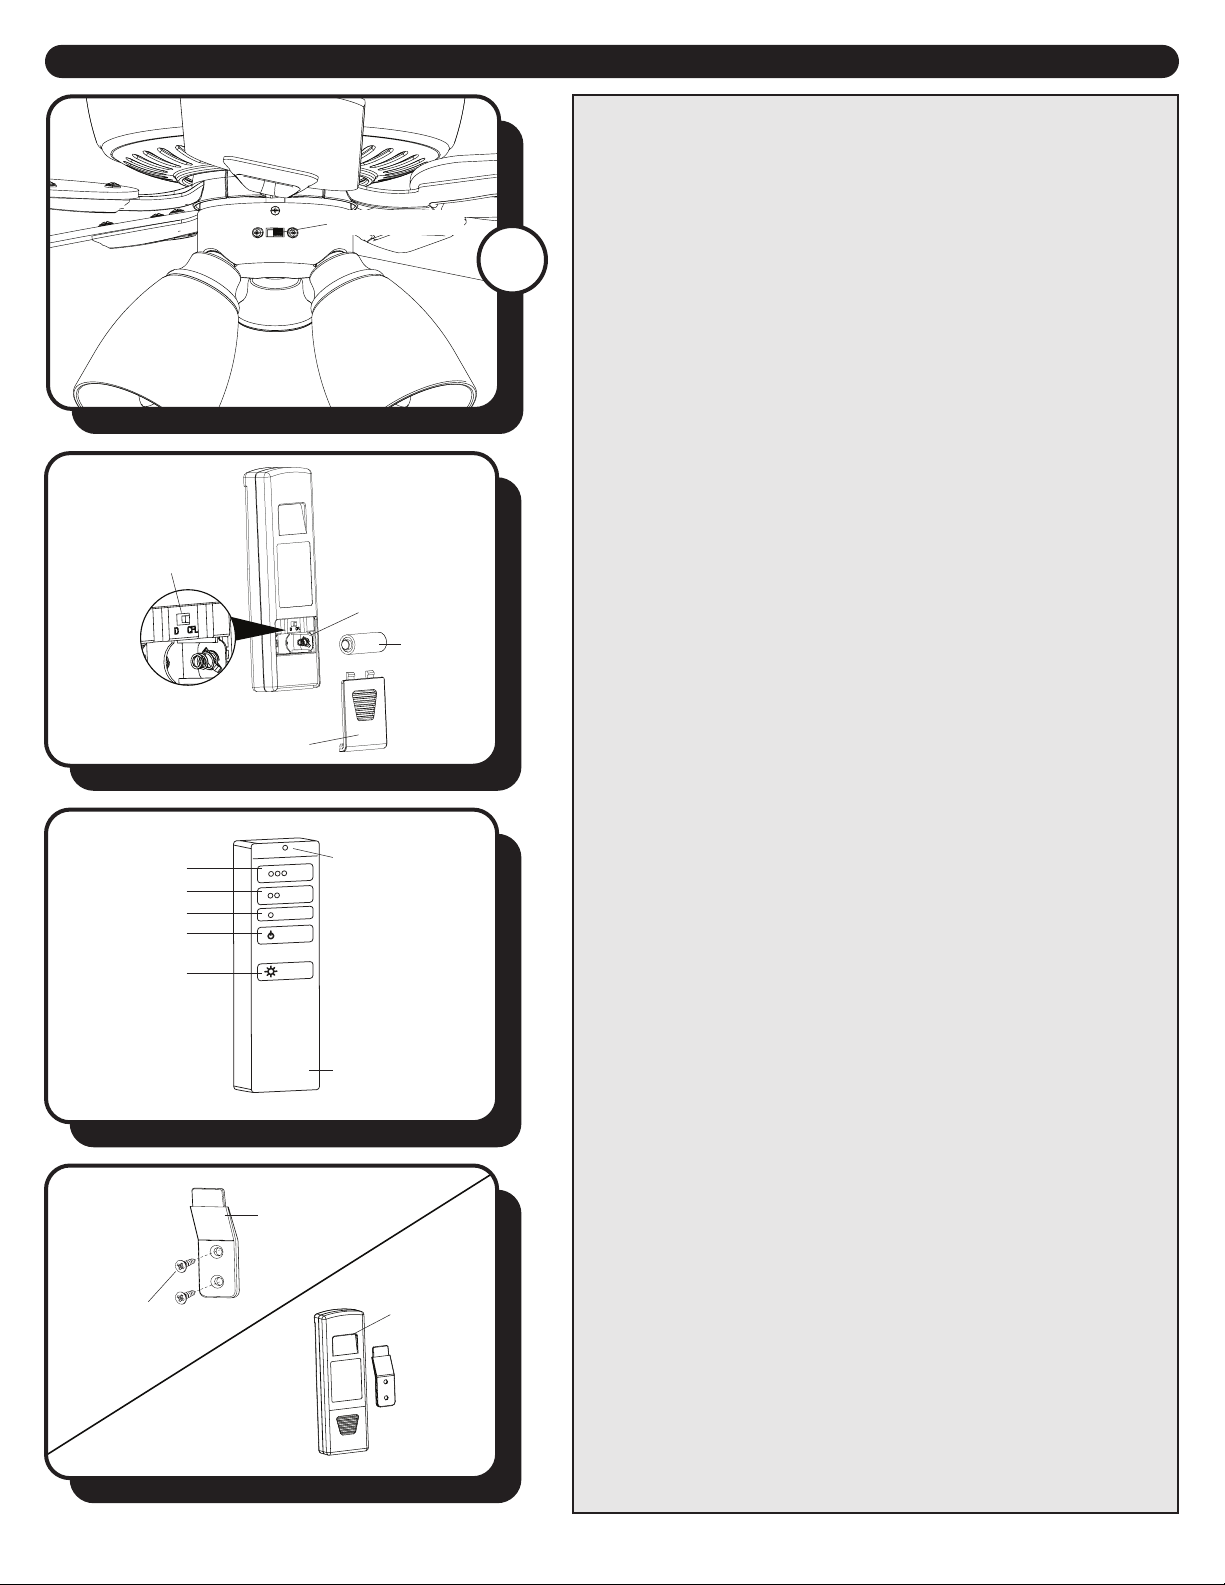
1. Use the fan reverse switch, located on the switch
housing to optimize your fan for seasonal performance.
Using a ceiling fan will allow you to raise your thermostat
setting in summer and lower your thermostat setting in
winter without feeling a dierence in your comfort.
Note: Wait for the fan to stop before moving the reverse
switch.
In warmer weather, push the reverse switch left which
will result in downward airow creating a wind chill eect.
In cooler weather, push the reverse switch right which
will result in upward airow that can help move stagnant,
hot air o the ceiling area.
Reverse Switch
A
B
C
D
E
2. Remove the battery cover from the back of the remote
transmitter and insert the 12-volt battery. Replace the
battery cover.
D/CFL Switch: Switch should be set to “D” to correspond
with the included LED bulbs. Flip to “CFL”, to disable the
dimming function if you change to non-dimmable bulbs.
IMPORTANT: The dimmer function does NOT work with
non-dimmable bulbs.
3. To operate the fan using remote control, press and
release the following buttons:
A - High fan speed
B - Medium fan speed
C - Low fan speed
D - Turns the fan o. Press and hold this button for 5
seconds to enter Light Delay O mode, which will turn
o light after one minute. The LED on the remote control
will ash four times to conrm mode setting.
E - Turns the light on and o. Press and hold this button
to dim or brighten when using dimmable bulbs.
4. Install wall bracket for remote control (optional) - Use
the two mounting screws to attach the wall bracket to
the wall. Note: A slot on the back of the remote control
allows it to be stored on the wall bracket when not in use.
Remote
Battery
Battery
Cover
Remote
Slot
Mounting
Screw
Battery
Compartment
D/CFL Button
LED Indicator
Wall Bracket
Loading ...
Loading ...