Loading ...
Loading ...
Loading ...
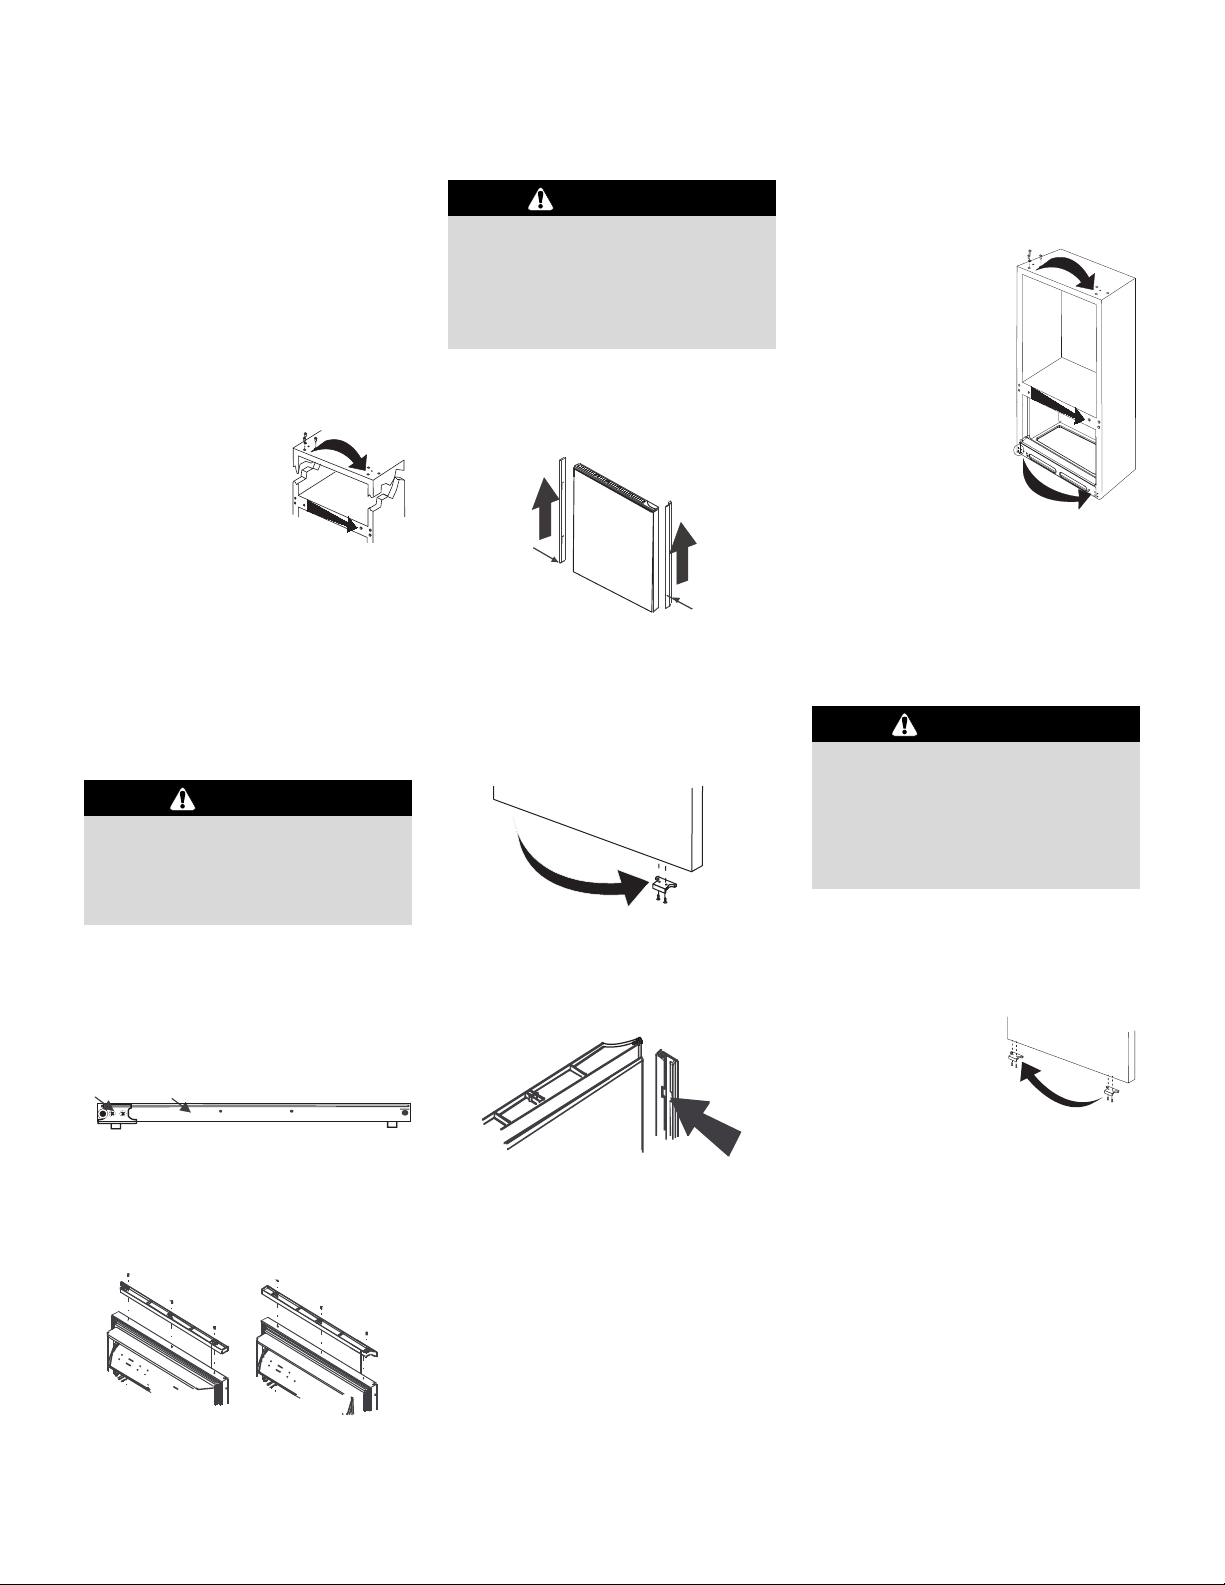
3. Transfer door stops from bottom edge
of fresh food door and freezer door
(some models) to opposite side of
door edge.
• Use a Phillips
screwdriver for
removal and
installation.
4. See How to Install and Remove
Handles (page 6) to remove and
reinstall handles.
5. Proceed to How to Replace the
Doors and Hinges to mount doors
(page 7).
3. Locate door stop (A) and door cap (B)
on bottom edge of fresh food door.
Remove with a Phillips screwdriver.
• Retain all items for later replace-
ment.
4. Remove top door extension with
1
⁄4"
hex head driver. Flip door extension
(A) so notched corner turns in toward
interior of door (B).
5
How to reverse
refrigerator door
DOORS WITH TRIM AND
PANELS
1. Perform all steps listed in How to
Remove the Door and Hinges
(page 4).
2. Transfer cabinet
plugs and screws to
opposite side of
cabinet.
• Remove plugs with flat blade of
screwdriver wrapped in masking
tape.
• Remove center mullion screws with
a
5
⁄16
" hex head driver.
• For swing doors only: Remove
bottom mullion screws with
3
⁄8
" hex
head driver.
5. Remove side door trim (A) and handle
trim (B) from door by tapping bottom
edges upward with soft rubber mallet.
•Trim will slide up approximately
3
⁄4"
and release from door.
6. Replace bottom door cap removed
previously. Install door stop on oppo-
site side of door.
7. Retrieve alternate side door trim
shipped with refrigerator. Install trim
by aligning notches of trim with metal
mounting tabs on side of door.
• Slide trim down until piece locks into
place.
•Tap top of trim with rubber mallet to
insure snug fit.
8. Remove tape from panels.
9. Proceed to How to Install and
Remove Handles to reinstall handle
(page 6).
To avoid possible injury and damage
to property, tape decorative panels
(some models) securely into place
before removing side door trim and
handles.
WARNING
STANDARD DOOR DESIGN
1. Perform all steps listed in How to
Remove the
Doors and Hinges
(page 4).
2. Transfer cabinet
plugs and cabinet
screws to opposite
side of cabinet.
• Remove cabinet
plugs with flat
blade of screw-
driver tip wrapped
in masking tape.
• Remove center mullion screws with
5
⁄16" hex head screwdriver.
• For swing doors only: Remove
bottom mullion screws with
3
⁄8"hex
head driver.
B
A
B
A
A
B
When working directly on doors, place
doors on a nonabrasive surface pro-
tected by towels or rugs to avoid dam-
age to door finish.
CAUTION
To avoid possible injury and damage
to property:
➢ Place doors on a nonabrasive
surface protected by towels or rugs
while working directly on doors.
CAUTION
Loading ...
Loading ...
Loading ...