Loading ...
Loading ...
Loading ...
I
I
I
I
ROUTINE MAINTENANCE
I
WARNING: DO NOT at any time let brake fluids, gasoline, petroleum- I
based products, penetrating oils, etc. come in contact with plastic parts.
I
Chemicals can damage, weaken or destroy plastic, which may result in
serious personal injury.
Periodic maintenance allows for Iong life and trouble-free operation. A cleaning,
lubrication and maintenance schedule should be maintained. As a common
preventive maintenance practice, follow these recommended steps:
1.When work has been completed, clean the tooI to allow smooth functioning of the
tool over time.
2. Use clean damp cloths to wipe the tool.
3. Check the state of all electrical cables.
4. Keep the motor air openings free from oil, grease and sawdust or woodchips and
store tooI in a dry place.
5. Be certain that all moving parts are welt lubricated, particularly after lengthy
exposure to damp and/or dirty conditions.
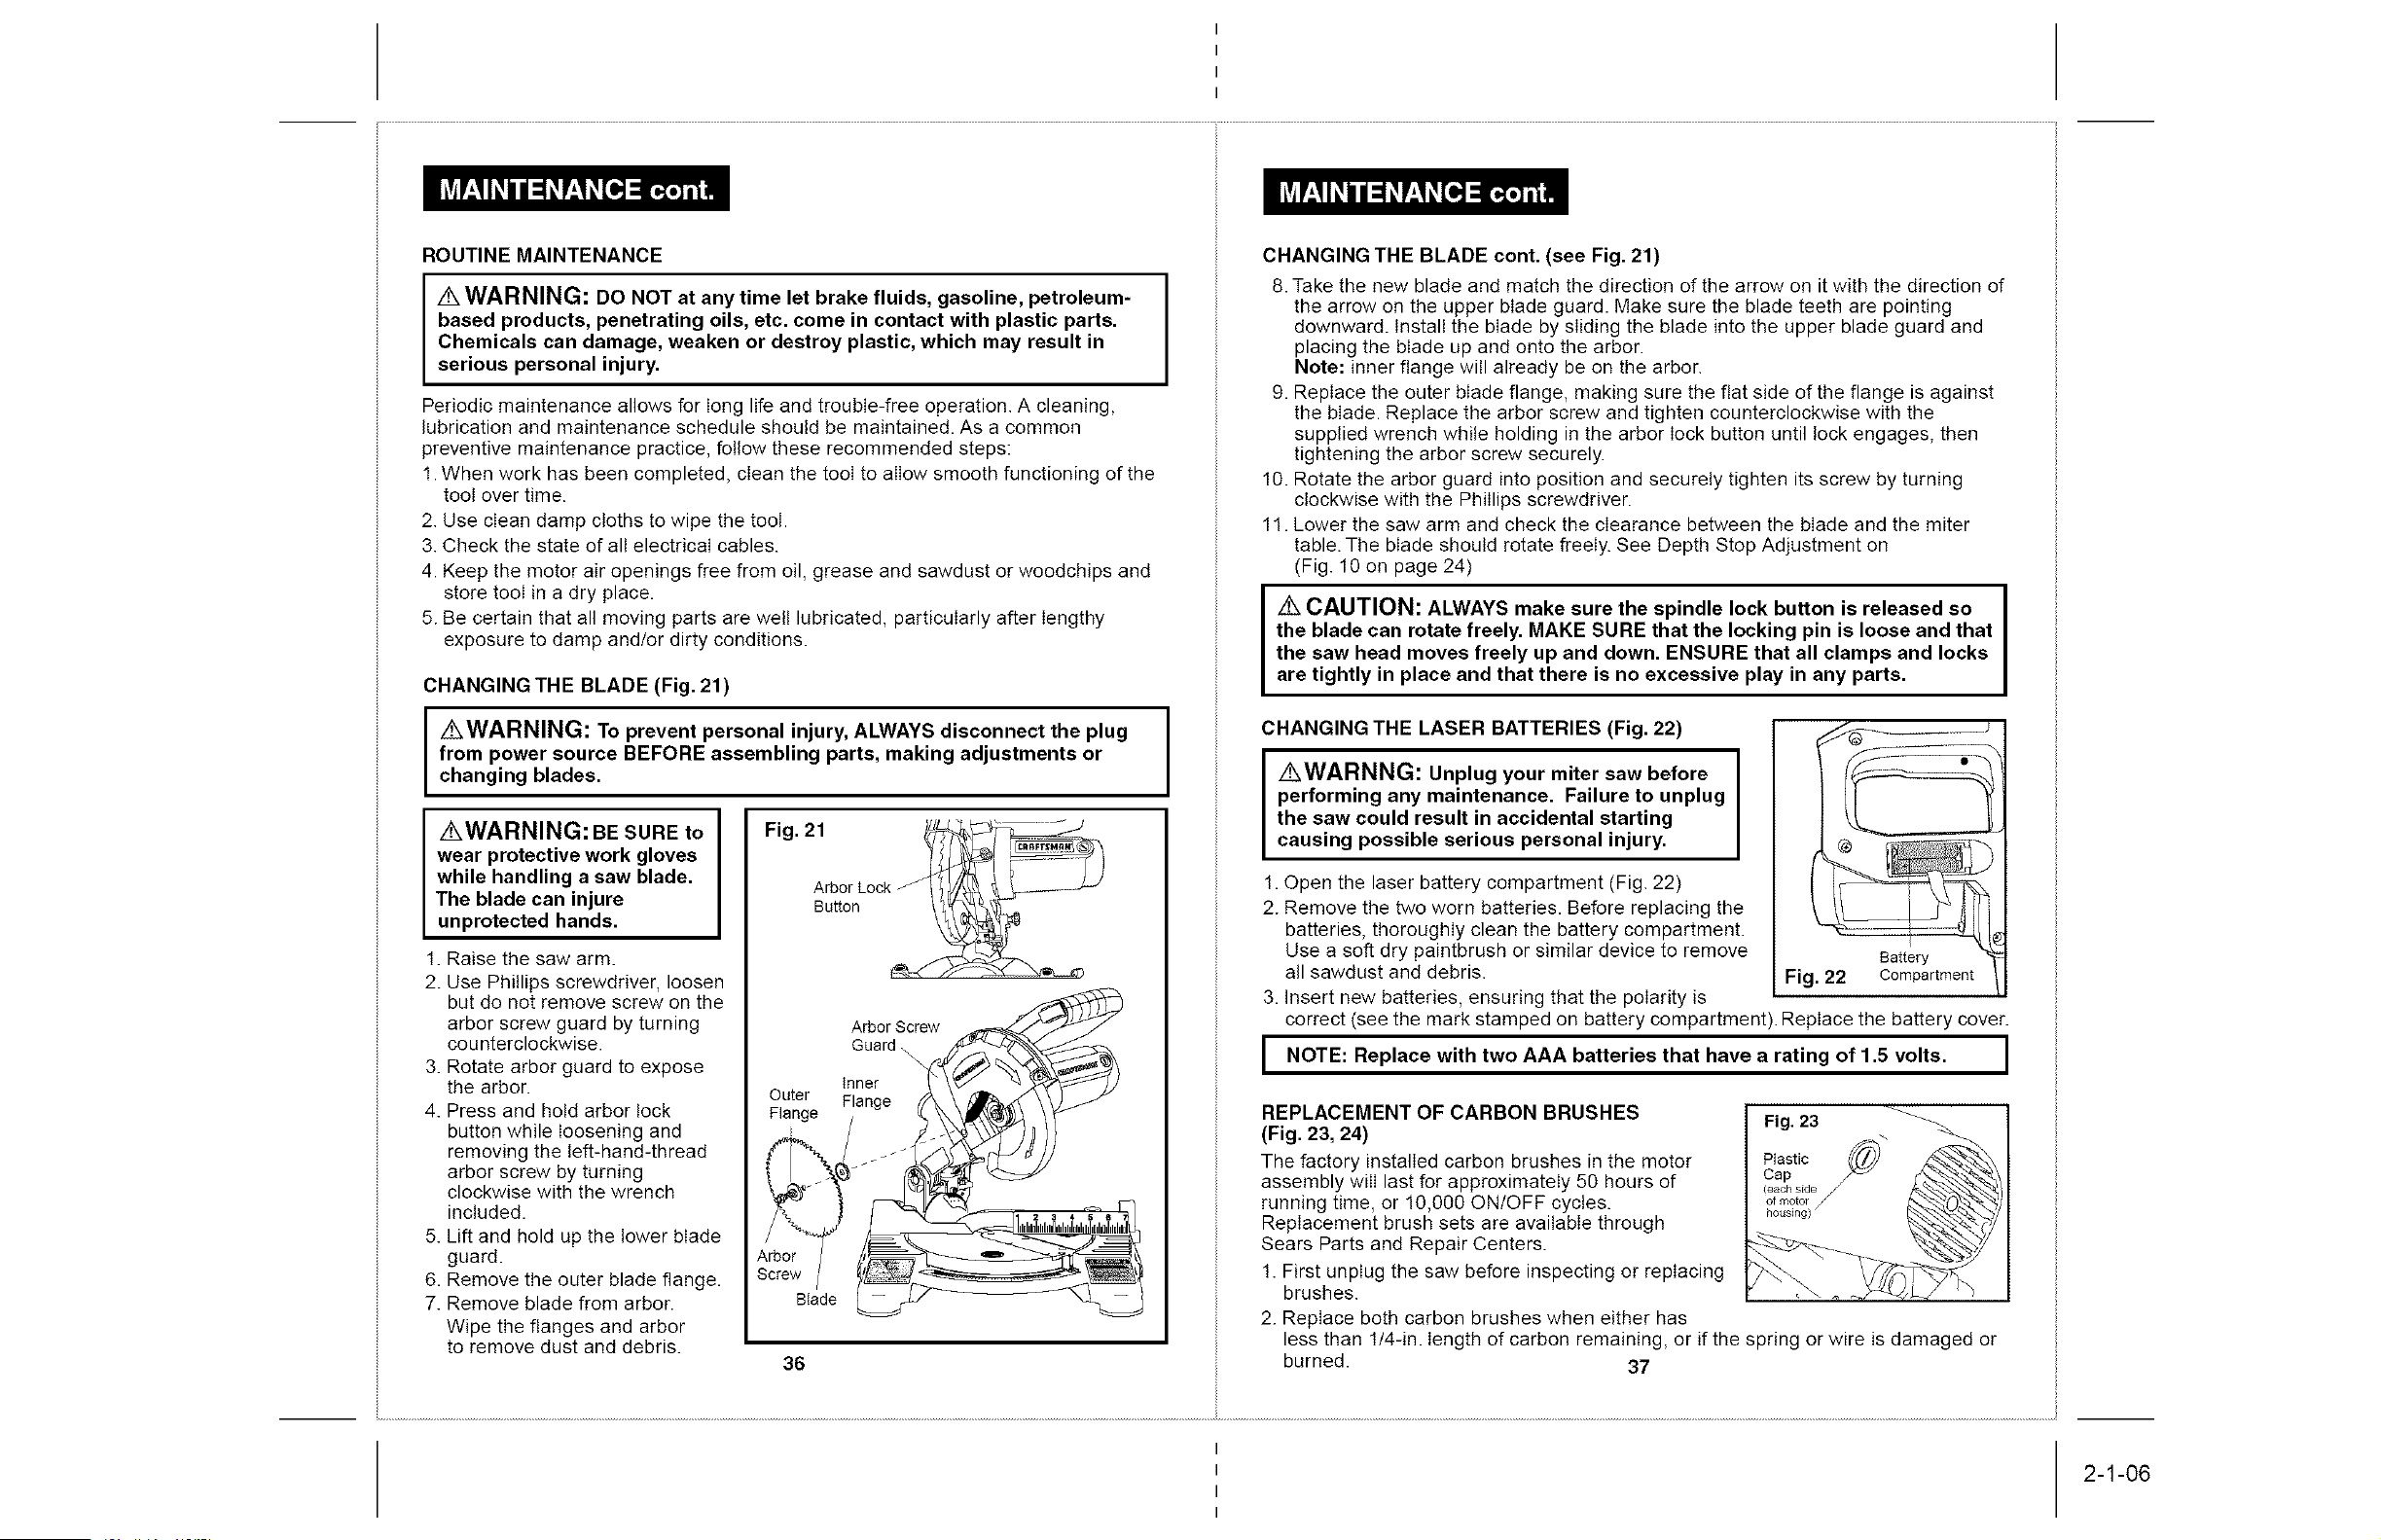
CHANGINGTHE BLADE (Fig. 21)
WARNING: To prevent personal injury, ALWAYS disconnect the plug
from power source BEFORE assembling parts, making adjustments or
changing blades.
AWARNING: BE SURE to
wear protective work gloves
while handling a saw blade.
The blade can injure
unprotected hands.
1. Raise the saw arm.
2. Use Phillips screwdriver, loosen
but do not remove screw on the
arbor screw guard by turning
counterclockwise.
3. Rotate arbor guard to expose
the arbor.
4. Press and hold arbor lock
button while loosening and
removing the left-hand-thread
arbor screw by turning
clockwise with the wrench
included.
5. Lift and hold up the lower blade
guard.
6. Remove the outer blade flange.
7. Remove blade from arbor.
Wipe the flanges and arbor
to remove dust and debris.
ArborScrew
Guard
inner _
FOUtngeFlange
A/rbor"T
Screw / ___
Blade
36
CHANGING THE BLADE cont. (see Fig. 21)
8. Take the new blade and match the direction of the arrow on it with the direction of
the arrow on the upper blade guard. Make sure the blade teeth are pointing
downward. Install the blade by sliding the blade into the upper blade guard and
placing the blade up and onto the arbor.
Note: inner flange will already be on the arbor.
9. Replace the outer blade flange, making sure the flat side of the flange is against
the blade. Replace the arbor screw and tighten counterclockwise with the
supplied wrench while holding in the arbor Iock button until lock engages, then
tightening the arbor screw securely.
10. Rotate the arbor guard into position and securely tighten its screw by turning
clockwise with the Phillips screwdriver.
11. Lower the saw arm and check the clearance between the blade and the miter
table. The blade should rotate freely. See Depth Stop Adjustment on
(Fig. 10 on page 24)
I
A CAUTION: ALWAYS make sure the spindle lock button is released so I
the blade can rotate freely. MAKE SURE that the locking pin is loose and that
I
the saw head moves freely up and down. ENSURE that all clamps and locks
are tightly in place and that there is no excessive play in any parts.
CHANGING THE LASER BATTERIES (Fig. 22)
I
/kWARNNG: Unplug your miter saw before I
performing any maintenance. Failure to unplug
I
the saw could result in accidental starting
causing possible serious personal injury.
1.
2.
Open the laser battery compartment (Fig. 22)
Remove the two worn batteries. Before replacing the
batteries, thoroughly clean the battery compartment.
Use a soft dry paintbrush or similar device to remove
all sawdust and debris.
3. Insert new batteries, ensuring that the polarity is
correct (see the mark stamped on battery compartment). Replace the battery cover.
I NOTE: with two AAA batteries that have of 1.5 volts. I
Replace
a
rating
I
REPLACEMENT OF CARBON BRUSHES
(Fig. 23, 24)
The factory installed carbon brushes in the motor
assembly will last for approximately 50 hours of
running time, or 10,000 ON/OFF cycles.
Replacement brush sets are available through
Sears Parts and Repair Centers.
1. First unplug the saw before inspecting or replacing
brushes.
Fig. 23
Plastic
Cap
2. Replace both carbon brushes when either has
less than 1/4-in. length of carbon remaining, or if the spring or wire
burned. 37
is damaged or
I
I
I
I
2-1-06
Loading ...
Loading ...
Loading ...