
Loading ...
Loading ...
Loading ...
24
Single Zone Art Cool Premier Wall Mounted Installation Manual
Due to our policy of continuous product innovation, some specifications may change without notification.
©LG Electronics U.S.A., Inc., Englewood Cliffs, NJ. All rights reserved. “LG” is a registered trademark of LG Corp.
GENERAL INSTALLATION GUIDELINES
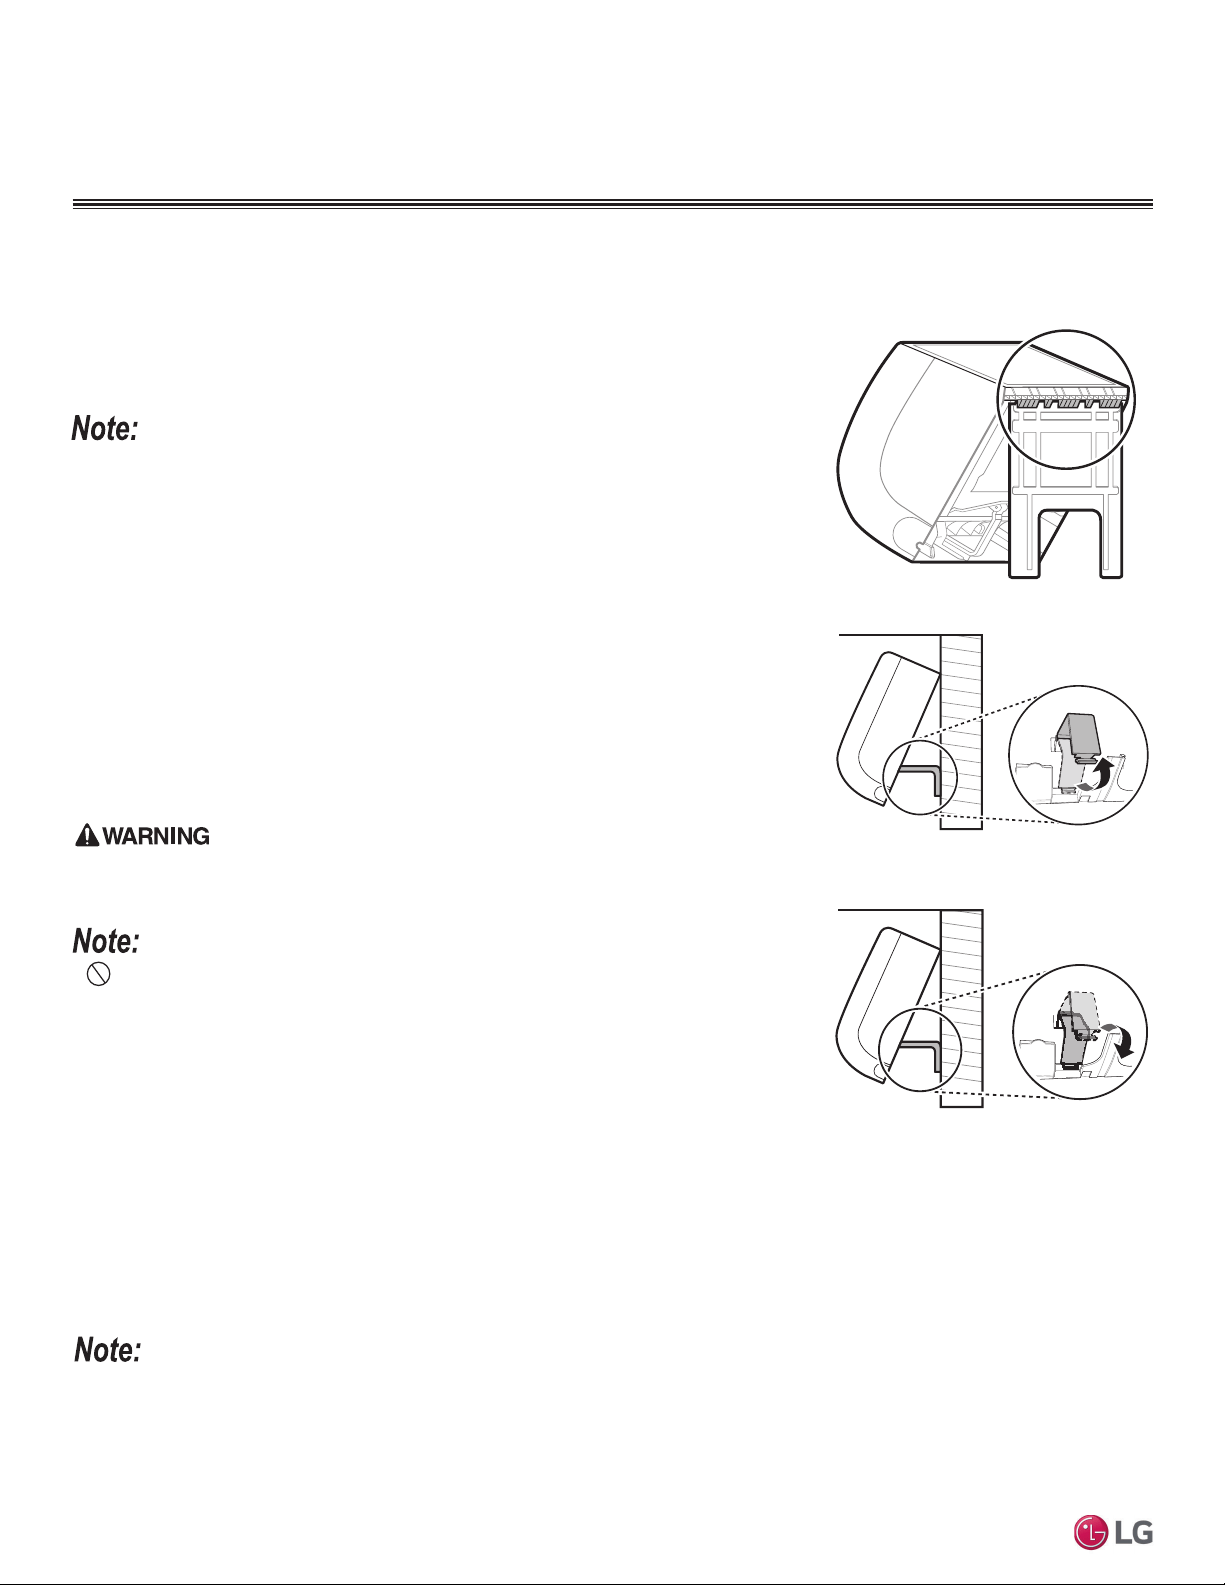
1. Position the indoor unit onto the top portion of the installation plate.
2. Engage the hooks at the top of the indoor unit with the top edge of the installation plate
(number of hooks depends on model type).
3. Ensure the hooks are properly seated on the installation plate by shaking the indoor unit left
and right.
Permanently secure the indoor unit to the wall ONLY AFTER all other tasks such as Refrigerant
Piping Connections, Drain Piping Connections, Electrical Connections, and Final Installation Proce-
dures are complete.
4. Retain a space between the indoor unit and the installation plate by unsnapping the piping
holder and using it as a space holder.
5. Carefully guide the refrigerant piping and drain piping through the access hole.
• Pay attention to the positioning of the piping through the wall.
6. Close the piping holder by snapping it back into place on the indoor unit.
7. Push the bottom of indoor unit towards the installation plate.
• Press the lower left and right sides of the unit against the installation plate until the clips
engage into their connection points.
• Clicking sounds could be heard as the bottom of the indoor unit attaches to the installation
plate successfully.
Figure 20: Attaching the Indoor Unit to the
Installation Plate.
Figure 21: Releasing the Piping Holder.
Mounting the Indoor Unit to the Installation Plate
The indoor unit can fall from the wall if it is not properly installed and secured to the installation plate.
Falling indoor units can cause bodily injury or death.
• To avoid a gap between the installation plate and the wall, ensure the screws are correctly
and fully secured.
• To prevent condensate from forming due to an inflow of outdoor air, before indoor unit installa-
tion is finished, completely seal the piping access hole in the wall.
Indoor Unit Mounting
Preparing for Piping / Electrical Connections
1. To prepare indoor unit for piping and electrical installation, disengage the bottom of the indoor unit from installation plate, if those procedures
have been performed.
2. Unsnap the piping / drain hose holder out from the indoor unit. Prop it open between the indoor unit and installation plate to separate the
bottom of the indoor unit from the wall. This will allow for more working space.
• Go to the Refrigerant Piping Connections section of this manual for information on indoor unit piping connection installation. See also the
Refrigerant Piping Connections section for drain piping installation.
• Go to the Electrical Installation section of this manual for information on electrical wiring to the indoor unit.
• After all Refrigerant Piping and Electrical Connection procedures are complete, snap the L-bracket closed, and secure the indoor unit to the
LQVWDOODWLRQSODWHDVGHWDLOHGLQ³0RXQWLQJWKH,QGRRU8QLWWRWKH,QVWDOODWLRQ3ODWH´
Figure 22: Closing the Piping Holder.
Loading ...
Loading ...
Loading ...