Cuisinart
®
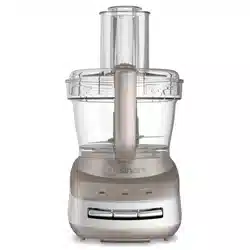
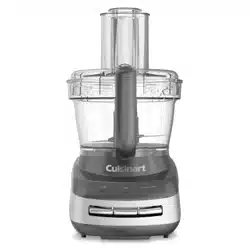
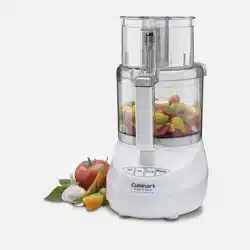
Core Custom
™
10-Cup Food Processor
FP-110 Series
For your safety and continued enjoyment of this product, always read the instruction book carefully
before using.
INSTRUCTION
AND RECIPE
BOOKLET

2
IMPORTANT
UNPACKING
INSTRUCTIONS
This package contains a Cuisinart
®
Core Custom
™
10-Cup Food Processor and the accessories for it:
10-cup work bowl, work bowl cover with small and
medium pushers, metal chopping/mixing/dough blade,
reversible slicing/shredding disc medium, reversible
slicing/shredding disc fine, removable stem adapter,
storage hub, base and instruction/recipe book.
CAUTION:
THE CUTTING TOOLS HAVE VERY SHARP EDGES.
To avoid injury when unpacking the parts, please follow
these instructions.
1. Place the box on a low table or on the floor next to
the kitchen counter where you intend to keep the
food processor. Be sure the box is right side up.
2. Open top flaps—there will be a rectangular block
of packing material that holds the processor parts,
each fitted into a cavity.
3. Remove the instruction/recipe book.
4. Lift out the packing material.
5. Remove the base and bowl and place them on the
counter or table. Read the instructions thoroughly
before using the machine.
6. Save the shipping cartons and packing material.
You will find these very useful if you need to repack
the processor for moving or other shipment.
We recommend that you visit our website,
www.cuisinart.com, for a fast, efficient way to
complete your product registration.
IMPORTANT
SAFEGUARDS
Always follow these safety precautions when using
this appliance.
Getting Ready
1. Read all instructions.
2. Blade and discs are sharp. Handle them care-
fully.
3. Always turn off and unplug appliance from
outlet when not in use, before putting on or
taking off parts, before removing food and
before cleaning. To unplug, grasp plug and
pull from electrical outlet. Never pull cord.
4. Do not use outdoors.
5. Do not let cord hang over edge of table or counter,
or touch hot surfaces.
6. Do not operate any appliance that has a dam-
aged cord or plug or after it has been dropped or
damaged in any way. Contact Cuisinart Consumer
Service Center at 1-800-762-0190 for information
on examination, repair, or adjustment.
Operation
1. Keep hands as well as spatulas and other utensils
away from moving blade or discs while processing
food to prevent the possibility of severe personal
injury or damage to food processor. A plastic
scraper may be used, but only when the food pro-
cessor motor is stopped.
2. Avoid coming into contact with moving parts.
Never push food down by hand when slicing or
shredding. Always use pusher.
3. Make sure motor has completely stopped before
removing cover. (If machine does not stop within 4
seconds after you remove the bowl cover assem-
bly, call 1-800-762-0190 for assistance. Do not use
the machine.)
4. Never store any blade or disc on stem adapter.
To reduce the risk of injury, no blade or disc should
be placed on the shaft except when the bowl is
properly locked in place and the processor is in
use. Store blades and discs as you would sharp
knives, out of reach of children.
5. Be sure cover and feed tube are securely locked in
place before operating food processor.
6. Never feed food by hand. Always use the pusher.
7. Never try to override or tamper with cover
interlock mechanism.
Cleaning
To protect against risk of electrical shock, do not put
base in water or other liquids.
General
1. This appliance should not be used by or near chil-
dren or individuals with certain disabilities.
2. Do not operate this, or any other motor-driven
appliance, while under the influence of alcohol or
other substances that affect your reaction time
or perception.
3. This food processor is for household use. Use
it only for food preparation as described in the
accompanying instruction and recipe book. Do not
use this appliance for anything but its intended use.
4. When using an approved Cuisinart Food
Processor accessory, read all instructions included
with that accessory.
5. The use of attachments not recommended or sold
by Cuisinart may cause fire, electrical shock or per-
sonal injury, or damage to your food processor.
3
6. To avoid possible malfunction of work bowl switch,
never store processor with cover assembly in
locked position.
7. Do not operate your appliance in an appliance
garage or under a wall cabinet. When storing in
an appliance garage, always unplug the unit
from the electrical outlet. Not doing so could
create a risk of fire, especially if the appliance
touches the walls of the garage or the door touches
the unit as it closes.
NOTE: This appliance has a polarized plug
(one blade is wider than the other). As a safety
feature, this plug will fit in a polarized outlet only
one way. If the plug does not fit fully in the
outlet, reverse the plug. If it still does not fit,
contact a qualified electrician. Do not attempt to
defeat this safety feature.
NOTE: This appliance is not intended for use by
children or by persons with reduced physical,
sensory, or mental capabilities, or lack of
experience and knowledge. Close supervision is
necessary when any appliance is used near
children. Children should be supervised to
ensure that they do not play with the appliance.
Do not fill the bowl above the marked maximum
fill line (or rated capacity) to avoid risk of injury
due to damage to the cover or bowl.
SAVE THESE
INSTRUCTIONS.
FOR HOUSEHOLD
USE ONLY.
WARNING: RISK OF FIRE OR
ELECTRIC SHOCK
The lightning flash with arrowhead symbol
within an equilateral triangle is intended to
alert the user to the presence of dangerous
uninsulated voltage within the product’s
enclosure that may be of sufficient
magnitude to constitute a risk of fire or
electric shock to persons.
The exclamation point within an equilateral
triangle is intended to alert the user to the
presence of important operating and
maintenance (servicing) instructions in the
literature accompanying appliance.
CONTENTS
Important Unpacking Instructions ................................ 2
Important Safeguards................................................... 2
Parts ............................................................................. 4
Assembly Instructions .................................................. 5
Machine Controls ......................................................... 5
Machine Functions ....................................................... 5
User Guide ................................................................... 7
Cleaning, Storage and Maintenance ............................ 8
For Your Safety ............................................................. 8
Technical Data .............................................................. 8
Troubleshooting ............................................................ 9
Warranty Information .................................................. 10
Recipes ....................................................................... 12
WARNING
RISK OF FIRE OR ELECTRIC SHOCK
DO NOT OPEN
WARNING: TO REDUCE THE RISK OF FIRE OR ELECTRIC SHOCK,
DO NOT REMOVE COVER (OR BACK)
NO USER-SERVICEABLE PARTS INSIDE
REPAIR SHOULD BE DONE BY AUTHORIZED SERVICE PERSONNEL ONLY
2.
1.
6.
7.
8.
3.
4.
5.
9.
4
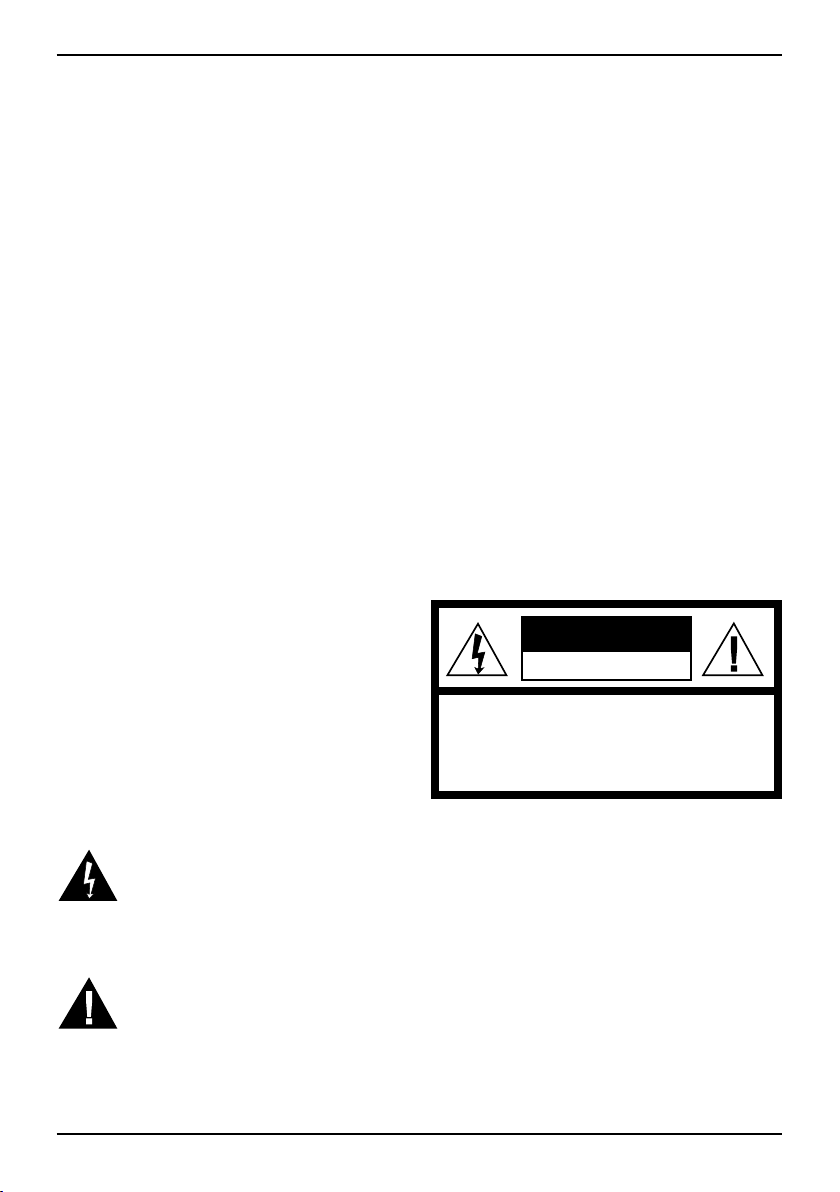
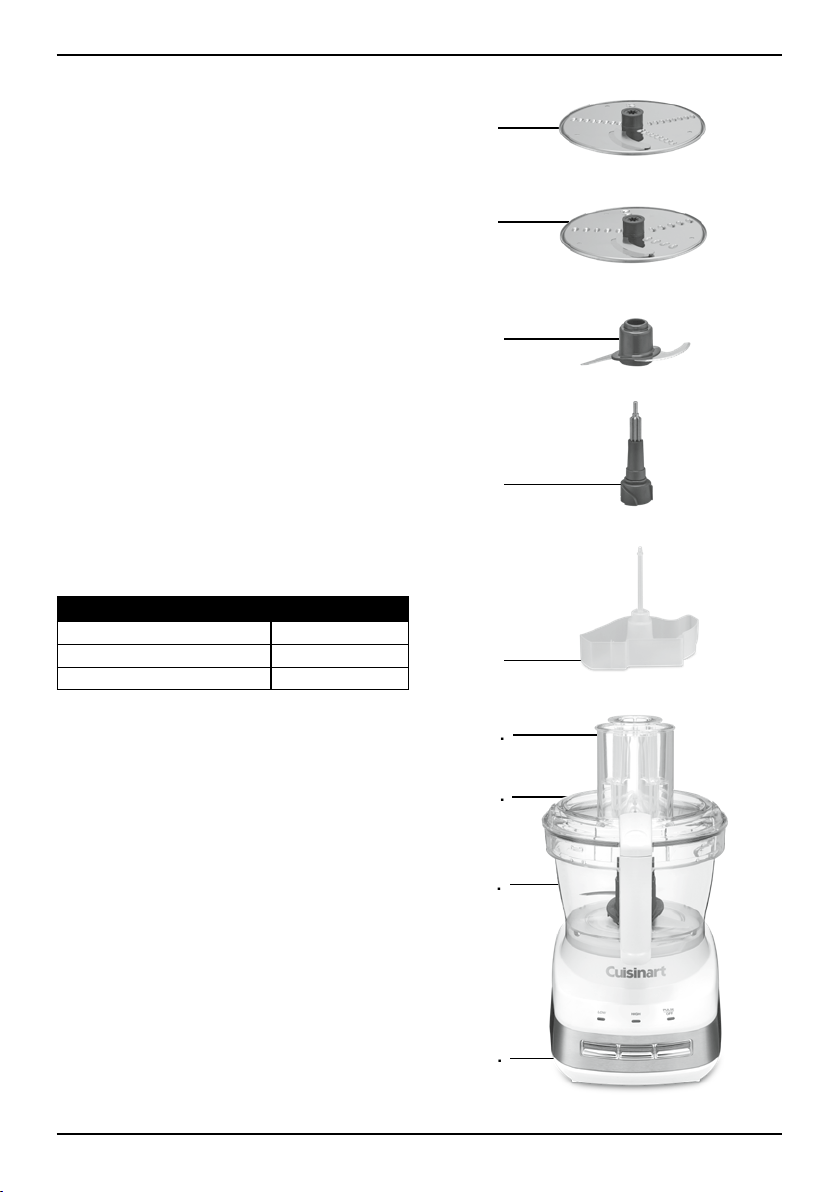
PARTS
The machine includes:
1. Housing base - With convenient paddle controls
2. 10-cup removable work bowl
3. Cover with feed tube
4. Small and medium pushers - Slide inside
the feed tube
5. Stem adapter
6. Metal chopping/mixing/dough blade
7. Fine reversible slicing/shredding disc
8. Medium reversible slicing/shredding disc
9. Storage Hub - Stores stem adapter, blade and
discs inside the work bowl (for storage use only)
10. BPA free (not shown) - All materials that come in
contact with food or liquid are BPA free
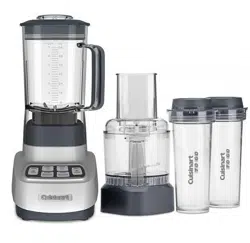
NOTE: Cuisinart offers Cuisinart Core
Essentials
™
, a line of accessories for your food
processor that can be purchased separately.
The selected accessory connects to the food
processor housing base, so you can turn your
food processor into a blender, juicer, dicer
and more!
AVAILABLE ACCESSORIES:
Visit Cuisinart.com to purchase!
ACCESSORY NAME MODEL #
36 oz. Blender Jar MFP-B36
Juicing Center MFP-JC
Dicing Kit FP-DC

5
ASSEMBLY
INSTRUCTIONS
Before First Use
Before using your Cuisinart
®
Core Custom
™
10-Cup
Food Processor for the first time, wash the work bowl,
work bowl cover, pusher, blade and discs (see cleaning
instructions on page 8).
1. Place the food processor base on a dry, level
countertop with the controls facing you. Do not
plug the unit in until it is fully assembled.
2. With the bowl on the base, use the handle to
turn the work bowl clockwise to lock it onto the
housing base.
CHOPPING/MIXING/
DOUGH BLADE
1. Place the work bowl on top of base, with the
work bowl handle just to the right of center.
Turn the work bowl clockwise to lock it onto the
housing base.
2.
Carefully place the blade onto the stem adapter.
Holding top of stem adapter, lift and place over the
work bowl accessory adapter. Blade should rest on the
bottom of the work bowl.
3. Plug in the housing base.
4. Add desired ingredients to work bowl.
5. Place work bowl cover on work bowl, with the feed
tube just to the right of center. Turn clockwise to
lock onto work bowl.
6. Align pusher with the feed tube opening on the
work bowl cover and slide down to the bottom.
7. You are now ready to operate the machine.
REVERSIBLE SLICING
AND SHREDDING DISCS
1. Place the work bowl on top of the base, with
the work bowl handle just to the right of center.
Turn the work bowl clockwise to lock it onto the
housing base.
2. Insert stem adapter without blade.
3. Choose desired disc.
4. Carefully place disc over stem adapter, with the
side being used facing up.
5. Place work bowl cover onto work bowl, with the
feed tube just to the right of center. Turn clockwise
to lock onto work bowl.
6. Align pusher with the feed tube opening on the
work bowl cover and slide down to the bottom.
7. Plug in the housing base.
8. The machine is now ready for use.
MACHINE CONTROLS
High and Low Control Paddles
The High and Low controls are paddles that allow the
machine to run until Off is selected.
1. Properly assemble and engage the machine.
2. Add ingredients to the work bowl, either through
the feed tube or directly into the bowl.
3. Press the High or Low paddle. The white LED light
will illuminate and the motor will start.
4. Press the Off paddle when finished.
Pulse Paddle
The Pulse control is a paddle that allows the machine
to run only while it is being pressed. This capability
provides more accurate control of the duration and
frequency of processing. Unless otherwise specified, a
pulse should be about one second.
With the machine properly assembled and engaged,
and ingredients in the work bowl, press the Pulse
paddle repeatedly as needed. The white LED light will
illuminate upon activation.
MACHINE FUNCTIONS
Using the Chopping/Mixing/Dough Blade
Chopping
• For raw ingredients: Peel, core and/or remove
seeds and pits. Food should be cut into even,
½- to 1-inch pieces. Foods cut into same size
pieces produce the most even results.
• Pulse food in 1-second increments to chop. For the
finest chop, either hold the Pulse paddle down or
press High or Low to run the machine continuously.
Watch ingredients closely to achieve desired
consistency and scrape the work bowl as neces-
sary. Low speed is recommended for making
doughs and batters. High speed is recommended
for most other chopping, processing and slicing/
shredding tasks.
Puréeing
• To purée fresh fruits or cooked fruits/vegetables:
Ingredients should be cut into 1-inch pieces; a
smooth purée is best achieved when all the pieces
are equal in size. Pulse to initially chop and then
process on High or Low until food is puréed; scrape
the work bowl as necessary. NOTE: Do not use
this method to purée cooked white potatoes.
• To purée solids for a soup or sauce: Strain the
solids from the liquid and process the solids alone.
Add cooking liquid and process as needed.

6
Dough
• Always use Low speed when kneading. Be sure
that the medium pusher lock is in the locked posi-
tion when kneading dough to avoid it from moving
around — some vibration is still normal. Always
start the food processor before adding liquid. First
process the dry ingredients (flour, salt, etc.) and
then add the liquid in a slow, steady stream, or
through the drizzle hole in the pusher, allowing the
dry ingredients to absorb it. If liquid is added too
quickly, wait until ingredients in the work bowl have
mixed, then add remaining liquid slowly (do not turn
off the machine). Never use more than 2½ cups
of white/all-purpose flour when preparing a
yeasted dough.
Using the Reversible Slicing and Shredding Discs
• The slicing side of the discs makes whole slices.
It slices fruits and vegetables, cooked meat and
semi-frozen raw meat. The shredding side of
the discs shreds most firm and hard cheeses.
It also shreds vegetables like potatoes, carrots
and zucchini.
• Always pack food in the feed tube evenly for slicing
and shredding. The food will dictate the amount of
pressure: Use light pressure for soft foods, medium
pressure for medium foods and firm pressure for
harder foods. Always process with even pressure.
• For round fruits or vegetables: Remove a thick
slice on the bottom of the food so that it sits
upright in the feed tube. If food does not fit in the
feed tube, cut in half or quarters to fit. Process with
even pressure.
• For small ingredients like mushrooms, radishes or
strawberries: Trim the ends so the food sits upright
in the feed tube.
• When slicing or shredding cheese, be sure that the
cheese is well chilled.
• To shred leafy vegetables like lettuce or spinach:
Roll leaves together and stand them up in feed
tube. Process with even pressure.
NOTE: Always use the pusher when slicing or
shredding. Never put your hands in the feed
tube while unit is running.
FOOD CAPACITY
Sliced or shredded fruit, vegetables or cheese 10 cups
Chopped fruit or vegetable 6 cups
Chopped cheese 4 cups
Puréed fruit or vegetables 3 cups cooked; 1½ cups puréed
Chopped or puréed meat, fish or seafood 1½ pounds
Thin liquid (e.g., dressings, soups, etc.)
7 cups
Cake batter 8-inch cheesecake batter; 1 box (15.25 ounce) cake mix
Cookie dough
2½ dozen (based on average chocolate
chip cookie recipe)
White bread/pizza dough 2.5 cups (all-purpose or bread flour)
Nuts for nut butter
3 cups
RECOMMENDED MAXIMUM
WORK BOWL CAPACITY

7
FOOD TOOL SPEED DIRECTIONS
Soft Cheeses
(ricotta, cream
cheese, cottage
cheese, etc.)
Chopping/Mixing/
Dough Blade
Low or
High
Bring cheese to room temperature. When applicable, cut into 1-inch pieces.
Process until smooth, stopping to scrape down the sides of the bowl as needed.
Perfect for making cheesecakes, dips, pasta fillings and more.
Firm Cheeses
(Cheddar, Swiss,
Edam, Gouda, etc.)
Slicing or
Shredding Disc
High Cheese should be well chilled before slicing/shredding. Cut to fit feed tube. Use
light to medium pressure when slicing/shredding.
Hard Cheeses
(Parmesan,
Romano, etc.)
Chopping/Mixing/
Dough Blade
Slicing or
Shredding Disc
Low If using the chopping blade, cut into ½-inch pieces. Pulse to break up and then
process until finely grated. This will produce a nicely grated cheese. If slicing or
shredding, cut to fit feed tube. Use light to medium pressure when slicing/
shredding.
Baby Food Chopping/Mixing/
Dough Blade
Pulse
and Low
or High
As for all fruit and vegetable purées, cut ingredients into ½- to 1-inch pieces.
Steam ingredients until completely soft. Pulse to chop, then process until
completely smooth (add steaming liquid through the feed tube when processing if
necessary). To ensure there are no lumps, press mixture through a fine mesh
strainer. Keeps frozen in ice cube trays for individual 1-ounce portions.
Butter Chopping/Mixing/
Dough Blade
Slicing or
Shredding Disc
High For creaming: Bring butter to room temperature. Cut into 1-inch pieces. Process,
scraping bowl as necessary. For compound (flavored) butters, process flavoring
ingredients, such as herbs, zest, vegetables, etc., before adding butter. For
shredding/slicing: Freeze briefly. Use light to medium pressure to shred or slice.
Shredded butter is great for preparing certain pastry doughs. Sliced butter is
great for serving alongside corn on the cob or freshly made rolls.
Crumbs (Bread,
Cookie, Cracker,
Chip)
Chopping/Mixing/
Dough Blade
High Break into pieces. Pulse to break up, and then process until desired consistency.
This will make perfect bread/cracker/chip crumbs for coating meats and fish.
Processed cookies make delicious pie and cake crusts!
Fresh Herbs Chopping/Mixing/
Dough Blade
Pulse Wash and dry herbs VERY well. Pulse to roughly chop. Continue pulsing until
desired consistency is achieved.
Ground Meat Chopping/Mixing/
Dough Blade
Pulse
and High
Cut meat into ½-inch pieces. Pulse to chop — about 14 long pulses or until
desired consistency is achieved. If a purée is desired, continue to process. Never
chop/purée more than 1½ pounds at one time.
Ice Cream Chopping/Mixing/
Dough Blade
High Put frozen fruit cut into 1-inch pieces into the work bowl, with liquid (juice or
milk), any desired sweeteners, such as sugar, honey, simple syrup and other
flavors. Process until smooth.
Milk Shakes/
Smoothies
Chopping/Mixing/
Dough Blade
Low For milk shakes, first add ice cream. While unit is running, add milk through the
feed tube until desired consistency is achieved. For smoothies, add fruit first, then
add the liquid through the feed tube while unit is running.
Nuts Chopping/Mixing/
Dough Blade
Pulse
and High
Pulse to chop to desired consistency. To make a nut butter, pulse to break up, and
then process until smooth, stopping to scrape down as needed.
Superfine Sugar Chopping/Mixing/
Dough Blade
High Process granulated sugar for about 1 minute until finely ground. Excellent for
using in meringues and other baked goods.
Whipped Cream Chopping/Mixing/
Dough Blade
Low Process well-chilled cream until cream begins to thicken. Add sugar as desired;
process continuously until cream reaches desired consistency. This cream is
dense and perfect as a whipped topping for cake or ice cream.
USER GUIDE
You can slice, shred and chop a multitude of vegetables and fruits in the Cuisinart
®
Food Processor. What you may
not know is that the food processor is the perfect tool for a number of other tasks, such as softening butter,
making breadcrumbs, making baby food, etc. Here is a guide that will help you in preparing just about anything!

8
CLEANING, STORAGE
AND MAINTENANCE
• Keep your Cuisinart
®
Core Custom
™
10-Cup
Food Processor ready to use on the kitchen
counter. When not in use, leave it unplugged.
Store accessories in the provided storage hub,
inside the work bowl.
• Keep the blade and discs out of the reach
of children.
• All parts except the housing base are dishwasher
safe but on the top rack only. Due to intense
water heat, washing the work bowl, cover and
accessories on the bottom rack may cause damage
over time. Insert the cover with the feed tube facing
up to ensure proper cleaning. Insert the work bowl
and pushers upside down for drainage. Remember
to unload the dishwasher carefully when removing
sharp blade and discs.
• To simplify cleaning, rinse the work bowl, cover,
pushers and blade or disc immediately after use
so food won’t dry on them. Be sure to position the
pushers and work bowl upside down for drainage.
If food lodges in the pusher, remove it by running
water through it, or use a bottle brush.
• If you wash the blade and discs by hand, do it
carefully. When handling, use the plastic hubs.
Avoid leaving them in soapy water where they may
disappear from sight. If necessary, use a brush.
• The work bowl is made of Tritan
®
plastic with
metal components. It should not be placed in a
microwave oven.
• The housing base may be wiped clean with a
soapy, nonabrasive cloth or sponge. Be sure to dry
it thoroughly.
• If the feet leave spots on the counter, spray them
with a spot remover and wipe with a damp sponge.
• If any trace of the spot remains, repeat the proce-
dure and wipe the area with a damp sponge and
nonabrasive cleaning powder.
IMPORTANT: Always use the provided storage
hub. Never store any blade or disc on the stem
adapter. No blade or disc should be placed on
the shaft except when the processor is about to
be used.
MAINTENANCE: Any other servicing should be
performed by an authorized service representative.
FOR YOUR SAFETY
• Like all powerful electrical appliances, a food
processor should be handled with care. Follow
these guidelines to protect yourself and your family
from misuse that could cause injury.
• Handle and store metal blade and discs carefully
utilizing the provided storage hub. Their cutting
edges are very sharp.
• Never put stem adapter, (blade or discs on the stem
adapter) until the work bowl is locked in place.
• Always be sure that the blade or disc is down on
the stem adapter as far as it will go.
• Always insert the stem adapter with metal blade in
the work bowl before putting ingredients in bowl.
• When slicing or shredding food, always use
the pusher. Never put your fingers or spatula into
feed tube.
• Always wait for the blade or disc to stop spinning
before you remove the pusher assembly or cover
from the work bowl.
• Always unplug the unit before removing food,
cleaning or putting on or taking off parts.
• Always remove work bowl from base of machine
before you remove the chopping/mixing/dough
blade or slicing/shredding disc.
• Be careful to prevent the chopping blade or slicing/
shredding disc from falling out of the work bowl
when emptying the bowl. Remove the stem adapter
with blade before tilting the work bowl.
TECHNICAL DATA
The motor in your food processor operates on a
standard line operating current. The appropriate voltage
and frequency for your machine are shown on a label
on the bottom of the base.
An automatic temperature-controlled circuit breaker in
the motor ensures complete protection against motor
burnout. If the processor runs for an exceptionally long
time when chopping, mixing or kneading a thick or
heavy mixture in successive batches, the motor may
overheat. If this happens, the processor will stop. Turn
it off, unplug the unit and wait for the motor to cool
before proceeding. It will usually cool within 10
minutes. In extreme cases, it could take an hour.
Safety switches prevent the machine from operating
when the work bowl or the cover is not locked into
position. The motor stops within seconds when the
motor is turned off; and when the pusher assembly is
removed, a fast-stop circuit also enables the motor to
stop within seconds.
Cuisinart offers a Limited Three-Year Warranty on the
entire machine.

9
TROUBLESHOOTING
Food Processing
1. Problem: The food is unevenly processed.
Solution:
• The ingredients should be cut evenly into ½- to
1-inch pieces before processing.
• Process in batches to avoid overloading.
2. Problem: Slices are uneven or slanted.
Solution:
• Place evenly cut food, cut side down, into the
feed tube.
• Apply even pressure on the pusher.
3. Problem: Food falls over in feed tube.
Solution:
• Feed tube should be packed full for best results.
4. Problem: Some food remains on top of the disc.
Solution:
• It is normal for small pieces to remain; cut
remaining bits by hand and add to processed
ingredients.
5. Problem: Metal chopping/mixing/dough blade
cannot be removed from the stem adapter.
Solution:
• Place the blade / stem adapter assembly in a
bowl filled with warm tap water. This should help
loosen trapped food particles between the blade
and stem adapter. To see if food has loosened,
remove assembly from water by lifting from the
stem. Holding the stem, place the blade assembly
on counter top and press down on stem. This
should free the blade from the stem. If blade still
cannot removed, return to warm water and repeat
above steps.
Dough Kneading
1. Problem: Motor slows down.
Solution:
• Amount of dough may exceed maximum capacity
of your food processor. Remove half and process
in two batches.
• Dough may be too wet (see number 8). If motor
speeds up, continue processing. If not, add more
flour, 1 tablespoon at a time, until the motor
speeds up. Process until dough cleans the sides
of the work bowl.
2. Problem: Blade doesn’t incorporate ingredients.
Solution:
• Always start the food processor before adding
liquid. Add liquid in a slow, steady stream, or
through the drizzle hole in the pusher, allowing
the dry ingredients to absorb it. If too much liquid
is added, wait until ingredients in the work bowl
have mixed, then add remaining liquid slowly (do
not turn off the machine). Pour liquid onto dough
as it passes under feed tube opening; do not pour
liquid directly onto bottom of the work bowl.
3. Problem: Blade rises in work bowl.
Solution:
• Excessively sticky dough can cause blade to rise.
Carefully reinsert blade and immediately add 2
tablespoons of flour through the feed tube while
the machine is running.
4. Problem: Dough doesn’t clean inside of the
work bowl.
Solution:
• Amount of dough may exceed maximum capacity
of your food processor. Remove half and process
in two batches.
• Dough may be too dry (see number 7).
• Dough may be too wet (see number 8).
5. Problem: Nub of dough forms on top of blade and
does not become uniformly kneaded.
Solution:
• Stop machine, carefully remove dough, divide it
into 3 pieces and redistribute them evenly in the
work bowl.
6. Problem: Dough feels tough after kneading.
Solution:
• Divide dough into 2 or 3 pieces and redistribute
evenly in bowl. Process 10 seconds or until uni-
formly soft and pliable.
7. Problem: Dough is too dry.
Solution:
• While machine is running, add water, 1
tablespoon at a time, until dough cleans the
inside of the bowl.
8. Problem: Dough is too wet.
Solution:
• While machine is running, add flour, 1
tablespoon at a time, until dough cleans the
inside of the bowl.
Technical
1. Problem: The motor does not start.
Solution:
• There is a safety interlock to prevent the motor
from starting if it is not properly assembled. Make
sure the work bowl and work bowl cover are
securely locked into position.
• If the motor still will not start, check the power
cord and outlet.

10
2. Problem: The food processor shuts off
during operation.
Solution:
• The cover may have become unlocked; check to
make sure it is securely in position.
• A safety protector in the motor prevents the motor
from overheating, which is caused by excessive
strain. Press the Off control button, unplug the
unit and wait 20 to 30 minutes to allow the food
processor to cool off before resuming.
3. Problem: The motor slows down during operation.
Solution:
• This is normal as some heavier loads (e.g., slicing/
shredding cheese) may require the motor to work
harder. Simply reposition the food in the feed tube
and try again.
• The maximum load capacity may have been
exceeded. Remove some of the ingredients and
continue processing.
4. Problem: The food processor vibrates/moves
around the countertop during processing.
Solution:
• Make sure the rubber feet at the bottom of the
unit are clean and dry. Also make sure that the
maximum load capacity is not being exceeded.
• This is normal as some heavier loads (e.g., slicing/
shredding cheese) may require the motor to
work harder.
WARRANTY
Limited Three-Year Warranty
This warranty is available to U.S. consumers only.
You are a consumer if you own a Cuisinart
®
Core
Custom
™
10-Cup Food Processor that was purchased
at retail for personal, family or household use. Except
as otherwise required under applicable law, this
warranty is not available to retailers or other
commercial purchasers or owners. We warrant that
your Cuisinart
®
Core Custom
™
10-Cup Food Processor
will be free of defects in materials and workmanship
under normal home use for 3 years from the date of
original purchase.
We recommend that you visit our website, https://
cuisinart.registria.com, for a fast, efficient way to
complete your product registration. However, product
registration does not eliminate the need for the
consumer to maintain the original proof of purchase in
order to obtain the warranty benefits. In the event that
you do not have proof of purchase date, the purchase
date for purposes of this warranty will be the date of
manufacture.
CALIFORNIA RESIDENTS ONLY
California law provides that for In-Warranty Service,
California residents have the option of returning a
nonconforming product (A) to the store where it was
purchased or (B) to another retail store that sells
Cuisinart products of the same type. The retail store
shall then, according to its preference, either repair the
product, refer the consumer to an independent repair
facility, replace the product, or refund the purchase
price less the amount directly attributable to the
consumer’s prior usage of the product. If neither of the
above two options results in the appropriate relief to
the consumer, the consumer may then take the
product to an independent repair facility, if service or
repair can be economically accomplished. Cuisinart
and not the consumer will be responsible for the
reasonable cost of such service, repair, replacement,
or refund for nonconforming products under warranty.
California residents may also, according to their
preference, return nonconforming products directly to
Cuisinart for repair or, if necessary, replacement by
calling our Consumer Service Center toll-free at
1-800-726-0190. Cuisinart will be responsible for
the cost of the repair, replacement, and shipping
and handling for such nonconforming products
under warranty.
HASSLE-FREE REPLACEMENT WARRANTY
Your ultimate satisfaction in Cuisinart products is our
goal, so if your Cuisinart
®
Core Custom
™
10-Cup Food
Processor should fail within the generous warranty
period, we will repair it or, if necessary, replace it at no
cost to you. To obtain a return shipping label, please fill
out the product inquiry form at https://www.
cuisinart.com/customer-care/product-assistance/
product-inquiry/. Or call our toll-free Consumer
Service Center at 1-800-726-0190 to speak with a
representative.
Your Cuisinart
®
Core Custom
™
10-Cup Food Processor
has been manufactured to the strictest specifications
and has been designed for use only in 120-volt outlets
and only with authorized accessories and replacement
parts. This warranty expressly excludes any defects or
damages caused by attempted use of this unit with a
converter, as well as use with accessories, replacement
parts or repair service other than those authorized by
Cuisinart. This warranty does not cover any damage
caused by accident, misuse, shipment or other than
ordinary household use. This warranty excludes all
incidental or consequential damages. Some states do
not allow the exclusion or limitation of these damages,
so these exclusions may not apply to you. You may
also have other rights, which vary from state to state.
Important: If the nonconforming product is to be
serviced by someone other than Cuisinart’s Authorized
Service Center, please remind the servicer to call our
Consumer Service Center at 1-800-726-0190 to ensure
that the problem is properly diagnosed, the product is
serviced with the correct parts, and the product is still
under warranty.

IB-17223-ESP
©2021 Cuisinart
Glendale, AZ 85307
Printed in China
21CE078003
Procesadora de alimentos de 10 tazas (2.35L)
Cuisinart
®
Core Custom
™
Serie FP-110
Para su seguridad y para disfrutar plenamente de este producto, siempre lea atentamente las instrucciones antes del uso.
MANUAL DE
INSTRUCCIONES Y
LIBRO DE RECETAS

2
IMPORTANTES
INSTRUCCIONES
DE DESEMBALAJE
Esta caja incluye la procesadora de alimentos de
10 tazas (2.35 L) Cuisinart
®
Core Custom
™
y sus
accesorios:
un bol de 10 tazas (2.35 L), una tapa con empujadores
pequeño y mediano, una cuchilla picadora/mezcladora/
amasadora de metal, un disco triturador/rallador
reversible medio, un disco triturador/rallador reversible
fino, un adaptador removible, un eje de almacenamiento,
un bloque-motor (base) y un manual de instrucciones/
libro de recetas.
PRECAUCIÓN:
LAS HERRAMIENTAS DE CORTE SON
MUY AFILADAS.
Para evitar el riesgo de lesiones, desembale
con cuidado el aparato, siguiendo las instrucciones
a continuación:
1. Ponga la caja sobre una superficie llana y amplia, tal
como una mesa o una encimera. Compruebe que la
caja está del lado correcto, no de cabeza.
2. En la caja, encontrará un bloque rectangular de
cartón con cavidades que contienen las piezas de
la procesadora.
3. Retire el manual de instrucciones/libro de recetas.
4. Saque el material de embalaje.
5. Retire la base y el bol de la caja y colóquelos en
la encimera o la mesa. Lea atentamente todas las
instrucciones antes de usar el aparato.
6. Se recomienda conservar el material de embalaje;
puede ser útil para volver a empaquetar el aparato
cuando se mude o necesite enviarlo por correo.
Se recomienda llenar el formulario de registro disponible
en www.cuisinart.com a fin de facilitar la verificación
de la fecha de compra original de este producto.
MEDIDAS DE
SEGURIDAD
IMPORTANTES
Al usar aparatos eléctricos, siempre se deben
tomar precauciones básicas de seguridad, entre ellas
las siguientes:
Preparación
1. Lea todas las instrucciones.
2. La cuchilla y los discos son muy afilados;
manipúlelos con sumo cuidado.
3. Siempre apague y desenchufe el aparato
cuando no esté en uso, antes de instalar/
sacar piezas, antes de vaciar el bol y antes de
limpiarlo. Para desenchufar, agarre el enchufe
y jálelo para sacarlo de la toma de corriente;
nunca jale el cable.
4. No lo use en exteriores.
5. No permita que el cable cuelgue del borde de la
encimera o de la mesa, ni que tenga contacto con
superficies calientes.
6. No use este aparato si el cable o el enchufe están
dañados, si no funciona correctamente, si está
dañado o después de una caída/caída al agua.
Llame al nuestro Centro de Servicio al Cliente al
1-800-762-0190 para obtener información sobre
cómo hacer revisar, reparar o ajustar el aparato.
Funcionamiento
1. Para reducir el riesgo de lesiones personales
graves o de daño al aparato, mantenga las manos
y los utensilios alejados de las cuchillas o de los
discos durante el funcionamiento. Se puede usar
una espátula de goma, siempre que el aparato
esté apagado.
2. Evite el contacto con las piezas móviles. Nunca
introduzca la mano en la boca de alimentación;
siempre use el empujador.
3. Espere hasta que el motor se haya detenido por
completo antes de quitar la tapa. Si el motor no se
detiene dentro de 4 segundos después de abrir la
tapa, desenchufe el aparato y llame al 1-800-726-
0190 para asistencia. No use el aparato.
4. No guarde las cuchillas ni los discos en el bol.
Para reducir el riesgo de lesiones personales,
nunca instale la cuchilla o el disco antes de haber
comprobado que el bol está correctamente
instalado. Guarde los accesorios fuera del alcance
de los niños.
5. Compruebe que la tapa está correctamente puesta
y que el empujador está completamente engranado
antes de encender el aparato.
6. Nunca empuje los alimentos con la mano; siempre
use el empujador.
7. No intente forzar/modificar el mecanismo de
enclavamiento/bloqueo de seguridad de la tapa.
Limpieza
Para reducir el riesgo de descarga eléctrica, no coloque
el bloque-motor en agua ni en ningún otro líquido.
Generalidades
1. Este aparato no debe ser usado por o cerca de
niños o personas con ciertas discapacidades.
2. No use este aparato bajo el efecto del alcohol u otra
sustancia que afecte su tiempo de reacción o su
percepción.
3. Este aparato es para uso doméstico. Úselo
solamente para la preparación de alimentos y
como se describe en este manual de instrucciones
y libro de recetas. Use este producto solo para el
uso previsto.
3
4. Antes de usar un accesorio/aditamento
aprobado para uso con esta procesadora de
alimentos, lea todas las instrucciones incluidas con
el accesorio/aditamento.
5. El uso de accesorios no recomendados ni vendidos
por Cuisinart puede provocar un incendio, una
descarga eléctrica o una herida.
6. Nunca guarde el aparato con el juego de
empujadores en la posición de bloqueo.
7. No haga funcionar el aparato debajo o dentro de
un armario/gabinete. Siempre desenchufe el
aparato antes de guardarlo en un armario/
gabinete. Dejar el aparato enchufado representa
un riesgo de incendio, especialmente si este toca
las paredes o la puerta del armario/gabinete cuando
se cierra.
NOTA: El cable de este aparato cuenta con un
enchufe polarizado (una pata es más ancha que
otra). Como medida de seguridad, se podrá
enchufar de una sola manera en la toma de
corriente polarizada. Si no entra en la toma de
corriente, inviértalo. Si aun así no entra
completamente, comuníquese con un
electricista. No intente modificar esta función
de seguridad.
NOTA: Los niños o las personas que carezcan de
la experiencia o de los conocimientos necesarios
para manipular el aparato, o aquellas cuyas
capacidades físicas, sensoriales o mentales
estén limitadas, no deben usar este aparato.
Supervise el uso de este aparato con cuidado
cuando sea usado cerca de niños. No permita
que los niños jueguen con este aparato.
Para evitar el riesgo de lesiones o daños al bol o
a la tapa, no llene el bol por encima de la línea de
llenado máximo, o más allá de su capacidad.
ADVERTENCIA: RIESGO DE
INCENDIO O DESCARGA
ELÉCTRICA
El símbolo de relámpago con punta de flecha
dentro de un triángulo equilátero tiene como
fin alertar al usuario de la presencia de
voltajes peligrosos no aislados en el interior
del aparato, los cuales pueden ser de
suficiente magnitud para constituir un riesgo
de incendio o descarga eléctrica.
El signo de exclamación dentro de un
triángulo equilátero tiene como fin alertar al
usuario de la presencia de instrucciones
importantes de uso y mantenimiento
(servicio) en la documentación que
acompaña al equipo.
ÍNDICE
Importantes instrucciones de desembalaje ................ 2
Medidas de seguridad importantes ............................. 2
Piezas ........................................................................... 4
Instrucciones de ensamblaje ....................................... 5
Controles ..................................................................... 5
Funciones .................................................................... 5
Guía de uso .................................................................. 6
Limpieza, almacenamiento y mantenimiento .............. 8
Para su seguridad ........................................................ 8
Especificaciones técnicas ............................................ 8
Resolución de problemas ............................................ 9
Garantía ..................................................................... 10
Recetas ...................................................................... 12
GUARDE ESTAS
INSTRUCCIONES.
PARA USO DOMÉSTICO
SOLAMENTE.
ADVERTENCIA: PARA REDUCIR EL RIESGO DE DESCARGA ELÉCTRICA,
NO DESARME LA CARCASA DEL APARATO. ESTE APARATO NO
CONTIENE NINGUNA PIEZA QUE PUEDA SER REPARADA/CAMBIADA
POR EL USUARIO. LAS REPARACIONES DEBEN SER EFECTUADAS POR
TÉCNICOS AUTORIZADOS SOLAMENTE.
ADVERTENCIA
RIESGO DE INCENDIO O DESCARGA
ELÉCTRICA;
NO LO ABRA
2.
1.
6.
7.
8.
3.
4.
5.
9.
4
PIEZAS
La máquina incluye:
1. Bloque-motor (base) - Con controles mecánicos
fáciles de usar
2. Bol removible de 10 tazas (2.35 L)
3. Tapa con boca de alimentación
4. Empujadores mediano y pequeño - Se deslizan
dentro la boca de alimentación
5. Adaptador removible
6. Cuchilla picadora/mezcladora/amasadora
de metal
7. Disco rebanador/triturador reversible fino
8. Disco rebanador/triturador reversible medio
9. Eje de almacenamiento - Guarda el adaptador
removible, la cuchilla y los discos en el bol
10. Sin BPA (no ilustrado) - Ninguna de las piezas en
contacto con los alimentos/líquidos contiene bisfenol
A (BPA).
Cuisinart ofrece los accesorios Cuisinart
Core Essentials
™
(vendidos por separados),
compatibles con su procesadora de alimentos.
¡El accesorio seleccionado se conecta
directamente a la base para convertir su
procesadora de alimentos en una licuadora, un
exprimidor, un cortador de dados y mucho más!
ACCESORIOS DISPONIBLES:
¡Visite Cuisinart.com para comprarlos!
ACCESORIO MODELO
Jarra licuadora de 36 oz (1 L) MFP-B36
Exprimidor/Extractor de jugo MFP-JC
Kit para cortar en cubos FP-DC

5
INSTRUCCIONES DE
ENSAMBLAJE
Antes del primer uso
Antes de usar el aparato por primera vez, lave todas
las piezas removibles según se describe en las
instrucciones de limpieza.
1. Ponga la procesadora sobre una superficie nivelada
y seca. No enchufe el aparato hasta que esté
completamente ensamblado.
2. Instale el bol sobre la base y gírelo en sentido
antihorario para sujetarlo.
CUCHILLA PICADORA/
MEZCLADORA/AMASADORA
1. Coloque el bol sobre la base, con el asa ligeramente
a la derecha del centro. Gire el bol en sentido horario
para sujetarlo.
2.
Con cuidado, deslice la cuchilla por encima del
adaptador. Sosteniendo el adaptador por la parte
superior, colóquelo en el eje del bol. La cuchilla debe
quedar en el fondo del bol.
3. Enchufe el cable en una toma de corriente.
4. Coloque los ingredientes deseados en el bol.
5. Coloque la tapa sobre el bol, con la boca de
alimentación ligeramente a la derecha del centro.
Gire la tapa en sentido horario para bloquearla.
6. Inserte el empujador en la boca de alimentación.
7. El aparato está listo.
DISCOS REBANADORES/
TRITURADORES REVERSIBLES
1. Coloque el bol sobre la la base, con el asa
ligeramente a la derecha del centro. Gire el bol en
sentido horario para sujetarlo.
2. Instale el adaptador removible (sin la cuchilla).
3. Elija el disco deseado.
4. Con cuidado, coloque el disco deseado sobre el
adaptador, con el lado que desea usar apuntado
hacia arriba.
5. Coloque la tapa sobre el bol, con la boca de
alimentación ligeramente a la derecha del centro.
Gire la tapa en sentido horario para bloquearla.
6. Inserte el empujador en la boca de alimentación.
7. Enchufe el cable en una toma de corriente.
8. El aparato está listo para su uso.
CONTROLES
Botones HIGH y LOW
Hacen funcionar la máquina a velocidad alta (“HIGH”) o
baja (“LOW”), hasta presionar el botón OFF para apagar.
1. Ensamble el aparato según se describió en las
instrucciones de ensamblaje.
2. Coloque los ingredientes en el bol o introdúzcalos en
la boca de alimentación.
3. Presione el botón de velocidad deseado: HIGH (alta)
o LOW (baja); la luz LED blanca correspondiente se
iluminará y el motor se encenderá.
4. Para apagar el aparato, presione el botón OFF.
Función de pulso
El botón PULSE prende el motor momentáneamente al
presionar el botón, y lo apaga al soltarlo. Esta función
permite obtener resultados más homogéneos y evita
procesar excesivamente los ingredientes. Salvo
indicación contraria en la receta, use pulsaciones cortas
de un segundo.
Ensamble el aparato según se describe en las
instrucciones de ensamblaje. Ponga los ingredientes en
el bol. Presione repetidamente el botón PULSE hasta
obtener la consistencia deseada. La luz LED blanca se
encenderá cada vez que presione el botón PULSE.
FUNCIONES
Usos de la cuchilla picadora/
mezcladora/amasadora
Picar
• Alimentos crudos: Pele las frutas y los vegetales
y quite las partes duras (corazón, pepas, semillas,
huesos, etc.). Corte los alimentos en pedazos
uniformes de ½ a 1 in. (1.5 a 2.5cm). Obtendrá
resultados más homogéneos si los pedazos son del
mismo tamaño.
• Procese los alimentos con la función de pulso,
usando pulsaciones de 1 segundo, hasta obtener la
consistencia deseada. Para obtener una textura más
fina, mantenga presionado el botón PULSE o use la
velocidad alta (“HIGH”) o baja (“LOW”). Compruebe
la consistencia de los alimentos a menudo y raspe el
bol con una espátula si es necesario. Se recomienda
usar la velocidad baja (“LOW”) para procesar masas
y mezclas. Se recomienda usar la velocidad alta
(“HIGH”) para picar, procesar, rebanar, rallar, triturar,
etc.
Hacer puré
• Puré de frutas/vegetales crudos o cocinados:
Corte los ingredientes en pedazos de 1 in. (2.5cm);
obtendrá resultados más homogéneos con pedazos
del mismo tamaño. Pulse para picar grueso, y luego
procese continuamente, usando la velocidad alta
(“HIGH”) o baja (“LOW”), hasta obtener puré; raspe
el bol si es necesario. NOTA: NO use este método
para preparar puré de papas.
• Para preparar cremas o salsas de vegetales: Cuele
la sopa, reservando el líquido, y licue solamente los
vegetales. Después, agregue un poco del caldo y
siga procesando.

6
Amasar
• Siempre use la velocidad baja para rebanar.
Cerciórese de bloquear el empujador grande para
amasar; esto evitará que el aparato se mueva. Nota:
es normal que vibre. Siempre ponga el aparato en
marcha antes de agregar líquido. Primero, procese
los ingredientes secos (harina, sal, etc.). Luego,
vierta el líquido lentamente por el orificio en el
empujador, y permita que los ingredientes secos lo
absorban. Si el líquido se añade demasiado rápido,
espere hasta que los ingredientes se mezclen antes
de agregar el líquido restante lentamente (no apague
la máquina). Nunca use más de 2½ tazas (310 g) de
harina común cuando prepare masa de levadura.
Usos de los discos rebanadores/
trituradores reversibles
• El lado rebanador de los discos corta rodajas/
tajadas/rebanadas enteras. Es ideal para cortar en
rodajas/tajadas frutas, vegetales y carne cocinada,
cruda o semicongelada. El lado triturador de
los discos es capaz de triturar la mayoría de los
quesos firmes y duros. También puede usarse para
triturar alimentos tales como papas, zanahorias y
calabacines/calabacitas.
• Para obtener resultados homogéneos, apretuje los
alimentos en la boca de alimentación. La presión
necesaria dependerá de la consistencia de los
alimentos. Use una presión ligera para rebanar
alimentos suaves, presión moderada para
rebanar alimentos firmes, y presión firme para
rebanar ingredientes duros. Siempre ejerza una
presión uniforme.
• Para cortar frutas/vegetales en rodajas: Corte
la extremidad inferior de la fruta o del vegetal, e
introdúzcalo en la boca de alimentación, el lado
cortado primero. Si no cabe, córtelo a la mitad o en
cuartos. Procese, ejerciendo presión uniforme.
• Para rebanar alimentos pequeños, tales como
champiñones, rábanos o fresas: Corte ambos
extremos de las frutas/hortalizas e introdúzcalas
verticalmente en la boca de alimentación.
• Refrigere o congele brevemente el queso antes de
rebanarlo o triturarlo.
• Para rallar col, lechuga y otras hortalizas de
hoja: Forme un rollo de hojas e introduzca este
verticalmente en la boca de alimentación. Procese,
ejerciendo presión uniforme.
NOTA: Siempre use el empujador para
empujar los alimentos; nunca introduzca
los dedos en la boca de alimentación durante
el funcionamiento.
ALIMENTO CAPACIDAD
Frutas/vegetales/queso rebanados o triturados 10 tazas
Frutas/vegetales picados 6 tazas
Quesopicado 4 tazas
Puré de frutas/vegetales 3 tazas (volumen procesado: 1½ tazas)
Carne, pescado o mariscos picados o molidos 1½ lb (680 g)
Líquidos fluidos (p. ej., aderezo, sopa, etc.) 7 tazas (1.65 L)
Mezcla de pastel Mezcla para un pastel de queso de 8 in. (20 cm); 15.25 oz (430 g) de mezcla preparada.
Galletas 2½ docenas (receta de galletas de chispas de chocolate)
Pan blanco/Masa de pizza 2½ tazas (310 g) de harina común o 2½ tazas (335 g) de harina para hacer pan
Mantequilla de fruto seco (p. ej., maní) 3 tazas (700 g)
CAPACIDADES MÁXIMAS
ALIMENTO ACCESORIO VELOCIDAD INSTRUCCIONES
Quesos suaves
(ricota/
requesón,
queso crema,
requesón, etc.)
Cuchilla
picadora/
mezcladora/
amasadora
“LOW” (baja) o
“HIGH” (alta)
Lleve el queso a temperatura ambiente. De ser necesario, corte el queso en
pedazos de 1 in. (2.5 cm). Procese hasta que esté finamente picado, raspando el
bol de vez en cuando. Perfecto para preparar pastel de queso, salsas para mojar,
relleno de pasta, etc.
GUÍA DE USO
Su nueva procesadora de alimentos Cuisinart
®
permite rebanar, triturar y picar una gran variedad de frutas y
vegetales. También es la herramienta perfecta para muchos otros trabajos de preparación, tales como suavizar
mantequilla, rallar pan, preparar papillas y mucho más. ¡A continuación incluimos una guía que le ayudará a preparar
cualquier receta!

7
ALIMENTO ACCESORIO VELOCIDAD INSTRUCCIONES
Quesos firmes
(Cheddar,
suizo, Edam,
Gouda, etc.)
Disco rebanador
o triturador
“HIGH” (alta) Refrigere o congele brevemente el queso antes de procesarlo. Córtelo en pedazos
suficientemente pequeños como para caber en la boca de alimentación. Use una
presión ligera a moderada.
Quesos duros
(Parmesano,
Romano, etc.)
Cuchilla
picadora/
mezcladora/
amasadora
Disco rebanador
o triturador
“LOW” (baja) Si usa la cuchilla picadora, córtelo en pedazos de ½ in. (1.5 cm) para picar. Pulse
varias veces para romperlo en pedazos, y luego procese continuamente hasta que
esté finamente picado; esto producirá resultados finos. Para rebanar o triturar los
alimentos, córtelos en pedazos que quepan en la boca de alimentación. Use una
presión ligera a moderada.
Papillas Cuchilla
picadora/
mezcladora/
amasadora
“PULSE”
(pulso) +
“LOW” (baja) o
“HIGH” (alta)
Cortar las frutas/los vegetales en pedazos de ½ a 1 in. (1.5 a 2.5 cm). Cocine los
ingredientes al vapor hasta que estén muy suaves. Pulse para picar, y luego
procese continuamente hasta obtener la consistencia deseada (agregar líquido por
la boca de alimentación si es necesario). Cuele el puré con un colador de malla
fina. Congele el puré en bandejas de cubitos de hielo para conseguir porciones
individuales de 1 oz (30 g).
Mantequilla Cuchilla
picadora/
mezcladora/
amasadora
Disco rebanador
o triturador
“HIGH” (alta) Para acremar/suavizar: Lleve la mantequilla a temperatura ambiente. Córtela en
pedazos de 1 in. (2.5 cm). Procese, raspando el bol si es necesario. Para preparar
mantequillas aromatizadas, procese los ingredientes aromatizantes (hierbas,
ralladura, vegetales. etc.) primero, antes de agregar la mantequilla. Para triturar/
rebanar: Congélela brevemente. Use una presión ligera a moderada. Triturar la
mantequilla puede resultar útil para preparar ciertos tipos de hojaldres. Rebanar la
mantequilla es perfecto para servir con mazorcas de maíz o pancitos frescos.
Pan rallado o
galletas
molidas
Cuchilla
picadora/
mezcladora/
amasadora
“HIGH” (alta) Rómpalo en pedazos. Pulse para picar, luego procese continuamente hasta
obtener la textura deseada. Esto producirá pan/galletas saladas/chips rallados
perfectos para empanar/rebozar carne o pescado. ¡Las galletas dulces ralladas
son perfectas para preparar corteza de tarta y pastel!
Hierbas
frescas
Cuchilla
picadora/
mezcladora/
amasadora
“PULSE”
(pulso)
Lave y seque MUY BIEN las hierbas. Pulse para picar grueso. Siga pulsando hasta
obtener la consistencia deseada.
Carne molida Cuchilla
picadora/
mezcladora/
amasadora
“PULSE”
(pulso) +
“HIGH” (alta)
Corte la carne en pedazos de ½ in. (1.5 cm). Pulse para picar (aprox. 14
pulsaciones largas), hasta conseguir la consistencia deseada. Para moler, siga
procesando continuamente. No procese más de 1½ lb (680 g) a la vez.
Helado Cuchilla
picadora/
mezcladora/
amasadora
“HIGH” (alta) Coloque pedazos de 1 in. (2.5 cm) de fruta congelada en el bol. Agregue líquido
(jugo o leche), el edulcorante deseado (azúcar, miel, jarabe simple) y otros
sabores. Procese continuamente hasta obtener una mezcla suave.
Batidos y
licuados
(“smoothies”)
Cuchilla
picadora/
mezcladora/
amasadora
“LOW” (baja) Para preparar batidos, agregue el helado primero. Sin apagar la máquina, vierta la
leche por la boca de alimentación y procese continuamente hasta obtener la
consistencia deseada. Para hacer licuados de frutas, procese las frutas primero, y
luego agregue el líquido por la boca de alimentación, sin apagar la máquina.
Nueces Cuchilla
picadora/
mezcladora/
amasadora
“PULSE”
(pulso) +
“HIGH” (alta)
Pulse hasta obtener la consistencia deseada. Para preparar mantequilla de nuez
(como p. ej., mantequilla de maní), pulse para picar y luego procese hasta que
esté suave, raspando el bol de vez en cuando.
Azúcar
superfino
Cuchilla
picadora/
mezcladora/
amasadora
“HIGH” (alta) Procese el azúcar granulado por aprox. 1 minuto, hasta pulverizarlo. El azúcar
superfino es ideal para preparar merengues y otros productos de panadería y
confitería.
Crema batida Cuchilla
picadora/
mezcladora/
amasadora
“LOW” (baja) Procese continuamente la crema fría hasta que se espese. Agregue la cantidad
deseada de azúcar y siga procesando continuamente hasta obtener la
consistencia deseada. La crema batida será densa, perfecta para acompañar
pastel o helado.

8
LIMPIEZA, ALMACENAMIENTO
Y MANTENIMIENTO
• Mantenga su procesadora de alimentos de 10 tazas
(2.35 L) Cuisinart
®
Core Custom
™
sobre la encimera,
para siempre tenerla lista. Desenchúfela cuando
no esté en uso. Guarde los accesorios en el eje de
almacenamiento provisto, en el bol.
• Mantenga la cuchilla y los discos fuera del alcance
de los niños.
• Todas las piezas removibles son aptas para
lavavajillas, pero se recomienda colocarlas en la
bandeja superior del mismo, ya que con el tiempo,
el intenso calor del agua en la bandeja inferior puede
dañar el bol, la tapa y los accesorios. Ponga la tapa
recta, con la boca de alimentación apuntando hacia
arriba, para que se limpie bien. Coloque el bol y los
empujadores al revés. Tenga cuidado al sacar la
cuchilla y los discos del lavavajillas.
• Se recomienda enjuagar todas las piezas removibles
inmediatamente después del uso para evitar que
residuos de alimentos se sequen en ellas, lo que
dificulta la limpieza. Cerciórese de colocar los
empujadores y el bol al revés, para que el agua
se escurra. Si alimentos quedan atrapados en los
empujadores, enjuague estos en agua o límpielos
con un cepillo para biberones.
• Si desea lavar la cuchilla y los discos a mano,
haga esto con mucho cuidado. Sosténgalos por
el eje central. Procure no dejarlos en agua jabonosa,
donde los puede perder de vista. De ser necesario,
use un cepillo.
• El bol está hecho de plástico de tipo SAN
(resinas de estireno acrilonitrilo), pero tiene algunos
componentes de metal. Por lo tanto, no es apto
para microondas
• Limpie la base después de cada uso con un paño
no abrasivo o una esponja humedecidos con agua
jabonosa. Seque bien.
• Si los pies dejan marcas en la encimera, rocíe
producto quitamanchas y restriegue con una
esponja húmeda.
• Si esto no soluciona el problema, vuelva a limpiar la
encimera con un limpiador en polvo no abrasivo.
IMPORTANTE: Siempre use el eje de
almacenamiento provisto. Nunca guarde la
cuchilla ni los discos en el adaptador removible.
Instale la cuchilla o el disco en el momento de
usarlos solamente.
MANTENIMIENTO: Cualquier otro servicio debe
ser realizado por un técnico/representante de
servicio autorizado.
PARA SU SEGURIDAD
• Como todos los electrodomésticos, este aparato
debe usarse con cuidado. Para evitar las lesiones
resultantes de un mal uso, siga estas reglas de
seguridad.
• Manipule la cuchilla de metal y los discos con sumo
cuidado, y guárdelos en el eje de almacenamiento
provisto. Sus filos son muy afilados.
• Compruebe que el bol esté correctamente instalado
y bloqueado antes de instalar el adaptador
removible, la cuchilla o un disco.
• Compruebe que la cuchilla o el disco estén
debidamente asentados en el adaptador removible,
lo más abajo posible.
• Siempre instale la cuchilla antes de colocar los
ingredientes en el bol.
• Siempre use el empujador para empujar los
alimentos; nunca introduzca los dedos ni una
espátula en la boca de alimentación.
• Siempre espere hasta que la cuchilla o el disco
estén totalmente inmóviles antes de abrir la tapa o
quitar el juego de empujadores.
• Siempre desenchufe el aparato antes de vaciar el
bol, limpiar el aparato, instalar o sacar piezas.
• Siempre retire el bol de la base antes de sacar la
cuchilla picadora/mezcladora/amasadora o el disco
rebanador/rallador.
• Tenga cuidado de no dejar caer la cuchilla o el disco
al vaciar el bol. Retire el adaptador removible, junto
con la cuchilla, antes de inclinar el bol.
ESPECIFICACIONES TÉCNICAS
El motor de su procesadora de alimentos funciona
con corriente estándar. Las especificaciones eléctricas
del aparato están indicadas en la etiqueta debajo de
la base.
Un interruptor de seguridad apagará automáticamente
el motor en caso de sobrecalentamiento. Esto puede
ocurrir cuando procesa mezclas espesas por un tiempo
prolongado, o cuando usa el aparato sin interrupción
por un tiempo excesivo. En caso de que esto suceda,
apague y desenchufe el aparato y permita que se enfríe
por 10 minutos o más (hasta una hora en casos
extremos).
Un mecanismo de seguridad impide que el aparato se
ponga en marcha a menos que el bol y la tapa estén
debidamente asegurados. El motor de la procesadora se
apaga muy rápidamente después de apagar el aparato y
se detiene automáticamente al sacar el juego de
empujadores.
Cuisinart ofrece una garantía limitada de tres años en
este aparato.

9
RESOLUCIÓN DE PROBLEMAS
Problemas al picar/rebanar/triturar
1. Problema: Los alimentos picados no son uniformes.
Solución:
• Corte los alimentos en pedazos uniformes de
½ a 1 in. (1.5 a 2.5 cm) antes de procesarlos.
• Procese los alimentos en varias veces para no
sobrellenar el bol.
2. Problema: Las rebanadas no son uniformes
o son sesgadas.
Solución:
• Coloque los alimentos en la boca de alimentación
con el lado cortado apuntando hacia abajo.
• Procese, ejerciendo una presión uniforme en el
empujador.
3. Problema: Los alimentos no se mantienen rectos
en la boca de alimentación.
Solución:
• Apretuje los alimentos en la boca de alimentación.
4. Problema: Quedan pedazos de alimento arriba
del disco.
Solución:
• Esto es normal; corte los pedazos a mano y
agréguelos a los alimentos procesados.
Problemas al amasar
1. Problema: El motor pierde velocidad.
Solución:
• Puede que la cantidad de masa exceda la
capacidad máxima. Divida la masa en dos
porciones y amase cada porción por separado.
• Puede que la masa sea demasiado húmeda
(ver “La masa está demasiado húmeda”
a continuación). Si el motor acelera, siga
procesando. En caso contrario, agregue harina,
una cucharada (5 g) a la vez, hasta que el motor
acelere. Siga procesando hasta que la masa se
despegue de las paredes del bol.
2. Problema: La cuchilla no incorpora los ingredientes.
Solución:
• Siempre ponga la procesadora en marcha antes
de agregar líquido. Vierta el líquido lentamente
por el orificio en el empujador, para permitir que
los ingredientes secos lo absorban. Si el líquido
se añade demasiado rápido, espere hasta que los
ingredientes se mezclen antes de agregar el líquido
restante lentamente (no apague la máquina).
Vierta el líquido por la boca de alimentación en el
momento preciso en que la masa pasa bajo esta;
procure no verter el líquido directamente en el
fondo del bol.
3. Problema: La cuchilla no permanece en el fondo
del bol.
Solución:
• Esto puede pasar si la masa está demasiado
pegajosa. Con cuidado, vuelva a instalar la cuchilla
y, después de encender la máquina, agregue
inmediatamente 2 cucharadas (15 g) de harina por
la boca de alimentación.
4. Problema: La masa no deja el bol limpio.
Solución:
• Puede que la cantidad de masa exceda la
capacidad máxima. Divida la masa en dos
porciones y amase cada porción por separado.
• Puede que la masa sea demasiado seca (ver “La
masa está demasiado seca” a continuación).
• Puede que la masa sea demasiado húmeda
(ver “La masa está demasiado húmeda” a
continuación).
5. Problema: La masa se enreda en la cuchilla y no
está homogénea
Solución:
• Apague la máquina y, con cuidado, retire la
masa del bol. Divida la masa en tres porciones y
disponga estas uniformemente en el fondo del bol;
siga amasando.
6. Problema: La masa parece dura.
Solución:
• Divida la masa en 2 o 3 porciones y disponga
estas uniformemente en el fondo del bol. Amase
por 10 segundos, o hasta obtener una masa suave
y homogénea.
7. Problema: La masa está demasiado seca.
Solución:
• Encienda la máquina y agregue agua, 1 cucharada
a la vez, hasta que la masa deje el bol limpio.
8. Problema: La masa está demasiado húmeda.
Solución:
• Encienda la máquina y agregue harina, 1
cucharada (5 g) a la vez, hasta que la masa deje el
bol limpio.
Problemas técnicos
1. Problema: El motor no se enciende.
Solución:
• Un sistema de seguridad impide que el motor se
encienda a menos que la unidad esté debidamente
ensamblada. Compruebe que el bol y la tapa estén
firmemente asegurados.
• Si esto no soluciona el problema, inspeccione el
cable y la toma de corriente.
2. Problema: El aparato se apaga durante el uso.
Solución:
• Compruebe que la tapa esté bien cerrada.
• Un interruptor de seguridad apaga
automáticamente el motor en caso de
sobrecalentamiento, lo que puede ocurrir
cuando procesa mezclas espesas por un tiempo
prolongado. En caso de que esto suceda, apague
y desenchufe el aparato y permita que se enfríe
por 20 a 30 minutos antes de continuar.

10
3. Problema: El motor pierde velocidad durante el
funcionamiento.
Solución:
• Esto puede ocurrir cuando el motor hace
mucha fuerza (p. ej., al rebanar/triturar queso).
Simplemente reposicione los alimentos en la boca
de alimentación y siga procesando.
• Puede que la cantidad de alimentos exceda la
capacidad máxima del bol. Quite una parte de los
ingredientes y siga procesando.
4. Problema: El aparato vibra/se mueve durante
el uso.
Solución:
• Compruebe que los pies de caucho debajo de la
base estén limpios y secos. También cerciórese
de que la cantidad de alimentos no exceda la
capacidad máxima del bol.
• Esto puede ocurrir cuando el motor hace mucha
fuerza (p. ej., al rebanar/triturar queso).
GARANTÍA
Garantía limitada de tres años
Esta garantía es para los consumidores que residen en
los EE.UU. solamente. Usted es un consumidor si
posee una procesadora de alimentos de 10 tazas
(2.35 L) Cuisinart
®
Core Custom
™
que fue comprada en
una tienda, para uso personal, familiar o casero. A
menos que la ley aplicable exija lo contrario, esta
garantía no es para los minoristas u otros consumidores/
compradores comerciales. Cuisinart garantiza este
producto contra todo defecto de materiales o
fabricación durante 3 años después de la fecha de
compra original, siempre que el aparato haya sido usado
para uso doméstico y según las instrucciones.
Le aconsejamos que llene el formulario de registro
disponible en https://cuisinart.registria.com a fin de
facilitar la verificación de la fecha de compra original de
este producto. Sin embargo, no es necesario registrar el
producto para recibir servicio bajo esta garantía. En
ausencia de prueba de la fecha de compra, el período
de garantía será calculado a partir de la fecha de
fabricación del producto.
RESIDENTES DE CALIFORNIA
La ley del estado de California ofrece dos opciones bajo
el período de garantía. Los residentes del estado de
California pueden regresar el producto defectuoso (A) a
la tienda donde lo compraron o (B) a otra tienda que
venda productos Cuisinart
®
de este tipo. La tienda
podrá, a su elección, reparar el producto, referir al
consumidor a un centro de servicio independiente,
sustituir el producto, o reembolsar al consumidor el
precio de compra menos la cantidad directamente
atribuible al uso anterior del producto por el consumidor.
Si estas dos opciones no satisfacen al consumidor,
podrá llevar el aparato a un centro de servicio
independiente, siempre que se pueda arreglar o reparar
el aparato de manera económica. Cuisinart (no el
consumidor) será responsable por los gastos de
servicio, reparación, sustitución o reembolso de los
productos defectuosos bajo garantía. Los residentes de
California también pueden, si lo desean, mandar el
producto defectuoso directamente a Cuisinart para que
lo reparen o lo cambien. Para esto, se debe llamar a
nuestro servicio posventa al 1-800-726-0190. Cuisinart
será responsable por los gastos de reparación,
reemplazo, manejo y envío de los productos
defectuosos durante el período de garantía.
GARANTÍA DE REEMPLAZO SIN DIFICULTADES
Su máxima satisfacción es nuestra prioridad, así que si
este producto Cuisinart
®
falla dentro del generoso
período de garantía, lo repararemos o, de ser necesario,
lo reemplazaremos, sin costo alguno para usted. Para
obtener una etiqueta de devolución, por favor llene el
formulario de solicitud disponible en https://www.
cuisinart.com/customer-care/product-assistance/
product-inquiry/. O llame sin cargo a nuestro servicio
de atención al cliente, al 1-800-726-0190, para hablar
con un representante.
Este producto satisface las más altas exigencias de
fabricación y ha sido diseñado para uso sobre corriente
de 120 V, usando accesorios y piezas de repuesto
autorizados solamente. Esta garantía excluye
expresamente los defectos o daños causados por
accesorios, piezas o reparaciones no autorizados por
Cuisinart, así como los defectos o daños causados por
el uso de un convertidor de voltaje. Esta garantía no
cubre el uso comercial o industrial del producto, y no es
válida en caso de daños causados por mal uso,
negligencia o accidente. Esta garantía excluye todos los
daños incidentales o consecuentes. Algunos Estados no
permiten la exclusión o limitación de daños incidentales
o consecuentes, de modo que las limitaciones
mencionadas pueden no regir para usted. Usted puede
tener otros derechos que varían de un Estado a otro.
Importante: Si debe llevar el producto defectuoso a un
centro de servicio no autorizado, por favor informe al
personal del centro de servicio que deben llamar al
Centro de Servicio al Cliente de Cuisinart al 1-800-726-
0190 a fin de diagnosticar el problema correctamente,
usar las piezas correctas para repararlo y comprobar
que el producto aún esté bajo garantía.

IB-17223-ESP
©2021 Cuisinart
Glendale, AZ 85307
Impreso en China
21CE078003