Loading ...
Loading ...
Loading ...
23
NOTE: Product improvement is a continuing endeavor. Therefore, materials, appearance and specifications are subject to change without notice.
Dishwasher Installation
LITERATURE
• Be sure to leave complete literature package, these Installation
Instructions and product samples and/or coupons with the
consumer.
CHECK THE FOLLOWING
• Tub trim does not interfere with the door
• Dishwasher is square and level at both the top and
bottom of the cabinet opening, with no twisting or
distortion of the tub or door
• On models without the adjustable leveling system,
make sure all 4 legs of the dishwasher are firmly in
contact with the floor
• On models with the adjustable leveling system, make
sure both front legs of the dishwasher and the center
rear leveling system leg are firmly in contact with the
floor
• Drain hose is not pinched between the dishwasher
and adjacent cabinets or walls
• Tub trim is fully seated on the tub flange
STEP 22
STEP 23
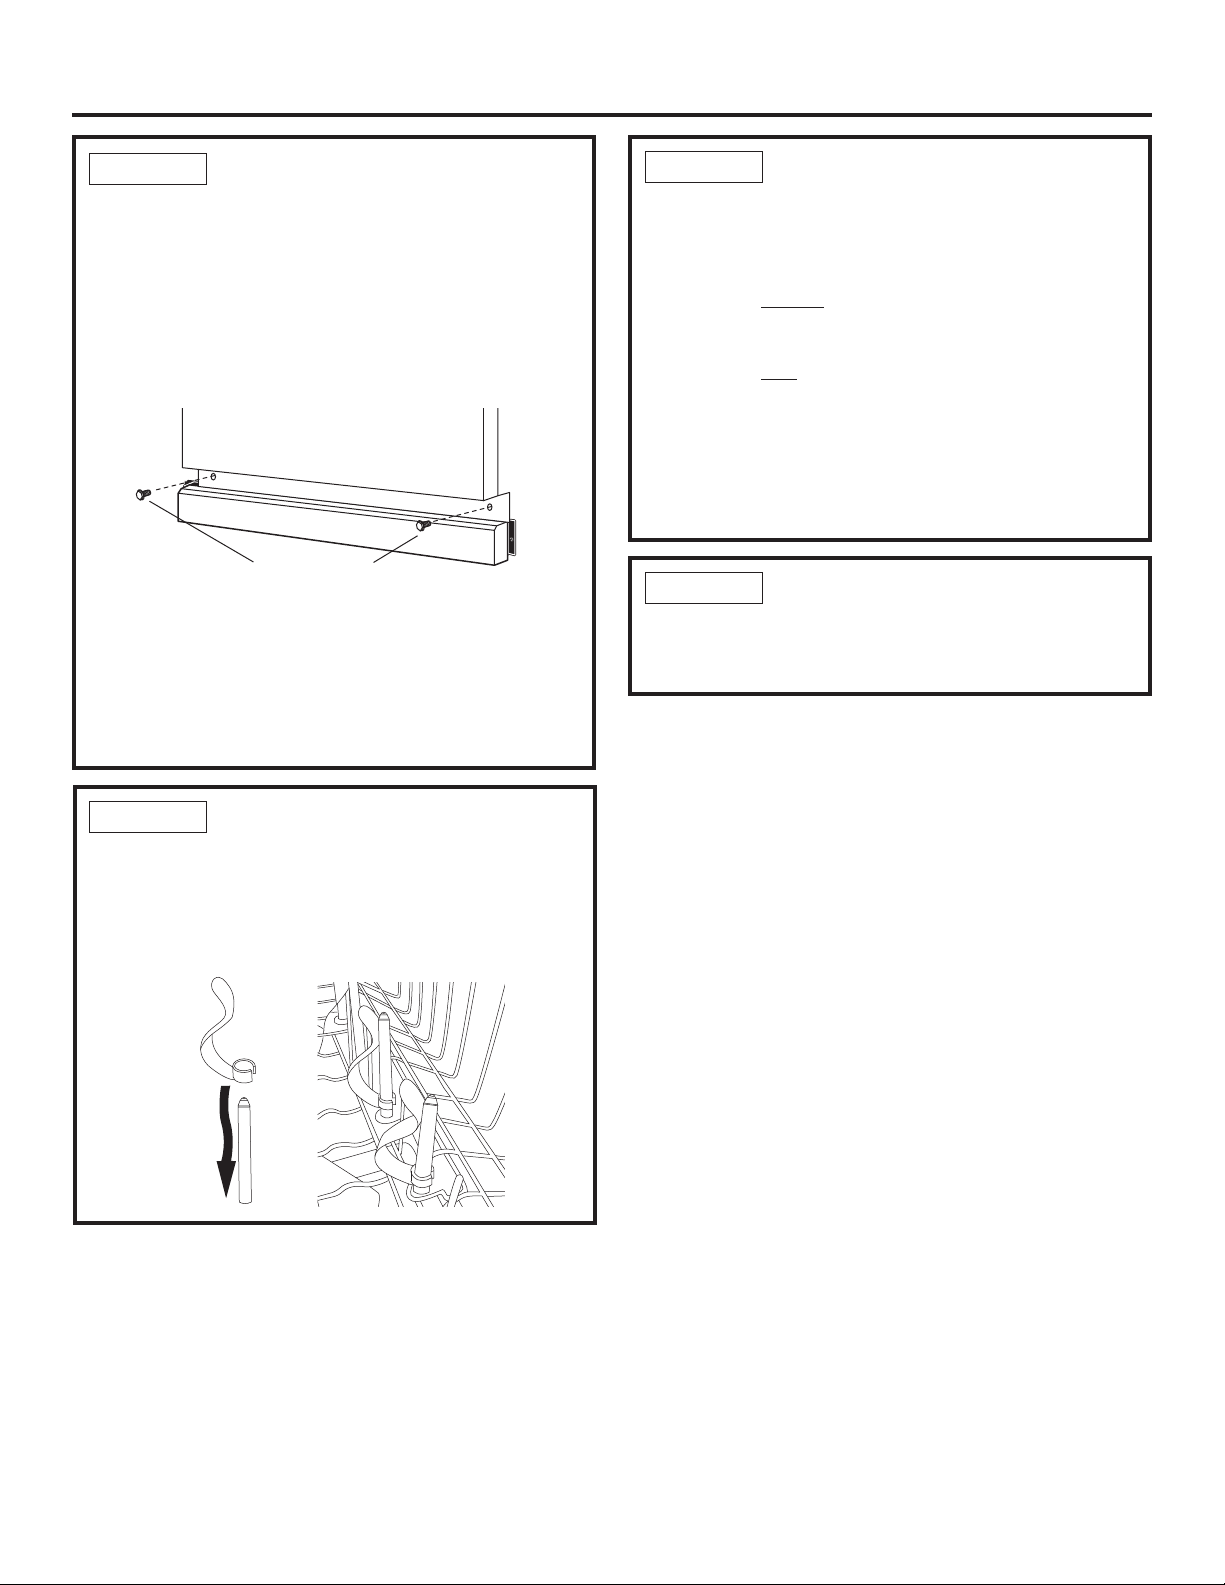
INSTALL BOTTLE JETS
CLIPS (on some models)
• Locate the Bottle Jets clips, depending on model,
either in the silverware basket or the user bag. Install
a clip over a Bottle Jets stem by slipping its clip end
over the nozzel and pressing it down to the base.
STEP 21
INSTALL TOEKICK
• Remove the 2 screws from the user bag.
• Place toekick against the legs of the dishwasher.
• Align the toekick with the bottom edge and make
sure it is against the floor.
• Insert and tighten the 2 toekick attachment screws.
The toekick should stay in contact with the floor.
NOTE: Be careful not to over-tighten the screws in the
toekick.
• When reinstalling the toekick, on models with a sound
barrier, ensure that the bottom edge is flush with
the floor. Any excess material should be tucked up
behind the outer door.
Tip: Reduce sound from under the dishwasher.
Make sure toekick is against floor.
STEP 20
Attachment
Screws
Toekick
Loading ...
Loading ...
Loading ...