Loading ...
Loading ...
Loading ...
12
Washer
Safety
Operation
Requirements
Installation
Instructions
Washer Use Washer Care
Troubleshooting
NOTE: Do not use the dispenser drawer or door to lift the washer.
NOTE: If you are installing into a drain pan, you can use a 24-inch long 2x4
to lever the washer into place.
6. With the washer in its final position, place a level on top of the washer
(if the washer is installed under a counter, the washer should not be
able to rock). Adjust the front leveling legs up or down to ensure the
washer
is resting solid. Turn the lock
nuts on each leg up towards the
base of the washer and snug with a wrench.
NOTE: Keep the leg extension at a minimum to prevent excessive
vibration. The farther out the legs are extended, the more the washer
will vibrate.
If the floor is not level or is damaged, you may have to extend the rear
leveling legs.
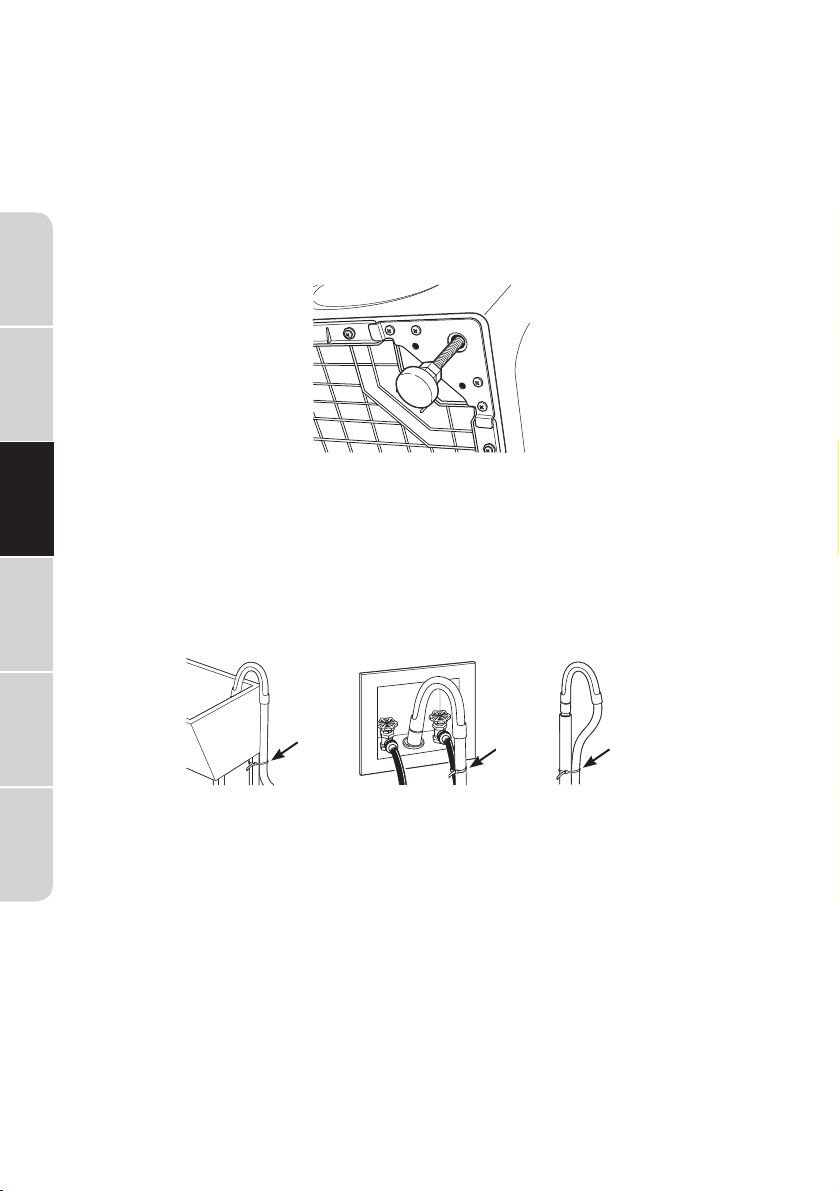
7. Attach the U-shaped hose guide to the end of the drain hose. Place
the hose in a laundry tub or standpipe and secure it with the cable tie
provided in the enclosure package.
Cable
Tie
Cable
Tie
Cable
NOTE: Placing the drain hose too far down the drain pipe can cause a
siphoning action. No more than 7 inch (17.78 cm) of hose should be in
the drain pipe. There must be an air gap around the drain hose. A snug
fit can also cause a siphoning action.
8. Plug the power cord into a grounded outlet.
NOTE: Check to be sure the power is off at the circuit breaker/fuse box
before plugging the power cord into an outlet.
9. Turn on the power at the circuit breaker/fuse box.
10. Read the rest of this Owner’s Manual. It contains valuable and helpful
information that will save you time and money.
11. Before starting the washer, check to make sure:
Main power is turned on.
•
The washer is plugged in.
•
Loading ...
Loading ...
Loading ...