Loading ...
Loading ...
Loading ...
©2017 Hestan Commercial Corporation
18
EN
NEVER ADJUST THE BURNER SO LOW THAT IT MAY GO OUT DURING USE.
DO NOT OPERATE THE GRILL WITH THE LOW HEAT SCREW REMOVED. GAS
CAN ESCAPE AND CAUSE A POTENTIALLY HAZARDOUS CONDITION.
ADJUSTMENT STEPS
1. Remove the control knobs, drip tray, and control panel
from the unit.
2. Follow lighting instructions by setting the control knob on
“HI” and allow the burner to preheat for 10 minutes.
3. Turn the control knob to “LOW” and wait for the burner
temperature to drop and stabilize, about 10 minutes.
Attempting adjustment at any setting other than LOW can
create a dangerous condition.
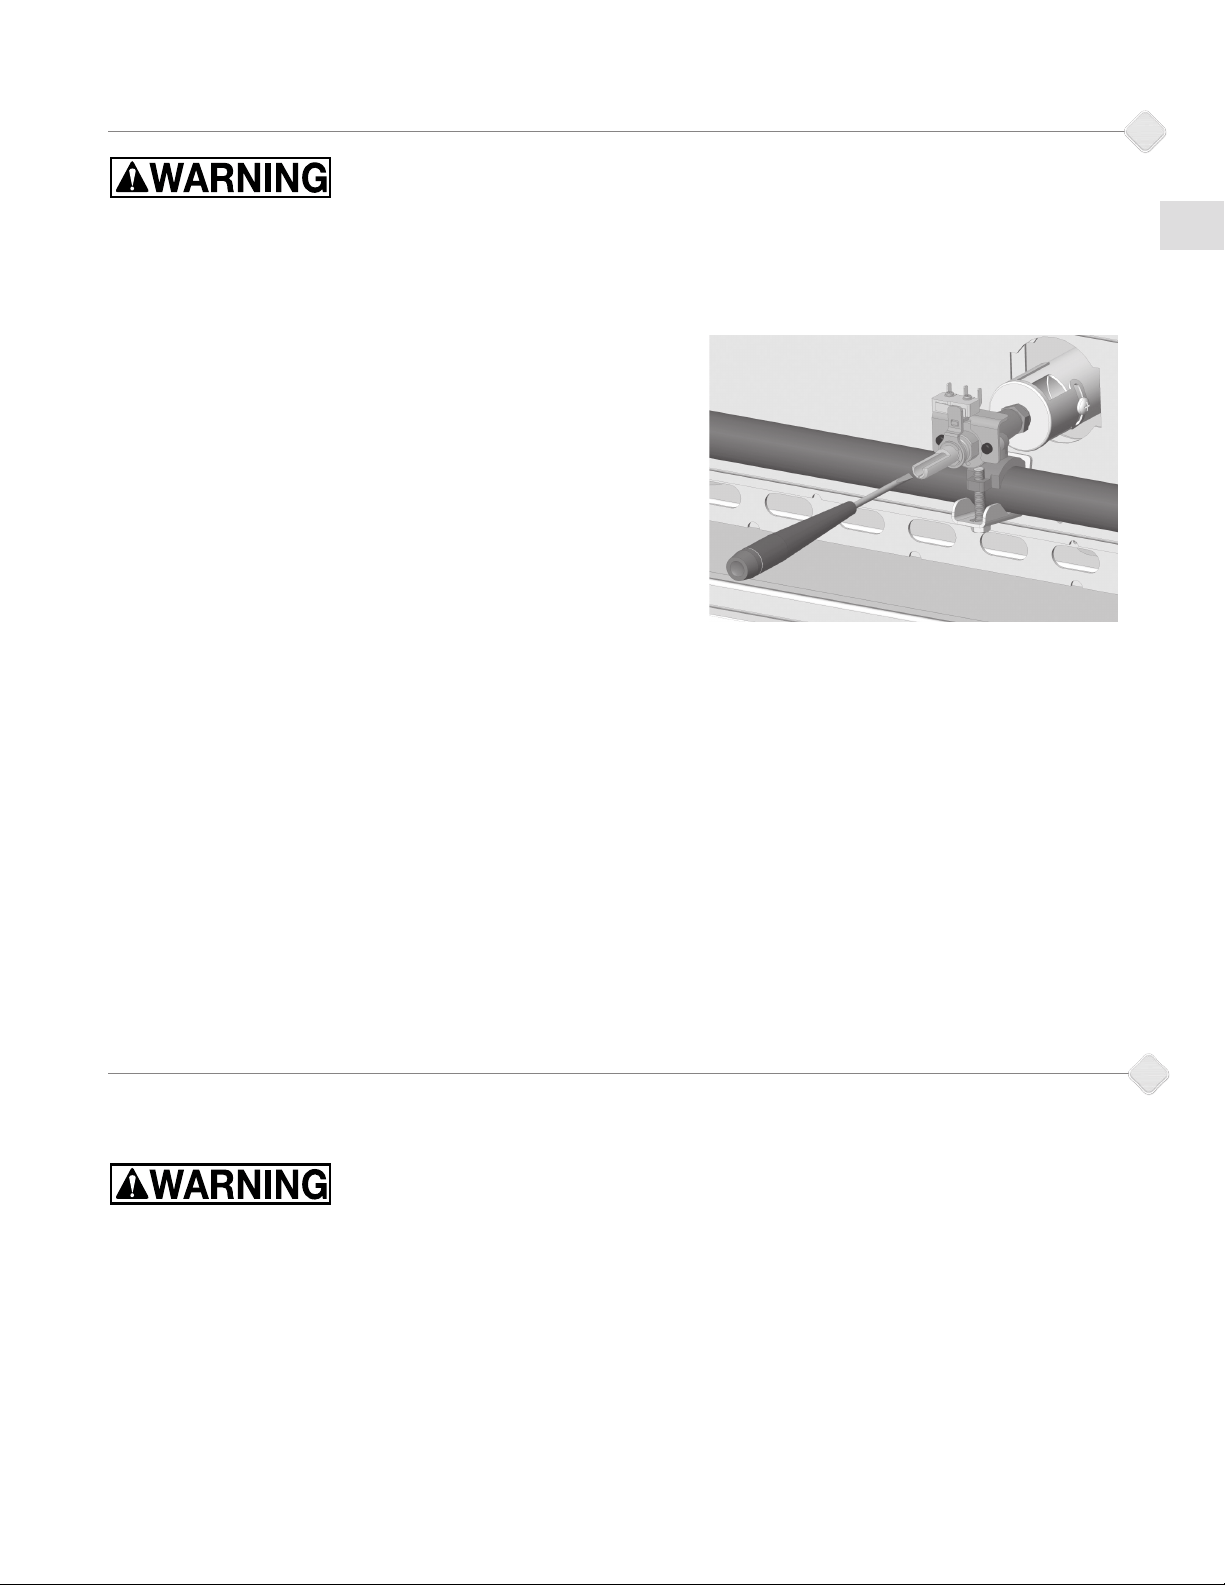
4. Insert a small flat-blade screwdriver into the valve stem to
begin the adjustment (see Fig. 5). The screw only has 2-3
complete revolutions of adjustment. After this, the screw
may continue to turn, but is actually coming out of the valve
and could result in a gas leak. DO NOT turn more than 3 revolutions!
5. Turn counter-clockwise very slowly to INCREASE the low flame. The flame will take a few seconds to
respond to the adjustments you are making.
6. Adjust the flame so the burner is still fully lit on all ports, without fluttering or going out. Turn off
the burner and re-light. Check the new low setting once again to assure proper adjustment is reached.
Reattach the control knob.
INFRARED BURNER FLAME ADJUSTMENT
Infrared burners do not require adjustment and need only be checked visually for proper performance. On
HIGH, an infrared burner should glow red evenly over its entire surface. A diminished red glow and/or a
large blue “halo” of flame on the surface of the infrared burner indicates improper airflow or a blockage at
the burner itself. Call for service.
GAS CONNECTIONS
(continued)
Figure 5
ELECTRICAL SUPPLY
Important: This appliance must be electrically grounded in accordance with local codes, or in the absence
of local codes with the National Electrical Code,
ANSI/NFPA 70-1990
.
Appliances equipped with a flexible electrical supply cord are provided with a three-prong grounding
plug. It is imperative that this plug be connected to a properly grounded three-prong receptacle. If the
receptacle is not the proper grounding type, contact an electrician. Do not remove the grounding prong
from this plug.
The grill is designed for 120 volt AC power and must be plugged into a Ground Fault Circuit Interrupter
(GFCI) protected circuit. Do not connect the grill to the electrical supply until after gas connections have
been made and leak checks have been performed.
Loading ...
Loading ...
Loading ...