Loading ...
Loading ...
Loading ...
Assembly instructions for ‘H’ drawer built-in kits
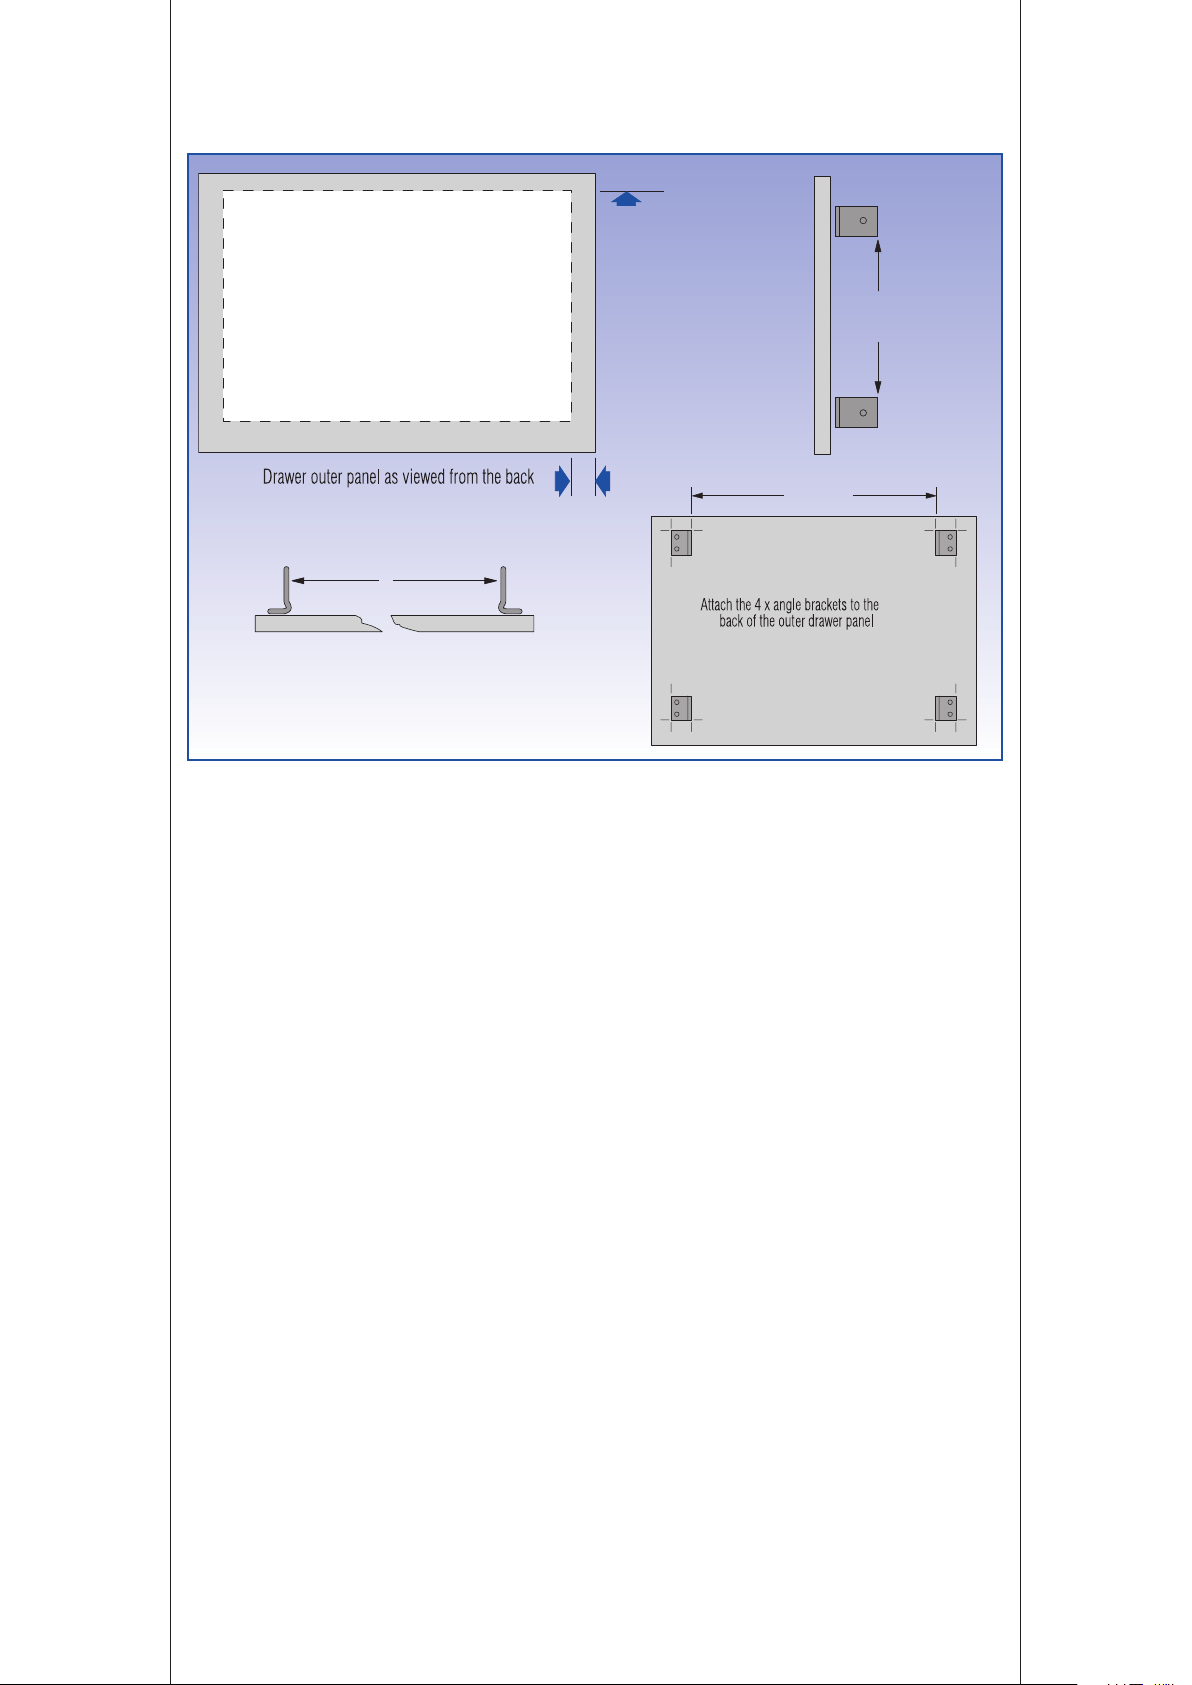
• The “H” drawer of this type of refrigerator is attached to the outer door panel of the built-in
cabinet by means of four angle brackets attached to the back of the outer drawer front.
1. Fit the Refrigerator as previously instructed into the built-in cabinet, and attach the
other door.
2. Remove the “H” Drawer handle from the top of the “H” Drawer and discard. Fit the
endcap outer and end cap blanks provided in the “H” Drawer kit.
3. Take and mark the position of the outer drawer front drawer panel against the “H”
Drawer itself, note the clearance needed between the Drawer front panel and the
door above. (Masking tape is ideal to place over the area to be marked).
The “H” Drawer can be removed from the refrigerator completely by pulling it out
to it stops and then lifting it up and pulling forward.
4. Place and mark drawer front mounting brackets at each corner of the “H” Drawer position.
5. Attach the mounting bracket to the back of the outer door panel.
Note: Check the length of the mounting screw E so that ie doesn’t go right through
the outer drawer panel.
6. The outer drawer panel can now be attached to the “H” Drawer itself by screwing
through the side of the “H” Drawer
7. Adjustment in/out is made by the slots in the brackets.
IMPORTANT: Ensure that refrigerator doors are able to close fully and seal around the flexible
gasket on the refrigerator\freezer. This is to prevent icing problems.
Diagram 14
Humidity Drawer Installation
15