Loading ...
Loading ...
Loading ...
Page 11www.123filter.com | (678) 261-7611 | Support@123Filter.com
7.2 Facing the front of the system, the 1st stage is the see through housing located on the right
hand side. Connect the RED tubing Feed Water Adapter (point A) to the stage 1 elbow
fitting (point B).
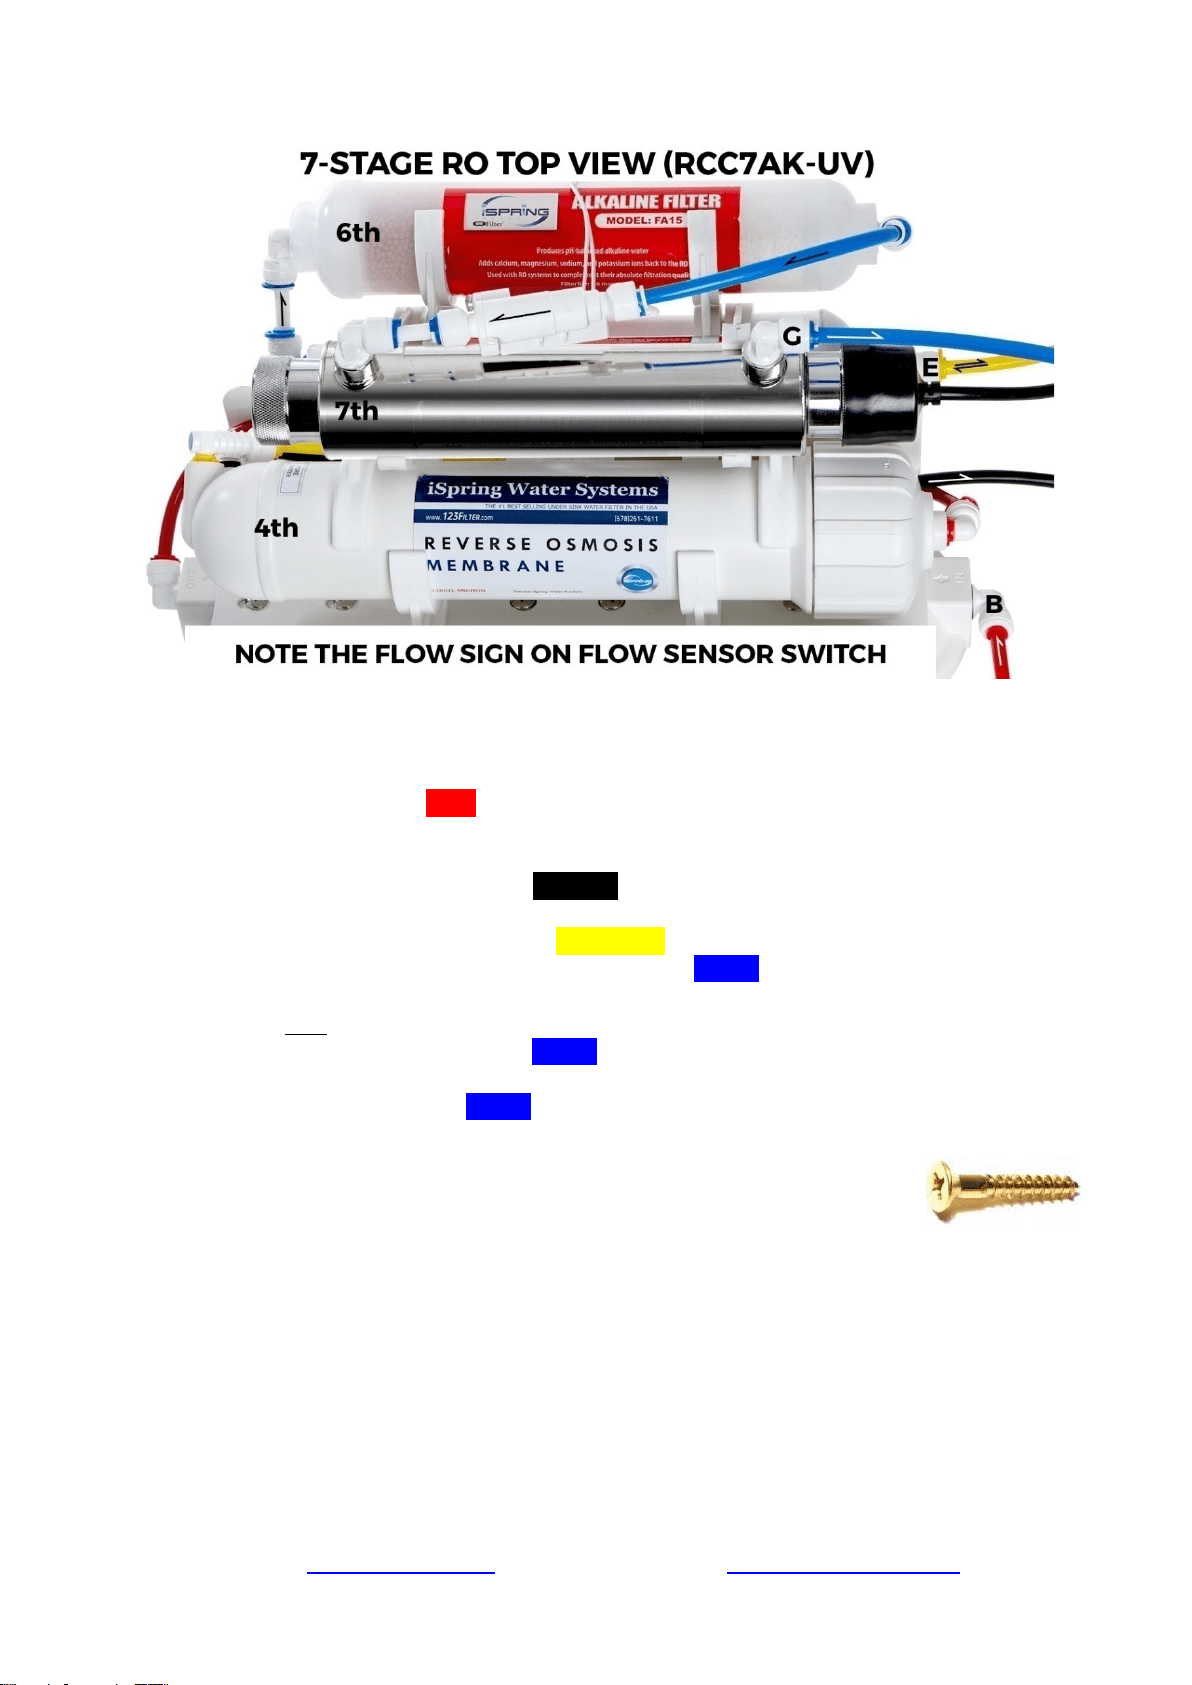
7.3 Connect the Flow Restrictor (point C, 3-inch long cylinder with a FLOW labeled on it) to
the Drain Saddle (point D) with the BLACK tubing.
7.4 On the right side of the Post Carbon Filter (FT15, 5
th
stage), connect the T-fitting (point E)
and the Tank Valve (point F) with the YELLOW tubing.
7.5 At the left end of the stage 5 FT15 filter, insert the BLUE tubing (links to RO faucet) into
the elbow fitting.
* Models with UV/AK/DI: RO water flows out of point G at FT15 and flows into the input
(left) side of the next stage. So the BLUE tubing should be connected to the output side of
the final stage.
7.6 Connect the other end of the BLUE tubing to the RO faucet.
7.7 You may neatly organize the tubings, but make sure to leave enough length so the filter
system can be moved freely in and out of the cabinet when replacing
filters.
7.8 You can mount the system using two 10 x 1-1/4 Phillips Flat Wood
Screws. This will make replacing filter cartridges easier.
Note: If you plan on mounting/hanging the system, it is highly recommended to include
supports under each of the bottom three housings. Supports under the housings will take the
water weight off the housing threads, and ensure the thread strength does not decay over the
years.
Loading ...
Loading ...
Loading ...