Loading ...
Loading ...
Loading ...
Page 9www.123filter.com | (678) 261-7611 | Support@123Filter.com
Step 4: Installing the Vertical Filters: Stages 1, 2, and 3
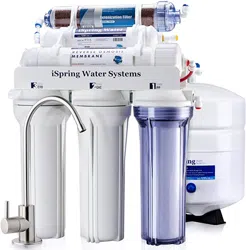
4.1 Make sure the O-ring is seated inside the groove on
top of the filter housing. A light amount of food-
grade silicon jelly may be used to help the O-ring
seal better, but is not required.
4.2 The filter cartridges are preserved in shrink wrap.
Note the direction sign on the sticker before
removing the wrap.
4.3 When placing the filter cartridge into its housing,
make sure it is centered and the knob protruding
from the bottom of the housing fits in the central
hole of the filter.
4.4 Screw the housing, with filters attached, onto the
housing caps (caps are pre-assembled on the
machine head). The cap also has a center knob
which should be inserted into the center hole of the
filter cartridge. Twist the housing on in a clockwise direction by hand, and then use the
housing wrench to tighten it another 1/4 – 1/2 of a turn. Do not over tighten. This can
cause leaks and make it difficult to unscrew the housing when replacing filters.
4.5 Follow steps 1.1 – 1.4 to install the GAC and CTO filters. *Note* the second stage GAC is
the only filter that must go in a certain direction. Make sure the end with the rubber washer
faces up, thereby attaching it to the housing cap.
Step 5: Installing the Tank Shut-Off Valve (TSV)
5.1 Wrap 10 - 15 wraps of Teflon tape clockwise (when looking from above) onto the metal
thread at the top of the tank.
5.2 Screw (clockwise) the Tank Shut-off Valve on and tighten it by hand. Do not over tighten.
5.3 Connect the YELLOW tubing into the Quick-Fitting on the TSV.
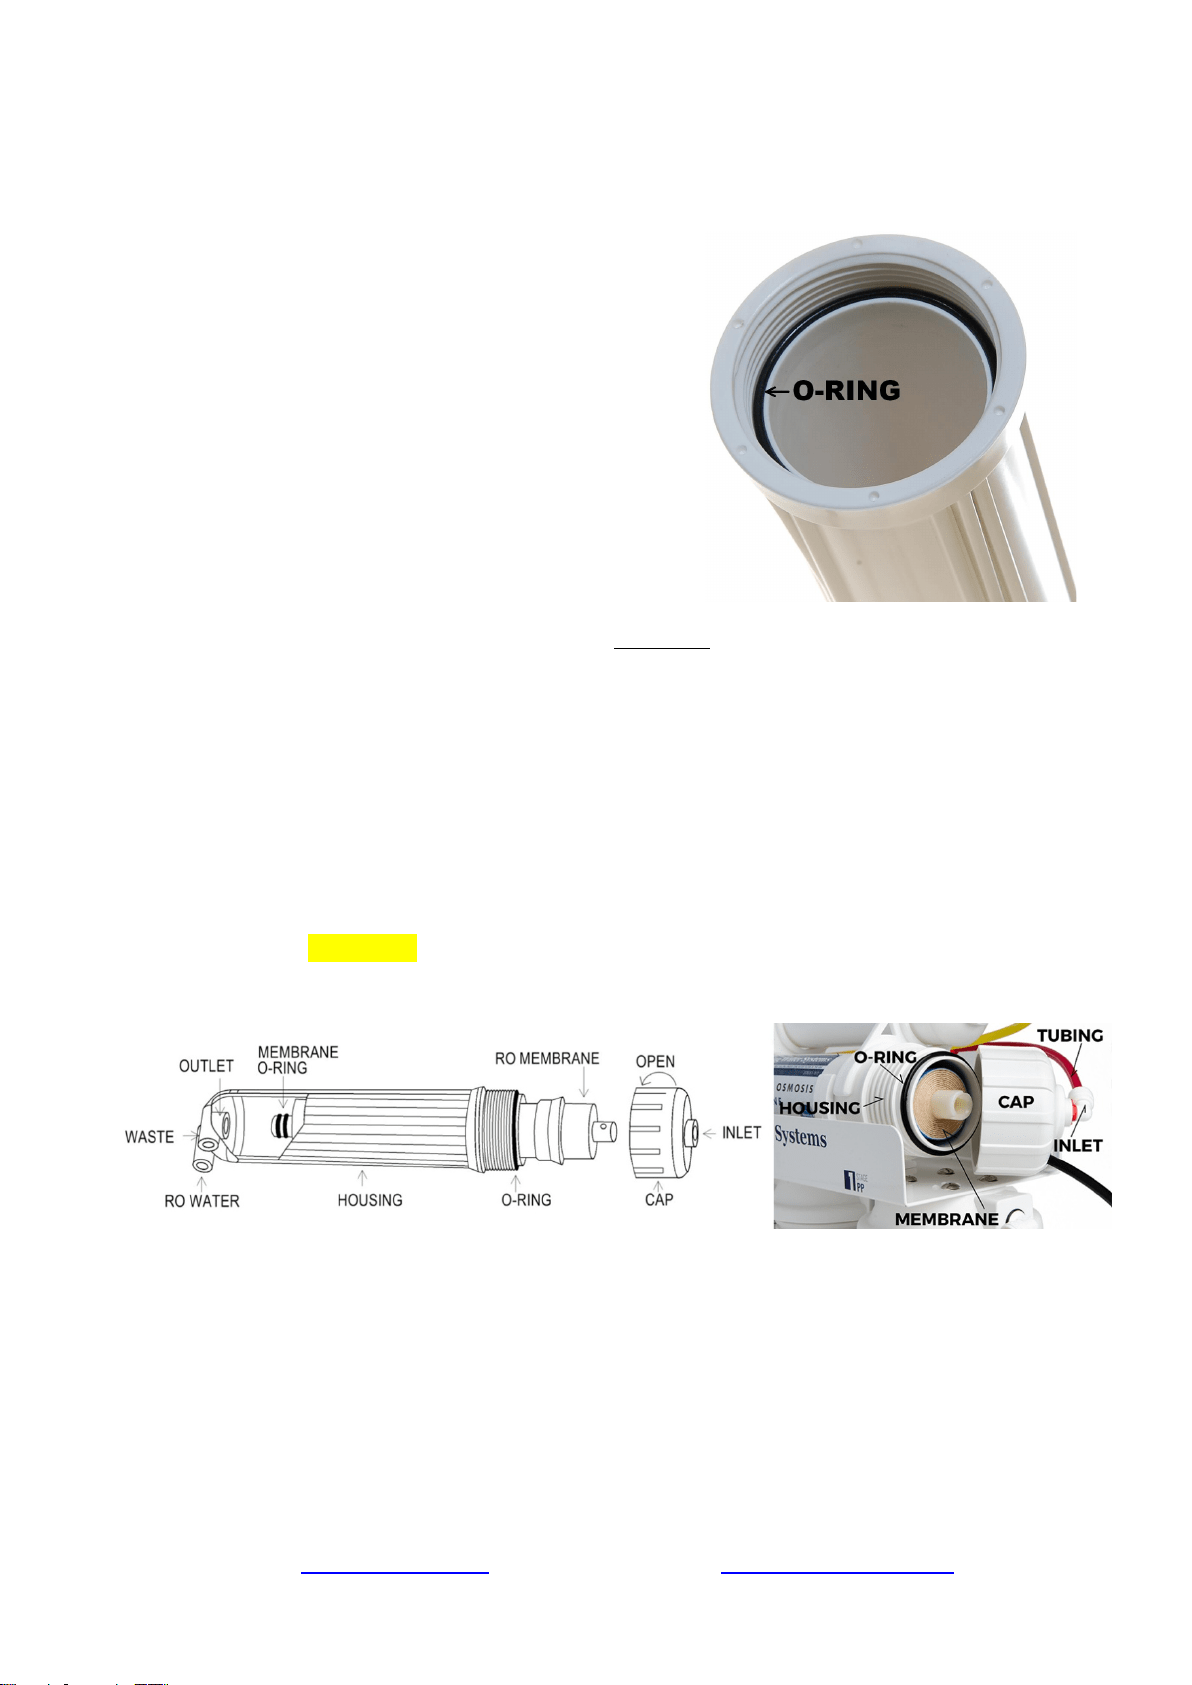
Step 6: Installing the Reverse Osmosis Membrane
Figure 8 Figure 9
6.1 First, disconnect the white tube from the quick-fitting connection on the membrane cap.
This will allow you to unscrew the membrane housing cap.
6.2 All the systems are wet tested without filters prior to shipment, so you may notice some
water drops still inside the housing.
6.3 Unscrew (counter clockwise) and remove the membrane cap.
6.4 Note: Following the flow direction sign on the membrane, cut open the “small end” of the
bag, hold the membrane with the bag to avoid touching or contaminating it, and firmly
insert it into the housing. This way the end with the two small black O-rings towards the
bottom. When it is inserted fully and properly, the “bigger” end of the membrane will be
Loading ...
Loading ...
Loading ...