
1
To find all Klëarvue Cabinetry installation instructions and installation videos, visit www.klearvuecabinetry.com.
Instructions for SKU Number: 346-0642
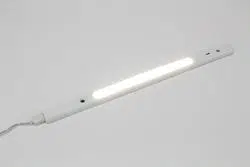
12” Cabinet Light x 1
5/16” x 5/8” Euro screw x 2
60” Linking Cables x 1
5/16” x 3/4” Wood Screw x 2
Wire Support Clips x 3
Includes:
LED DRAWER LIGHT
Questions, problems, missing parts?
Before returning to your retailer, call our customer service at
1-844-255-9692 Monday – Friday 8:00 a.m. – 5:00 p.m. CST
4
RV2151
If, during normal use, this KLËARVŪE
®
lighting fixture breaks or fails due to a defect in material and workmanship within five (5)
years from the date of original purchase, simply bring this lighting fixture with your original sales receipt back to your nearest
MENARDS
®
retail store. At its discretion, KLËARVŪE
®
agrees to have the product or any defective part(s) repaired or replaced with
the same or similar PKLËARVŪE
®
product free of charge, within the stated warranty period, when returned by the original purchaser
with original sales receipt. This warranty; (1) excludes expendable parts including but not limited to light bulbs; (2) does not cover
damage that has resulted from abuse or misuse; and (3) does not cover any losses, labor, injuries to persons/property or costs. This
warranty does give you specific legal rights and you may have other rights, which vary from state to state.
WARRANTY
CARE & MAINTENANCE
TROUBLESHOOTING
• Use only a mild soap and/or water with a soft cloth to clean the fixture. Harsh chemicals will damage the fixture. Do not wipe the
fixture with a rough cloth that may scratch the finish or the lens.
• LEDs are not serviceable. Do not attempt to open or service LEDs.
• The light does not come on at all:
a) With power supply turned o, ensure all connections are made correctly.
b) Make sure the circuit breaker is on and that switch controlling branch circuit is on.
If one of these fix this issue, please consult a certified electrician.

WARNING: These products may represent a possible shock or fire hazard if improperly installed or attached
in any way. Products should be installed in accordance with these instructions, current electrical codes, and/
or the current National Electric Code (NEC). Disconnect power to the unit prior to installation.
WARNING: To reduce risk of re, electric shock, or injury to persons,
• Read all installation instructions before beginning. If you have any doubts about how to install this lighting fixture, or if the fixture
fails to operate completely, consult a qualified electrician to ensure correct branch circuit conductor.
• This product must be installed in accordance with the applicable installation code by a person familiar with the construction and
operation of the product and the hazards involved.
• To reduce the risk of fire, electric shock or injury to persons, do not make or alter any open holes in a wiring enclosure nor in any
electrical components during kit installation.
• To prevent wiring damage or abrasion, do not expose wiring to edges of sheet metal or other sharp objects.
• There are no serviceable parts inside the fixture.
• Suitable for dry locations.
• The installer must determine that supply power is 120V AC at the luminaire before installation.
• Cords should be visually examined periodically and immediately replace when any damage is noted.
• To avoid electrical shock, do not operate fixture with missing or damaged lens.
• LEDs emit bright light. Avoid looking directly at the light source.
• This product is not suitable for use in dimming circuits.
• Use only with intended power adapter KLËARVŪE® 346-0641 sold separately.
SAVE THESE INSTRUCTIONS. For safest operation, read and become familiar with complete installation instructions prior to use.
Pay close attention to this manual and stay within its guidelines when using this product.
CAUTION: All parts must be used as indicated in this manual. Do not substitute any parts, leave parts out, or use parts that are worn
out or broken. Failure to obey this instruction could invalidate any safety certification.
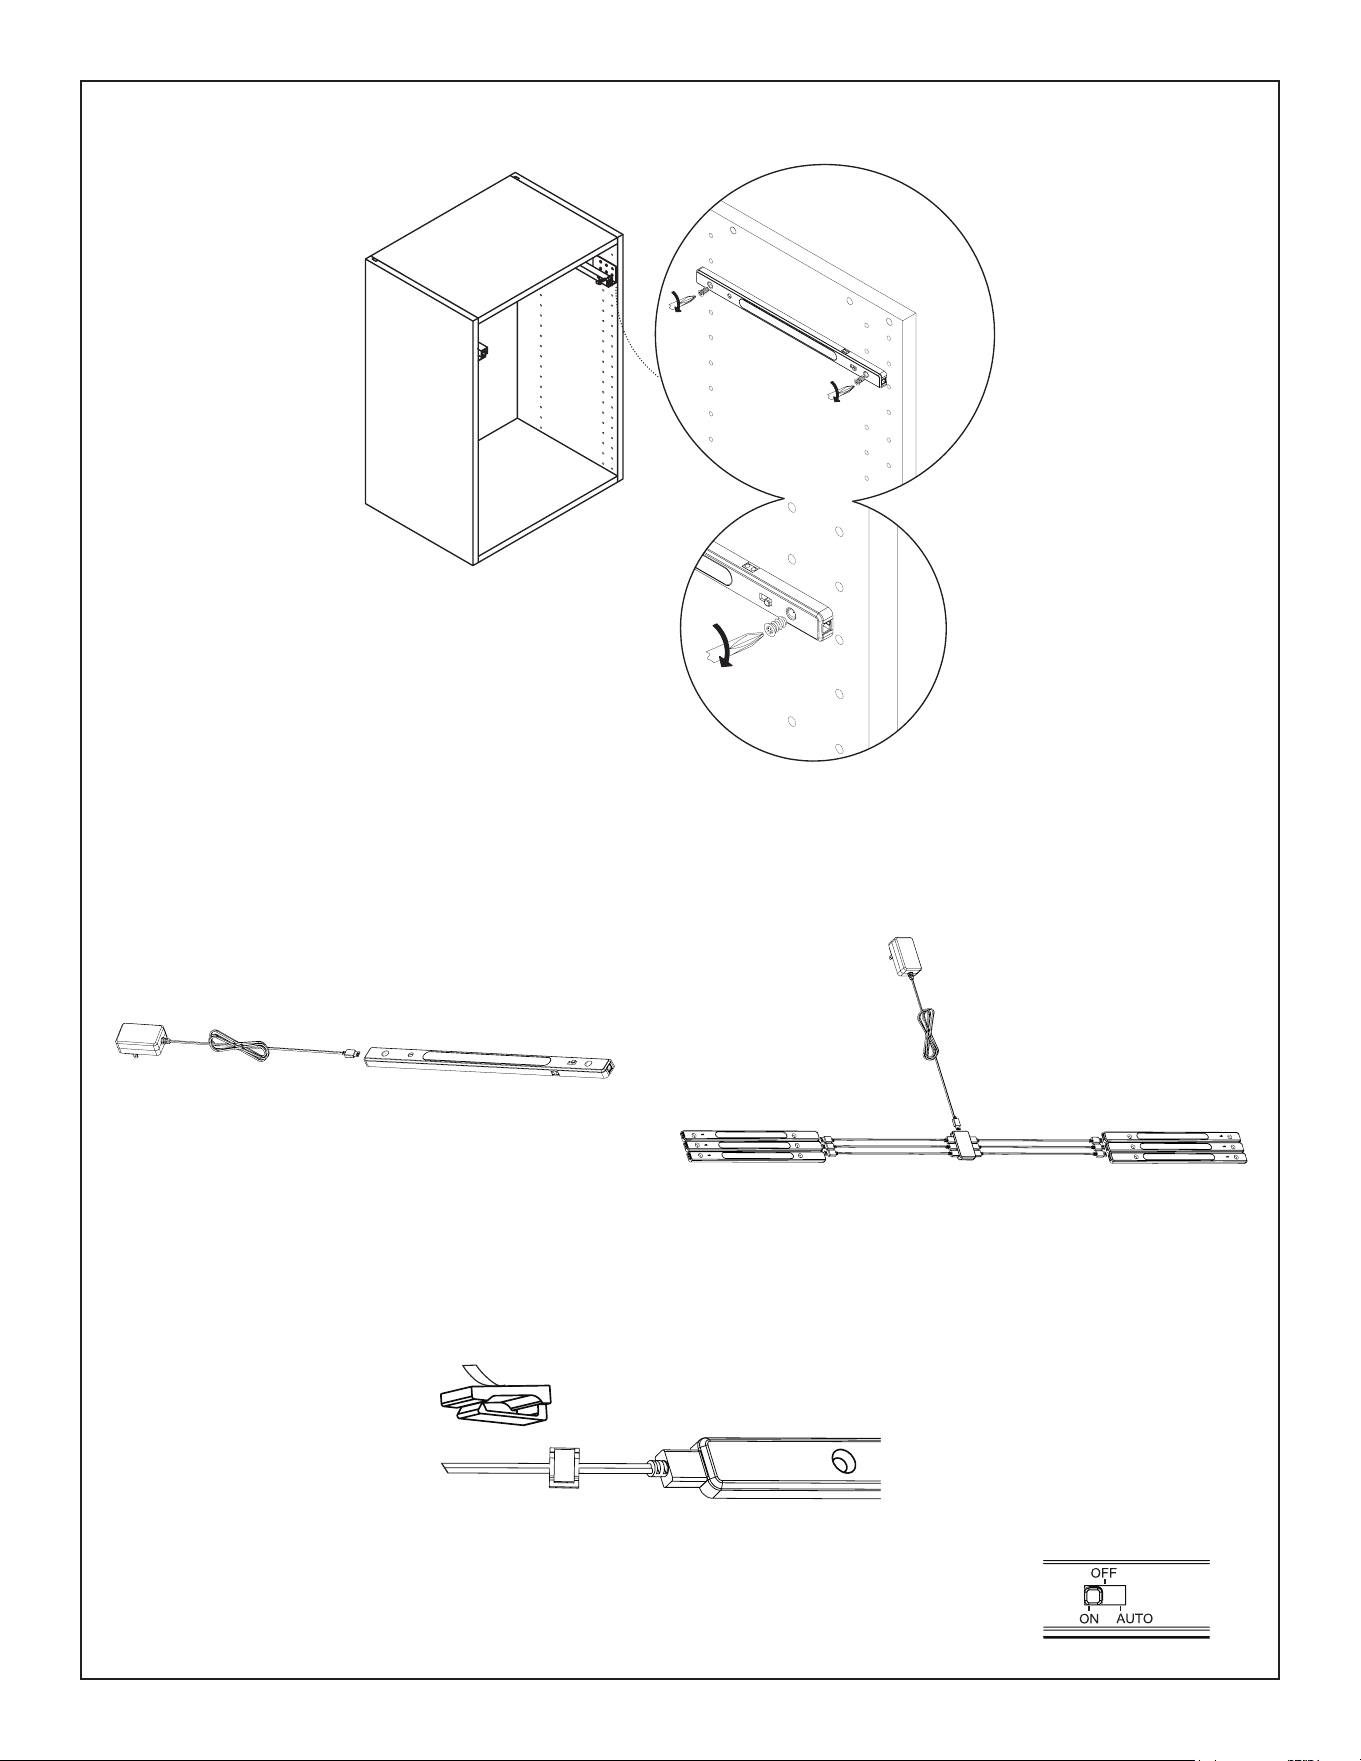
STEP 1:
• Assess the locations of each drawer and the desired location for each drawer light. Ensure there is enough space for the drawer
to open and close as intended.
• Assess whether the mounting holes on the fixture align with the pre-drilled holes within the cabinet housing.
• Assess the distance from the cabinet light to a power receptacle and whether the power adapter and/or linking accessories
(KLËARVŪE® 346-0641) can reach without strain.
• Assess where wire support clips can be best positioned to guide power adapter wire away from drawer slide.
STEP 2:
• If mounting holes on the fixture do not align with the pre-drilled holes within the cabinet housing, mark the location of necessary
holes and pre-drill starter holes.
• Drill a hole in the back of the cabinet housing to enable routing the power adapter (KLËARVŪE® 346-0641) to the power
receptacle.
STEP 3:
• Using suitable hardware (5/16” x 5/8” Euro screw for existing holes or 5/16” x 3/4” Wood Screw for holes drilled in Step 2),
mount the drawer light to the inside of the cabinet. Ensure the attached proximity sensor is facing outward.
STEP 4:
• Route the power adapter (KLËARVŪE® 346-0641) cable through the hole that was drilled into the back of the cabinet housing
during Step 2, then attach it to the drawer light fixture.
• If using more than one fixture, attach each drawer light fixture to the 6-port linking accessory (included with KLËARVŪE® 346-
0641, sold separately) using the 36” linking cables (included with each drawer light fixture). Then, attach the power adapter
(KLËARVŪE® 346-0641) cable to the 6-port linking accessory.
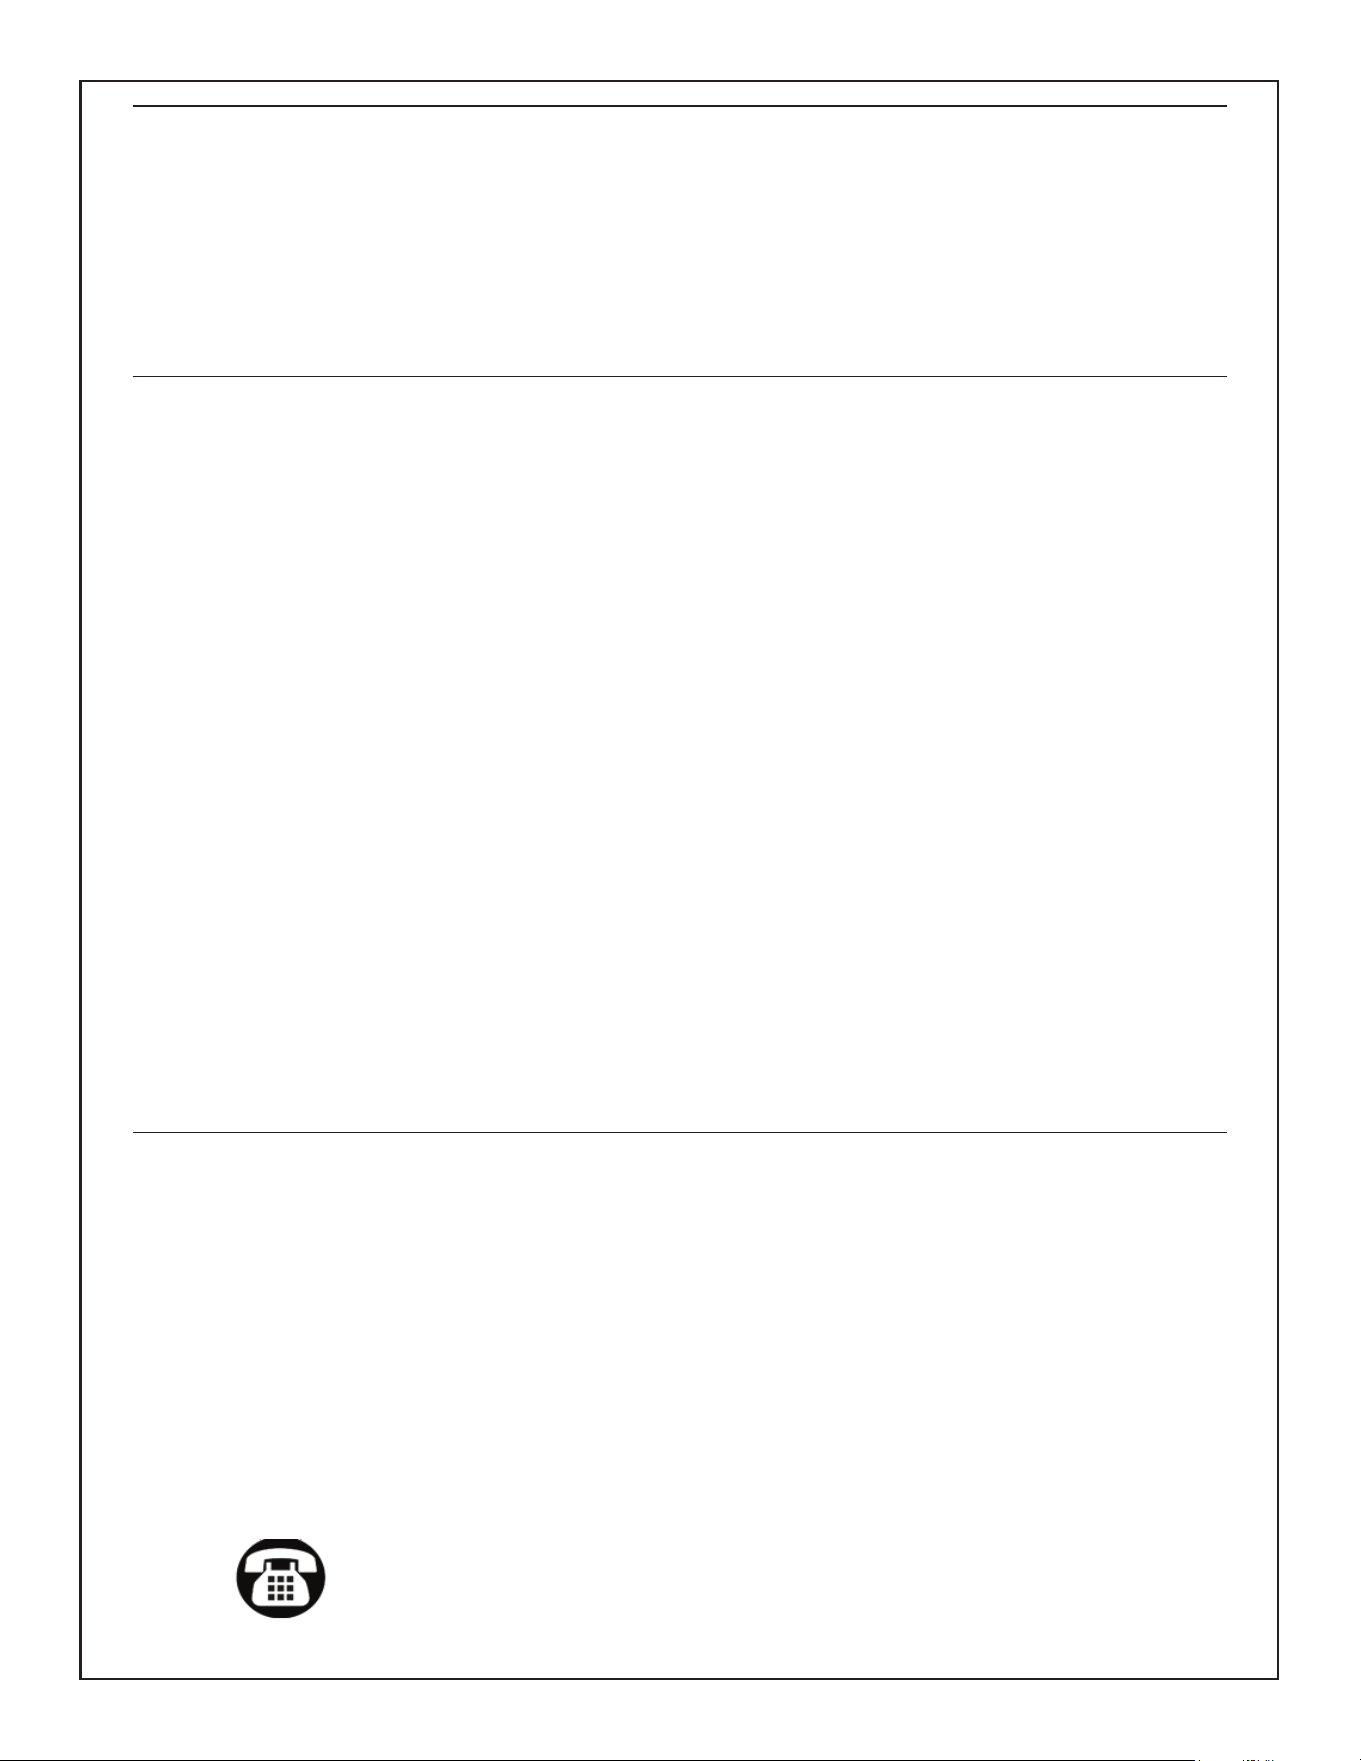
STEP 5:
• Use the wire support clips to route the cables away from the drawer’s path and ax the clips to the cabinet housing so as not to
impede the drawer from opening or closing.
• If using the 6-port linking accessory (included with KLËARVŪE® 346-0641, sold separately), use the strip of 3M tape to ax the
housing to the side of the cabinet in such a way that it does not impede the drawer from opening or closing.
STEP 6:
• Use the switch at the front of the drawer light fixture to set control options:
ON = Steady on
OFF = Steady o
AUTO = When drawer is shut, the light will turn o. When drawer is open, the light will turn on.
• This fixture is intended to be used with KLËARVŪE® Cabinetry.
• Power adapter is not included with each drawer light fixture. Power adapter must be purchased separately
(KLËARVŪE® 346-0641).
• When installing more than one drawer light (up to 6), use the 6-port linking accessory (included with KLËARVŪE® 346-064,
sold separately).
3
2
Important: Please read before you begin your drawer installation.
DRAWER LIGHT INSTALLATION
WARNING: These products may represent a possible shock or fire hazard if improperly installed or attached
in any way. Products should be installed in accordance with these instructions, current electrical codes, and/
or the current National Electric Code (NEC). Disconnect power to the unit prior to installation.
WARNING: To reduce risk of re, electric shock, or injury to persons,
• Read all installation instructions before beginning. If you have any doubts about how to install this lighting fixture, or if the fixture
fails to operate completely, consult a qualified electrician to ensure correct branch circuit conductor.
• This product must be installed in accordance with the applicable installation code by a person familiar with the construction and
operation of the product and the hazards involved.
• To reduce the risk of fire, electric shock or injury to persons, do not make or alter any open holes in a wiring enclosure nor in any
electrical components during kit installation.
• To prevent wiring damage or abrasion, do not expose wiring to edges of sheet metal or other sharp objects.
• There are no serviceable parts inside the fixture.
• Suitable for dry locations.
• The installer must determine that supply power is 120V AC at the luminaire before installation.
• Cords should be visually examined periodically and immediately replace when any damage is noted.
• To avoid electrical shock, do not operate fixture with missing or damaged lens.
• LEDs emit bright light. Avoid looking directly at the light source.
• This product is not suitable for use in dimming circuits.
• Use only with intended power adapter KLËARVŪE® 346-0641 sold separately.
SAVE THESE INSTRUCTIONS. For safest operation, read and become familiar with complete installation instructions prior to use.
Pay close attention to this manual and stay within its guidelines when using this product.
CAUTION: All parts must be used as indicated in this manual. Do not substitute any parts, leave parts out, or use parts that are worn
out or broken. Failure to obey this instruction could invalidate any safety certification.
STEP 1:
• Assess the locations of each drawer and the desired location for each drawer light. Ensure there is enough space for the drawer
to open and close as intended.
• Assess whether the mounting holes on the fixture align with the pre-drilled holes within the cabinet housing.
• Assess the distance from the cabinet light to a power receptacle and whether the power adapter and/or linking accessories
(KLËARVŪE® 346-0641) can reach without strain.
• Assess where wire support clips can be best positioned to guide power adapter wire away from drawer slide.
STEP 2:
• If mounting holes on the fixture do not align with the pre-drilled holes within the cabinet housing, mark the location of necessary
holes and pre-drill starter holes.
• Drill a hole in the back of the cabinet housing to enable routing the power adapter (KLËARVŪE® 346-0641) to the power
receptacle.
STEP 3:
• Using suitable hardware (5/16” x 5/8” Euro screw for existing holes or 5/16” x 3/4” Wood Screw for holes drilled in Step 2),
mount the drawer light to the inside of the cabinet. Ensure the attached proximity sensor is facing outward.
STEP 4:
• Route the power adapter (KLËARVŪE® 346-0641) cable through the hole that was drilled into the back of the cabinet housing
during Step 2, then attach it to the drawer light fixture.
• If using more than one fixture, attach each drawer light fixture to the 6-port linking accessory (included with KLËARVŪE® 346-
0641, sold separately) using the 36” linking cables (included with each drawer light fixture). Then, attach the power adapter
(KLËARVŪE® 346-0641) cable to the 6-port linking accessory.
STEP 5:
• Use the wire support clips to route the cables away from the drawer’s path and ax the clips to the cabinet housing so as not to
impede the drawer from opening or closing.
• If using the 6-port linking accessory (included with KLËARVŪE® 346-0641, sold separately), use the strip of 3M tape to ax the
housing to the side of the cabinet in such a way that it does not impede the drawer from opening or closing.
STEP 6:
• Use the switch at the front of the drawer light fixture to set control options:
ON = Steady on
OFF = Steady o
AUTO = When drawer is shut, the light will turn o. When drawer is open, the light will turn on.
• This fixture is intended to be used with KLËARVŪE® Cabinetry.
• Power adapter is not included with each drawer light fixture. Power adapter must be purchased separately
(KLËARVŪE® 346-0641).
• When installing more than one drawer light (up to 6), use the 6-port linking accessory (included with KLËARVŪE® 346-064,
sold separately).
3
2
Important: Please read before you begin your drawer installation.
DRAWER LIGHT INSTALLATION
1
To find all Klëarvue Cabinetry installation instructions and installation videos, visit www.klearvuecabinetry.com.
Instructions for SKU Number: 346-0642
12” Cabinet Light x 1
5/16” x 5/8” Euro screw x 2
60” Linking Cables x 1
5/16” x 3/4” Wood Screw x 2
Wire Support Clips x 3
Includes:
LED DRAWER LIGHT
Questions, problems, missing parts?
Before returning to your retailer, call our customer service at
1-844-255-9692 Monday – Friday 8:00 a.m. – 5:00 p.m. CST
4
RV2151
If, during normal use, this KLËARVŪE
®
lighting fixture breaks or fails due to a defect in material and workmanship within five (5)
years from the date of original purchase, simply bring this lighting fixture with your original sales receipt back to your nearest
MENARDS
®
retail store. At its discretion, KLËARVŪE
®
agrees to have the product or any defective part(s) repaired or replaced with
the same or similar PKLËARVŪE
®
product free of charge, within the stated warranty period, when returned by the original purchaser
with original sales receipt. This warranty; (1) excludes expendable parts including but not limited to light bulbs; (2) does not cover
damage that has resulted from abuse or misuse; and (3) does not cover any losses, labor, injuries to persons/property or costs. This
warranty does give you specific legal rights and you may have other rights, which vary from state to state.
WARRANTY
CARE & MAINTENANCE
TROUBLESHOOTING
• Use only a mild soap and/or water with a soft cloth to clean the fixture. Harsh chemicals will damage the fixture. Do not wipe the
fixture with a rough cloth that may scratch the finish or the lens.
• LEDs are not serviceable. Do not attempt to open or service LEDs.
• The light does not come on at all:
a) With power supply turned o, ensure all connections are made correctly.
b) Make sure the circuit breaker is on and that switch controlling branch circuit is on.
If one of these fix this issue, please consult a certified electrician.