Loading ...
Loading ...
Loading ...
240EdwardsS:raet,S£
Cleveland,Tensessee37_11
TeI:423-472-$333
Fax:423-478-67"3
EXHAUSTING
The free air flow rate is approximately 180 cubic feet per minute. The vent system carries
lint and moisture away and to the outside. The length of the venting and the number of
elbows affect the air flow rate and the efficiency of the exhaust system.
DO NOT EXHAUST DRYER INTO ANY WALL, CEILING, CRAWL SPACE OR A
CONCEALED SPACE OF A BUILDING, VENT CONNECTION, GAS VENT OR
CHIMNEY. THIS COULD CREATE A FIRE HAZARD FROM LINT EXPELLED BY
THE DRYER. FOR THE SAME I_ASON, WE RECOMMEND ONLY METAL
EXHAUST DUCT TO MINIMIZE RESTPdCTED AIR FLOW AND RELIABLY INSURE
THE CONTAINMENT OF EXHAUST AIR, HEAT AND LINT. NEVER INSTALL A
SCREEN OVER EXHAUST OUTLET. NEVER USE PLASTIC OR OTHER COMBUS-
TIBLE DUCTWORK. AT LEAST ONCE A YEAR, INSPECT AND CLEAN INTE_OR
OF DUCTWORK. FREQUENTLY CHECK AND CLEAN VENT HOOD TO ASSURE
PROPER OPERATION.
A clothes dryer produces combustible lint and the area around the clothes dryer should be
kept free of lint. DO NOT STORE FLAMAVlABLE LIQUIDS OR MATERIALS NEAR
A DRYER.
It is recommended that a dryer be exhausted to the outside using 4" rigid or flexible metal
ducting.
When located in a bedroom, bathroom or closet, the dryer must be exhausted to the outside.
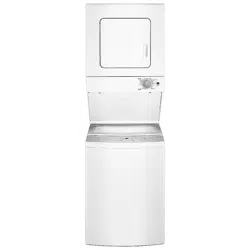
The stacked washer/dryer can only be exhausted out the back. A 4" vent should be installed
to accept the exhaust from the dryer.
To permit sufficient air circulation under the exhaust hood, there should be no less than a 12"
clearance between the bottom of the exhaust hood and the ground. When possible the
exhaust hood should not exhaust directly into a window well. DO NOT terminate exhaust
under a building.
NOTE: Where the exhaust hood is to be installed through masonry, a special masonry saw is
necessary to cut the hole.
Install the exhaust hood and secure with screws to the outside wall and seal with caulking
compound.
Loading ...
Loading ...
Loading ...