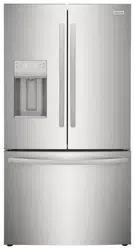
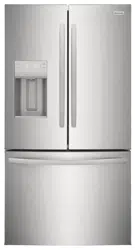
User Manual Frigidaire FLSC238DS7 Refrigerator
Installation
This Owner's Guide provides specific operating instructions for your model. Use the refrigerator only as instructed in this Use & Care Manual. Before starting the refrigerator, follow these important first steps.
LOCATION
- Choose a place that is near a grounded electrical outlet. Do Not use an extension cord or an adapter plug.
- If possible, pince the refrigerator out of direct sunlight and away from the range, dishwasher or other heat sources.
- The refrigerator must be installed on a floor that is lovel and strong enough to support a fully loaded refrigerator
- Consider water supply availability for models equipped with an automatic ice maker.
INSTALLATION
CAUTION : Do Not install the refrigerator where the temperature will drop below 55°F (13°C) or rise above 110°F (43°C). The compressor will not be able to maintain proper temperatures inside the refrigerator.
CAUTION : Do Not block the toe grille on the lower front of your refrigerator. Sufficient air circulation is essential for the proper operation of your refrigerator.
DOOR OPENING
NOTE: If your refrigerator is placed with the door hinge side against a wall, you may have to allow additional space so the door can be opened wider.
Your refrigerator should be positioned to allow easy access to a counter when removing food. For best use of drawers and freezer baskets, the retngerstor should be in a position where both the refrigerator and freezer doors can be fully opened.
TOE GRILLE INSTALLATION / REMOVAL
To Remove Toe Grille:
- Open freezer and fresh food compartment doors,
- Working from left side of toe grille, slip your fingers between top of toe grille and cabinet. Gently pull forward until first set of tabs are free. Slide your hand down past the free tabs and pull forward again until the second set of tabs are free. Continue this process until all tabs are free and the toe grille can be removed. (See graphic at top of page in right column.)

To install Toe Grille:
- Open freezer and fresh food compartment doors.
- Line up toe grille at base of refrigerator, making sure the four bottom tabs are resting through holes at base of cabinet
- Starting from left side of toe grille, press in on first top tab using your thumb and push toe grille forward until it snaps in place. Continue this process until all tabs are snapped in place and toe grille is secured to refrigerator.

LEVELING
All four corners of your refrigerator must rest firmly on a solid floor. Your refrigerator is equipped with adjustable front rollers to hep level your unit. To ensure proper door seal and assist door closing. the refrigerator should be tited 1/4" (6 mm), front to beck
To Level Your Refrigerator.
- Remove toe grille. (See To Remove Toe Gre".)
- Use flat-blade screwdriver or 3/8" socket wrench to squst frontrolers
- Check both doors to be sure seals touch cabinet on all four
sides
NOTE: The refrigerator doors are designed to shut by themselves within a 20 degree opening

Installation - Connecting Ice Maker To Water Supply
WARNING To avoid electric shock, which can cause death or severe personal Injury, disconnect the refrigerator from electrical power before connecting a water supply line to the refrigerator.
CAUTION: To Avoid Property Demage:
- Copper tubing is recommended for the water supply line. Water supply tubing made of plastic is not recommended since it greatly increases the potential for water leaks. Manufacturer will not be responsible for any damage if plastic tubing is used for supply line.
- DO NOT install water supply tubing in areas where temperatures fall below freezing.
- Chemicals from a malfunctioning softener can damage the ice maker. If the ice maker is connected to soft water, ensure that the softener is maintained and working properly.
IMPORTANT: Ensure that your water supply line connections comply with all local plumbing codes.
Before Installing The Water Supply Line, You Will Need
- Basic Tools: adjustable wrench, flat-blade screwdriver, and Phillips screwdriver
- Access to a household cold water line with water pressure between 20 and 100 pai
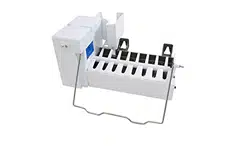
- A water supply line made of % inch (6.4 mm) OD, copper tubing. To determine the length of copper tubing needed, you will need to measure the distance from the ice maker inlet valve at the back of the refrigerator to your cold water pipe. Then add approximately 7 feet (2.1 meters), so the refrigerator can be moved out for cleaning (as shown). shutoff valve to connect the water supply line to your household water system. DO NOT use a self-piercing type shutoff valve.
- A compression nut and ferrule (sleeve) for connecting the water supply line to the ice maker inlet valve.
NOTE: Water line idt number 5303917950, available from your appliance dealer at additional cost, contains 25 feet (7.6 meters) of 14 inch OD copper tubing, a saddle type shutoff valve (nonpiercing), (2) inch brass compression nuts. (2) temules/sleeves, and instructions for installing a water supply line.
To Connect Water Supply Line To Ice Maker inlet Valve
- Disconnect refrigerator from electric power source.
- Place end of water supply line into sink or buckel. Tum ON water supply and flush supply line until water is clear. Tum OFF water supply at shut off valve
- Unscrew plastic cap from water valve inlet and discard cap.
- Slide brass compression nut, then ferrule (sleeve) onto water supply line. shown ush water supply line into water valve inlet as far as it will go (la inch).
- Side fornde (sleeve) into valve inlat and finger tighten compression nut onto valve Tighten another half turn with a wrench; DO NOT over tighten
- With stool clamp and screw, secure water supply line to rear panel of refrigerator as shown
- Col excess water supply line (about 2% tums) behind refrigerator as shown and arrange colle so they do not vibrate or wear against any other surface. a. Tum Of water supply at shutoff valve and tighten any connections that leak
- Reconnect refrigerator to electrical power source
- Make sure ice maker power switch is turned On (See page 14 for location of power switch

IMPORTANT: It takes approximately 24 hours for the ice maker to begin producing ice. Air in new plumbing lines may cause ice maker to cycle two or three times before making a full tray of ice. New plumbing may cause ice to be discolored or have poor favor. Discard ice made during the first 24 hours
DOOR REMOVAL INSTRUCTIONS:

If it is necessary to move the refrigerator through narrow doorways, follow these steps to remove the doors.
IMPORTANT: Before you begin, remove electrical power cord from wall outlet, Remove any food from door shelves,
- Disconnect electrical supply.
- Open both doors, then remove toe grille see page 4 to learn how),
- Close doors.

To Remove Refrigerator Door:
- Remove top hinge cover screw on refrigerator door and remove cover,
- Trace around hinge with soft lead pencil, This will make it easier to realign doors when they are replaced
- Remove top hinge and lift refrigerator door off bottom hinge pin, Set door aside,
- Remove bottom hinge, if necessary,
- Reverse this procedure to reinstall refrigerator door,
To Remove Freezer Door:
- Disconnect water line coming from lower hinge of freezer door at connection located under front of freezer: Press outer ring against face of fitting, then pull to remove tube,
- Remove top hinge cover screw on freezer door and remove cover,
- Disconnect wiring harness connector plug at top hinge: place your thumbs on fiat sides of each connector and bend both parts back and forth, then with firm grasp, pull both pieces apart
- Trace around hinge with soft lead pencil, This will make it easier to realign doors when they are replaced
- Remove top hinge, allowing wiring harness to pull through hinge and lift freezer door off of bottom hinge pin, Lay door down avoid kinking water line,
- Remove bottom hinge, if necessary,
- Reverse this procedure to reinstall freezer door,
When both doors have been reinstalled, connect water fine by inserting tube and pushing until mark touches face of fitting, replace toe grille and plug in electrical power cord.


Features At A Glance

Temperature Controls
COOL DOWN PERIOD
To ensure safe food storage, allow the refrigerator to operate with the doors closed for at least 6 hours before loading it with food.
REFRIGERATOR & FREEZER CONTROLS
NOTE: When changing control settings, wait 24 hours before making additional adjustments.

Temperature Control Range

Temperature Adjustment Guide

TEMPERATURE ADJUSTMENT
After 24 hours, adjust the controb as needed, Make your adjustments small and gradual; allowing time for temperatures to change and stabilize, Refer to the adjacent guidelines for temperature settings,
To adjust the temperature to a higher or lower setting, press the Up or Down button closest to the display, The first time you press the button, the display shows the last setting you entered, Each press of the button after that increments the setting by one degree, The display shows your new setting momentarily, then changes back to the
IF TEMPERATURE DISPLAYS FLASH...
If ever you see both temperature displays continuously flashing, it may indicate that the control system has detected a performance problem. Call your Frigidaire service representative, who can interpret the flashing message.
To maintain temperatures, a fan circulates air in the refrigerator and freezer compartments. For good circulation, do not block cold air vents with food items.
OTHER CONTROL FEATURES

TURNING THE COOLING SYSTEM ON AND OFF
You can disaMe the cooling system in your refrigerator by pressing the On/Off button located on the left side of the temperature control panel. To ensure that you do not accidentally turn off the cooling system, the button does not work unless you press and hold it for three seconds. Once you disable the cooling system, all refrigeration to the freezer and fresh food compartments stops. To turn the cooling system back on, you must again press and hold the On/Off button for three more seconds.
SYSTEM MONiTORiNG ALARMS (SeUect ModeUs)
The electronic control system continuously monitors your refrigerator/freezer for temperature consistency, doors left ajar, and power failures. Variances from normal operating conditions are communicated by audible tones and a set of four status indicator lights.
NOTE: Each time you make settings on the control pane!, Door a single audible tone acknowledges your input.
USING THE ALARM RESET BUTTON
You can disable or activate the alarm system by pressing and holding the Reset button for three seconds. Use it, for example, to turn off audible tones and/or flashing indicator lights.
Once you disable the alarm system, you must again press and hold the Alarm Reset button for three more seconds to reset (activate) the alarm system.
The On indicator light remains offwhile the freezer and refrigerator compartments cool toward the current cooling settings. When temperature settings are reached, the On light displays green to indicate an active alarm system.
RESPONDING TO ALARMS (Audible Tones & indicator Lights)
Your refrigerator's control system can convey the following information through audible tones and the alarm indicator lights.

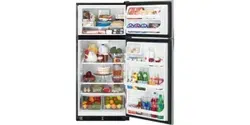
Looking Inside
ICE CREAM SHELF (SOME MODELS)
This shelf attaches to the top of the ice dispenser container. It allows storage of both round and rectangular cartons of your favorite ice cream.

CANTILEVER SHELF ADJUSTMENT
Refrigerator shelves are easily adjusted to suit individua needs, Before adjusting the shelves, remove a food, Cantilever shelves are supported at the back of the refrigerator.

To adjust cantilever shelves:
- Lift front edge up,
- Pull shelf out,
Replace the shelf by inserting the hooks at rear of the shelf into the wall bracket, Lower the shelf into the desired slots and lock into position, SpilfSafe glass shelves (some models) catch and hold accidental spills,

DOOR STORAGE
Door bins and shelves are provided for convenient storage of jars, bottles, and cans. Frequently used items can be quickdy selected.
Some models have door bins that can accommodate gallon- sized plastic drink containers and economy-sized jars and containers. Some bins are adjustable for maximum storage capacity.
The dairy compartment, which is warmer than the general food storage section, is intended for short term storage of cheese, spreads, or butter.

ADJUSTABLE DOOR BINS
Some models have adjustable door bins that can be moved to suit individual needs.
To move door bins
- Litt bin straight up.
- Remove bin.
- Place bin in desired position.
- Lower bin onto supports until locked in place.

TALL BOTTLE RETAINER (SOME MODELS)
The Tall Bottle Retainer keeps tall containers in the bin from falling forward when opening or closing the refrigerator door. To install, hold the retainer at the top, and slide it over the outside wall of the bin, as shown in the diagram.

SPECIAL ITEM RACK (SOME MODELS)
The innovative design of the Special Item Rack allows you to store a six-pack of 12 ounce drink cans, a bottle of wine. a two-liter soft drink bottle, or a carton of eggs. The Special Item Rack mounts on the left side of your refrigerator To install, just slide the Special Item Rack onto any she as shown in the drawing.

Looking Inside Special Storage Areas
CRISPERS (SOME MODELS)
The crispers, located under the bottom refrigerator shelf, are designed for storing fruits, vegetables, and other fresh produce. Wash items in dearwater and remove excess water before placing them in the crispers. Items with strong odors or high moisture content should be wrapped before storing.

HUMIDITY CONTROL (SOME MODELS)
The Humidity Control, present on some models with crisper drawers, allows you to adjust the humidity within the crisper. This can extend the life of fresh vegetables that keep best in high humidity
NOTE: Leafy vegetables keep best when stored with the Humidity Control set on Higher Humidity, or in a drawer without a Humidity Control This keeps incoming air to a minimum and maintains maximum moisture content.

MEAT KEEPER
Some models are equipped with a Meat Keeper. Meat Keeper temperatures can be adjusted by sliding the Meat Keeper Temperature Control in either direction. Use this pan for short term storage of bulk meat items. If meats are to be kept longer than one or two days, they should be frozen. The Meat Keeper is fixed and cannot be moved up or down. If fruits or vegetables are to be stored in the Meat Keeper, set the Meat Keeper Temperature Control to a warmer setting to prevent freezing

WINE RACK (SOME MODELS)
The wine rack stores bottles of wine, or single two-liter plastic bottles of juice or soda pop. To install, slide the Wine Rack onto the shell with the curve facing in. To remove, slide the

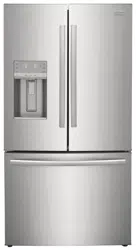
Automatic Ice and Water Dispenser
AUTOMATIC ICE & WATER DISPENSER OPERATING INSTRUCTION

EXTREME FREEZE
To freeze food at a faster rate to preserve freshness, push the Touch Pad 0 for 3-5 seconds to activate this feature, A green light above the Touch Pad, Push the Touch Pad Oagain for 3-5 seconds to deactivate,
EXTRA ICE
To increase ice production for special occasions, such as parties, push the Touch Pad 2 for seconds to activate this feature, A green light above the Touch Pad, Push the Touch Pad 2 again for 3-5 seconds to deactivate.
CUBE
Press the Crush Touch Pad 3 to get cubed ice, A green light will appear above the Touch Pad, Press glass against ICE dispensing paddle 8 as far up as possible to catch all ice,
CRUSH
Press the CRUSH Touch Pad Oto get crushed ice, A green light will appear above the Touch Pad. Press glass against ICE dispensing paddle 8 as far up as possible to catch all ice,
LIGHT
Press the LIGHT Touch Pad 5 to turn on dispenser light, Press 5 again to turn the light off. The light also turns on automatically when ice and/or water is dispensed, Replace light bulb with an appliance bulb of the same wattage,
FILTER STATUS
The FILTER STATUS indicator light above the Touch Pad 6 will light up each time the dispenser is used, The following filter light indications are:
Green The filter is still operating within its specified life cycle,
Amber The filter has reached approximately 80% of its useful life . This is the recommended time to purchase a replacement filter,
Red The filter is 100% used up, Change the filter as soon as possible,
After the filter cartridge has been changed, press and hold the FILTER RESET Touch Pad 6 for seconds,
NOTE: The Green, Red and Amber lights will flash when reset is completed,
LOCK
The Ice & Water Dispenser can be locked out to prevent unwanted use,
To Lock Out Press the LOCK Touch Pad 7 for 3-5 seconds, A Red light will appear above the Touch Pad.
To Lock Press the LOCK Touch Pad 7 for 3-5 seconds until the Red light above the Touch Pad goes out,
WATER
To operate the water dispenser, press a glass against the WATER dpensing paddle _, To stop dispensing water, pull the glass away from the dispensing paddle, Dispensed water is not cold, For colder water, add crushed ice or cubes before dispensing water, A drip tray located at the base of the dispenser catches small spills and allows them to evaporate, This drip tray is removable and dishwasher safe. Do not pour water and excess ice in this area because there is no drain.
ICE AND WATER DISPENSER FEATURES
The Ice and water dispenser conveniently dispenses chilled water, and ice cubes or crushed ice, depending on the model.
To operate the ice dispenser, select the ice option desired using the touchpad. Press a glass against the dispenning paddle an for up as possible to catch all ice. To stop dispensing loe, pull glass away from dispensing paddle. Do not remove the glass und the ice has completely dispensed. (Complete instructions for the dispenser operation are attached to the inside of the freezer door)
How the Water Dispenser Works
The water tank, located behind the refrigerator compartment, automatically fills as water is dispensed. For proper dispenser operation, the recommended supply water pressure should fall between 20 pal and 100 pal.
CAUTION: Water pressure must not exceed 100 lbs. Excessive pressure may cause water filter to malfunction.
After the refrigerator is connected to the water supply, fill the water tank by drawing one glass of water. It may take about 19 minutes after activating the dispenser paddio before water begins to fill this first glass. Continua flushing the system for 3 minutes to rid the tank and plumbing connections of any impurities. The water disponsor has a built in shutoff device that will stop the water tow after 3 minutes of continuous use. Simply release the dispenser paddle to reset the shutoff mechanism.
CAUTION Chemicals from a malfunctioning softener can damage the ice maker. If the ice maker is connected to soft water, ensure that the softener is maintained and working properly.
How the ice Dispenser Works

The ice maker and container are located in the top of the treazer compartment. After the refrigerator is installed property and has cooled for several hours, the ice maker can begin making ice within hours. Air in new plumbing lines may cause the ice maker to cycle two or three times before making a full tray of ice. Ice production is controlled by the ice maker's On/Off power switch. Pross the switch to the "O" position to turn it Off and press it to the T position to turn it On. With no usage it will take approximately 2 days to fill the ice container. The ice maker also has a built-in wire signal arm, which automatically stope ice production when the ice bin is full. This signal arm should not be used to manually stop the ice maker.
The ice maker will produce 8 cubes per cycle and approximately 150 cubes in 24 hours, depending on freezer compartment temperature, room temperatura, number of door openings, and other usage conditions
Because of new plumbing connections, the first production of ice cubes may be discoloned or have an odd flavor. These should be discarded until the cubes made are free of sidcoloraration and taste.
ICE DISPENSER TIPS
- Ice cubes stored too lang may develop an odd favor. Empty the ice container and ensure that the lon maker's Orvor power switch is turned On (set to the "1" position. The ice maker will than preduce mora ice
- Occasionaly shake the ice container to keep ice separated.
- Keep the ice makar's On/Oft power switch turad Off (set to the "O' position) until the refrigerator is connected to the water suppl or whenever the water supply is turned off
IMPORTANT: The ice maker is turned On at the factory so it can work as soon as you install your natriparator if you cannot connect a water supply turn the On Off switch to the Off (0) position. Otherwise, the ice maker's valve may be noisy when il attempts to operate without water.
CAUTION If the dispensing paddle is pushed for more than 4 minutes, the dispenser motor may overload and stop. The overload protector will reset automatically after 3 or 4 minutes.
- If a large quantity of ice is needed at one time it is best to remove cubes directly from the ice container
- The following sounds are normal when the ice maker is operating:
- Motar unning
- Ice propping into ice container
- Water valed opening or cclosing
- Running water
- Turn Off the ice maker when cleaning the freezer and vacation.
CLEANING THE ICE DISPENSER
Clean the dispenser and ice container at regular intervals, particularly before you take a vacation or move, or if the ice dispenser sticks.
- Turn office production by pressing the ice maker's On/Off switch.
- Remove ice container by lifting up and out. Empty and carefully clean the container with mild detergent. Rinse with clear water. Do not use harsh or abrasive cleaners. Allow ice container to dry completely before replacing in the freezer.
- Remove ice chips and clean the shell and chute that supports the ice container.
- Replace the ice container. Press the ice maker's On/Off switch to resume ice production.

IMPORTANT: When removing or replacing the ice bin, do not rotate the auger in the ice bin. If the auger is accidentally turned. you must raalign the auger by tuming it in 90 turns until the ipe bin its into place with the drive mechanism.
Remove and empty the ice storage bin if:
- An extended power failure (one hour or longer causes ice cubes in the ica storage bin to malt and freaze together and jam the dispanser mechanism
- The ice dispenser is not used frequently ice cubes will freeze together in the bin and jarn the dispenser necharasn Remove that son storage bin and shake la loosen the cubes.
NEVER use an ice pick or similar sharp instrument to break up the ice This could damage the ice storage bin and dispenser mechanism.

PureSourceTM Ice and Water Filter (some models)
NOTE: If you purchased a refrigerator with a PureSource™ Ice and Water filter, please read the following use and care information. This ice and water filter system filters water to your ice maker and water dispenser. It is located in the upper right back corner of the fresh food compartment.
System Startup:
Water supply does not need to be turned off, however, do not use ice and water dispenser while installing filter. The filter cartridge has already been installed in the filter housing at the factory. Refer to the How The Water Dispenser Works section to properly fill the system with water.
Changing the Filter:
Water conditions vary throughout the world, but changing the water filter every months normally will ensure the highest possible water quality. The Filter Status light will turn red after 400 gallons of water has flowed through the ice and water dispenser (some models). Also, if the filter has been in a refrigerator that has not been in use for awhile (during moving for example), change the fitter before reinstalling the refrigerator. The dispenser system will also operate without filtration (with filter cartridge removed).

To change filter:
It is not necessary to turn the water supply off to change the filter.
- Open treezer door and leave open until filter change is complate.
- Turn the ice maker's power switch to the Off ("O") position (See illustration on page 14).
- Hold tear cup firmly, and un aw towards left (Some water could leak out as you remove cup. This is normal). Filter cartridge should come down with cup. If cartridge remains in housing, pull down gantly, while twisting filler back and forth.
- Rinse out cup under running water.
- The large o-ring that seals the filter system sets in the o-ring groove down inside the cup. Should the o-ring fall out caring filter cartridge replacement, simply place it back in the groove prior to screwing the cup back in place. If the o-ring becomas damaged, you will need to order one from the Customer Care Center
- Discard old fiter cartridge
- Remove new siter cartridge from packaging and place in cup. The end with the small o-ring should be up, out of the cup
- Screw cup, with fiber, back onto housing. Do Not Use Wrench To Reinstall Cup Filter cartridge will sett-align as cup is tightened Be sure cup is completely tightened with PureSource™ logo facing outward Do Not Tighten Past Stop.
- Turn the ice maker's power switch to the On (T) position
- Check for leaks Open refrigerator decr. Wipe any water droplets from the cup. Fill a gas with water if there is a laic, unscrew bitor cup, and reinsart the filter cartridge Check placement of large O-ring Roinstall titer oup, making certain it is tightened completely
- To condition filter system and purge air from weter lire la dess with water. Continue leshing the system for approximately 3 minutes to assure that the purest water possible is stored in the water tank
IMPORTANT: Resetting The Filter Status Light (some models) After replacing the filter cartridge, it will be necessary to press the Filter Status reset button located on the ice and water dispenser. This will reset the Filter Status light. Push the reset button until the green, red and amber lights flash (10-15 seconds). Please refer to the complete dispenser operating instructions attached to the inside of the freezer door. possible is stored in On models without a Filter Status reset button, there is a set of Reminder Stickers included in the envelope that the Use & Care Manual came in. Choose a dated sticker that indicates 6-9 months (depending on your water quality and usage) from the date of installation. Place the sticker on the front of the filter cup to remind you when it is time to change the filter
PureSource2 loe and Water Front Filter (some modele)
NOTE: If you purchased a refrigerator with a PureSource loe and Waler front er, please read the following use and care information. This ice and water filter system filters water to your ice maker and water dispenser. It is located in the upper right front comer of the fresh food compartment.
System Startup:
Water supply does not need to be tumed off, however, do not use ice and water dispenser while installing filter.
The filter cartridge has already been installed in the filter housing at the factory. Refer to the How The Dispenser Works section to properly fill the system with the water
To change filter:

It is not necessary to turn the water supply off to change the filter.
1. Turn the ice maker's power switch to the Off (0) position (See illustration on page 14).
2. Push the Filter Release Button, located to the right of the filer cartridge, to release the fitor from the housing. To minimize the possibility of the filter falling outpf the housing during removal, it would be best to hold the filter as it movds out toward you
NOTE: A small amount of water may be released during this operation. You should have a paper towel or dish cloth handy to wipe up any water that may drip out of the filter or housing. Two small holes neer the back of the housing have been added for any excess water to escape. It would be best to clear away any food near this area on the top shelf in advance of removing the filter.
3. Pull the old iter cartridge straight out of the housing
4. Discard the old filter.
5. Remove the new iter cartridge from the packaging and insert into the filter housing the same way the old one came out.
6. When the cartridge is almost in, you will feel it stop against the clip assembly in the back of the housing. The clip assembly holds the filter cartridge firmly in place. At this point, you will need to push firmly until the cartridge snaps fully in place. When completely in place, the front of the filter cartridge will be flush with the front of the housing.
7. Tarn the ice maker's power switch to the On (1) position
8. Fill a glass with watar. As you are doing this, check for leaks at the filter housing. There will be noticeable spurts and sputters as the system pushas the air out through the system and out the dispenser nozzle. This is normal
9. After you have run one glass of water, continue to fush the system for approximately 3 minutes to assure that the purest water possible is stored in the water storage tank
IMPORTANT: Resetting The Filter Status Light (some models)
After replacing the filter cartridge, it will be necessary to press the Filter Reset button located on the oe and water dispenser. This will reset the Filter Status light, Push the reset button until the green, red and amber ights fash (10-15 seconds). Please refer to the complete dispenser operating instructions attached to the inside of the freezer
Food Storage & Energy Saving Ideas
FOOD STORAGE IDEAS
Fresh Food Storage
- The fresh food compartment should be kept botwoon 34°F and 40° F with an optimum temperature of 37° F
- Avoid overcrowding the refrigerator shalvas. This reduces the circulation of air around the food and results in unaven cooling.
Fruits and Vegetables
- Storage in the crisper drawers traps moisture to help preserve the fruit and vegetable quality for longer time periods.
Ment
- Raw meat and poultry should be wrapped securely so leakage and contamination of other loods or surfaces does not occur
Frozen Food Storage
- The freezer compartment should be kept at 0 F or lower
- A freezer operates most efficiently when it is at least 2/3 full.
Packaging Foods for Freezing
- To minimize dehydration and quality deterioration, use aluminum foil, freezer wrap, freezer bags or airtight containers.
- Force as much air out of the packages as possible and seal them tightly. Trapped air can cause food to dry out. change color, and develop an off-flavor (freezer burn).
- Wrap fresh meats and poultry with suitable freezer wrap prior to freezing
- Do not refreeze meat that has completely thawed.
Loading the Freezer
- Avoid adding too much warm food to the freezer at one time. This overloads the freezer, slows the rate of freezing. and can raise the temperature of frozen foods.
- Leave a space between the packages, so cold air can circulate freely, allowing food to freeze as quickly as possible.
- Avoid storing hard-to-freeze loods such as ice cream and orange juice on the freezer door shelves. These foods are best stored in the freezer interior where the temperature vanes less.

ENERGY SAVING IDEAS
- Locate the refrigerator in the coolest part of the room, out of direct sunlight. and away from healing ducts or registers. Do not place the refrigerator next to heal-producing appliances such as a range, oven, or dishwasher
- If this is not possible, a section of cabinetry or an added layer of insulation between the two appliances will help the refrigerator operate more efficiently.
- Level the refrigerator so that the doors close tightly
- Refer to this Use & Care Manual for the suggested temperature control settings.
- Do not overcrowd the refrigerator or black cold air vents Doing so causes the refrigerator to run longer and use more anergy.
- Cover foods and wipe containers dry before placing them in the refrigerator. This cuts down on moisture build-up inside the unit.
- Organize the refrigerator to reduce door openings Ramove as many items as needed at one time and close the door as soon as possible
Normal Operating Sounds & Sights
UNDERSTANDING THE SOUNDS YOU MAY HEAR
Your new high-efficiency refrigerator may make unfamiliar sounds. Most often, these are all normal sounds that soon will become familiar to you. They also indicate your refrigerator is operating as designed. Hard surfaces, such as vinyl or wood floors, walls, and kitchen cabinets may make sounds more noticeable. Listed below are descriptions of some of the most common sounds you may hear, and what is causing them.
NOTE: Rigid foam insulation is very energy efficient, but is not a sound insulator.

A. Evaporator
The flow of refrigerant through the evaporator may create a boiling or gurgling sound.
B. Evaporator Fan
You may hear air being forced through the refrigerator by the evaporator fan.
C. Defrost Heater
During defrost cycles, water dripping onto the defrost heater may cause a hissing or sizzling sound. After defrosting, a popping sound may occur.
IMPORTANT: During the automatic defrost cycle, you may notice a red glow in the vents on the back wall of your freezer compartment. This is normal during the defrost cycle.
D. Automatic Ice Maker
If your refrigerator is equipped with an automatic ice maker, you will hear ice cubes falling into the ice bin.
E. Cold Control & Automatic Defrost Control
May create minimal mechanical sounds.
F. Condenser Fan
You may hear air being forced through the condenser by the condenser fan.
G. Compressor
Modem, high-efficiency compressors operate much faster than older models. The compressor may have a high-pitched hum or pulsaling sound.
H. Water Valve
If your refrigerator is equipped with an automatic ice maker, you will hear a buzzing sound as the water valve opene to till the ice maker during each cycle.
IMPORTANT: Your ice maker is turned On at the factory so it can work as soon as you install your refrigerator. To ensure proper function of your ice maker, connect a water supply immediately or tum the On/Off switch to the Off ("O") position.
L. Drain Pan (not removable)
You may haar water running into the drain pan during the defrost cycle
J. Condenser
May create minimal sounds from forced air
K. Motorized Damper
May produce a light humming or clicking during operation
Care & Cleaning
Koop your refrigerator and freezer cloan to provent odor build-up. Wipe up any spills immediately and clean both sections at least twice a year. Never use metallic scouring pads, brushes, abrasive cleaners or strong alkaline solutions on any surface. Do not wash any removable parts in a dishwasher. Always unplug the electrical power cord from the wall outlet before cleaning.
CAUTION
- When moving the refrigerator, pull straight out. Do not shift the refrigerator from side to side as this may damage the floor. Be careful not to move the refrigerator beyond the plumbing connections.
- Damp objects stick to cold metal surfaces. Do not touch refrigerated surfaces with wet or damp hands.
- Never use CHLORIDE to clean stainless steel.
NOTES:
- If you set your temperature controls to tum off cooling, power to lights and other electrical components continues until you unplug the power cord from the wall outlet
- Do not use razor blades or other sharp instruments which can scratch the appliance surface when removing adhesive labels. Any glue left from tape or labels can be removed with a mixture of warm water and mild detergent, or, touch the glue residue with the sticky side of tape you have already removed. Do not remove the serial plate.
Interior/Door Liner
- Soap and water
- Baking soda and water
Use 2 tablespoons of baking soda in 1 quart of warm water. Be sure to wring excess water out of sponge or cloth before cleaning around controls, light bulb or any electrical part.
Door Gaskets
Wipe gaskets with a clean soft cloth.
Drawers/Bins
Do not wash any removable items (bins, drawers, etc.) in dishwasher.
Glass Shelves
- Soap and water
- Glass cleaner
- Mid liquid sprays
Allow glass to warm to room temperature before immersing in warm water.
Toe Grille
- Soap and water
- Mild liquid sprays
- Vacuum attachment
Vacuum dust from front of toe grille. Remove toe grille (See illustration on page 4). Vacuum backside and wipe with sudsy cloth or sponge Rinse and dry
Exterior and Handles
- Soap and water
- Non Abrasive Glass Cleaner
Do not use commercial household cleaners ammonia, or alcohol to clean handles. Use a soft cloth to clean smooth handles. Do Not use a dry cloth to clean smooth doors.
Exterior and Handles (Stainless Steel Models Only)
- Soap and water
- Armonia
- Stainless Steel Cleaners
CAUTION Never use CHLORIDE to clean stainless steel.
Clean stainless steel front and handles with non-abrasive soapy water and a dishcinth Rinse with clean water and a solt cloth . Wipe stubbom spots with an ammonia-soaked paper towel, and rinse. Use a non-abrasive stainless steal cleaner. These cleaners can be sed at most home improvement major department stores Always follow manufacturer's instruction
NOTE: Always, clean, wipe and dry with the grain to prevent cross-grain scratching. Wash the rest of the cabinet with wam water and mild lqud detergent Rinse well and wpe dry with a chan soft cloth
CAUTION Wear gloves when replacing light bulbs to avoid getting out.

REPLACING LIGHT BULBS
- Unplug refrigerator.
- Wear gloves as protection against possible broken glass and heat.
- Remove light cover, if necessary
- Unscrew and replace old bulb with an appliance bulb of the same type and wallage.
- Replace light cover, if necessary.
- Remember to plug the refrigerator back in.

Vacation and Moving Tips.
Short Vacations
- Leave refrigerator operating during vacations of 3 weeks or less
- Use all perishable sems from refrigerator compartment.
- Tum automatic ice maker off and empty ice bucket, even if you will only be gone for a few days.
Long Vacations
- Remove all food and so if you will be gone one month or more
- Tum the cooling system off (see page 9 for On/Of button position) and disconnect power,
- Tum off automatic ice maker and tum water supply valve to closed position.
- Clean interior thoroughly
- Leave both doors open to prevent odors and mold build-up. Block doors open il necessary
Moving
- Remove all food and ice
- If using handcart, load from side
- Adjust rollers all the way up to protect them during siding or moving
- Pad cabinet to avoid scratching sudace
IMPORTANT: the refrigerator is going to be stored or moved in freezing temperatures. The water in the ice and water system must be drained completely Failure to do so could result in water leaks when the refrigerator is put back into service Contact a service representative to perform this operation.
In the U.S.A, your appliance is warranted by Electrolux Home Products, Inc. We authorize no person to change or add to any of our obligations under this waranty. Our obligations for service and parts under this wamanty must be performed by us or an authorized
Electrolux Home Products, Inc. servicer. In Canada, your appliance is warranted by Electrolux Canada Corp.
NORMAL RESPONSIBILITIES OF THE CONSUMER
- This warranty applies only to products in ordinary household use, and the consumer is responsible for the hems listed below:
- Proper use of the appliance in accordance with instructions provided with the product.
- Proper installation by an authorized servicer in accordance with Instructions provided with the appliance and in accordance with all local plumbing, electrical and or gas codes.
- Proper connection to a grounded power supply of sufficient voltage, replacement of blown fuses, repair of loc connections or defects in house wiring
- Expense for making the appliance accessible for servicing, such as removal of tim, cupbcerds, shekveselt.. which are not a part of the appliance when I was shipped from the factory,
- Damages to finish after installation.
- Replacement of light bulbs andior fluorescent tubes (on models with these features
EXCLUSIONS
This warranty does not cover the following:
- CONSEQUENTIAL OR INCIDENTAL DAMAGES SUCH AS PROPERTY DAMAGE AND INCIDENTAL EXPENSES RESULTING FROM ANY BREACH OF THIS WRITTEN OR ANY IMPLIED WARRANTY NOTE: Some stanas do not allow the exclusion or limitation of incidemal or consequential damages, so this anitation or exclusion may not apply to you.
- Service calls which do not involves malfunction or defects in workmanship or material, or for applanos not in ordinary household use. The consumer shall pay for such service calls.
- Demages caused by services performed try servicers other than Electrolux Home Products, Inc., Electrolux Canada Corp. or to authorized services; use of pants other than genuine Electrolux Home Products, inc. parts; obtained from persone other than such servicers or external causes such as abuse, misuce, inadequate power supply or acts of God
- Products with orgns seral numbers that have been removed or altered and cannot be readily determined
IF YOU NEED SERVICE
Koep your bill of sale, delivery slip, or some other appropriate payment record. The date on the bit octablishes the warranty paned should service be required if service is performed is in your best imerest to obtain and soap at ceipts. This written warranty ches you specific lega rights. You may also have other rights that very from state to starke Service under this waranty must be obtained by contacting Electrolux Home Products, Inc, or Electrolux Canada Corp.
This warranty ony appẫas in the 50 States of Fm U.S.A. in Puerto Rico, sed in Canaca. Product batuss or quofcalon si doarbeter ilustrated are sutied to change without notow. All wamanties are made by Electrolux Home Products, Inc. in Canada you appliance is warranted by Electrolux Canada Corp.
Befor You Call
RUNNING OF REFRIGERATOR
Compressor does not run.
- Cooling system is turned Off.
- Refrigerator is in defrost cycle.
- Plug at wall outlet is disconnected.
- House fuse blown or tripped circuit breaker.
- Power outage.
- Tum cooling system On. See Temperature Controls section.
- This is normal for a fully automatic defrost refrigerator.
- The defrost cycle occurs periodically, lasting about 30 minutes.
- Ensure plug is tighty pushed into cuel
- Check/replace fuse with a 15 amp time-delay fuse. Reset circuit breaker.
- Check house lights. Call local Electric Company.
Refrigerator runs too much or too long.
- Room or outside weather is hot.
- Refrigerator has recently been disconnected for a period of
- Freezer temperature too cold. Refrigerator temperature is satisfactory.
- Automatic ice maker is operating
- Doors are opened too frequently or too long.
- Refrigerator/freezer door may be slightly open.
- Freezer control is set too cold control found in refrigerator section).
- Refrigerator/freezer gasket is dirty, wom, cracked, or poorly firmed.
- It's normal for the refrigerator to work longer under these conditions.
- It takes 8-12 hours for the refrigerator to cool down completely. ice maker operation causes refrigerator to run alightly
- Warm air entering the refrigerator causes it to run more. Open doors less often.
- Ensure refrigerator is level. Keep food and containers from blocking door. See PROBLEM section OPENING/CLOSING OF DOORS/DRAWERS
- Set refrigerator control to warmer setting until refrigerator temperature is satisfactory Allow 24 hours for temperature to stabilize.
- Clean or change gasket. Leaks in door seal will cause refrigerator to run longer in order to maintain desired temperatures
Compressor goes off and on frequently.
- Electrogic control system keeps the refrigerator at a constant temperature.
- This is normal. Refrigerator goes on and off to keep temperature constant.
Digital temperature displays are flashing.
- Electronic control system has detected a performance problem
- Call your Frigidaire service representative, who can interpret any messages or number codes flashing on the digital displays.
TEMPERATURES ARE TOO COLD
Refrigerator temperature too cold. Freezer temperature is satisfactory.
- Refrigerator control is set too cold
- Set refrigerator control to a wamer setting. Allow 24 hours for temperature to stabilize
Food stored in drawers freezes
- Refrigerator control is set too cold
Food stored in Meat Keeper freezes (some models).
- Meat Keeper Temperature Control set too cold.
- Adjust Meat Keeper Temperature Control to a lower setting (Meat should be stored at a temperature (ust below the tranzing point for maximum fresh storage time It is normal for ice brystaa to form due to the moisture content of mest)
TEMPERATURES ARE TOO WARM
Freezer/Refrigerator temperature is too warm.
- Doors are opened too frequently or too long.
- Door is slightly open.
- Warm air enters the refrigerator whenever the door is opened. Open the door less often.
- See PROBLEM section OPENING/CLOSING OF DOORS/DRAWERS
Freezer temperature is too warm. Refrigerator temperature is satisfactory.
- Freezer control is set too warm.
- Set freezer control to a colder setting. Allow 24 hours for temperature to stabilize
Temperature in the Meat Keeper is too warm (some models).
- Meat Keeper Temperature Control is set too warm.
- Adjust Meat Keeper Temperature Control to a colder setting.
Refrigerator temperature is . Refrigerator control is set too too warm. Freezer warm. temperature is satisfactory.
WATER/MOISTURE/FROST INSIDE REFRIGERATOR
Moisture collects on inside of refrigerator walls.
- Weather is hot and humid
- Door is slightly open.
- Door is opened too often or too long.
- Open containers
- The rate of frost buildup and internal seating
- See PROBLEM section OPENING/CLOSING OF DOORS/DRAWERS
- Open door less otten.
- Keep containers covered
Water collects in bottom of drawer.
- Washed vegetables and fruit drain while in the drawer.
- Dry items belore putting them in the drawer. Waler collecting in bottom of drawer is normal.
WATER/MOISTURE/FROST OUTSIDE REFRIGERATOR
Moisture collects on outside of refrigerator or between doors.
- Weather is humid
- Door is slightly open, causing cold air from inside refrigerator to meet wam air from outside.
- This is normal in hunid weather. When humidity is lower, the moisture should disappear
- See PROBLEM section OPENING/CLOSING OF DOORS/DRAWERS CORRECTION
AUTOMATIC ICE MAKER
Ice make is not making any ice.
- lce maker power switch is Off
- Household water ine valve is not open.
- Freezer is not cold enough.
- Saddle valve on cold water pipa is clogged or restricted by foreign material.
- Check to see if the water dispenser is dispensing water.
- Water filter is not completely sealed (models with liter beside temperature control panel)
- Tum power switch to On (T) position
- Turn on household water lina valvo
- See PROBLEM section TEMPERATURES ARE TOO WARM
- Turn off household water lina valve. Ramove valve.
- Ensure that valve is not a self-piercing saddle valve
- Clean valve. Replace valve if necessary.
- If not the ice & water fiter cartridge is clogged or restricted by foreign material, and must be replaced
- Push firmly unt the water fiber snaps into prace lce maker is not making enough ice.
ICE DISPENSER
Dispenser will not dispense ice.
- Ice storage container is empty.
- Frenzar temperature is set too warm.
- Household water line valve is not open.
- Freezer door is not closed.
- lce dispensing arm has been t hald in for more than 4-6 minutes.
- When the first supply of ice is dropped into the container, the dispenser should operate
- Turn freezer control to a higher safting so that ice cubes will be made. When first supply of ite is made, dispenser should operate
- Open household water Ine valve Allow sufficient time for the ice to be made. When ica is made, the dispenser should operate
- Ensure freezer door is closed
- Motor is overioaded, Motor overload protector will reset in approximately 3 minutes. Ice can then be dispensed
Ice dispenser is jammed.
- Ice has melted and frozen around auge due to intraclaint use, temporature fluctuations and/or power outages
- Ice cubes are jammed between ice maker and back of ice container
- lce cubes are frozen together
- Ice cubes are hollow or smaller than normal
- Remove ice container, thaw, and empty the contents.
- Clean container, wipe dry, and replace in proper pesson Whan now ice is made, dispenser should operate.
- Remove ice cubes that are jamming the dispenser
- Use the dispenser often so that aubes do not hes20 legether,
- The ice & water ter cartridge could be clogged . Replace the ter cartridge, Dispensing system operates best at 20-100 psi wator prassura, Woll wator pressures should tal with tongs