
Loading ...
Loading ...
Loading ...
Push the dishwasher into position, taking care not to twist or crush the power
cord or hoses (see fig. 5-17).
TWO PEOPLE WEARING SAFETY GLOVES ARE NEEDED TO PUSH
THE DISHWASHER INTO PLACE.
Fig. 5-15
Fig. 5-16
Fig. 5-17
l enapr ood eh tgn i t nuom r o f e r udeco r P2 . 3 . 5
Mount the door panel.
Place the template on the inner surface of the panel, centering it along the up-
per side and matching up the reference locators (ref. A fi g. 5-18); mark the po-
sition of the door hooks with a pencil (see fi g. 5-18). Remove the template
and
use a drill with a suitable bit to make holes at the points mar
ked on the panel.
A
A
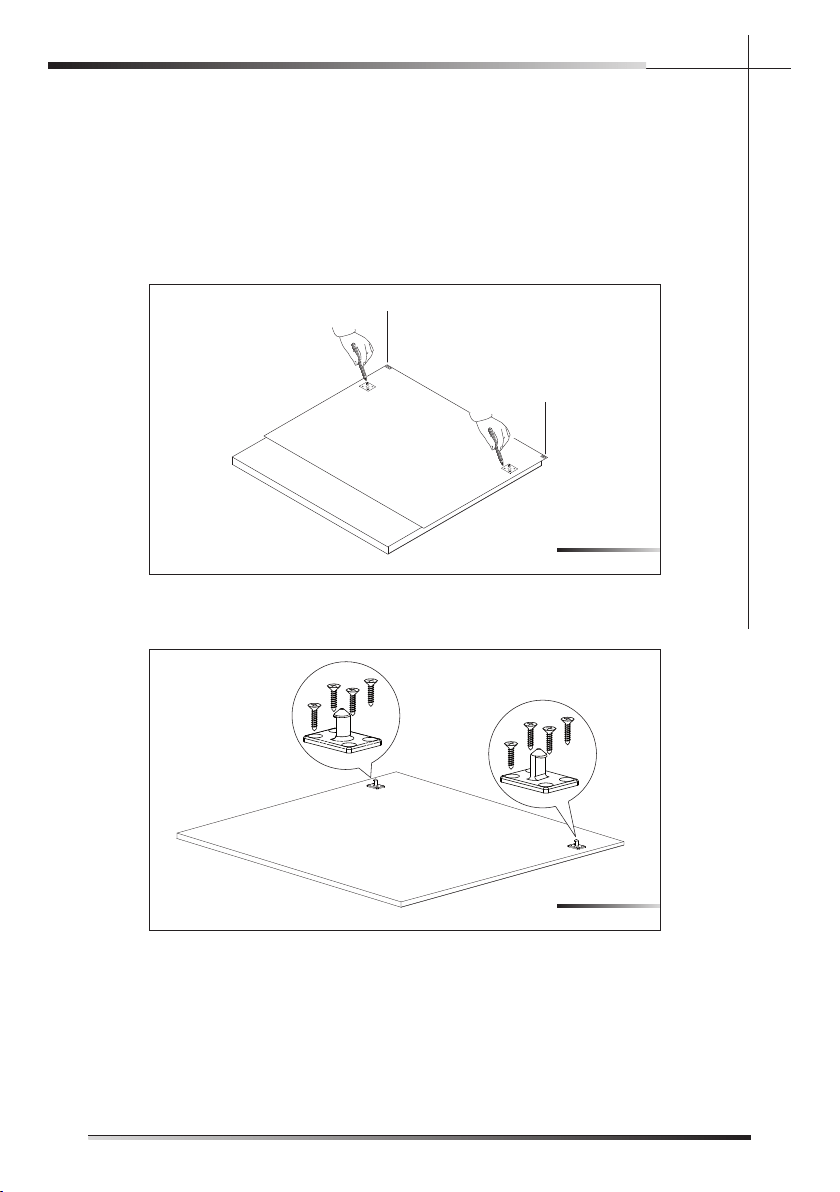
Use the screwdriver to secure the door hooks with the 8 supplied screws (see
fi g. 5-19) at the marked reference points.
Fig. 5-18
Fig. 5-19
l enap r ood eh t gn i t nuom r o f e r udeco r P 2 . 3 . 5
Mount the door panel.
Place the template on the inner surface of the panel, centering it along the up-
per side and matching up the reference locators (ref. A fig. 5-18); mark the po-
sition of the door hooks with a pencil (see fig. 5-18). Remove the template and
use a drill with a suitable bit to make holes at the points marked on the panel.
A
A
Use the screwdriver to secure the door hooks with the 8 supplied screws (see
fig. 5-19) at the marked reference points.
Fig. 5-18
Fig. 5-19
(not read for STX models)
EN
25
INSTALLATION INSTRUCTION
Loading ...
Loading ...
Loading ...