Loading ...
Loading ...
Loading ...
PREPARATION
PLEASE REFER TO DIAGRAMS (A, B, C...) AND ITEM NUMBERS (1, 2, 3...) AS NOTED THROUGHOUT MANUAL. FOR EXAMPLE,
A=I REFERS TO ITEM 1 IN FIGURE A.
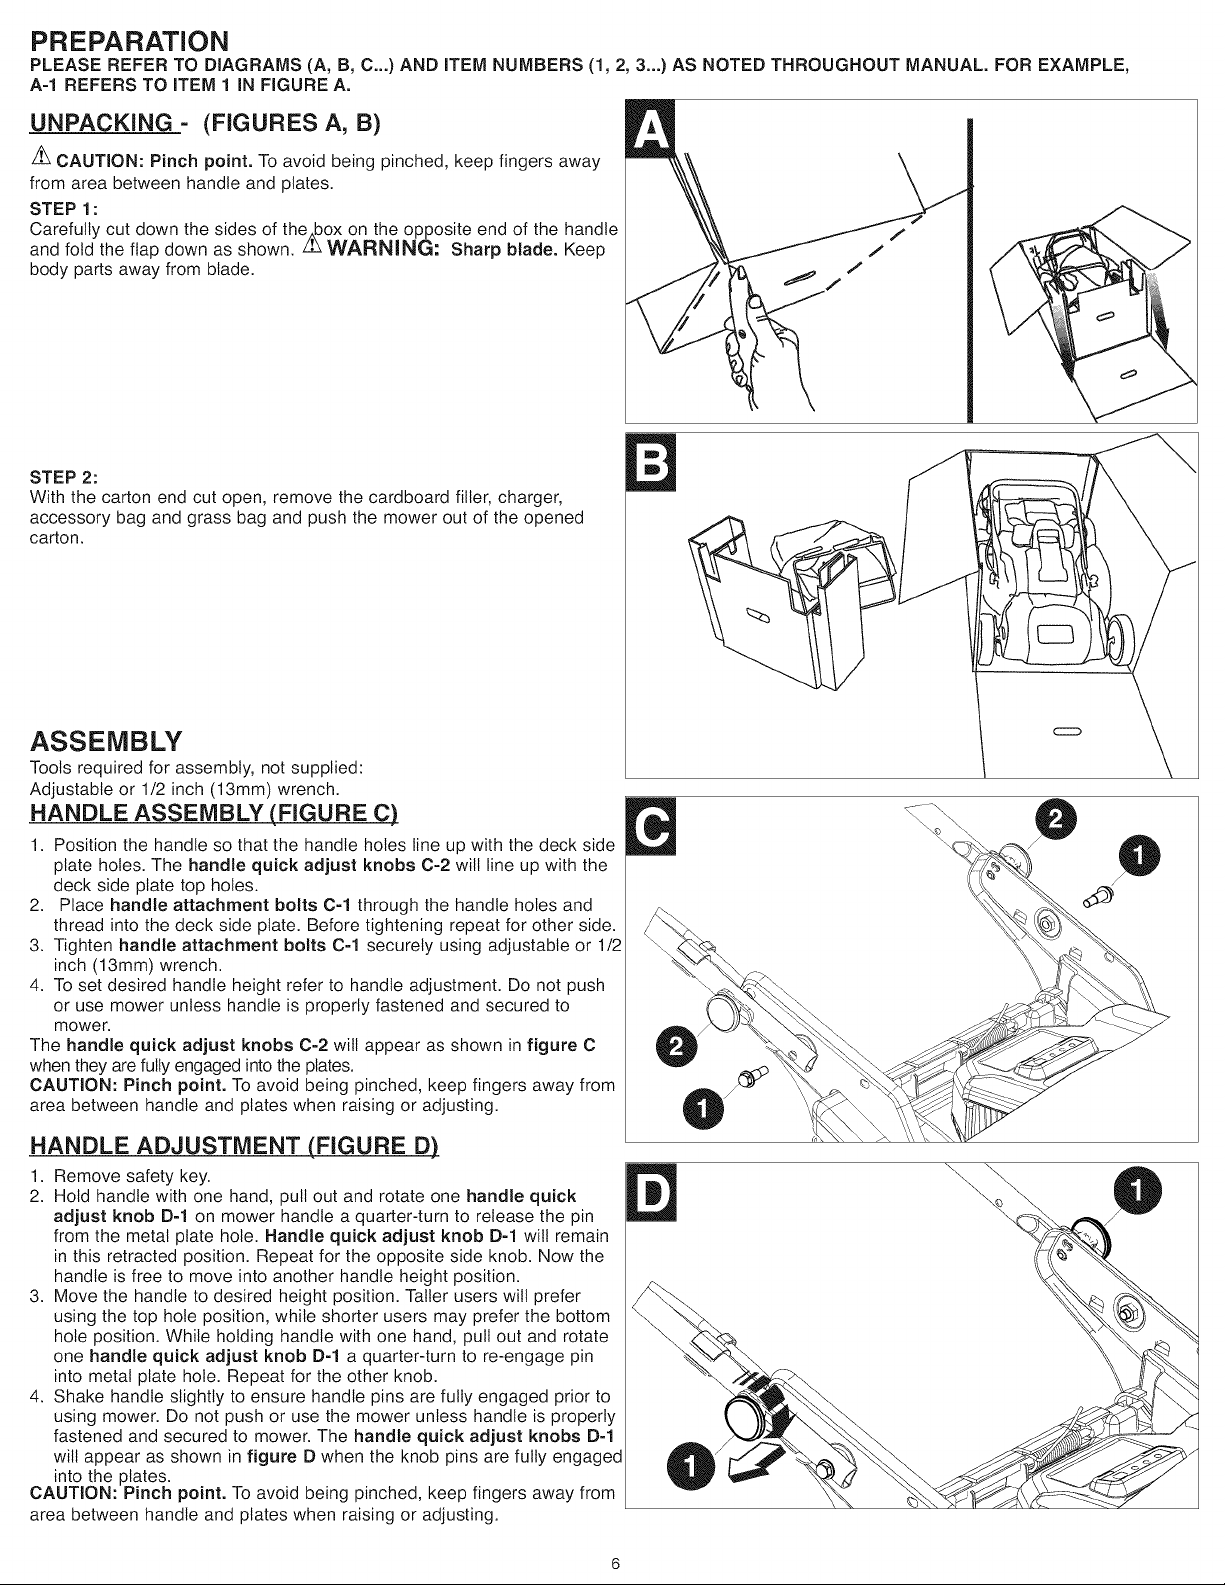
UNPACKING = (FIGURES A, B)
Z_ CAUTION: Pinch point. To avoid being pinched, keep fingers away
from area between handle and plates.
STEP 1:
Carefully cut down the sides of the,box on the opposite end of the handle
and fold the flap down as shown. ZL_ WARNING: Sharp blade. Keep
body parts away from blade.
STEP 2:
With the carton end cut open, remove the cardboard filler, charger,
accessory bag and grass bag and push the mower out of the opened
carton.
ASSEMBLY
Tools required for assembly, not supplied:
Adjustable or 1/2 inch (13mm) wrench.
HANDLE ASSEMBLY (FIGURE C)
1. Position the handle so that the handle holes line up with the deck side
plate holes. The handle quick adjust knobs C-2 wilt line up with the
deck side plate top holes.
2. Place handle attachment bolts C-1 through the handle holes and
thread into the deck side plate. Before tightening repeat for other side.
3. Tighten handle attachment bolts C-1 securely using adjustable or 1/2
inch (13mm) wrench.
4. To set desired handle height refer to handle adjustment. Do not push
or use mower unless handle is properly fastened and secured to
mower.
The handle quick adjust knobs C-2 will appear as shown in figure C
when they are fully engaged into the plates.
CAUTION: Pinch point. To avoid being pinched, keep fingers away from
area between handle and plates when raising or adjusting.
HANDLE ADJUSTMENT (FIGURE D)_
1. Remove safety key.
2. Hold handle with one hand, pull out and rotate one handle quick
adjust knob D-1 on mower handle a quarter-turn to release the pin
from the metal plate hole. Handle quick adjust knob D-1 will remain
in this retracted position. Repeat for the opposite side knob. Now the
handle is free to move into another handle height position.
3. Move the handle to desired height position. Taller users wilt prefer
using the top hole position, while shorter users may prefer the bottom
hole position. While holding handle with one hand, pull out and rotate
one handle quick adjust knob D-1 a quarter-turn to re-engage pin
into metal plate hole. Repeat for the other knob.
4. Shake handle slightly to ensure handle pins are fully engaged prior to
using mower. Do not push or use the mower unless handle is properly
fastened and secured to mower. The handle quick adjust knobs D-1
wilt appear as shown in figure D when the knob pins are fully engaged
into the plates.
CAUTION: Pinch point. To avoid being pinched, keep fingers away from
area between handle and plates when raising or adjusting.
Loading ...
Loading ...
Loading ...