Loading ...
Loading ...
Loading ...
MULCHING MOWING TIPS
Your mower was shipped from Black & Decker with the mulch insert installed if not equipped with On-Demand. While mulching, your new mower
is designed to cut the grass clippings into small pieces and distribute them back into the lawn. Under normal conditions, the mulched grass wilt
biodegrade quickly to provide nutrients to the lawn.
Please review the following recommendations for optimum mulching performance.
1. Avoid mowing when the grass is wet from rain or dew. Wet grass may form clumps which interfere with the mulching action and reduce
run-time. The best time to mow grass is in the late afternoon when the grass is dry and the newly cut area will not be exposed to direct
sunlight.
2. For best mulching performance, set the cutting height to remove about one third of the grass blade length, ideally no more than 1-1/2 in. at
one time. If the lawn is overgrown, it may be necessary to increase the cut height to reduce the pushing effort and prevent overloading the
motor. Stow your cutting pace in tall or thick grass conditions. For extremely heavy mulching, it is advisable to first cut at a high cut height set-
ting, and then re-cut to the final cut height. Otherwise, make narrower cuts and mow slowly. ALWAYS MAKE SURE BLADE IS SHARP.
3. For best performance, keep the mower housing free of built-up grass. From time to time release bail handle to turn mower off and wait for the
blade to come to a complete stop. Then remove the safety key and battery pack and turn mower on its side. Using an object such as a stick,
wipe out any accumulation of grass in the blade area. Be careful of the sharp edges of the blade. Clean often in wet, spring grass, and always
after every use.
4. Certain types of grass or grass conditions may require that an area be mulched a second time to fully disperse the grass throughout the lawn.
If cutting a second time, it is advisable to cut perpendicular (across) the first cut pattern. DO NOT CHANGE CUT PATTERN IN ANY WAY
THAT WOULD CAUSE MOWING DOWN A HILL.
5. Change your cutting pattern from week to week. This wilt help 3revent matting of the lawn.
MAINTENANCE
iMPORTANT: To assure product SAFETY and RELIABILITY, repairs, maintenance and adjustment (including brush inspection and replacement)
should be performed by BLACK & DECKER Service Centers or other qualified service organizations, always using Black & Decker replacement
parts. When servicing use ONLY IDENTICAL REPLACEMENT PARTS.
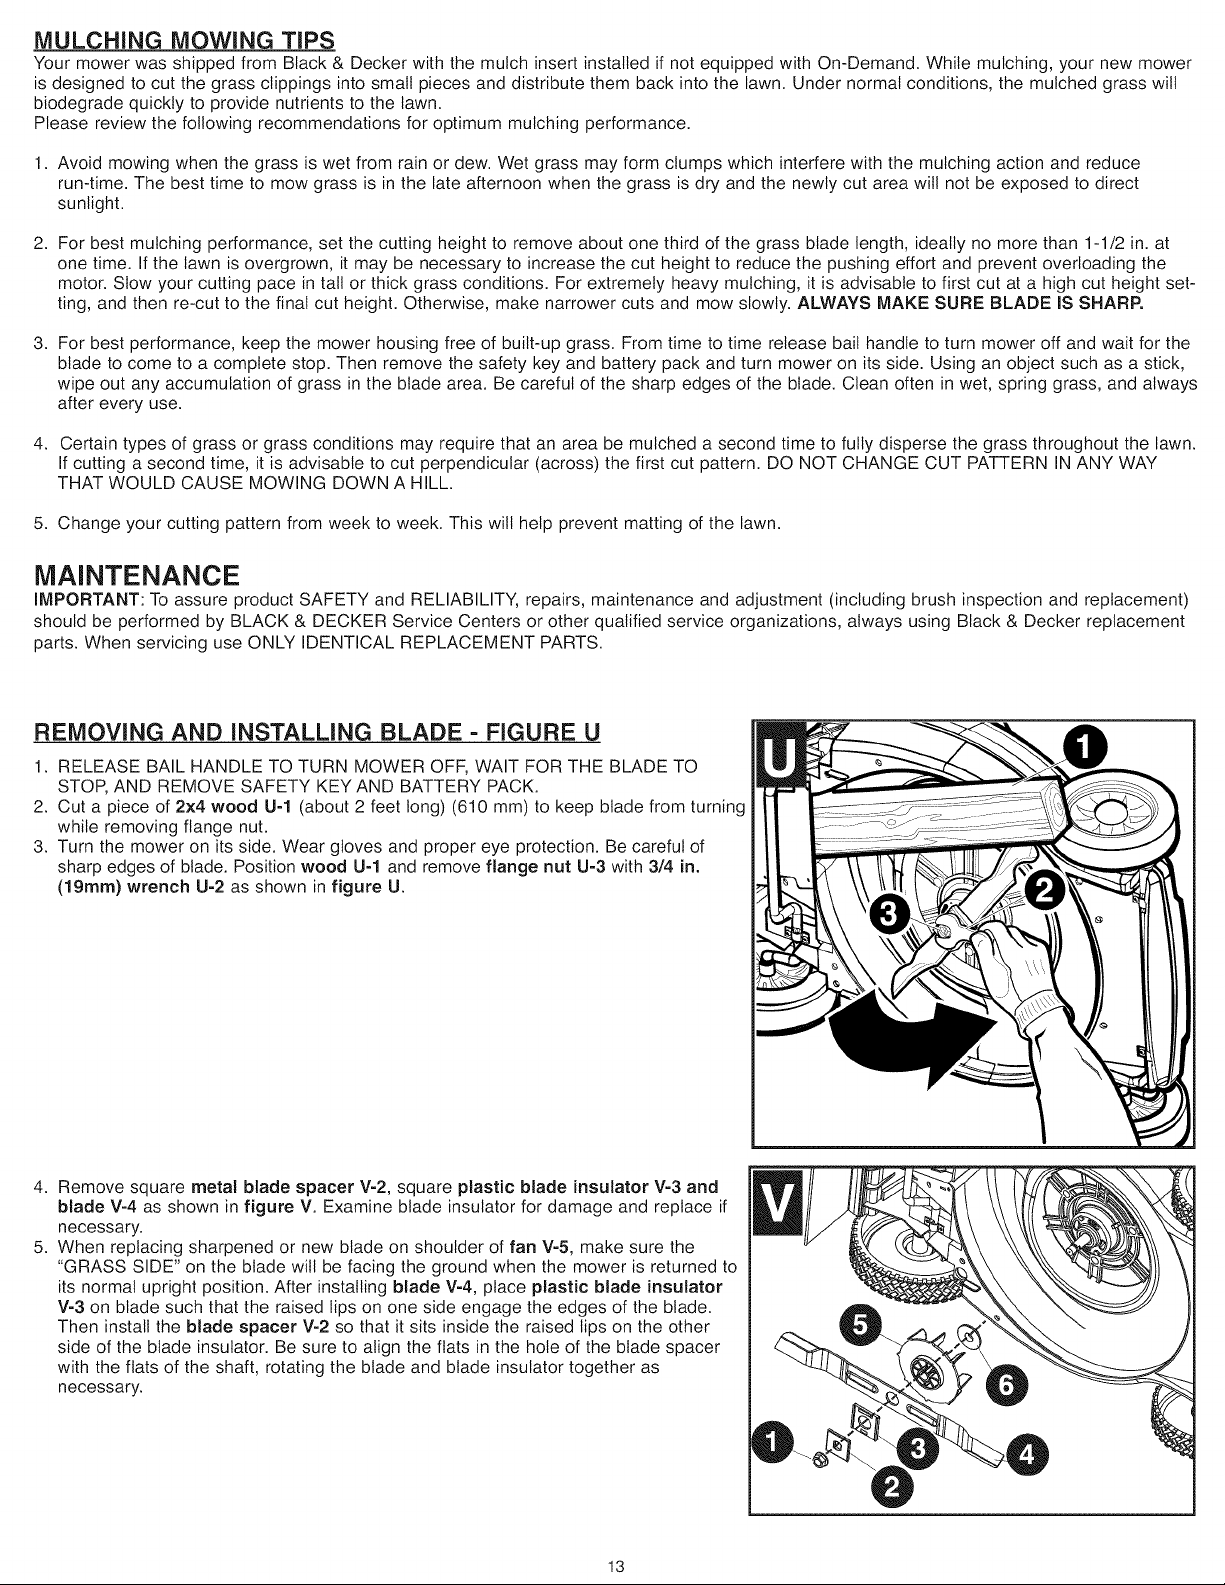
REMOVING AND INSTALLING BLADE - FIGURE U
1. RELEASE BAIL HANDLE TO TURN MOWER OFF, WAIT FOR THE BLADE TO
STOP, AND REMOVE SAFETY KEY AND BATTERY PACK.
2. Cut a piece of 2×4 wood U=I (about 2 feet long) (610 mm) to keep blade from turning
while removing flange nut.
3. Turn the mower on its side. Wear gloves and proper eye protection. Be careful of
sharp edges of blade. Position wood U=I and remove flange nut U-3 with 3/4 in.
(19ram) wrench U=2 as shown in figure U.
4. Remove square metal blade spacer V=2, square plastic blade insulator V=3 and
blade V=4 as shown in figure V. Examine blade insulator for damage and replace if
necessary.
5. When replacing sharpened or new blade on shoulder of fan V=5, make sure the
"GRASS SIDE" on the blade will be facing the ground when the mower is returned to
its normal upright position. After installing blade V=4, place plastic blade insulator
V-3 on blade such that the raised lips on one side engage the edges of the blade.
Then install the blade spacer V=2 so that it sits inside the raised tips on the other
side of the blade insulator. Be sure to align the flats in the hole of the blade spacer
with the flats of the shaft, rotating the blade and blade insulator together as
necessary.
13
Loading ...
Loading ...
Loading ...