Loading ...
Loading ...
Loading ...
knowing your miter saw
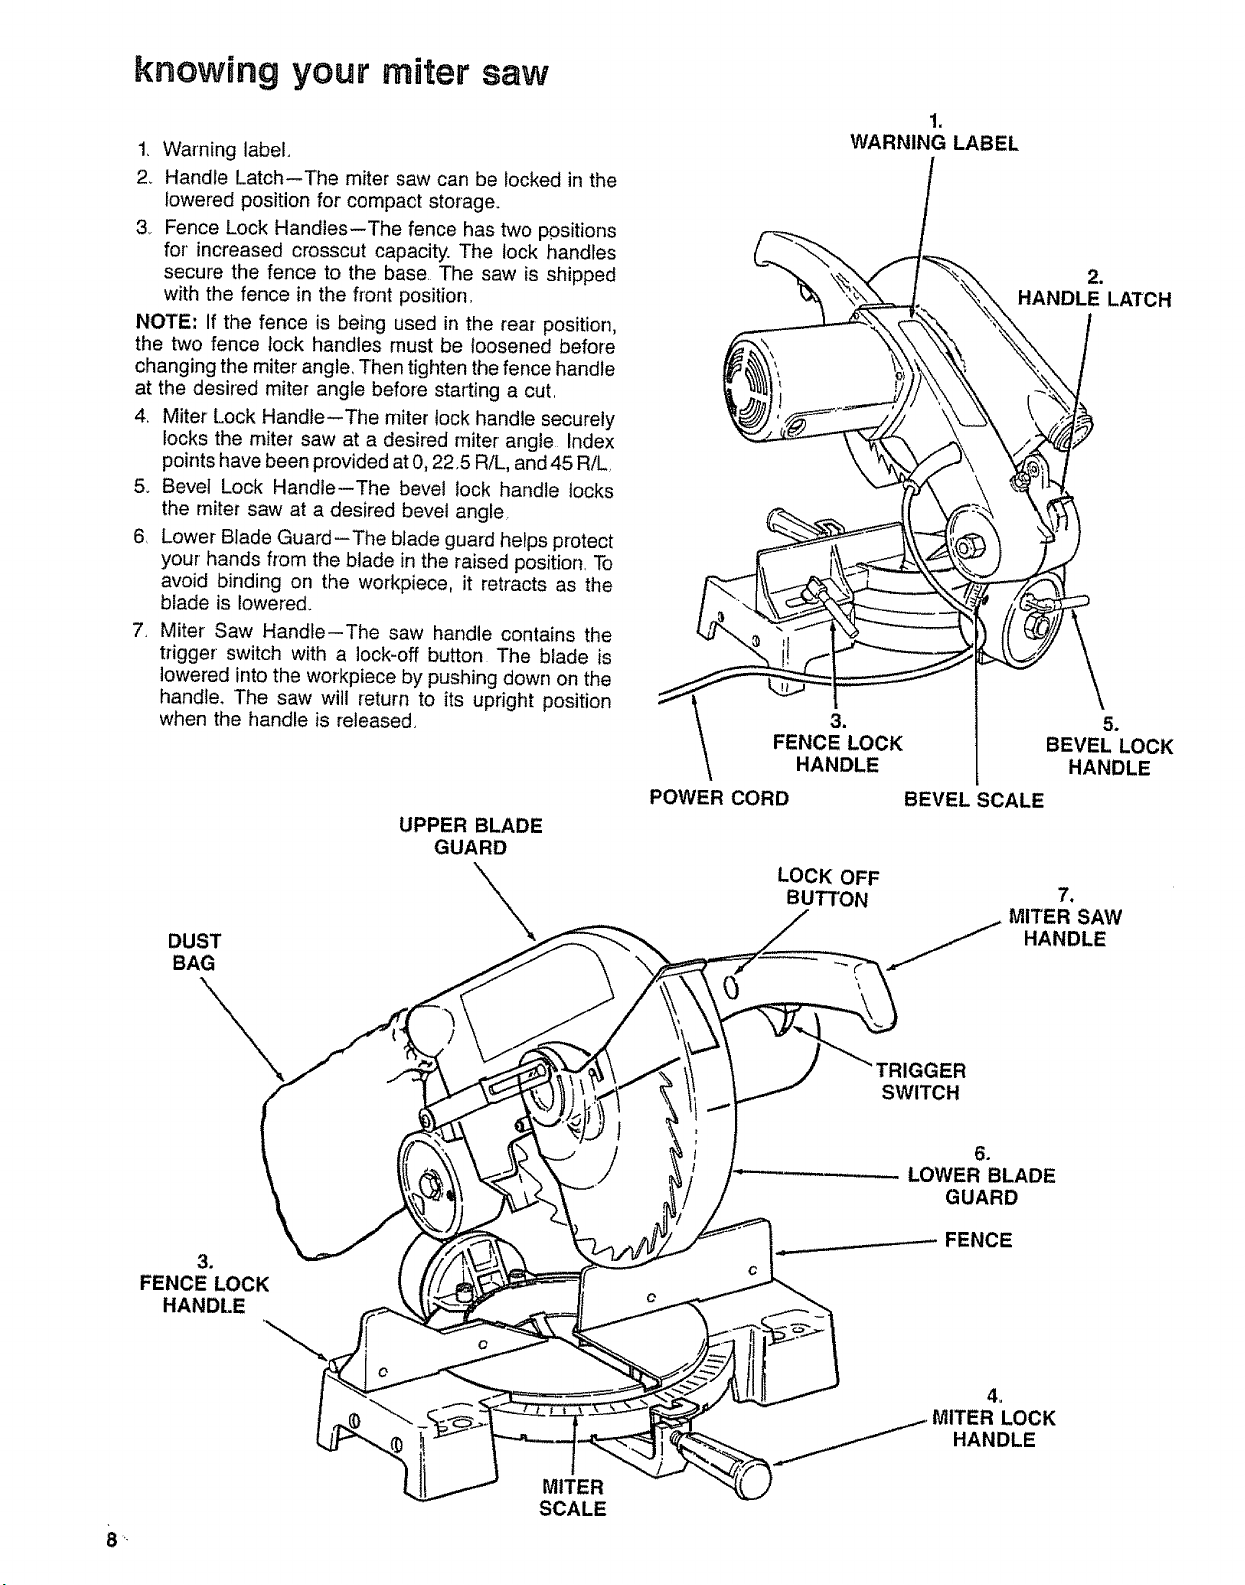
1. Warning label.
2. Handle Latch--The miter saw can be locked in the
lowered position for compact storage.
3_ Fence Lock Handles--The fence has two positions
for' increased crosscut capacity. The lock handles
secure the fence to the base. The saw is shipped
with the fence in the front position,
NOTE: If the fence is being used in the rear position,
the two fence lock handles must be loosened before
changing the miter angle, Then tighten the fence handle
at the desired miter angle before starting a cut,
4. Miter' Lock Handle--The miter lock handle securely
locks the miter saw at a desired miter angle Index
points have been provided at 0, 22.5 R/L, and 45 R/L
5. Bevel Lock Handle--The bevel lock handle locks
the miter saw at a desired bevel angle.
6. Lower Blade Guard-The blade guard helps protect
your hands from the blade in the raised position_ To
avoid binding on the workpiece, it retracts as the
blade is lowered.
7. Miter Saw Hand}e--The saw handle contains the
trigger switch with a lock-off button The blade is
lowered into the workpiece by pushing down on the
handle. The saw witl return to its upright position
when the handle is released.
1N
WARNING LABEL
3_
FENCE LOCK
HANDLE
=
HANDLE LATCH
5.
BEVEL LOCK
HANDLE
POWER CORD BEVEL SCALE
UPPER BLADE
GUARD
LOCK OFF
BUTTON
,
MITER SAW
_ HANDLE
DUST
BAG.. _ -_ -`I_
1 6.
_ /_-............................................. LOWER BLADE................
/ GUARD
._ __._FENCE
3.
FENCE LOCK
HANDLE c_,_._,-_
4.
MITER LOCK
HANDLE
SCALE
Loading ...
Loading ...
Loading ...