Loading ...
Loading ...
Loading ...
NOTE: Pay attention to pieces removed, noting their
position and direction they face (see illustration), Wipe
the blade collars clean of any sawdust before installing
the new blades,
8. Install the new 10" blade (see recommended acces-
sory list). Make sure the rotation arrow on the blade
matches the clockwise rotation arrow on the upper
guard.
9. install the outer blade collar, arbor washer and
arbor screw. Press the arbor lock and turn the 1/2"
wrench counter clockwise to secure the blade,
Tighten arbor screw securely.
Lower the lower blade guard until the slot in mount-
ing plate rests all the way down on the locking
screw, Tighten the screw with phillips screwdriver.
DANGER: NEVER USE SAW WITHOUT MOUNT-
ING PLATE SECURELY IN PLACE. IT KEEPS
THE ARBOR SCREW FROM FALLING OUT IF
IT ACCIDENTALLY LOOSENS, AND PREVENTS
THE SPINNING BLADE FROM COMING OFF
THE MACHINE.
10.
t1.. Be sure the arbor lock is released so the blade
turns freely.
NOTE: The arbor tock can be damaged by improper
use, Ifthe arbor lock will not hold, lower the blade down
on to a scrap piece of wood positioned against the
fence.. This will serve as an alternate locking means
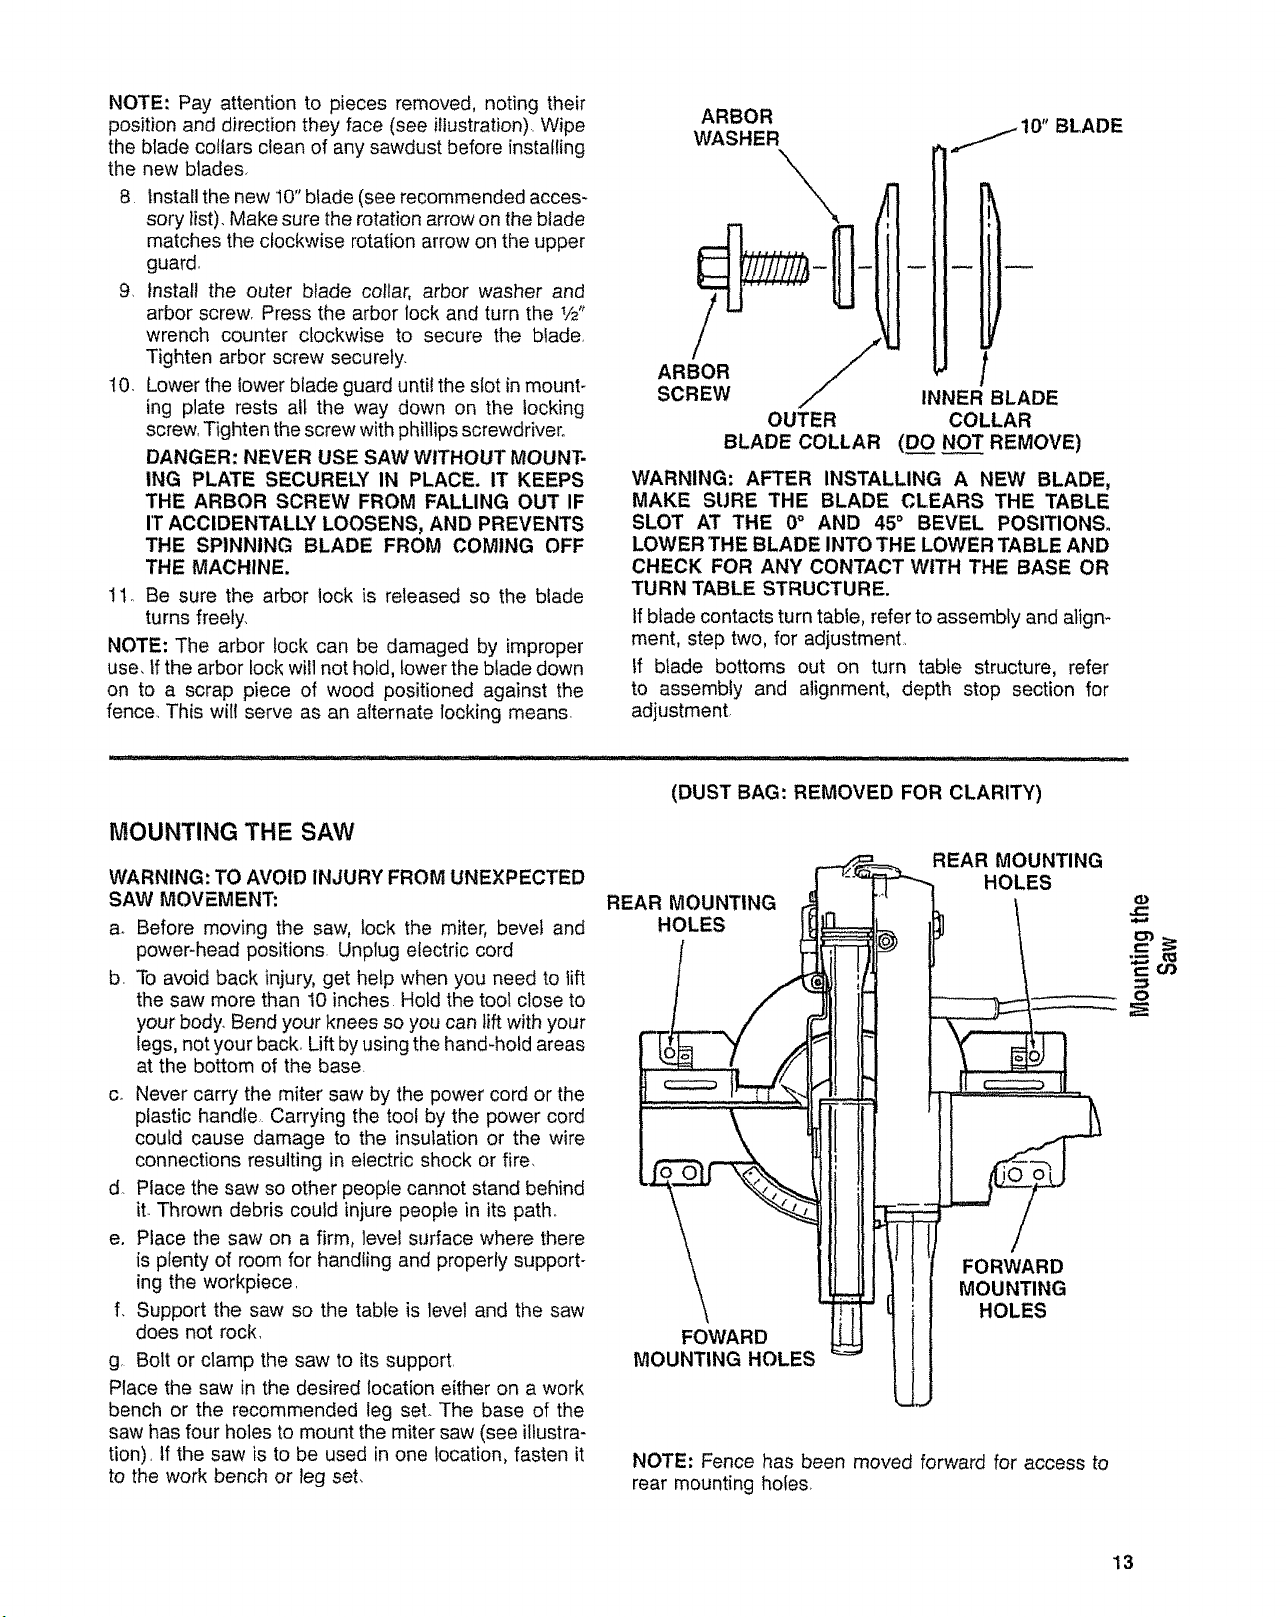
ARBOR
WASHER
X
/
ARBOR /
SCREW
OUTER
BLADE COLLAR
1
INNER BLADE
COLLAR
(DO NOT REMOVE)
BLADE
WARNING: AFTER INSTALLING A NEW BLADE,
MAKE SURE THE BLADE CLEARS THE TABLE
SLOT AT THE 0° AND 45° BEVEL POSITIONS.
LOWER THE BLADE INTO THE LOWER TABLE AND
CHECK FOR ANY CONTACT WITH THE BASE OR
TURN TABLE STRUCTURE.
If blade contacts turn table, refer to assembly and align-
ment, step two, for adjustment,,
If blade bottoms out on turn table structure, refer
to assembly and alignment, depth stop section for
adjustment,
MOUNTING THE SAW
WARNING: TO AVOID INJURY FROM UNEXPECTED
SAW MOVEMENT:
a. Before moving the saw, tock the miter, bevel and
power-head positions. Unplug electric cord
b. To avoid back injury, get help when you need to lift
the saw more than 10 inches Hold the tool close to
your body. Bend your knees so you can lift with your
legs, not your back. Lift by using the hand-hold areas
at the bottom of the base.
c. Never carry the miter saw by the power cord or the
plastic handle, Carrying the tool by the power cord
could cause damage to the insulation or the wire
connections resulting in electric shock or fire,
d. Place the saw so other people cannot stand behind
iL Thrown debris could injure people in its path,,
e. Place the saw on a firm, level surface where there
is plenty of room for handling and properly support-
ing the workpiece,
f. Support the saw so the table is level and the saw
does not rock,
g. Bolt or clamp the saw to its support.
Place the saw in the desired location either on a work
bench or the recommended teg set. The base of the
saw has four holes to mount the miter saw (see illustra-
tion), tf the saw is to be used in one location, fasten it
to the work bench or leg set,
(DUST BAG: REMOVED FOR CLARITY)
REAR MOUNTING
HOLES
\
FOWARD
MOUNTING HOLES
REAR MOUNTING
HOLES
/
FORWARD
MOUNTING
HOLES
NOTE: Fence has been moved forward for access to
rear mounting holes
o
13
Loading ...
Loading ...
Loading ...