Loading ...
Loading ...
Loading ...
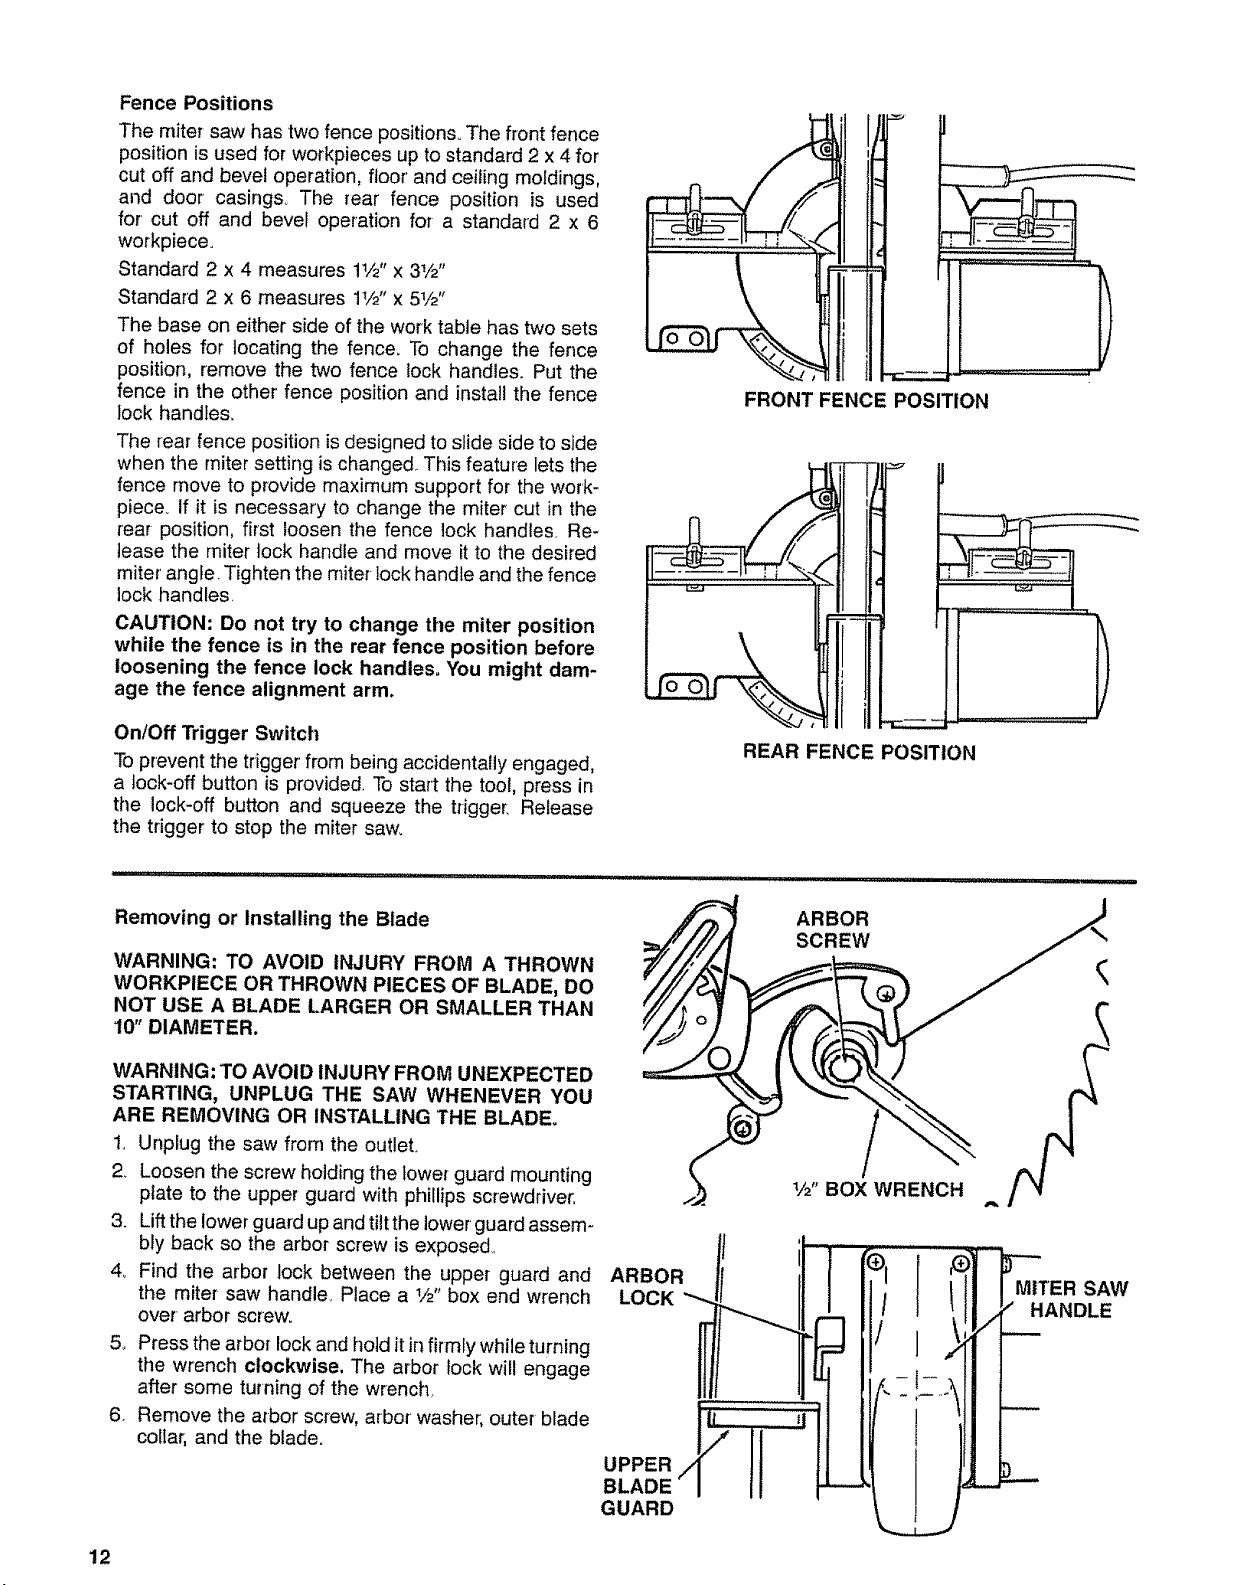
Fence Positions
The miter saw has two fence positions° The front fence
position is used for workpieces up to standard 2 x 4 for
cut off and bevel operation, floor' and ceiling moldings,
and door casings_ The rear fence position is used
for' cut off and bevel operation for a standard 2 x 6
workpiece°
Standard 2 x 4 measures 11/2" x 31/2"
Standard 2 x 6 measures 1V2"x 51/2"
The base on either side of the work table has two sets
of holes for locating the fence. To change the fence
position, remove the two fence lock handles. Put the
fence in the other fence position and install the fence
lock handles,
The rear fence position is designed to slide side to side
when the miter setting is changed.. This feature lets the
fence move to provide maximum support for the work-
piece_ If it is necessary to change the miter cut in the
rear position, first loosen the fence lock handles. Re-
lease the miter lock handle and move it to the desired
miter angle. Tighten the miter lock handle and the fence
lock handles.
CAUTION: Do not try to change the miter position
while the fence is in the rear fence position before
loosening the fence lock handles, You might dam-
age the fence alignment arm.
OnlOff Trigger Switch
To prevent the trigger from being accidentally engaged,
a lock-off button is provided. To start the tool, press in
the lock-off button and squeeze the trigger: Release
the trigger to stop the miter saw.
FRONT FENCE POSITION
REAR FENCE POSITION
Removing or Installing the Blade
12
WARNING: TO AVOID INJURY FROM A THROWN
WORKPIECE OR THROWN PIECES OF BLADE, DO
NOT USE A BLADE LARGER OR SMALLER THAN
10" DIAMETER.
WARNING: TO AVOID INJURY FROM UNEXPECTED
STARTING, UNPLUG THE SAW WHENEVER YOU
ARE REMOVING OR INSTALLING THE BLADE°
1, Unplug the saw from the outlet,
2 Loosen the screw holding the lower guard mounting
plate to the upper guard with phillips screwdriver,
3. Lift the lower guard up and tilt the lower' guard assem-
bly back so the arbor screw is exposed,,
4,, Find the arbor lock between the upper guard and
the miter saw handle Place a 1/2"box end wrench
over-arbor screw,
5_ Press the arbor lock and hold it in firmly while turning
the wrench clockwise, The arbor lock wil! engage
after some turning of the wrench.
6. Remove the arbor screw, arbor washer, outer blade
collar; and the blade.
ARBOR
SCREW
1/2"BOX WRENCH
i f
,4
!
Z
MITER SAW
i / HANDLE
i
i
i
l
i
Loading ...
Loading ...
Loading ...