This manual contains important information regarding your Adcraft unit. Please read this manual
thoroughly prior to equipment set-up, operation and maintenance. Failure to comply with regular
maintenance guidelines outlined in this manual may void the warranty.
INSTRUCTION MANUAL
VS-300
VACUUM PACKAGING MACHINE

October 2016
WARNINGS
• Do not touch any hot surfaces
• Plug only into a 3-hole grounded electrical outlet of the appropriate voltage
• Do not immerse unit, cord or plug in liquid at any time
• Unplug cord from outlet when not in use and before cleaning
• Do not operate unattended
• Do not use this unit for anything other than intended use
• Do not use outdoors
• Always use on a rm, dry and level surface away from any heat sources
• Do not use if unit has a damaged cord or plug, in the event the appliance malfunctions, or has been
damaged in any manner
• Keep children and animals away from unit
• Any incorrect installation, alterations, adjustments and/or improper maintenance can lead to property
loss and injury. All repairs should be done by authorized professionals only.
IMPORTANT TIPS
• Vacuum packaging is not a substitute for canning. All perishables still need to be refrigerated or
frozen
• Follow all food safety regulations as outlined by the FDA at www.FDA.gov
• Some fruits and vegetables may release gases which is known as outgassing. When packaging these
fruits and vegetables, outgassing can cause the vacuum to be gradually lost over time. Blanching or
freezing before vacuum packaging helps prevent this from occuring.
• Delicate foods can be frozen prior to packaging to protect them from getting crushed by the vacuum,
• Allow foods and liquids to cool before vacuum packaging
• Avoid overlling the pouch by leaving a minimum of 3” of space between the contents and the open
end of the pouch. This will prevent spills during the vacuum sealing process.
• To prevent wrinkles from forming in the seal, gently strech the pouch at along the seal bar before
closing the lid
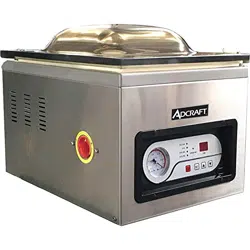
FEATURES
1. Seal Pad
2. Lid Gasket
3. Power Switch
4. Vacuum Chamber
5. Filler Plates
6. Seal Bar
7. Lid Lock
8. Control Panel
1
2
3
4
5
6
7
8
October 2016
1
2
5
6 7
3
4
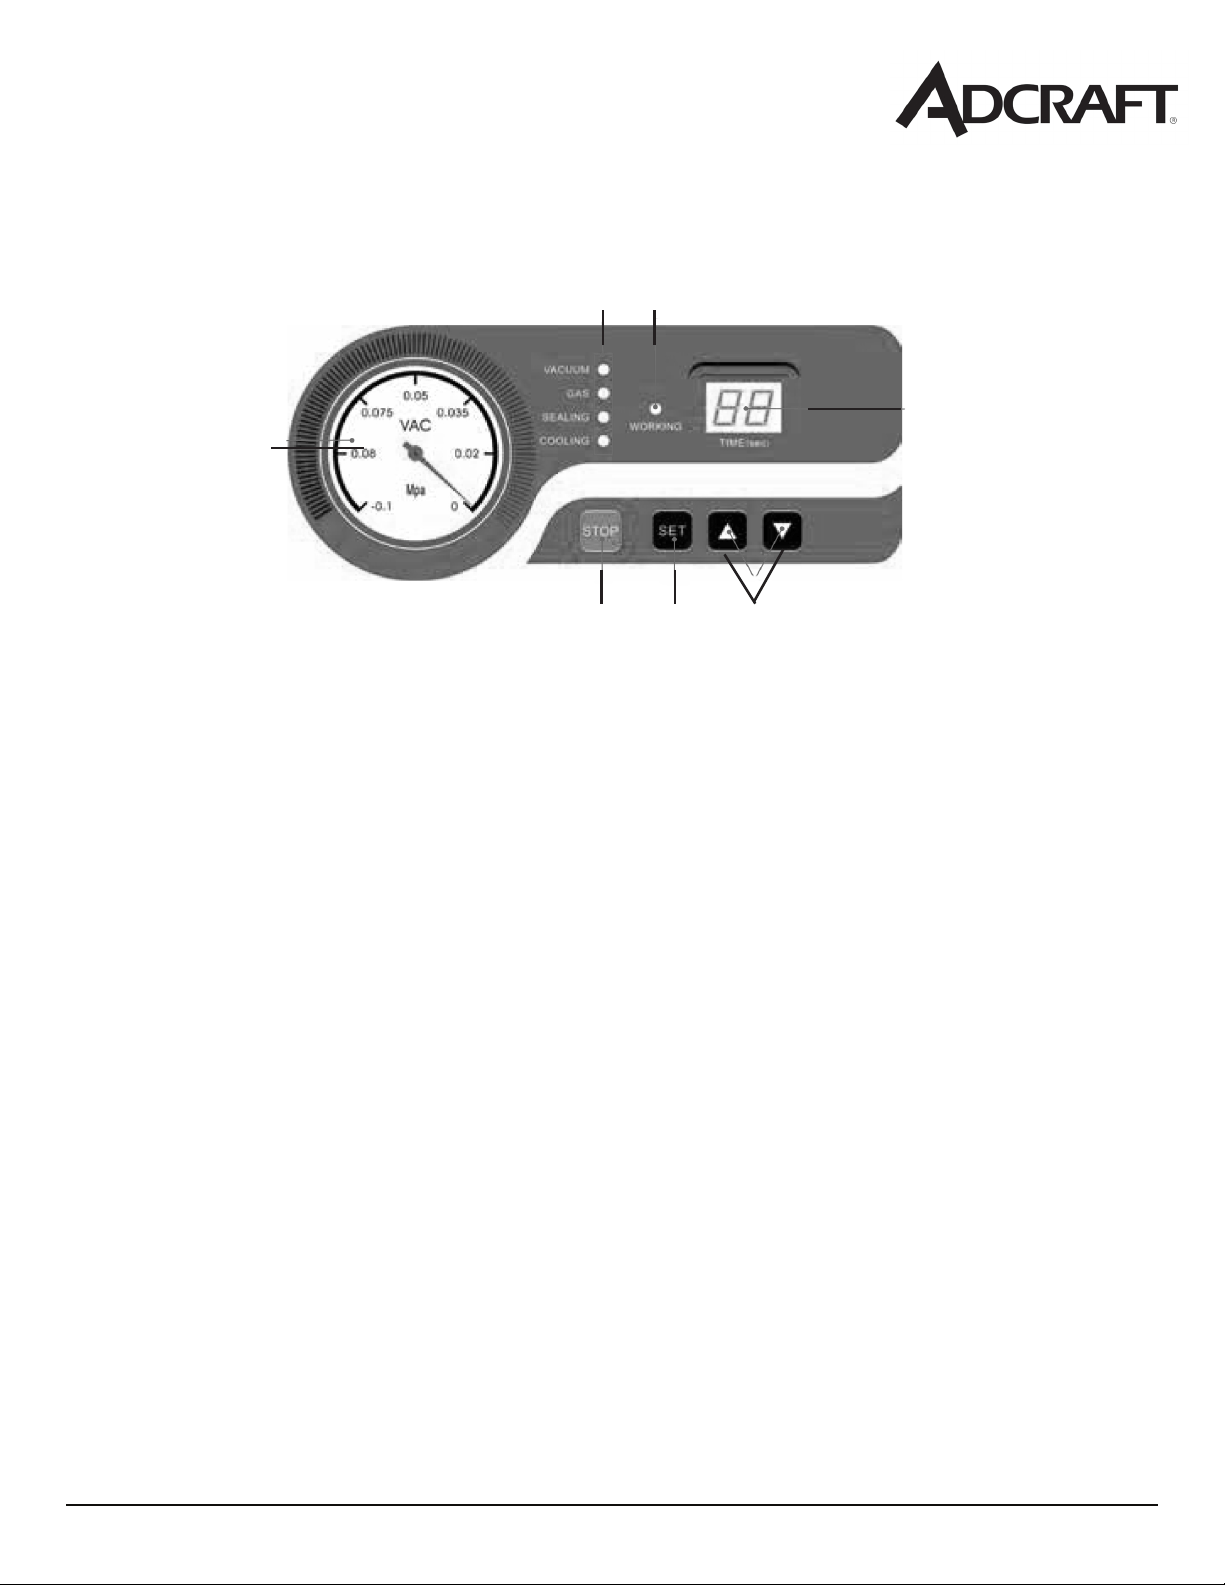
1. Vacuum Gauge - Indicates the vacuum level inside the chamber.
Function Lights:
Vacuum - Illuminates to adjust vacuum time as well as during the vacuum
process. During set up, adjust the vacuum time using the UP/DOWN buttons.
Sealing - Illuminates to adjust vacuum time as well as during the sealing process.
During set up, adjust the sealing time using the UP/DOWN buttons.
Cooling - Illuminates to adjust vacuum time as well as during the cooling process.
During set up, adjust the cooling using the UP/DOWN buttons.
2. Working Indicator Light - Illuminates to indicate the machine is in use.
3. LED Screen (Time) - Displays current function to cycle time, measured in seconds.
4. STOP Button - Press to stop the cycle and immediately seal the pouch. This button will only
work when the machine is in the vacuum process.
5. SET Button - Press to select the vacuum time, sealing time or cooling time. Use with the UP/
DOWN buttons.
6. UP/DOWN Buttons - Press to increase or decrease vacuum time, sealing time or cooling time.
Control Panel
October 2016
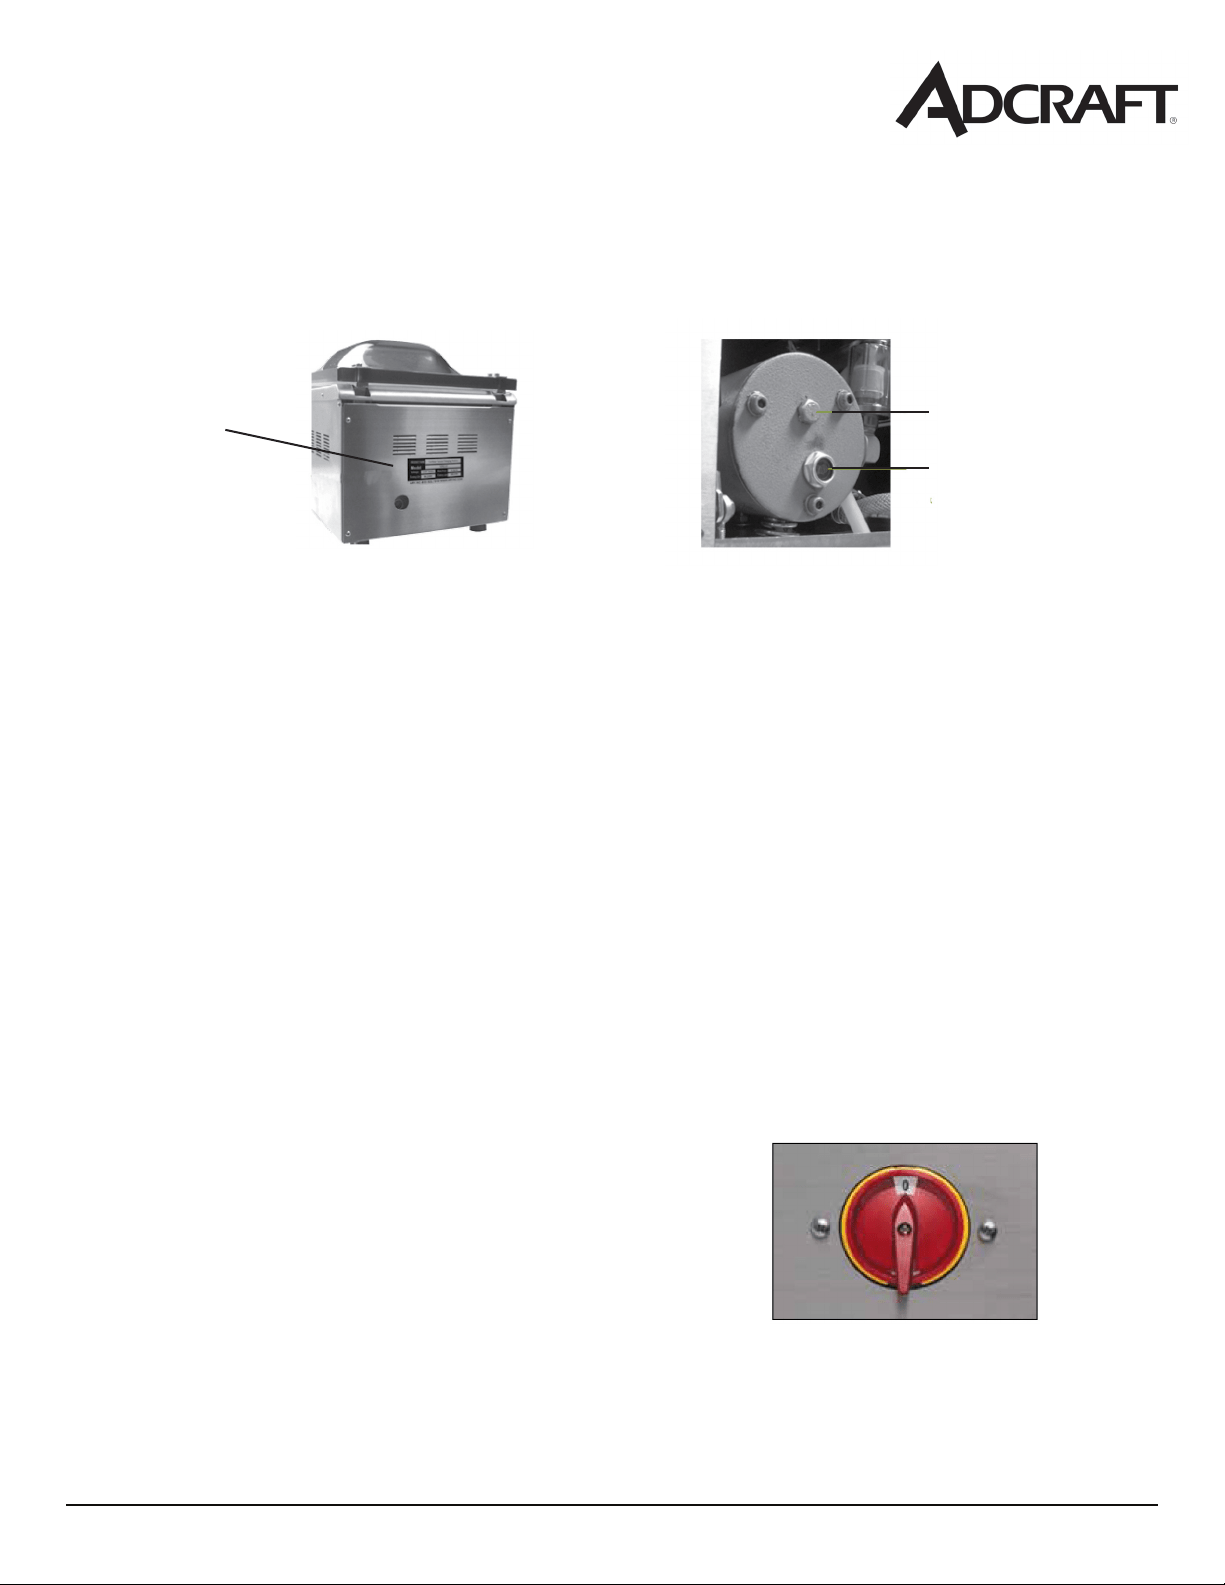
Adding Oil to the Vacuum Machine
Starting Up the Vacuum Machine
1. Prepare the oil - Fill the empty oil bottle with the oil that comes with the machine.
2. Remove the back panel - Using a Phillips head screwdriver, remove the four screws from the
back panel and take the panel off the machine.
3. Remove the oil ll bolt - Locate the oil ll bolt on the vacuum pump and remove it using an
adjustable wrench or simular tool.
4. Fill the pump with oil - Insert the spout inot the open hole and begin pouring the oil into the
pump. Fill the pump until the oil level is at 1/2 to 3/4 in the site glass. This is approximately
3 - 3 1/2 ounces of oil.
5. Replace the oil ll bolt and back panel - Once the pump is lled with oil, screw the oil ll bolt
back in place and put the back of the panel on the machine.
1. Attach the power cord and plug the machine in.
2. Open the lid
3. Turn the power switch on - red power switch is located
on the left side of the unit. Once turned on an indicator
symbol with show on the control panel.
Back of housing
cabinet
Oil ll bolt
Oil site glass
NOTE: OIL MUST BE ADDED TO THE MACHINE PRIOR TO USE. MAKE SURE THE UNIT IS
TURNED OFF AND UNPLUGGED BEFORE ADDING OIL.

October 2016
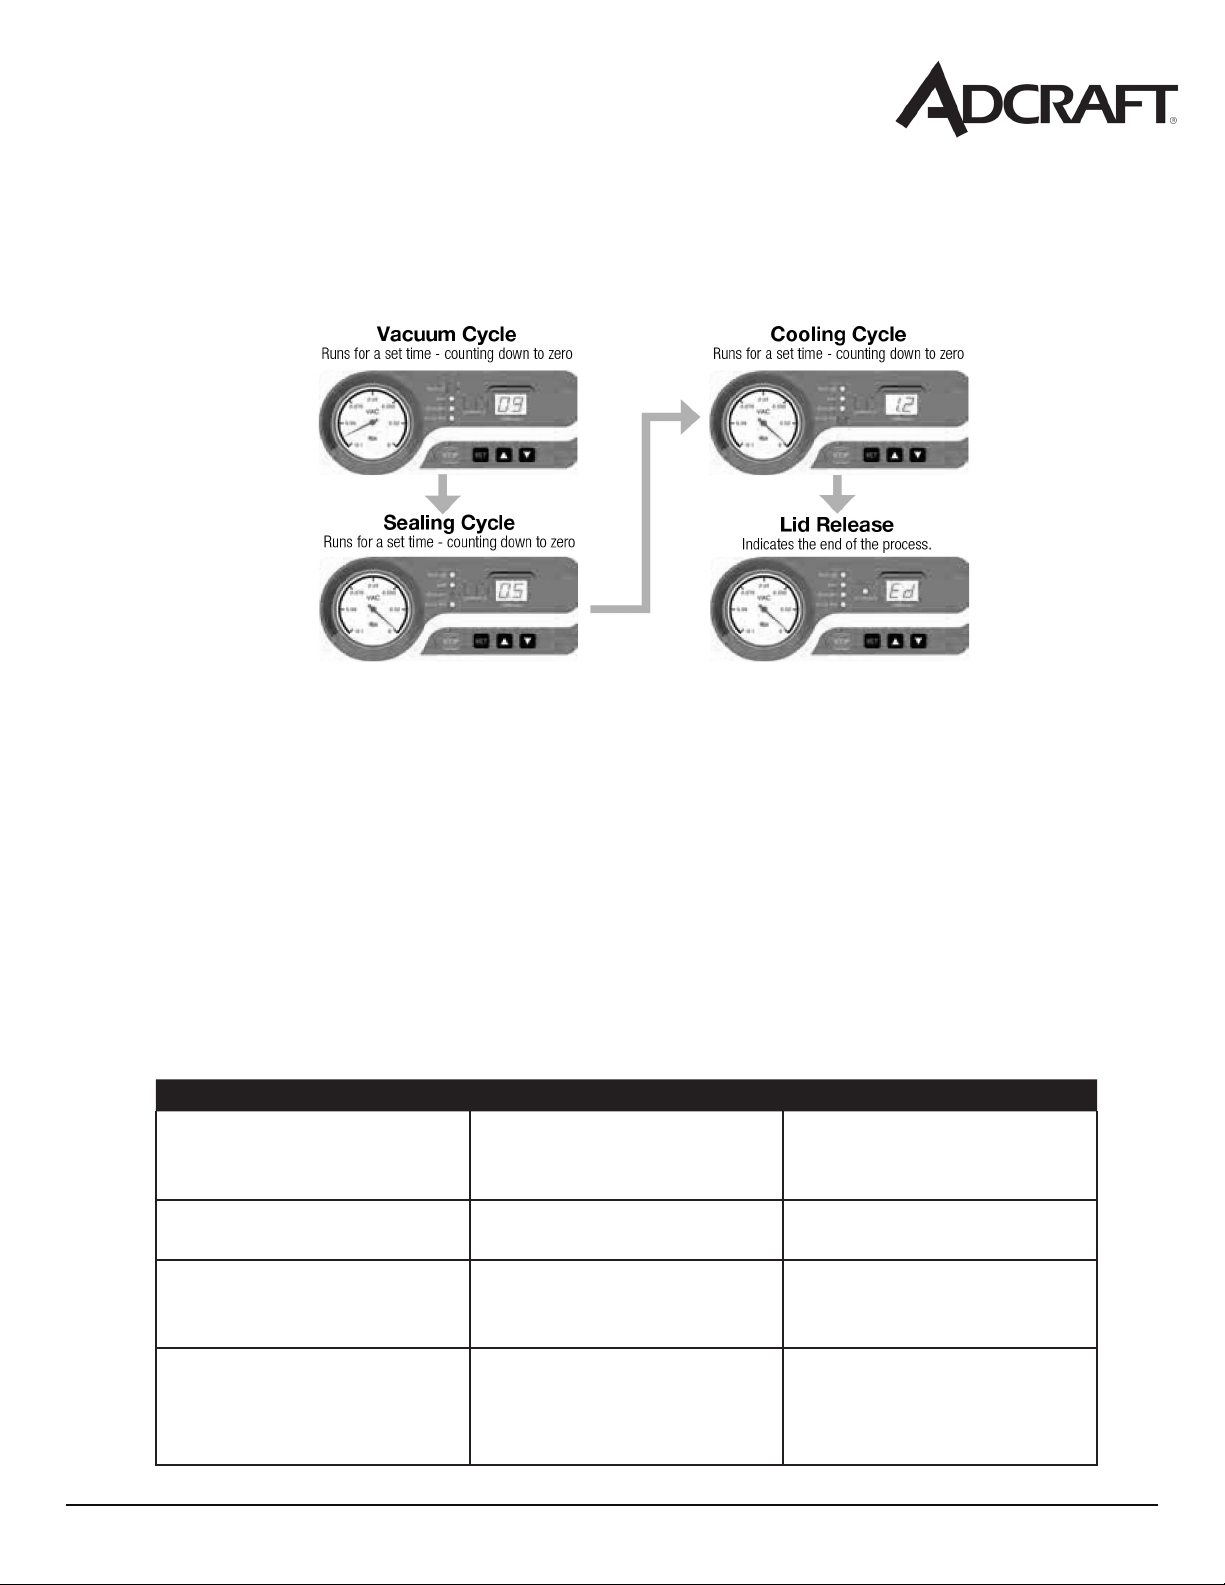
Adjusting the Timing Controls
NOTE:All timing adjustments must be made with the lid lock off and the lid open.
To adjust or set the timing controls, press the SET button on the control panel until the required
label (Vacuum, Sealing or Cooling) is illuminated. For each selection, the current time setting will
show on the LED screen. All time settings are dsplayed in seconds.
For initial testing, the time settings should be:
Vacuum time - 40 seconds
Sealing time - 1.2 seconds
Cooling time - 2 seconds
Vacuum Time: To increase or decrease the vacuum time, press the SET button until VACCUM is
illuminated and then use the UP/DOWN buttons to adjust the vacuum time accordingly. The time
setting will display on the LED screen on the control panel.
NOTE:llerplatescanbeusedtoreducethevacuumtimerequired.Placethellerplates
inside the chamber as desired.
Sealing Time: To increase or decrease the sealing time, press the SET button until SEALING is
illuminated and then use the UP/DOWN buttons to adjust the sealing time to accommodate your
application. It is recommended that you make adjustments in 0.1 second increments to avoid
melting the pouch.
Note: for thicker pouches, you should increase the seal time in 0.1 increments until the
pouch seals completely. For thinner pouches, decrease the seal time in 0.1 increments to avoid
over sealing the pouch
Cooling Time: To increase or decrease the cooling time, press the SET button until COOLING is il-
luminated and then use the UP/DOWN buttons to adjust the cooling time accordingly.
NOTE: to prolong the life of your seal bar, set the cooling time to twice the sealing time.
October 2016
Problem Possible Causes Solution
Power light is on but the unit
is not getting hot when you
turn the thermostat up
It’s either a defective ther-
mostat or a burnt out heating
element
Replace the broken part
Temperature keeps rising on
it’s own
The thermostat is malfunc-
tioning
Replace the thermostat
Power is connected, heat
is working but the indicator
light is not on
The indicator light is defec-
tive
Replace the indicator light
Unit is plugged in but no indi-
cator light or heat is working
The electrical connection is
not connected well or the
fuse is blown
Check the electrical connec-
tion to ensure it’s connected
properly. Replace the fuse if
it’s blown.
October 2016
Replacement Parts for the Vacuum Packaing Machine

October 2016

October 2016
October 2016