Loading ...
Loading ...
Loading ...
6
INTRODUCTION
Thank you for choosing a De’Longhi product. Please take a few
moments to read the instructions to avoid risks or damage to the
appliance.
Download the App!
DE’LONGHI
DEʼLONGHI
This appliance can be used also with the APP named “Pinguino”
that can be downloaded from the App Store® or from Google Play.
To gain access to all functions you need a local net (Home WLAN)
with access to Internet. Further check there are no obstacles to
the Internet access, such as Firewall, Proxy, authentications, etc.,
DESCRIPTION
Description of the appliance (See page 3 - A)
A1 Air outlet grid
A2 Control panel
A3 Handles
A4 Wheels
A5 Remote control signal receiver
A6 Remote control storage
A7 Filter
A8 Air intake grille
A9 Air exhaust hose housing
A10 Air intake grille
A11 Lower drainage hose with cap
A12 Power supply cable
A13 Upper drainage hose with cap
Description of accessories (See page 3 - B)
B1 Wall ange with cap
B2 Window outlet vent
B3 Hose adapter to wall ange/window outlet vent
B4 Air exhaust hose
B5 Hose adapter to unit
B6 Window bracket with locking pin
B7 Additional window bracket with locking pin
B8 Water drain tube with cap
B9 Remote control
B10 End of season dust cover (on some models only)
B11 End of season accessories bag (on some models only)
B12 Foam stripping
B13 Upper water drain tube
Electrical connection
Before plugging the appliance into the outlet, check that:
• The outlet’s power supply corresponds to the value
indicated on the rating label on the back of the appliance;
• The outlet and electrical circuit are adequate for the appli-
ance;
• The outlet is a 3-hole grounded outlet . If this is not
the case, you must choose another outlet. Failure to follow
these important safety instructions absolves the manufac-
turer of all liability.
If it becomes necessary, the power cable must be re-
placed by a qualied professional only.
The instructions below will enable you to prepare your air
conditioner for operation as eciently as possible. Before use,
make sure the air intake and outlet grilles are unobstructed.
USE
Note: This appliance features an auto evaporative
function to remove excess condensate water
during cooling and dehumidiying modes.
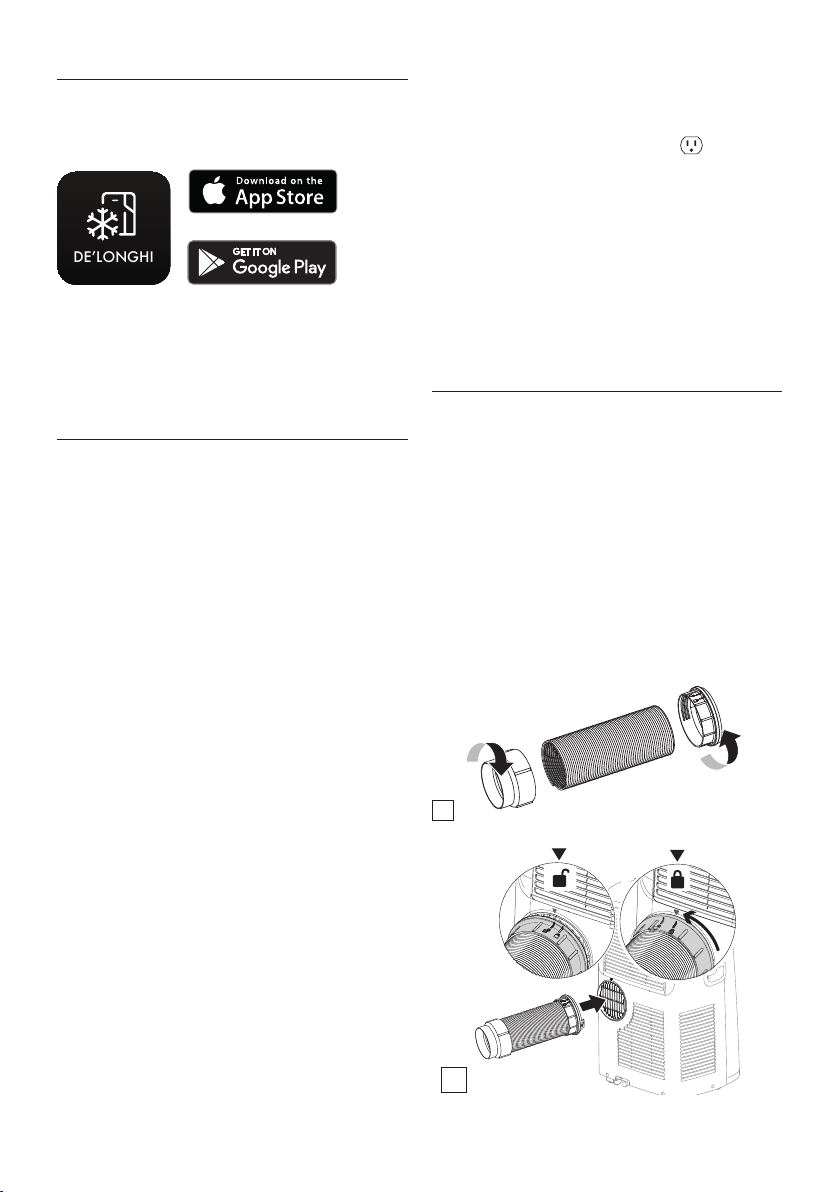
AIR CONDITIONING WITH WALL INSTALLATION
For optimal results set up your appliance in this way:
• Screw the hose adaptor B3 and B5 to the hose’s end B4 as
shown in gure 1a.
• Fit the assembled air exhaust hose adapter B5 in the hous-
ing at the back of the appliance. Align the open lock sym-
bol on the adapter (B5) with the arrow on the back of the
unit. Turn adapter counter clockwise until the closed lock
symbol is aligned with the arrow, as shown in gure 1b.
1a
1b
Loading ...
Loading ...
Loading ...