Loading ...
Loading ...
Loading ...
10 Specifications subject to change without notice. IM-40MHH-02
Prepare the Refrigerant Piping
The refrigerant piping is inside an insulating sleeve attached to the
back of the unit. You must prepare the piping before passing it
through the hole in the wall.
NOTE: (Piping Angle) Refrigerant piping can exit the indoor unit
from four different angles (see Fig. 12):
1. Left−hand side
2. Left rear
3. Right−hand side
4. Right rear
Fig. 12 — Piping Angles
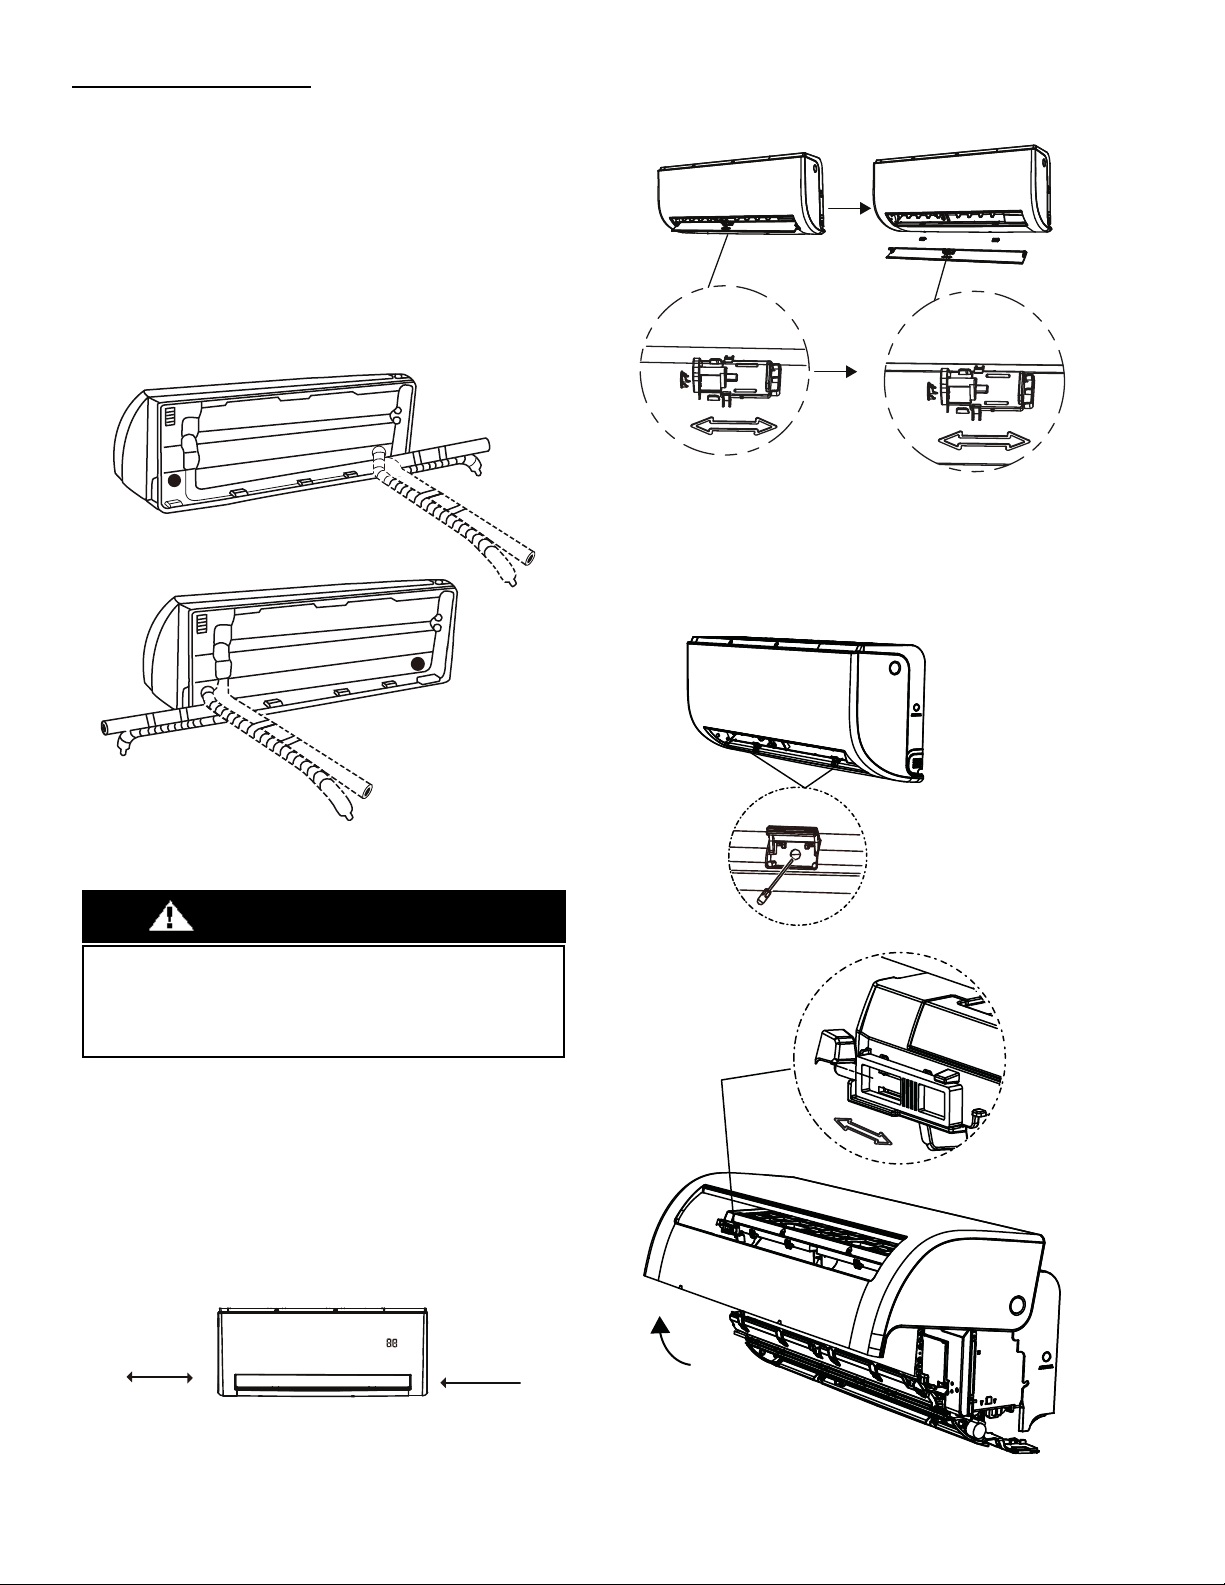
If the refrigerant piping is already embedded in the wall, perform the
following steps:
1. Hook the indoor unit on the mounting plate. Keep in mind that
the hooks on the mounting plate are smaller than the holes on the
back of the unit. If you find that you do not have ample room to
connect the embedded pipes to the indoor unit, the unit can be
adjusted left or right by about 1.25−1.95in. (30−50mm), depending
on the model (see Fig. 13).
Fig. 13 — Hook Indoor Unit to Mounting Plate
2. Prepare the Refrigerant Piping
1. Dissemble the louver.
Fig. 14 — Dissemble the Louver
2. Open and fix the position of the panel. First, unscrew the
two screws (see Fig. 15), then open the panel, and fix the
position of the panel by the latch.
Fig. 15 — Panel Position
ELECTRICAL OPERATION HAZARD
Be extremely careful not to dent or damage the piping while
bending them away from the unit. Any dents in the piping will
affect the unit’s performance.
CAUTION
Move to left or right
1.25−1.95in
(30−50mm)
1.25−1.95in
(30−50mm)
Loading ...
Loading ...
Loading ...