O_ r's
instructions
Register your product at www.samsung.com/global/register
Important Warranty Infiwmation Regarding Television Format Viewing
Standard screen format televisions (4:3, the aspect ratio of the screen width to height) are primarily designed to
view standard format full-motion video. The images displayed on them should primarily be in the standard 4:3
ratio format and constantly moving. Displaying stationary graphics and images on screen, such as the dark top
and bottom letterbox bars (wide screen pictures), should be limited to no more than 15% of the total television
viewing per week.
Wide screen format televisions (16:9, the aspect ratio of the screen width to height) are primarily designed to
view wide screen format full-motion video. The images displayed on them should primarily be in the wide
screen 16:9 ratio format, or expanded to fill the screen if your model offers this feature, and constantly moving.
Displaying stationary graphics and images on screen, such as the dark side-bars on non-expanded standard
format television video and programming, should be limited to no more than 15% of the total television
viewing per week.
Additionally, viewing other stationary images and text such as stock market reports, video game displays,
station logos, web sites or computer graphics and patterns, should be limited as described above for all
televisions. Displaying any stationary images that exceed the above guidelines can cause uneven aging of
picture tubes (CRT_') that leave subtle, but permanent burned-in ghost images in the television picture, rio
avoid this, vary the programming and images, and primarily display full screen moving images, not
stationary patterns or dark bars'. On television models that offer picture sizing features, use these controls to
view the different formats as a full screen picture.
Be careful in the selection and duration of television formats used for viewing. Uneven CRT aging as a result
of format selection and use, as well as other burned-in images, is not covered by your Samsung limited
warranty.
© 2006 Samsung Electronics Co., Ltd. All rights reserved.
En gl ish -2
Contents
• List of Features ............................................................................... 4 • Selecting theAntenna ................................................... 30
• Accessories ............................................................................ 4 • Adomg and Erasing Channels .................................................. 30
• Viewing the Control Panel ................................................................ 5 • To set-up Your Favorite Channels ............................................. 31
• Viewing me Connection PaneI ........................................................... 6 • Viewing the Channel Lists ............................................ 32
• Remote Control ........................................................................... 7 • Setting the Default Channel List Moee ........................................ 32
• InstaIIing Batteries in the Remote Control ......................................... 8 • LabeIing ChanneIs ....................................................................... 33
• Connecting VHF and UHF Antennas 8
• Connecting Cable TV ......................................................................... 9
• Connecting a VCR ............................................................................. 10
• Connecting an S-VHS VCR ............................................................... 10
• Connecting a Second VCR to Record from the TV ........................... 11
• Connecting a Camcorder ................................................................... 11
• Connecting a DVD PtayedSet-Top Box ........................................... 11
• Connecting a DVD PlayedSet-Top Box via HDMI ............................. 12
• Connecting a Digital Audio Sys[em ................................................... 12
• Connecting an Amplifier/DVD Home Theater .................................... t3
• Fine Tuning Analog Channels ........ 33
• Checking the DigitaI-SigraI Strength 34
• Using the R.Surf Feature .............................................................. 34
• Setting the Time 35
__, ...... __u__
• Turning the TV On and O =,.............................................................. 13
• Plug & Play Feature ........................................................................... 13
• Changing Channels 15
• Adjusting the Volume ..................................................................... 16
• viewing the DispIay ............................................................................ 16
• Viewing me Menus 16 • Iden[ifyinc _robtems 48
• Memorizing the Channels .................................................. 17 • Specifications ....................................................................... 48
• Setting Up Your Remote Control .............................................. 18
• To SeIect the Source .......................................................................... 23
• To Edit the Input Source Name ......................................................... 23
• Selecting a Menu Language .................................................... 38
• Usir j the V-Chip ............................................... 38
• Viewing Closed CaptionstOn-Screen Text Messages - Digital .,. 45
• Viewing Closed Captions(Qn-Screen Text Messages) -AnaIog ,. 46
• Menu Transparency Level .............................. 4Z
• Setting the Blue Screen Mode ......... 4T
• Setting the Function Hel_ 47
• Using Automatic Picture Settings ....................................................... 24
• Changing the Screen Size ................................................................. 25
• Tih ....................................................................................................... 26
• Setting the Film Mode 26
• Cus[omizmg the Sound ......................... 27
• Setting the SRS TruSurround XT .................................... 27
• Automatic Volume Contro .. 28
• Choosing a Multi-Channel Sound (MTS_ track - Digital ,.. 28
• Choosing a Multi-Channel Sound (MTS) track - Analog .............. 29
• Setting the On/Off Melod_, .. 29
Symbol
& (11P
i
Press Important Note One-Touch
Button
English-3
General Infl_rmation
List of Features
• Adjustable picture settings that can be stored in the TV's memory.
• Automatic timer to turn the TV on and off.
• A special sleep timer.
• VChip function.
• Excellent Digital Interface & Networking:
With a built in HD digital tuner, non-subscription HD broadcasts can be viewed with no Set Top Box needed.
• Remote Control
The supplied remote can be used to operate the TV as well as most DVD players, Set top boxes, Cable Boxes and VCRs.
• SRS TruSurround XT
SRS TruSurround XT provides a virtual Dolby surround system.
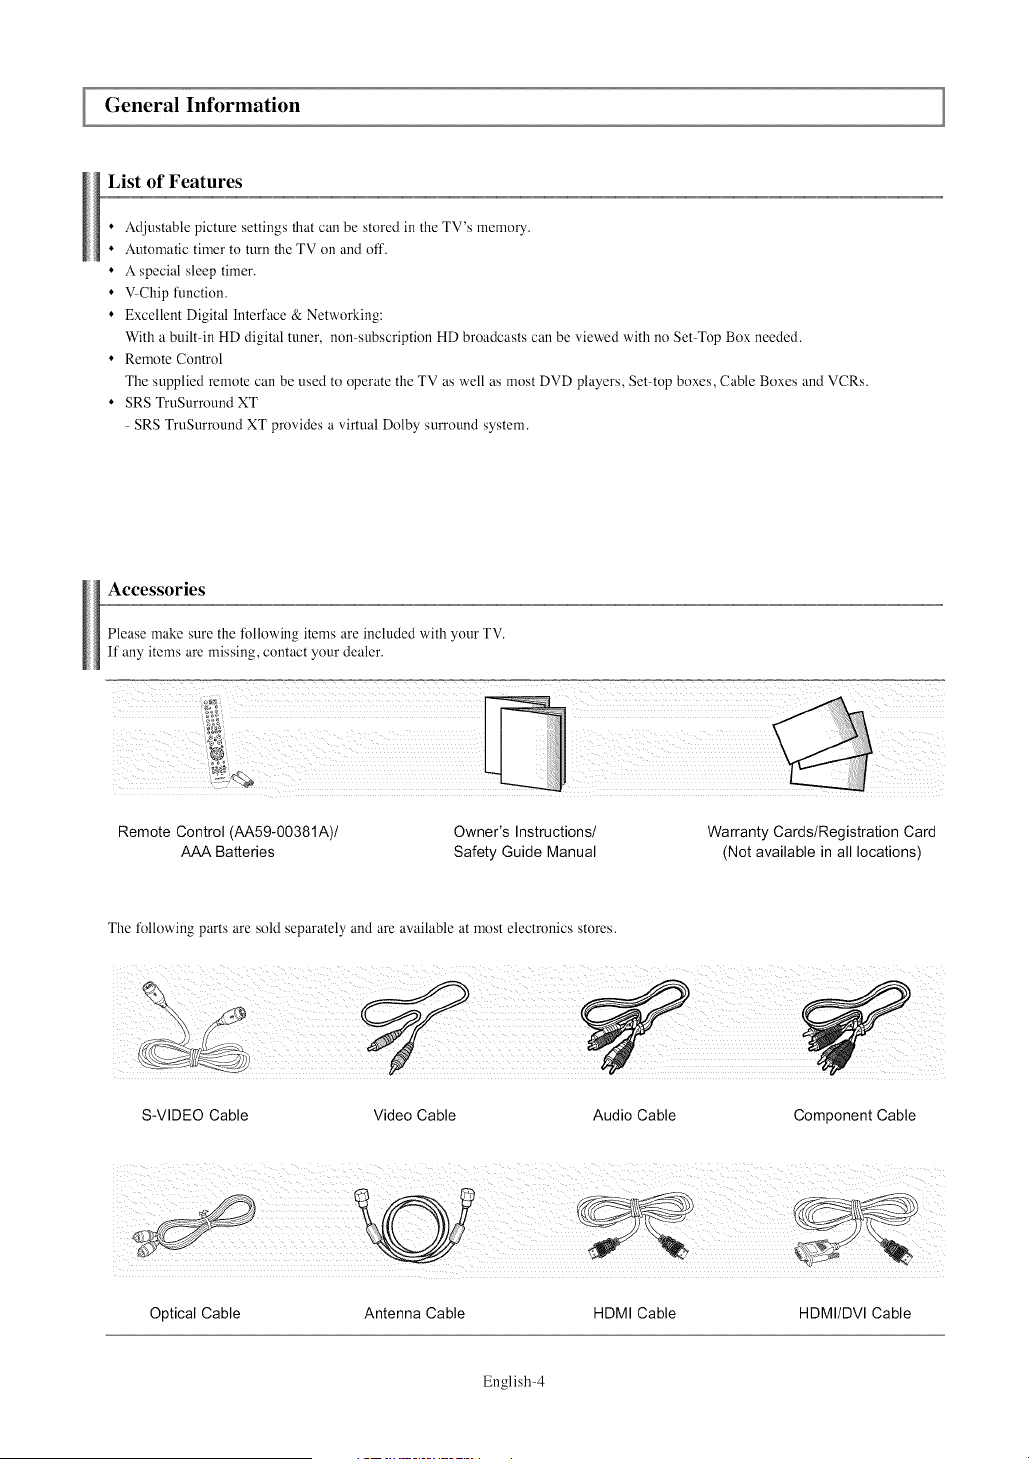
Accessories
Please make sure the following items are included with your TV.
If any items are missing, contact your dealer.
Remote Control (AA59-00381A)/
AAA Batteries
Owner's Instructions/
Safety Guide Manual
Warranty Cards/Registration Card
(Not available in all locations)
The tk)llowing parts are sold separately and are available at most electronics stores.
S-VIDEO Cable Video Cable Audio Cable Component Cable
Optical Cable Antenna Cable HDMI Cable HDMI/DVI Cable
English-4
Viewing the Control Panel
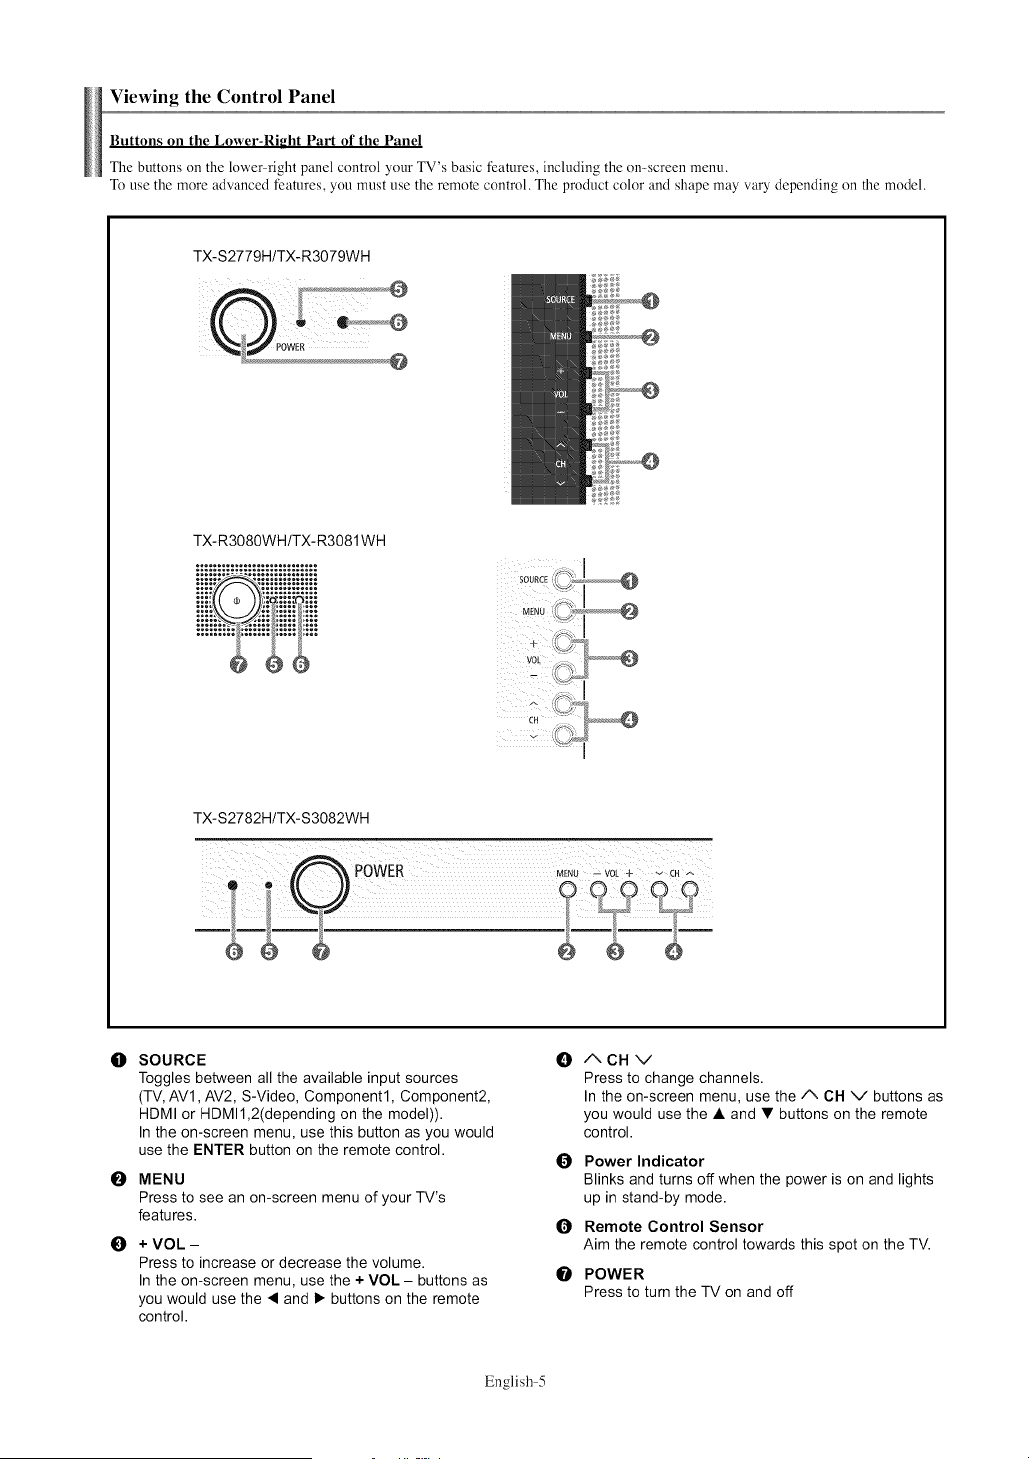
Buttons on the Lower-Right Part of the Panel
The buttons on the lower right panel control your TV's basic features, including the on-screen menu.
To use the more advanced features, you must use the remote control. The product color and shape may vary depending on the model.
TX-S2779H/TX-R3079WH
@
TX-R3080WH/TX-R3081WH
TX-S2782H/TX-S3082WH
0 SOURCE 0
Toggles between all the available input sources
(TV, AVl, AV2, S-Video, Component1, Component2,
HDMI or HDMI1,2(depending on the model)).
In the on-screen menu, use this button as you would
use the ENTER button on the remote control.
E)
O
MENU
Press to see an on-screen menu of your TV's
features.
+ VOL -
Press to increase or decrease the volume.
In the on-screen menu, use the + VOL - buttons as
you would use the < and I_ buttons on the remote
control.
Q
O
O
/XCHV
Press to change channels.
In the on-screen menu, use the A CH V buttons as
you would use the • and • buttons on the remote
control.
Power Indicator
Blinks and turns off when the power is on and lights
up in stand-by mode.
Remote Control Sensor
Aim the remote control towards this spot on the TV.
POWER
Press to turn the TV on and off
English-5
ViewingtheConnectionPanel
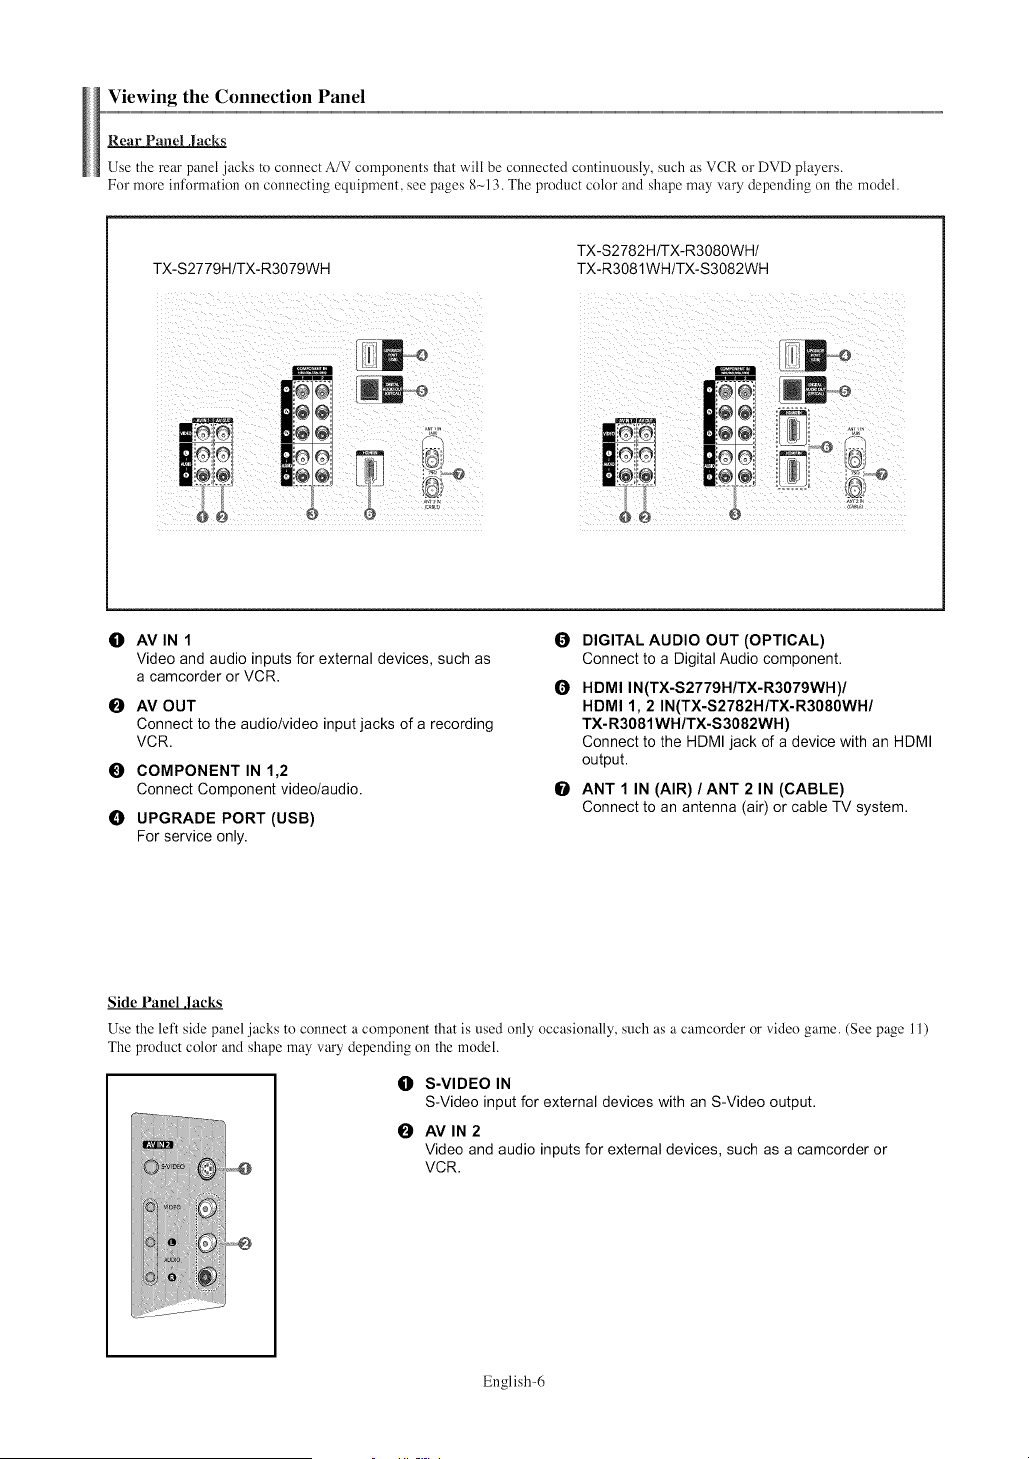
Rear Panel Jacks
Use the rear panel jacks to connect A/V components that will be connected continuously, such as VCR or DVD players.
For more information on connecting equipment, see pages 8_-13. The product color and shape may vary dewnding on the model.
TX-S2779H/TX-R3079WH
TX-S2782H/TX-R3080WH/
TX-R3081WH/TX-S3082WH
O AVIN1
Video and audio inputs for external devices, such as
a camcorder or VCR,
O AV OUT
Connect to the audio/video input jacks of a recording
VCR.
0 COMPONENT IN 1,2
Connect Component video/audio.
UPGRADE PORT (USB)
For service only.
0 DIGITAL AUDIO OUT (OPTICAL)
Connect to a Digital Audio component.
O HDMI IN(TX-S2779H/TX-R3079WH)/
HDMI 1, 2 IN(TX-S2782H/TX-R3080WH/
TX-R3081WH/TX-S3082WH)
Connect to the HDMI jack of a device with an HDMI
output.
O ANT 1 IN (AIR)/ANT 2 IN (CABLE)
Connect to an antenna (air) or cable TV system.
Side Panel ,lacks
Use the left side panel jacks to connect a component that is used only occasionally, such as a camcorder or video game. (See page 11)
The product color and shape may vary depending on the model.
li} S-VIDEO IN
S-Video input for external devices with an S-Video output.
O AVIN2
Video and audio inputs for external devices, such as a camcorder or
VCR.
English-6
Remote Control
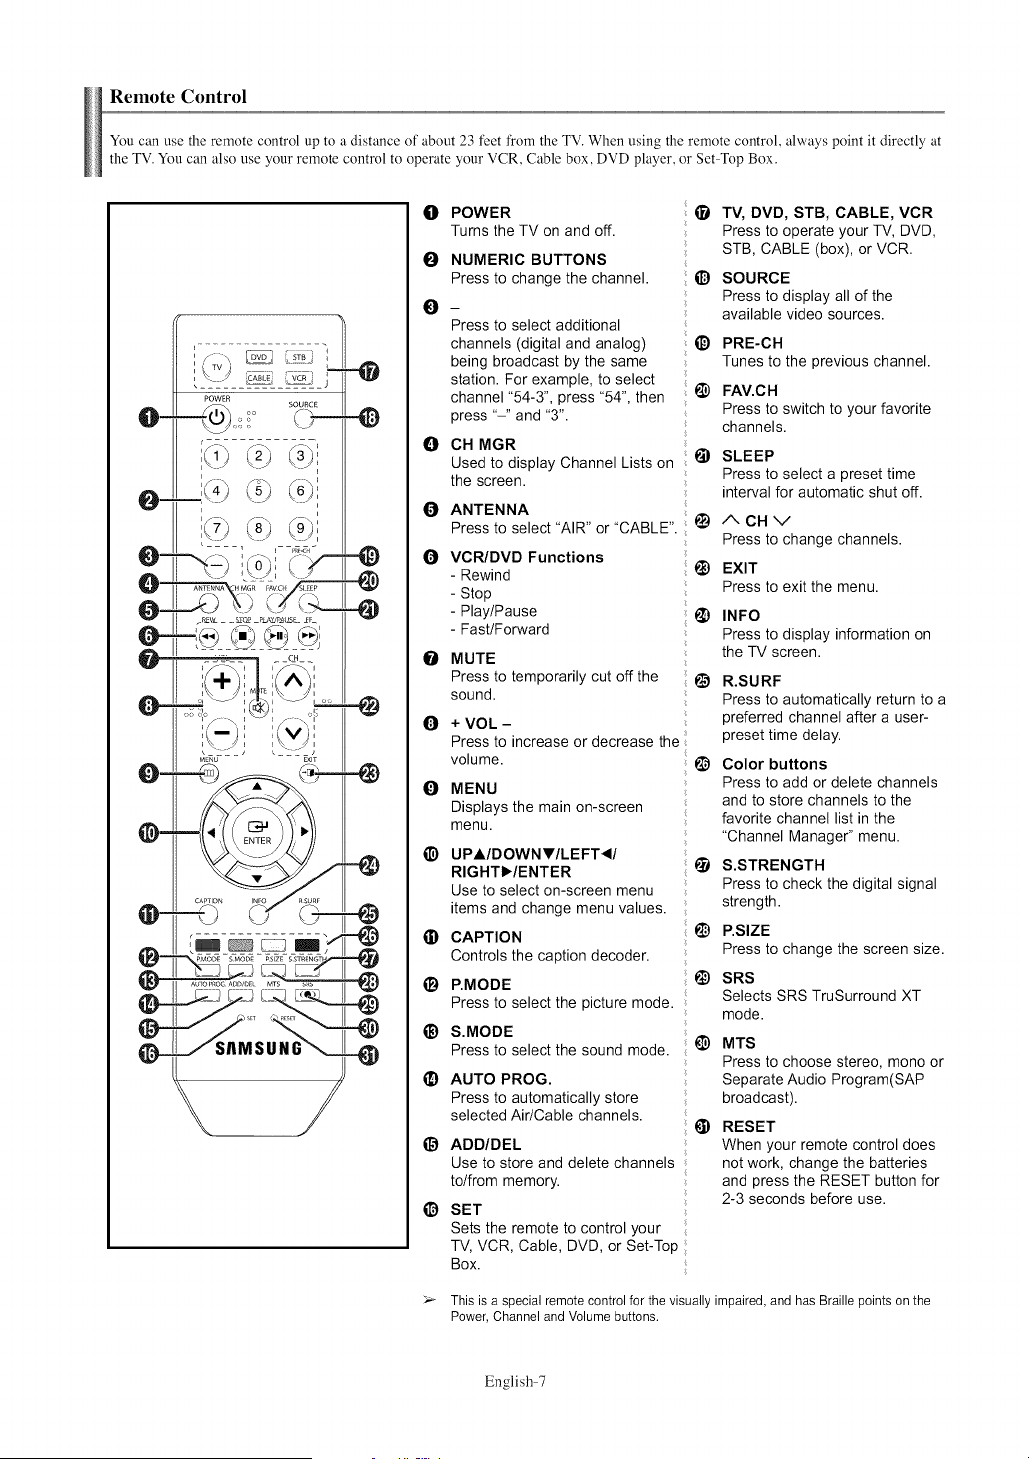
You can use the remote control up to a distance of about 23 feet from the TV. When using the remote control, always point it directly at
the TV. You can also use your remote control to operate your VCR, Cable box, DVD player, or Set Top Box.
o
0
O
0
0
0
0
0
0
@
@
e
e
@
POWER
Turns the TV on and off.
NUMERIC BUTTONS
Press to change the channel.
Press to select additional
channels (digital and analog)
being broadcast by the same
station. For example, to select
channel "54-3", press "54", then
press "-" and "3".
CH MGR
Used to display Channel Lists on
the screen.
ANTENNA
Press to select "AIR" or "CABLE".
VCR/DVD Functions
- Rewind
- Stop
- Play/Pause
- Fast/Forward
MUTE
Press to temporarily cut off the
sound.
+ VOL -
Press to increase or decrease the
volume.
MENU
Displays the main on-screen
menu.
UPAIDOWN_f lLEFT _II
RIGHTlY/ENTER
Use to select on-screen menu
items and change menu values.
CAPTION
Controls the caption decoder.
P,MODE
Press to select the picture mode.
S.MOBE
Press to select the sound mode.
AUTO PROG.
Press to automatically store
selected Air/Cable channels.
i_ ABD/DEL
Use to store and delete channels
to/from memory.
O SET
Sets the remote to control your
TV, VCR, Cable, DVD, or Set-Top
Box.
TV, DVD, STB, CABLE, VCR
Press to operate your TV, DVD,
STB, CABLE (box), or VCR.
O SOURCE
Press to display all of the
available video sources.
PRE-CH
Tunes to the previous channel.
@
@
FAV.CH
Press to switch to your favorite
channels.
SLEEP
Press to select a preset time
interval for automatic shut off.
I_) ACHV
Press to change channels.
_) EXIT
Press to exit the menu.
_) INFO
Press to display information on
the TV screen.
_) R.SURF
Press to automatically return to a
preferred channel after a user-
preset time delay.
I_ Color buttons
Press to add or delete channels
and to store channels to the
favorite channel list in the
"Channel Manager" menu.
_) S.STRENGTH
Press to check the digital signal
strength.
i_) P.SIZE
Press to change the screen size.
SRS
Selects SRS TruSurround XT
mode.
t_) MTS
Press to choose stereo, mono or
Separate Audio Program(SAP
broadcast).
@ RESET
When your remote control does
not work, change the batteries
and press the RESET button for
2-3 seconds before use.
_- This is a special remote control for the visually impaired, and has Braille points on the
Power, Channel and Volume buttons.
English-7
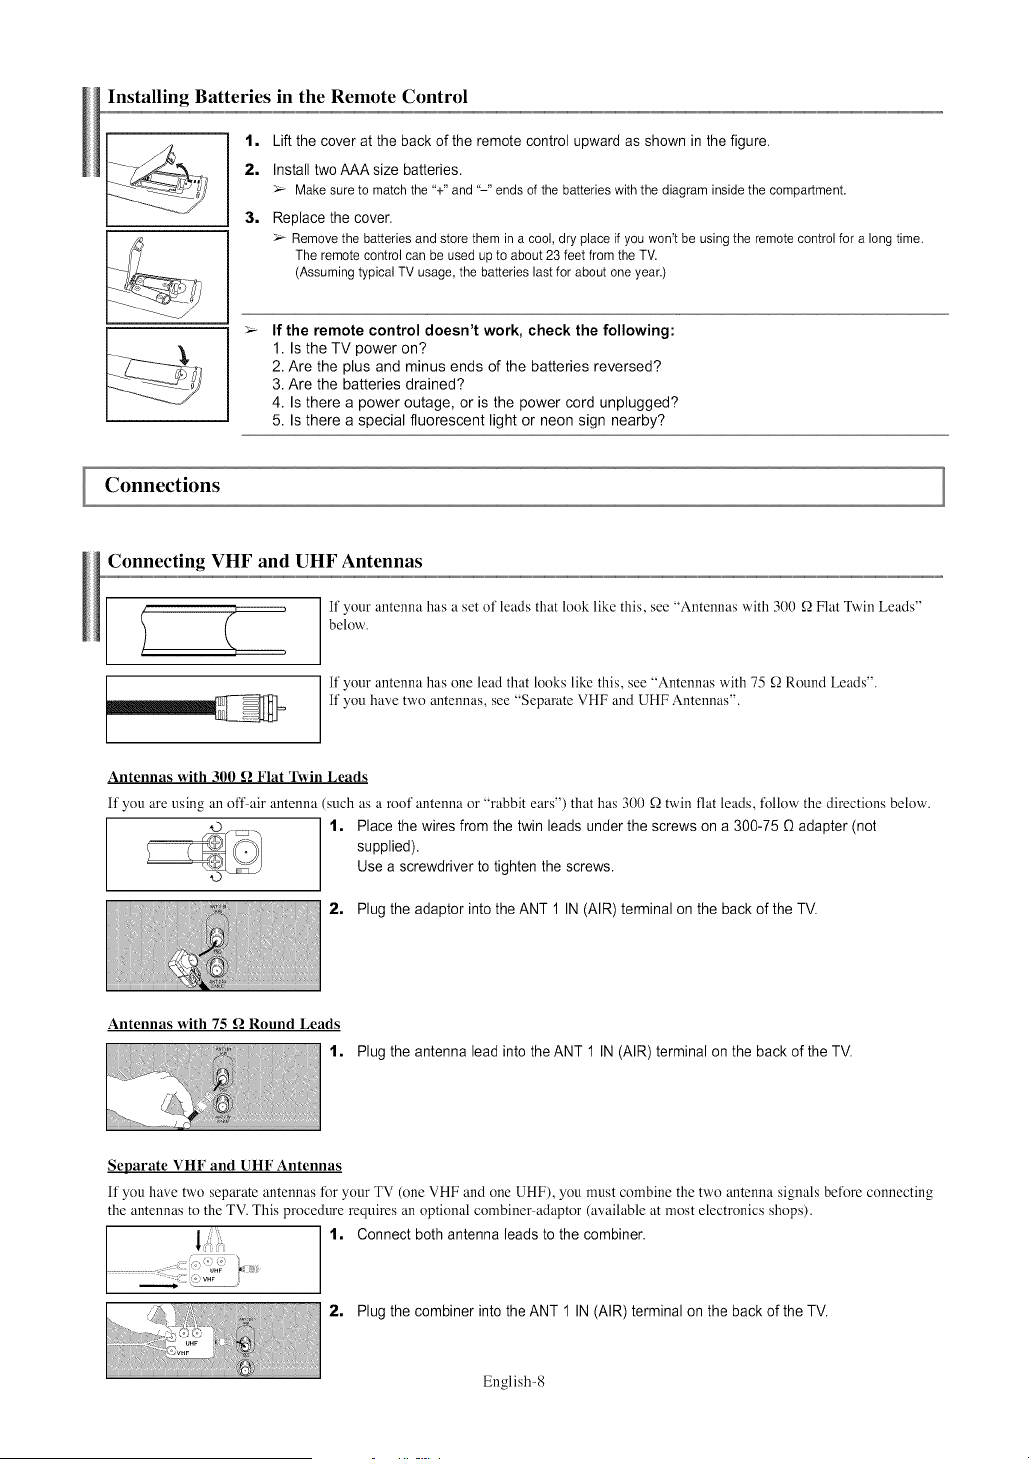
Installing Batteries in the Remote Control
1, Lift the cover at the back of the remote control upward as shown in the figure.
2, Install two AAA size batteries.
>_ Make sure to match the %" and "-" ends of the batteries with the diagram inside the compartment.
3, Replace the cover.
>_ Remove the batteries and store them in a cool, dry place if you won't be using the remote control for a long time.
The remote control can be used up to about 23 feet from the TV.
(Assuming typical TV usage, the batteries last for about one year.)
If the remote control doesn't work, check the following:
1. Is the TV power on?
2. Are the plus and minus ends of the batteries reversed?
3. Are the batteries drained?
4. Is there a power outage, or is the power cord unplugged?
5. Is there a special fluorescent light or neon sign nearby?
Connections
Connecting VHF and UHF Antennas
, , , If' your antenna has a set of leads that look like this, see "Antennas with 300 _ Flat Twin Leads"
) ( below.
p
If your antenna has one lead that looks like this, see "Antennas with 75 _ Round Leads".
If you have two antennas, see "Separate VHF and UHF Antennas".
Antennas with 300 _ Flat Twin Leads
If you are using an offair antenna such as a roof antenna or "rabbit ears") that has 300 _Qtwin fiat leads, tk)llow the directions below.
1, Place the wires from the twin leads under the screws on a 300-75 _ adapter (not
supplied).
Use a screwdriver to tighten the screws.
2, Plug the adaptor into the ANT 1 IN (AIR) terminal on the back of the TV.
Antennas with 75 _ Round Leads
1. Plug the antenna lead into the ANT 1 IN (AIR) terminal on the back of the TV.
Separate VHF and UHF Antennas
If you have two separate antennas for your TV (one VHF and one UHF), you must combine the two antenna signals beti)re connecting
the antennas to the TV. This procednre requires an optional combiner adaptor (available at most electronics shops).
1. Connect both antenna leads to the combiner.
............ u.F ,_
2, Plug the combiner into the ANT 1 IN (AIR) terminal on the back of the T>
English-8
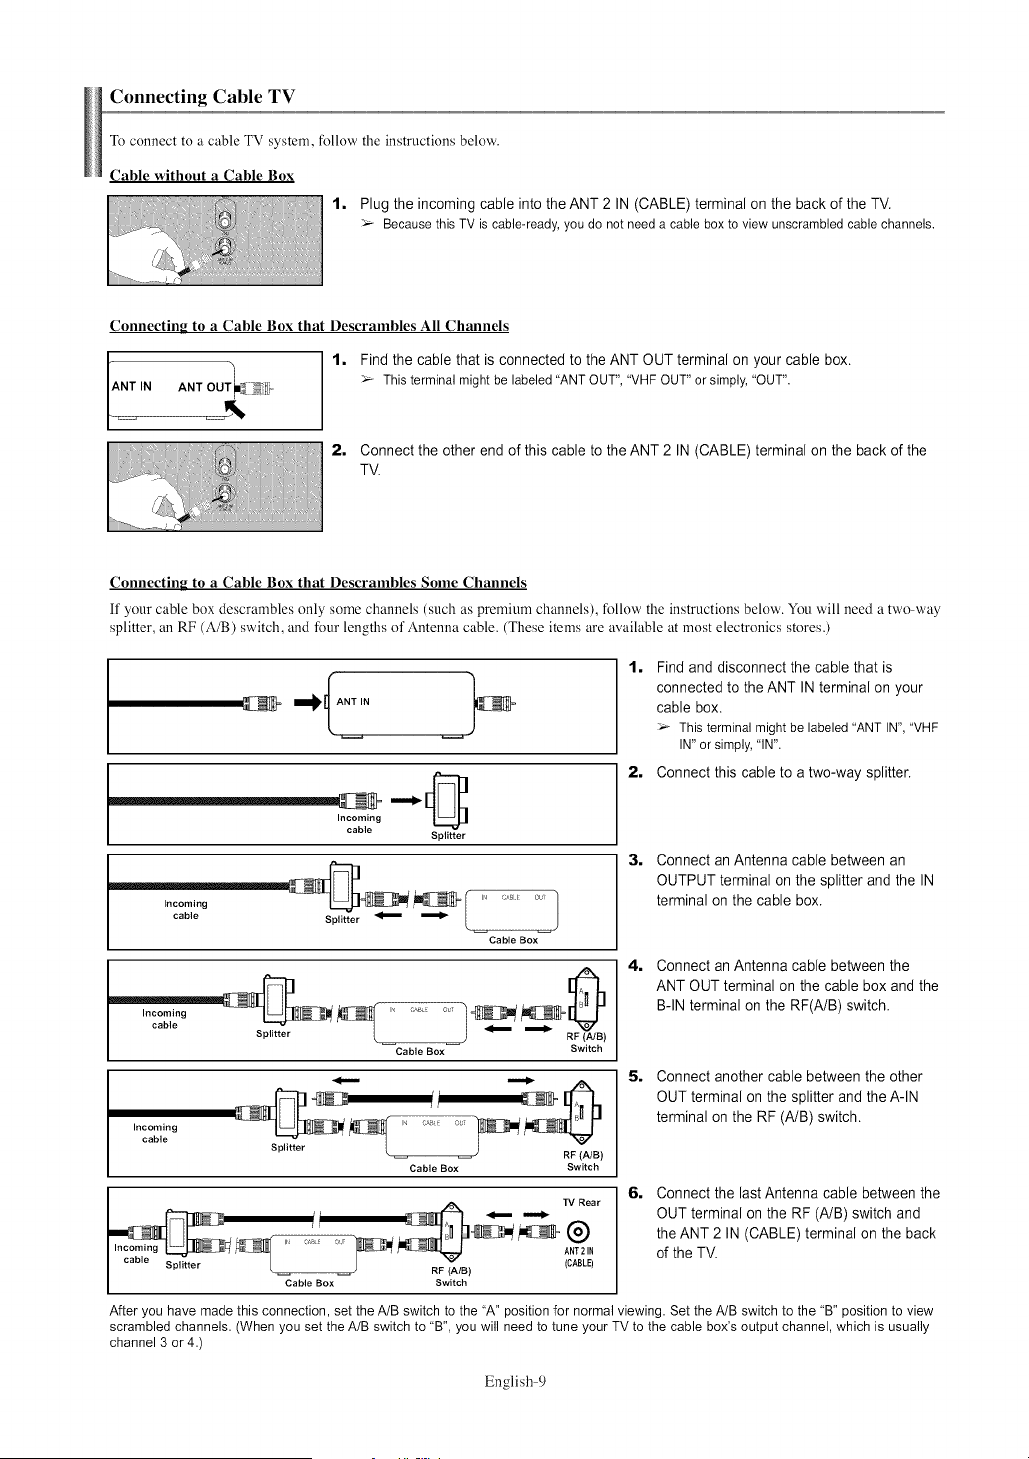
Connecting Cable TV
To connect to a cable TV system, follow the instructions below.
Cable without a Cable Box
1. Plug the incoming cable into the ANT 2 IN (CABLE) terminal on the back of the TV.
_-_ Becausethis TV is cable-ready,youdo not needa cableboxto viewunscrambledcablechannels.
Connecting to a Cable Box that Descrambles All Channels
Find the cable that is connected to the ANT OUT terminal on your cable box.
_-_ This terminalmightbe labeled"ANTOUT","VHFOUT"or simply,"OUT".
Connect the other end of this cable to the ANT 2 IN (CABLE) terminal on the back of the
TV.
Connecting to a Cable Box that Descrambles Sonle Channels
If your cable box descrambles only some channels (such as premium channels), fbllow the instructions below. You will need a two way
splitter, an RF (A/B) switch, and four lengths of Antenna cable. (These items are available at most electronics stores.)
•
Incoming
cable
Splitter
...........
cable Splitter _ _ L l
Cable Box
1. Find and disconnect the cable that is
connected to the ANT IN terminal on your
cable box.
Thisterminalmight be labeled"ANTIN", "VHF
IN"or simply,"IN".
2. Connect this cable to a two-way splitter.
3, Connect an Antenna cable between an
OUTPUT terminal on the splitter and the IN
terminal on the cable box.
Incoming i c,_ c,,! J
cable Splitter RF (A/e)
Cable Box Switch
4. Connect an Antenna cable between the
ANT OUT terminal on the cable box and the
B-IN terminal on the RF(A/B) switch.
Incoming
cable
-
S litter (A/e)
Cable Box Switch
S. Connect another cable between the other
OUT terminal on the splitter and the A-IN
terminal on the RF (A/B) switch.
__ N-_NI_' ......... _, 2_g-N_x[- WA_NRear6. Connect the last Antenna cable betweentheon
/I _ i. OUT terminal on the RF (A/B) switch and
_W _W_ the ANT 2 IN (CABLE) terminal the back
of the TV.
I .... Splitter L RF (A/e) (CABLE)
Cable Box Switch
After youhave madethis connection,set theA/B switch to the "A" positionfor normalviewing.Set the A/B switchto the "B" position to view
scrambledchannels. (Whenyou set the A/Bswitch to "B", youwill needto tune your TV to the cable box'eoutput channel,which is usually
channel 3 or 4.)
English-9
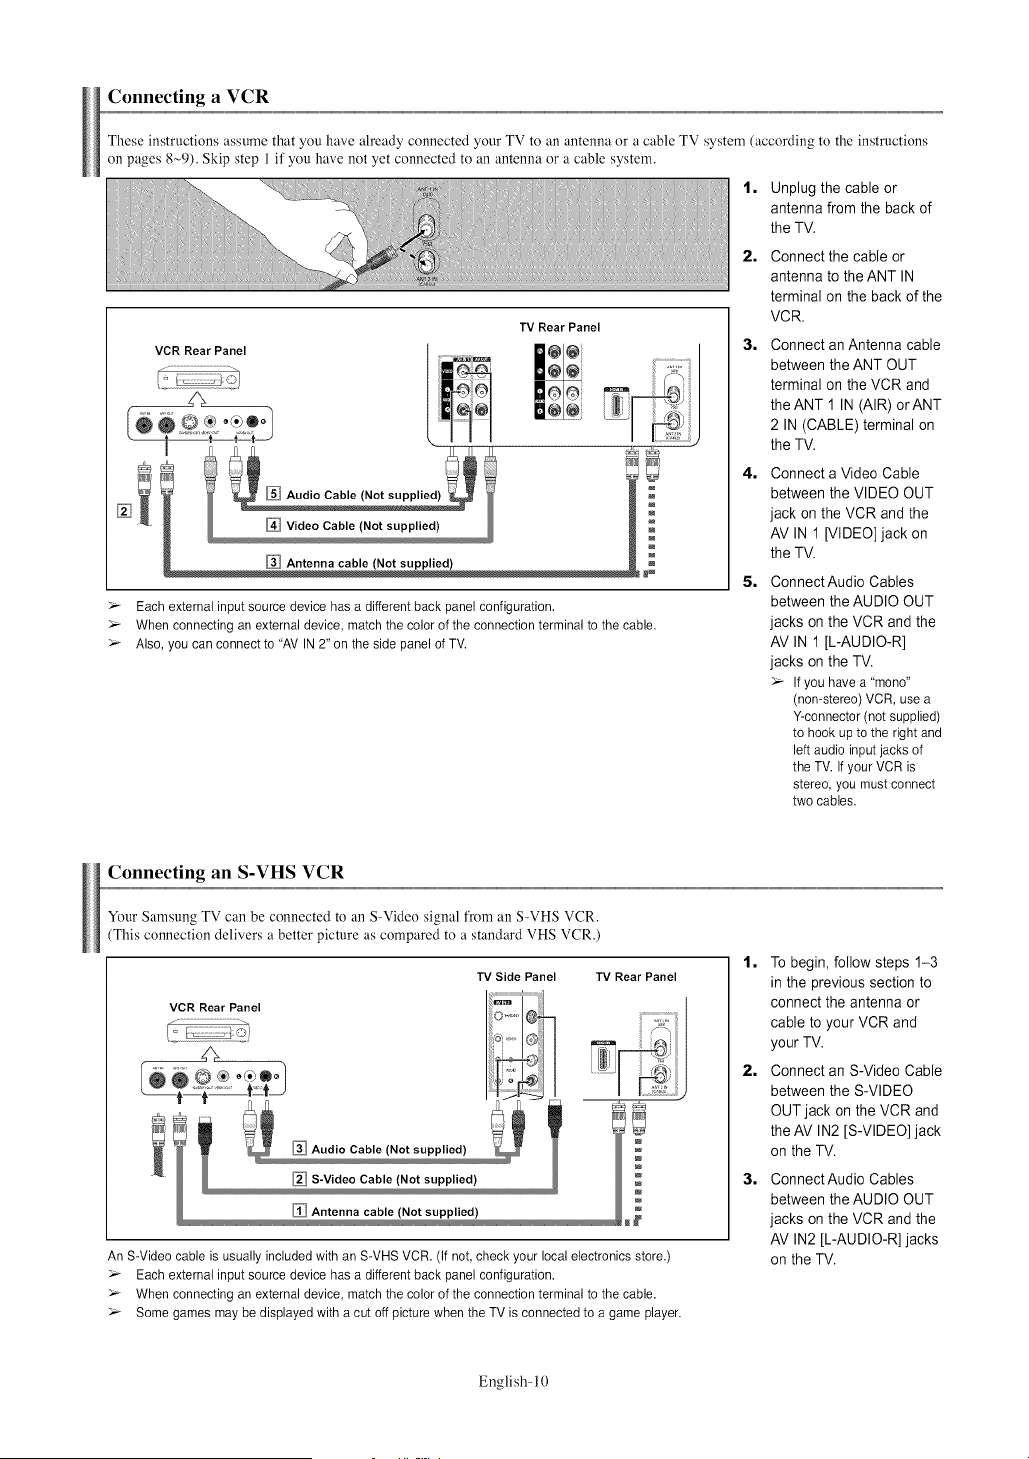
Connecting a VCR
These instructions assume that you have already connected your TV to an antenna or a cable TV system (according to the instructions
on pages 8~9). Skip step 1 if you have not yet connected to an antenna or a cable system.
1, Unplug the cable or
antenna from the back of
the TV.
TV Rear Panel
@@
@@
Antenna cable (Not supplied)
>_ Each external input source device has a different back panel configuration.
>_ When connecting an external device, match the color of the connection terminal to the cable.
>_ Also, you can connect to "AV IN 2" on the side panel of TV.
2=
3=
4=
5=
Connect the cable or
antenna to the ANT IN
terminal on the back of the
VCR.
Connect an Antenna cable
between the ANT OUT
terminal on the VCR and
the ANT 1 IN (AIR) orANT
2 IN (CABLE) terminal on
the TV.
Connect a Video Cable
between the VIDEO OUT
jack on the VCR and the
AV IN 1 [VIDEO] jack on
the TV.
Connect Audio Cables
between the AUDIO OUT
jacks on the VCR and the
AV IN 1 [L-AUDIO-R]
jacks on the TV.
> If you have a "mono"
(non-stereo) VCR, use a
Y-connector (not supplied)
to hook up to the right and
left audio input jacks of
the TV. If your VCR is
stereo, you must connect
two cables.
Connecting an S-VHS VCR
Your Samsung TV can be connected to an S-Video signal from an S-VHS VCR.
(This connection delivers a better picture as compared to a standard VHS VCR.)
TV Side Panel TV Rear Panel
An S-Video cable is usually included with an S-VHS VCR. (If not, check your local electronics store.)
>_ Each external input source device has a different back panel configuration.
>_ When connecting an external device, match the color of the connection terminal to the cable.
>_ Some games may be displayed with a cut off picture when the TV is connected to a game player.
1, To begin, follow steps 1-3
in the previous section to
connect the antenna or
cable to your VCR and
your TV.
2, Connect an S-Video Cable
between the S-VIDEO
OUT jack on the VCR and
the AV IN2 [S-VIDEO] jack
on the TV.
3= Connect Audio Cables
between the AUDIO OUT
jacks on the VCR and the
AV IN2 [L-AUDIO-R] jacks
on the TV.
English- 10
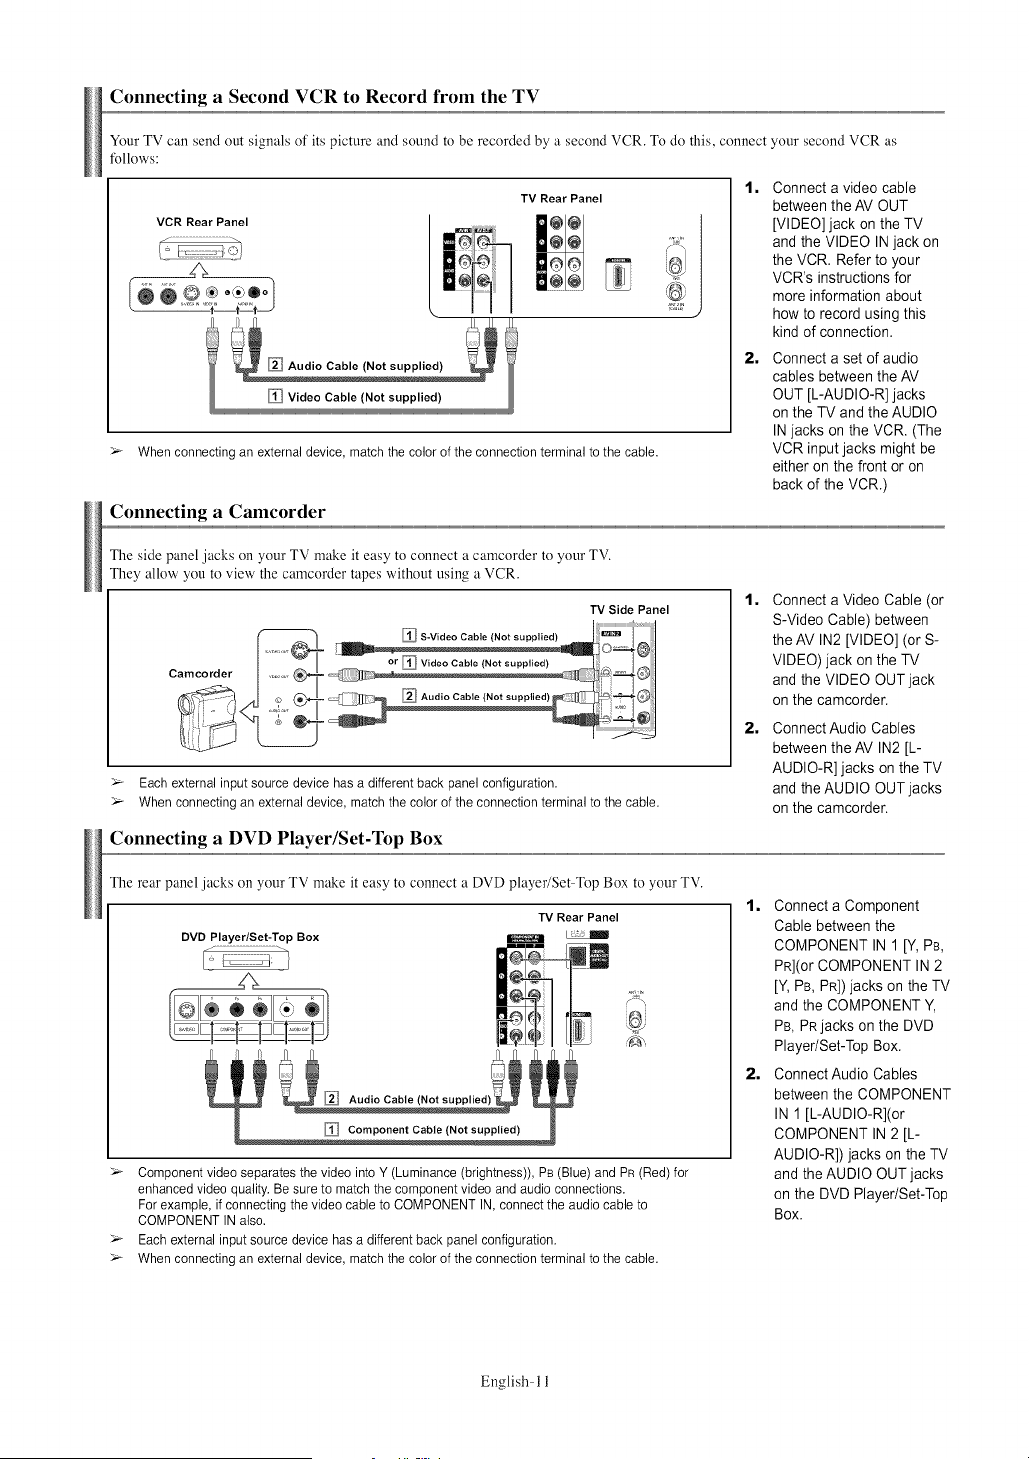
Connecting a Second VCR to Record from the TV
Your TV can send out signals of its picture and sound to be recorded by a second VCR. To do this, connect your second VCR as
fbllows:
TV Rear Panel
> When connecting an external device, match the color of the connection terminal to the cable.
1=
2=
Connect a video cable
between the AV OUT
[VIDEO] jack on the TV
and the VIDEO IN jack on
the VCR. Refer to your
VCR's instructions for
more information about
how to record using this
kind of connection.
Connect a set of audio
cables between the AV
OUT [L-AUDIO-R] jacks
on the TV and the AUDIO
IN jacks on the VCR. (The
VCR input jacks might be
either on the front or on
back of the VCR.)
Connecting a Camcorder
The side panel jacks on your TV make it easy to connect a camcorder to your TV.
They allow you to view the camcorder tapes without using a VCR.
Camcorder
> Each external input source device has a different back panel configuration.
> When connecting an external device, match the color of the connection terminal to the cable.
Connecting a DVD Player/Set-Top Box
1=
2=
Connect a Video Cable (or
S-Video Cable) between
the AV IN2 [VIDEO] (or S-
VIDEO) jack on the TV
and the VIDEO OUT jack
on the camcorder.
Connect Audio Cables
between the AV IN2 [L-
AUDIO-R] jacks on the TV
and the AUDIO OUT jacks
on the camcorder.
The rear panel jacks on your TV make it easy to connect a DVD player/Set Top Box to your TV.
DVD Player/Set-Top Box
Audio Cable (Not supplied)
TV Rear Panel
P{
Component Cable (Not supplied)
> Component video separates the video into Y (Luminance (brightness)), PB (Blue) and PR (Red) for
enhanced video quality. Be sure to match the component video and audio connections.
For example, if connecting the video cable to COMPONENT IN, connect the audio cable to
COMPONENT IN also.
> Each external input source device has a different back panel configuration.
> When connecting an external device, match the color of the connection terminal to the cable.
1, Connect a Component
Cable between the
COMPONENT IN 1 [Y, PB,
PR](OrCOMPONENT IN 2
[Y, PB, PR]) jacks on the TV
and the COMPONENT Y,
PB, PRjacks on the DVD
Player/Set-Top Box.
2, Connect Audio Cables
between the COMPONENT
IN 1 [L-AUDIO-R](or
COMPONENT IN 2 [L-
AUDIO-R]) jacks on the TV
and the AUDIO OUT jacks
on the DVD Player/Set-Top
Box.
English- 11
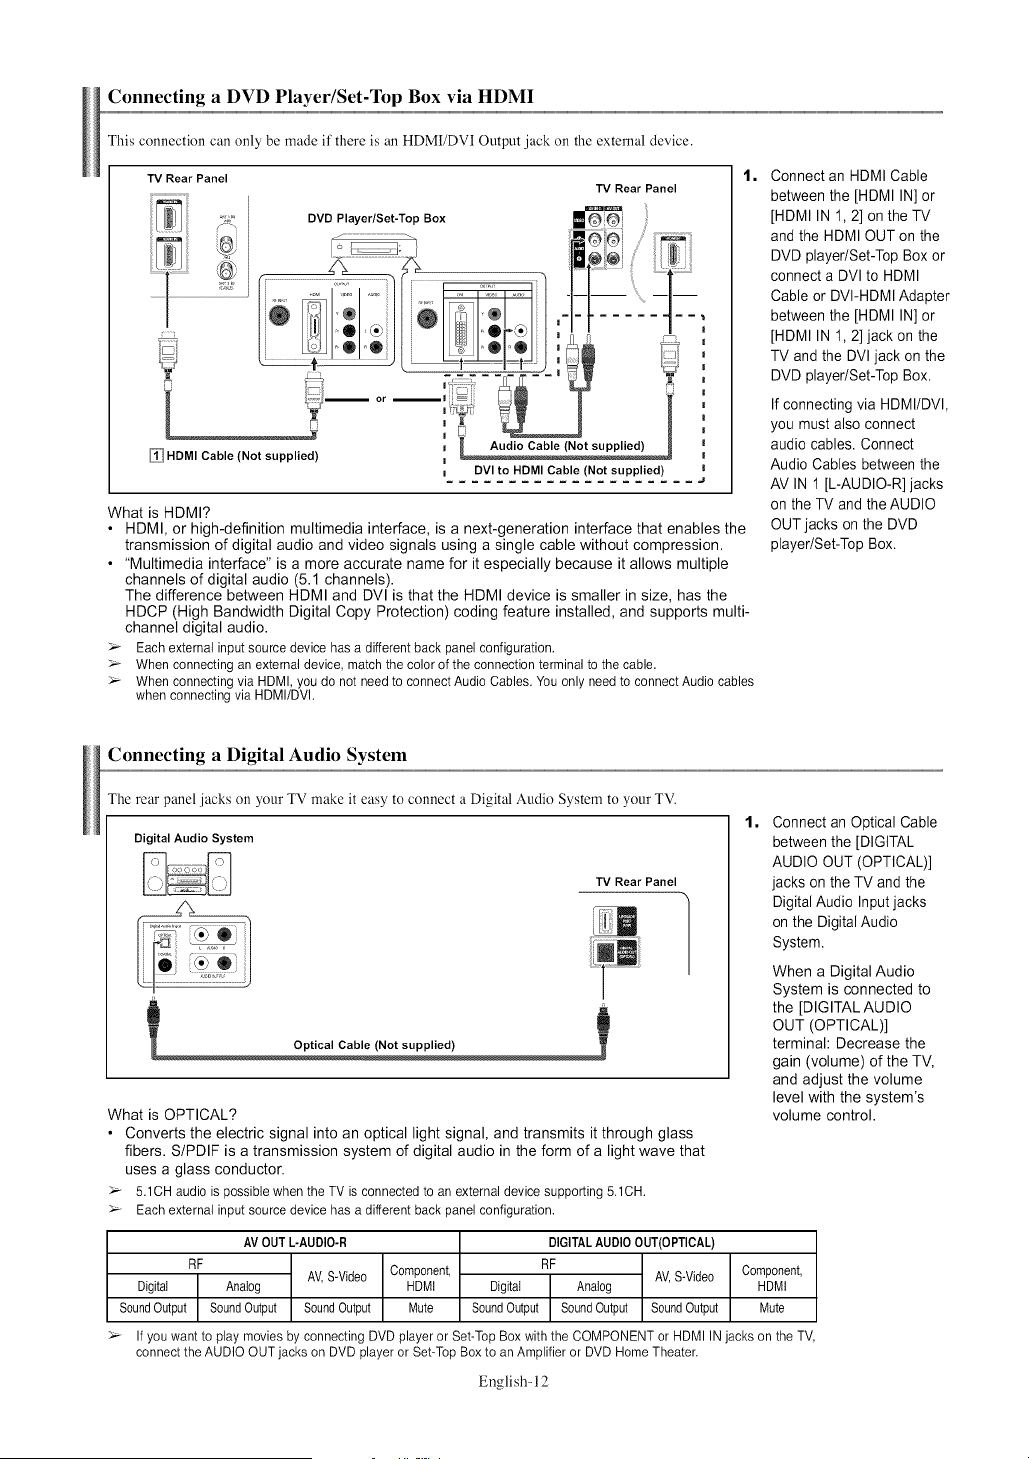
Connecting a DVD Player/Set-Top Box via HDMI
This connection can only be made if there is an HDMI/DVI Output jack on the external device.
TV Rear Panel
HDMI Cable {Not supplied)
TV Rear Panel
m DVI to HDMI Cable {Not supplied)
1=
What is HDMI?
• HDMI, or high-definition multimedia interface, _sa next-generation interface that enables the
transmission of digital audio and video signals using a single cable without compression.
• "Multimedia interface" is a more accurate name for it especially because it allows multiple
channels of digital audio (5.1 channels).
The difference between HDMI and DVl is that the HDMI device is smaller in size, has the
HDCP (High Bandwidth Digital Copy Protection) coding feature installed, and supports multi-
channel digital audio.
> Eachexternalinputsourcedevicehas a differentbackpanelconfiguration.
> Whenconnectinganexternaldevice,matchthe colorof the connectionterminalto the cable.
> Whenconnectingvia HDMI,you do not needto connectAudioCables.Youonlyneedto connectAudiocables
whenconnectingvia HDMI/DVh
Connect an HDMI Cable
between the [HDMI IN] or
[HDMI IN 1,2] on the TV
and the HDMI OUT on the
DVD player/Set-Top Box or
connect a DVI to HDMI
Cable or DVI-HDMI Adapter
between the [HDMI IN] or
[HDMI IN 1,2] jack on the
TV and the DVI jack on the
DVD player/Set-Top Box.
If connecting via HDMI/DVI,
you must also connect
audio cables. Connect
Audio Cables between the
AV IN 1 [L-AUDIO-R] jacks
on the TV and the AUDIO
OUT jacks on the DVD
player/Set-Top Box.
Connecting a Digital Audio System
The rear panel jacks on your TV make it easy to connect a Digital Audio System to your TV.
Digital Audio System
TV Rear Panel
What is OPTICAL?
• Converts the electric signal into an optical light signal, and transmits it through glass
fibers. S/PDIF is a transmission system of digital audio in the form of a light wave that
uses a glass conductor.
> 5.1CHaudioispossiblewhenthe TV is connectedto an externaldevicesupporting5.1CH.
> Eachexternalinputsourcedevicehas a differentbackpanelconfiguration.
1=
Connect an Optical Cable
between the [DIGITAL
AUDIO OUT (OPTICAL)]
jacks on the TV and the
Digital Audio Input jacks
on the Digital Audio
System.
When a Digital Audio
System is connected to
the [DIGITAL AUDIO
OUT (OPTICAL)[
terminal: Decrease the
gain (volume) of the TV,
and adjust the volume
level with the system's
volume control.
RF
Digital
SoundOutput
AV OUTL-AUDIO-R
AV,S-Video
Analog
SoundOutput SoundOutput
Component,
HDMI
Mute
DIGITALAUDIOOUT(OPTICAL)
RF
AV,S-Video
Digital Analog
SoundOutput SoundOutput SoundOutput
Component,
HDMI
Mute
> If you want to play movies by connecting DVD player or Set-Top Box with the COMPONENT or HDMI IN jacks on the TV,
connect the AUDIO OUT jacks on DVD player or Set-Top Box to an Amplifier or DVD Home Theater.
English-12
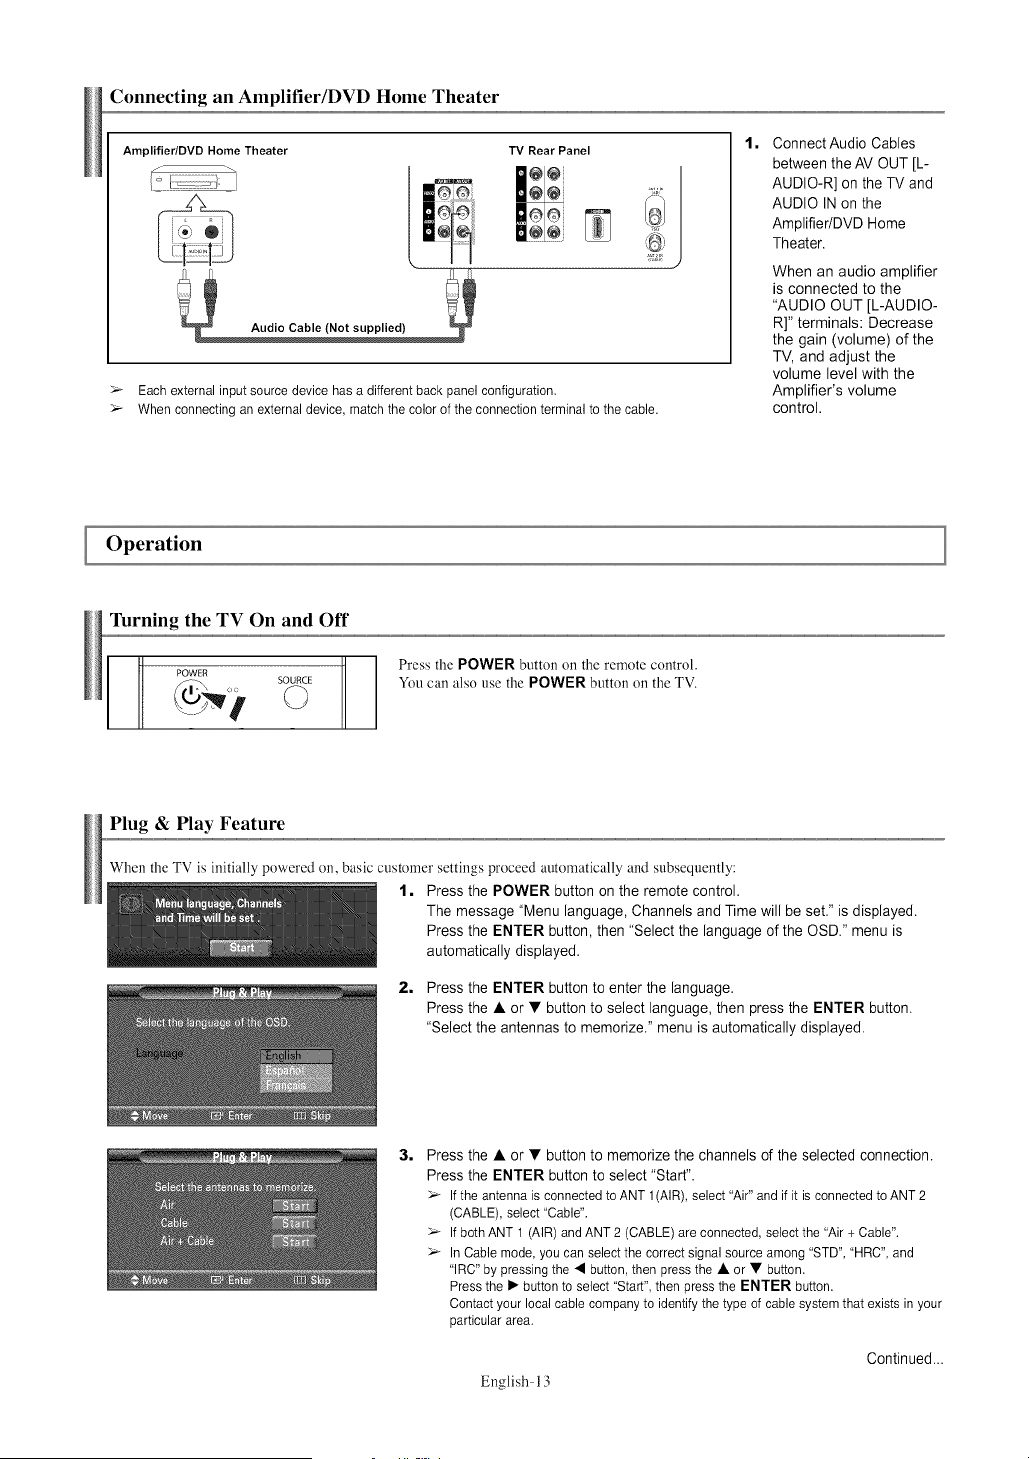
Connecting an Amplifier/DVD Home Theater
Amplifier/DVD Home Theater
TV Rear Panel
@@
ee
E
Audio Cable (Not supplied)
>_ Each external input source device has a different back panel configuration.
>_ When connecting an external device, match the color of the connection terminal to the cable.
1= Connect Audio Cables
between the AV OUT [L-
AUDIO-R] on the TV and
AUDIO IN on the
Amplifier/DVD Home
Theater.
When an audio amplifier
is connected to the
"AUDIO OUT [L-AUDIO-
R]" terminals: Decrease
the gain (volume) of the
TV, and adjust the
volume level with the
Amplifier's volume
control.
Operation
Turning the TV On and Off
POWER
SOURCE
Press the POWER button on the remote control.
You can also use the POWER button on the TV.
Plug & Play Feature
When the TV is initially powered on, basic customer settings proceed automatically and subsequently:
1, Press the POWER button on the remote control.
The message "Menu language, Channels and Time will be set." is displayed.
Press the ENTER button, then "Select the language of the OSD." menu is
automatically displayed.
2, Press the ENTER button to enter the language.
Press the • or • button to select language, then press the ENTER button.
"Select the antennas to memorize." menu is automatically displayed.
3= Press the • or • button to memorize the channels of the selected connection.
Press the ENTER button to select "Start".
>_ If the antenna is connected to ANT 1 (AIR), select "Air" and if it is connected to ANT 2
(CABLE), select "Cable".
>_ If both ANT 1 (AIR) and ANT 2 (CABLE) are connected, select the "Air + Cable".
>_ In Cable mode, you can select the correct signal source among "STD", "HRC", and
"IRC" by pressing the • button, then press the • or • button.
Press the I_ button to select "Start", then press the ENTER button.
Contact your local cable company to identify the type of cable system that exists in your
particular area.
Continued...
English- 13
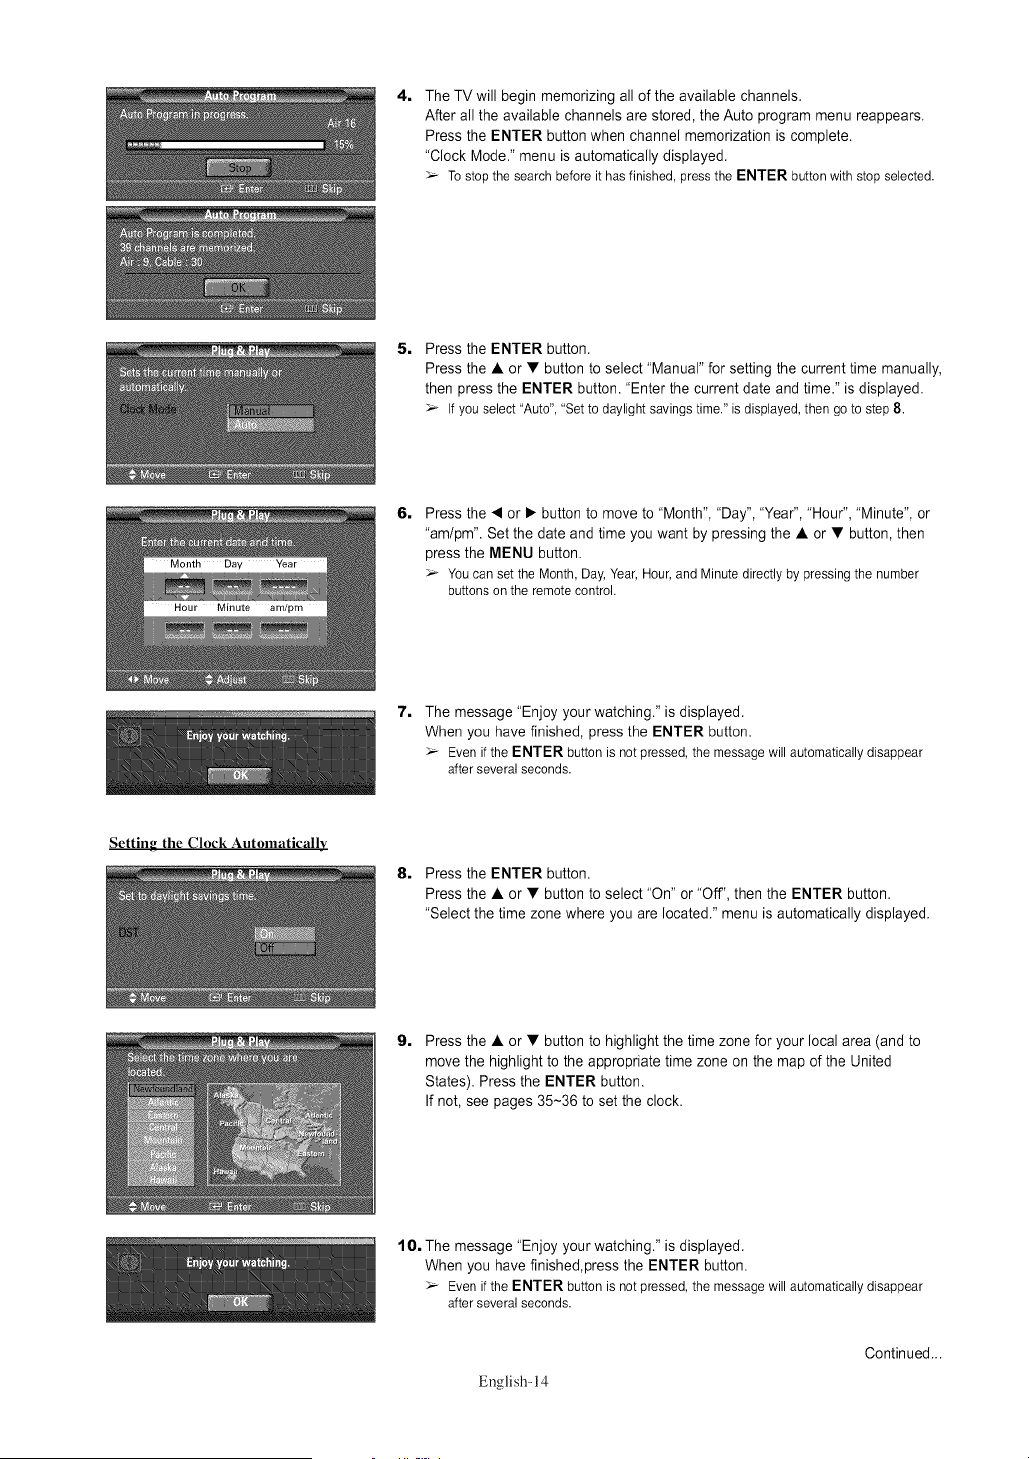
4, The TV will begin memorizing all of the available channels.
After all the available channels are stored, the Auto program menu reappears.
Press the ENTER button when channel memorization is complete.
"Clock Mode." menu is automatically displayed.
_-_ Tostopthe searchbeforeit hasfinished,pressthe ENTER buttonwithstopselected.
5, Press the ENTER button.
Press the • or • button to select "Manual" for setting the current time manually,
then press the ENTER button. "Enter the current date and time." is displayed.
_-_ If youselect"Auto","Set to daylightsavingstime."is displayed,then goto step8.
6,
Press the • or • button to move to "Month", "Day", "Year", "Hour", "Minute", or
"am/pm". Set the date and time you want by pressing the • or • button, then
press the MENU button.
_-_ Youcansetthe Month,Day,Year,Hour,andMinutedirectlyby pressingthe number
buttonson the remotecontrol.
7. The message "Enjoy your watching." is displayed.
When you have finished, press the ENTER button.
_-_ Even if the ENTER button is not pressed, the message will automatically disappear
after several seconds.
Setting the Clock Automatically
8, Press the ENTER button.
Press the • or • button to select "On" or "Off", then the ENTER button.
"Select the time zone where you are located." menu is automatically displayed.
9,
Press the • or • button to highlight the time zone for your local area (and to
move the highlight to the appropriate time zone on the map of the United
States). Press the ENTER button.
If not, see pages 35-36 to set the clock.
10, The message "Enjoy your watching." is displayed.
When you have finished,press the ENTER button.
_-_ Evenif the ENTER buttonis notpressed,the messagewill automaticallydisappear
afterseveralseconds.
English-14
Continued...
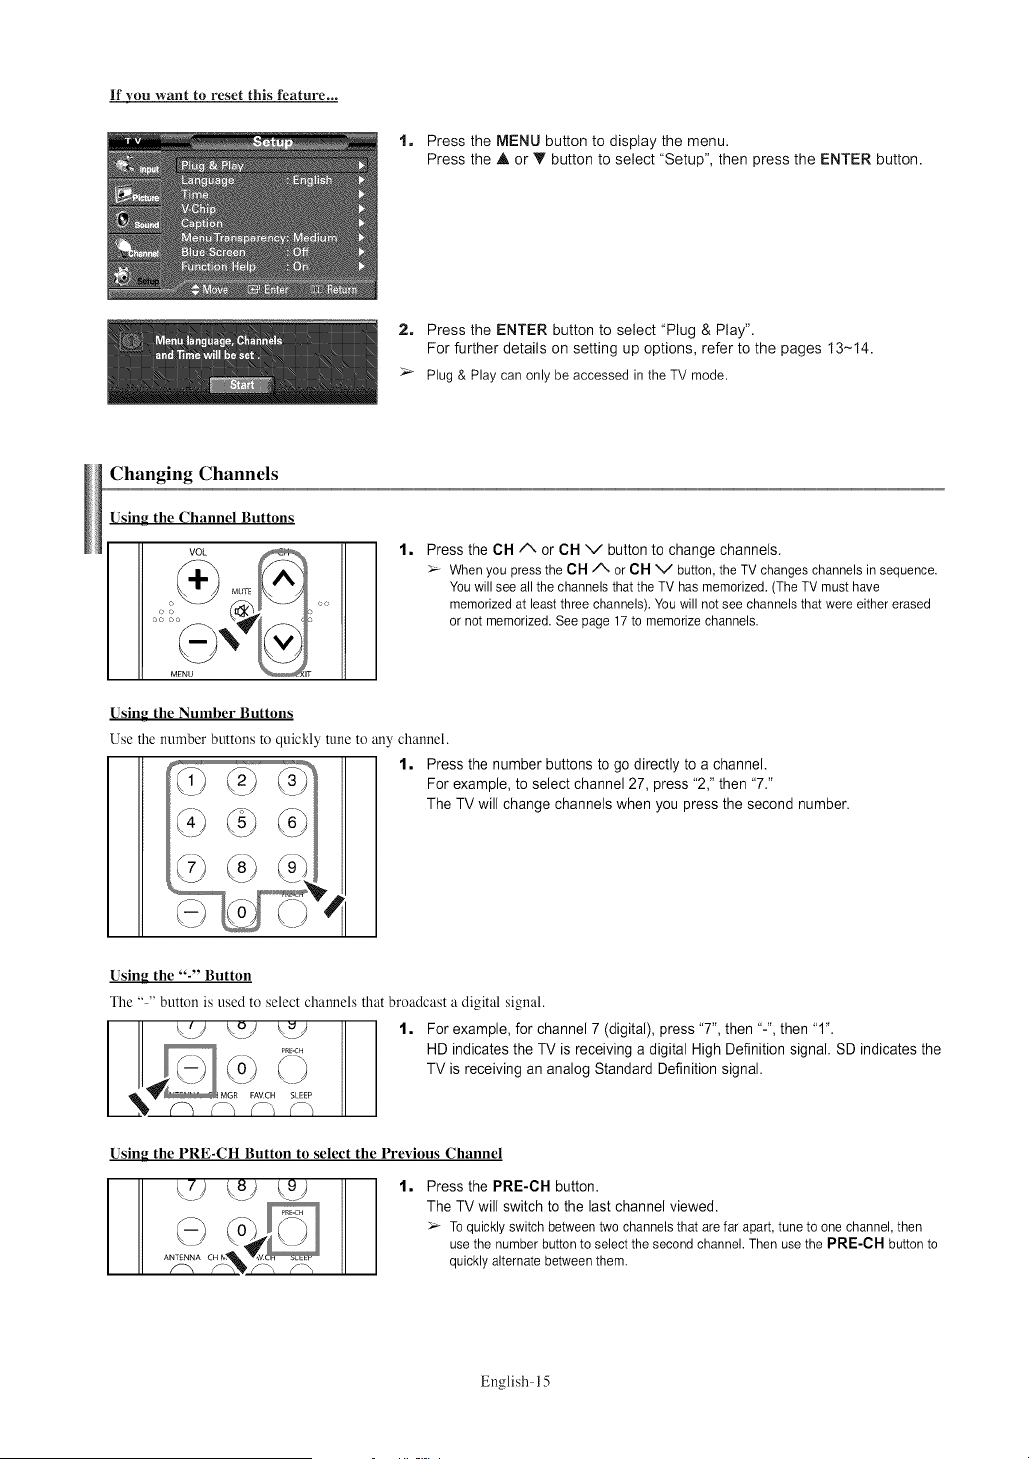
If you want to reset this feature...
1, Press the MENU button to display the menu.
Press the A or Y button to select "Setup", then press the ENTER button.
2, Press the ENTER button to select "Plug & Play".
For further details on setting up options, refer to the pages 13-14.
Plug & Play can only be accessed in the TV mode.
Changing Channels
Using the Channel Buttons
VOL
e o • rc
l,
Press the CH/", or CH v button to change channels.
:_ When you press the CH/X or CH V button, the TV changes channels in sequence.
You will see all the channels that the TV has memorized. (The TV must have
memorized at least three channels). You will not see channels that were either erased
or not memorized. See page 17 to memorize channels.
Usin_ the Number Buttons
Use the number buttons to quickly tune to any channel.
1, Press the number buttons to go directly to a channel.
For example, to select channel 27, press "2," then "7."
The TV will change channels when you press the second number.
Using the "-" Button
The .... button is used to select channels that broadcast a digital signal.
1, For example, for channel 7 (digital), press "7", then "-", then "1".
HD indicates the TV is receiving a digital High Definition signal. SD indicates the
TV is receiving an analog Standard Definition signal.
Using the PRE-CH Button to select the Previous Channel
l, Press the PRE-CH button.
The TV will switch to the last channel viewed.
To quickly switch between two channels that are far apart, tune to one channel, then
use the number button to select the second channel. Then use the PRE-CH button to
quickly alternate between them.
English- 15
AdjustingtheVolume
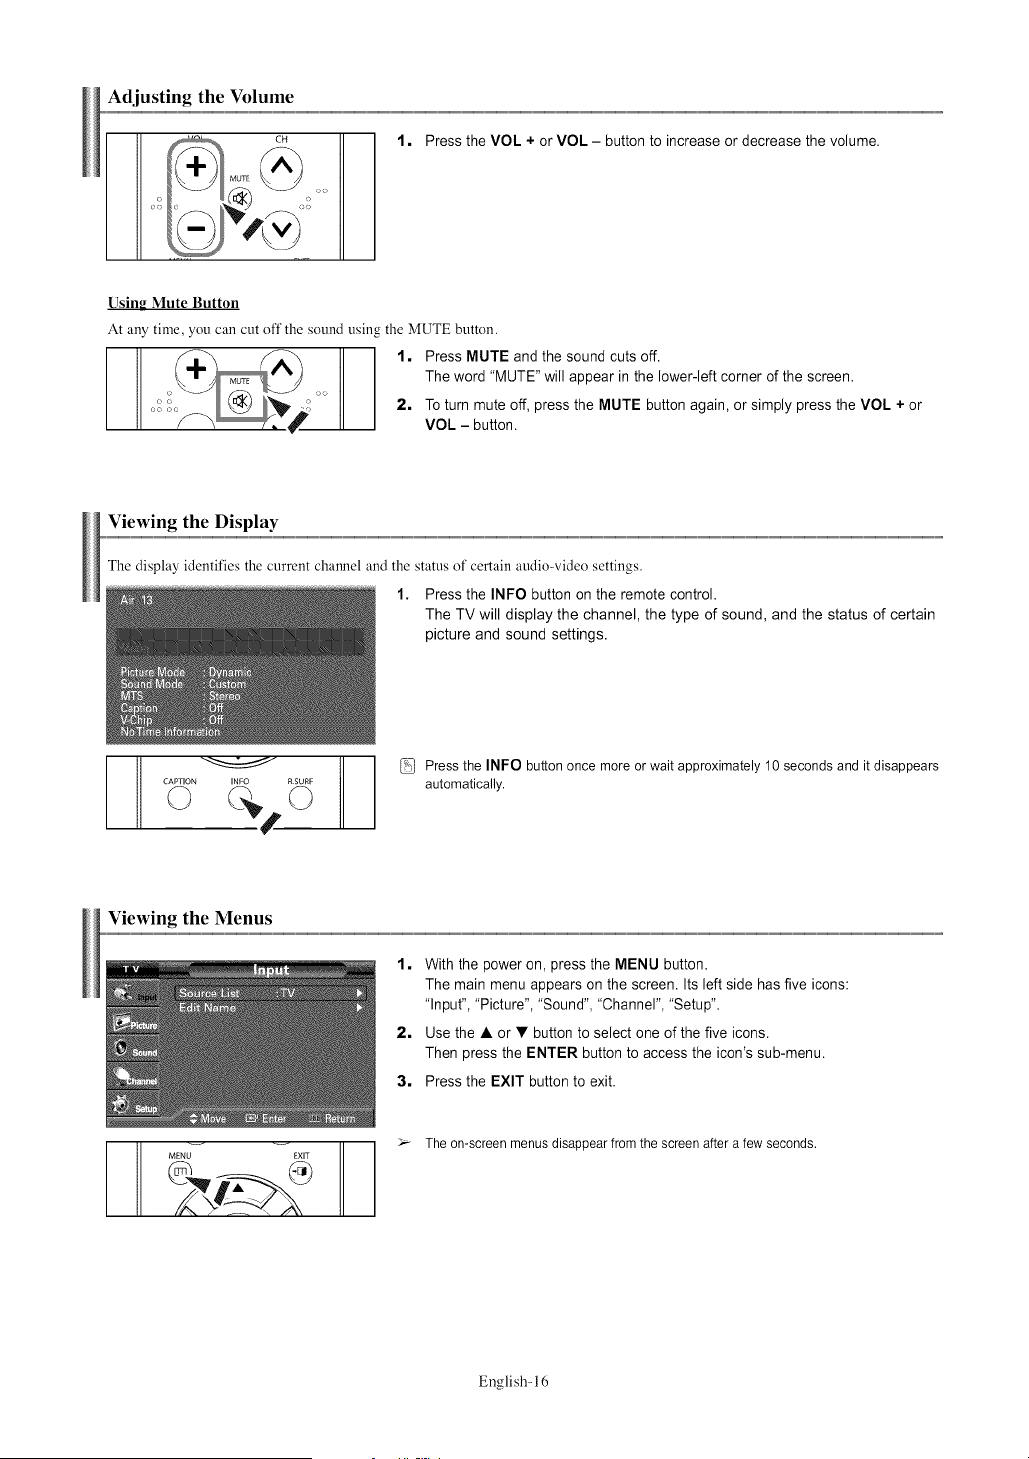
1. Press the VOL + or VOL - button to increase or decrease the volume.
Using Mute Button
At any time, you can cut off the sound using the MUTE button.
1. Press MUTE and the sound cuts off.
The word "MUTE" will appear in the lower-left corner of the screen.
2. To turn mute off, press the MUTE button again, or simply press the VOL + or
VOL - button.
Viewing the Display
The display identifies the current channel and the status of certain audiowideo settings.
1. Press the INFO button on the remote control.
The TV will display the channel, the type of sound, and the status of certain
picture and sound settings.
II1%
CAPTION INFO R SURF
© ©
Press the INFO button once more or wait approximately 10 seconds and it disappears
automatically.
Viewing the Menus
1. With the power on, press the MENU button.
The main menu appears on the screen. Its left side has five icons:
"Input", "Picture", "Sound", "Channel", "Setup".
2. Use the • or • button to select one of the five icons.
Then press the ENTER button to access the icon's sub-menu.
3. Press the EXIT button to exit.
MENU EXIT
> The on-screen menus disappear from the screen after a few seconds.
English-16
Memorizing the Channels
Your TV can memorize and store all of the available channels tk_rboth "off' air" (air) and cable channels.
After the available channels are memorized, use the CH A or CH V button to scan through the channels.
This eliminates the need to change channels by entering the channel digits. There are three steps tbr memorizing channels:
selecting a broadcast source, memorizing the channels (amomatic) and adding and deleting channels (manual).
Selecting the Video Signal-source
Before your television can begin memorizing the available channels, you must specify the type of signal source that is connected to the
TV (i.e. an air or a cable system).
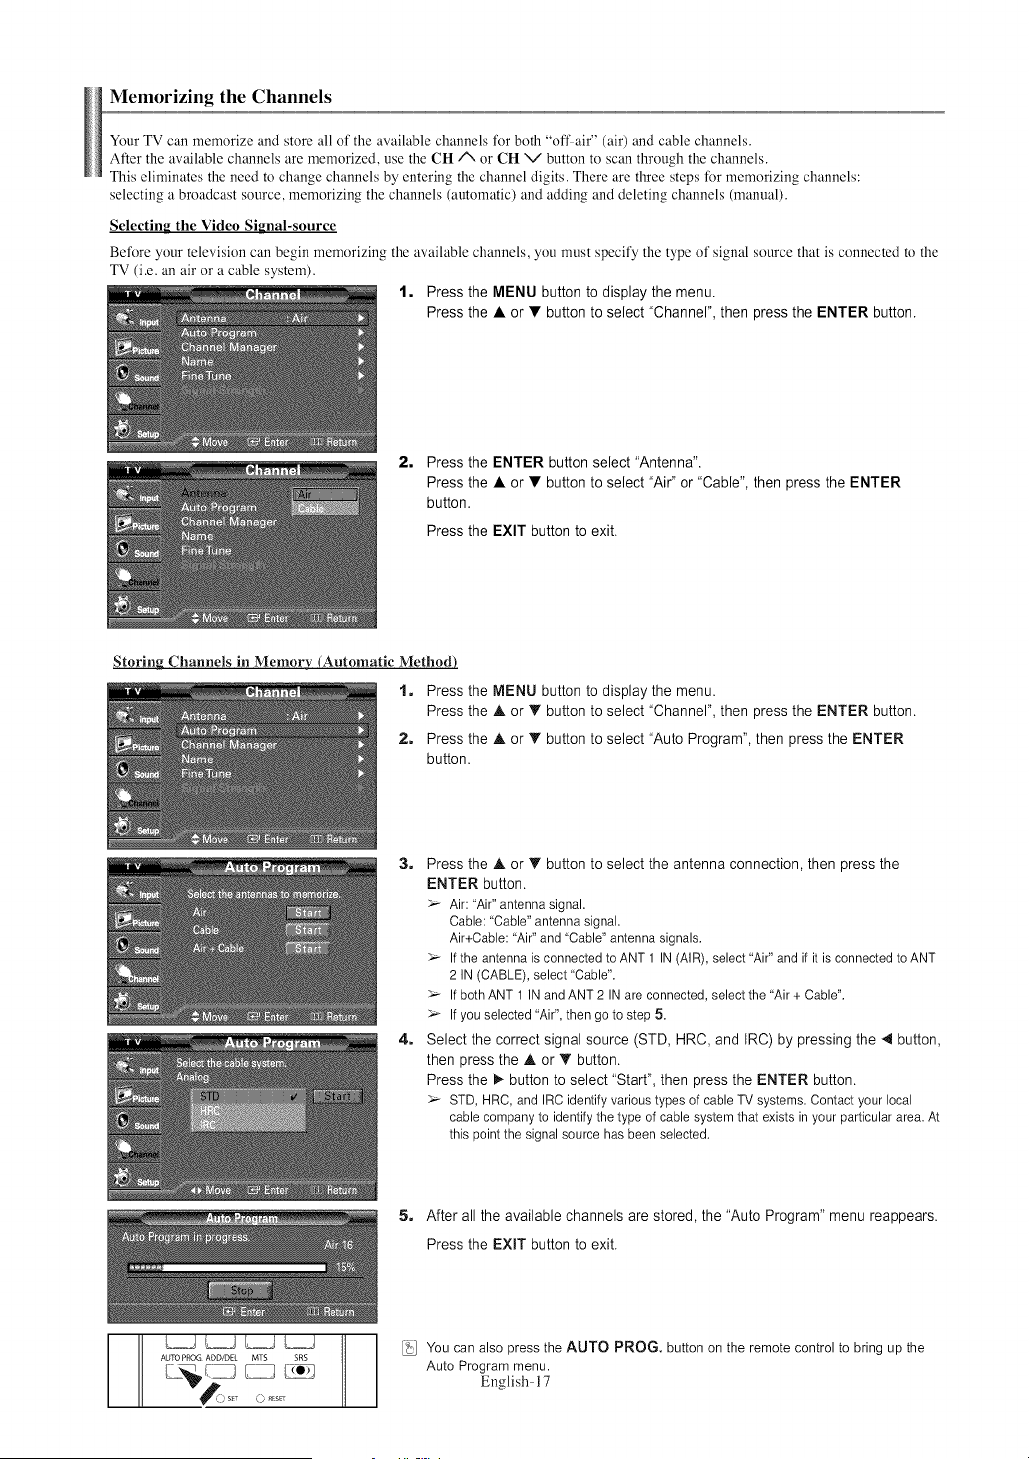
1. Press the MENU button to display the menu.
Press the • or • button to select "Channel", then press the ENTER button.
2. Press the ENTER button select "Antenna".
Press the • or • button to select "Air" or "Cable", then press the ENTER
button.
Press the EXIT button to exit.
Storing Channels in Memory (Automatic Method)
1. Press the MENU button to display the menu.
Press the • or • button to select "Channel", then press the ENTER button.
2. Press the • or • button to select "Auto Program", then press the ENTER
button.
3. Press the • or • button to select the antenna connection, then press the
ENTER button.
> Air: 'Air" antenna signal.
Cable: 'Cable" antenna signal.
Air+Cable: 'Air" and 'Cable" antenna signals.
If the antenna is connected to ANT 1 IN (AIR), select 'Air" and if it is connected to ANT
2 IN (CABLE), select 'Cable".
If both ANT 1 IN and ANT 2 IN are connected, select the 'Air + Cable".
If you selected 'Air", then go to step 5.
4. Select the correct signal source (STD, HRC, and IRC) by pressing the 4 button,
then press the • or • button.
Press the _- button to select "Start", then press the ENTER button.
STD, HRC, and IRC identify various types of cable TV systems. Contact your local
cable company to identify the type of cable system that exists in your particular area. At
this point the signal source has been selected.
5. After all the available channels are stored, the "Auto Program" menu reappears.
Press the EXIT button to exit.
AUTO PROG ADD/DEL MTS SRS
You can also press the AUTO PROG. button on the remote control to bring up the
Auto Program menu.
English- 17
Setting Up Your Remote Control
After it has been set up properly, your remote control can operate in five different modes: TV, VCR, Cable, DVD, or Set Top Box.
Pressing the corresponding button on the remote control allows you to switch between these modes, and control whichever piece of
equipment you choose.
:'_ The remote control might not be compatible with all DVD Players, VCRs, Cable boxes, and Set-Top Boxes.
AUTO PROG ADD/DEL MTS SRS
)sEr F) R_SEr
_AMSUNG
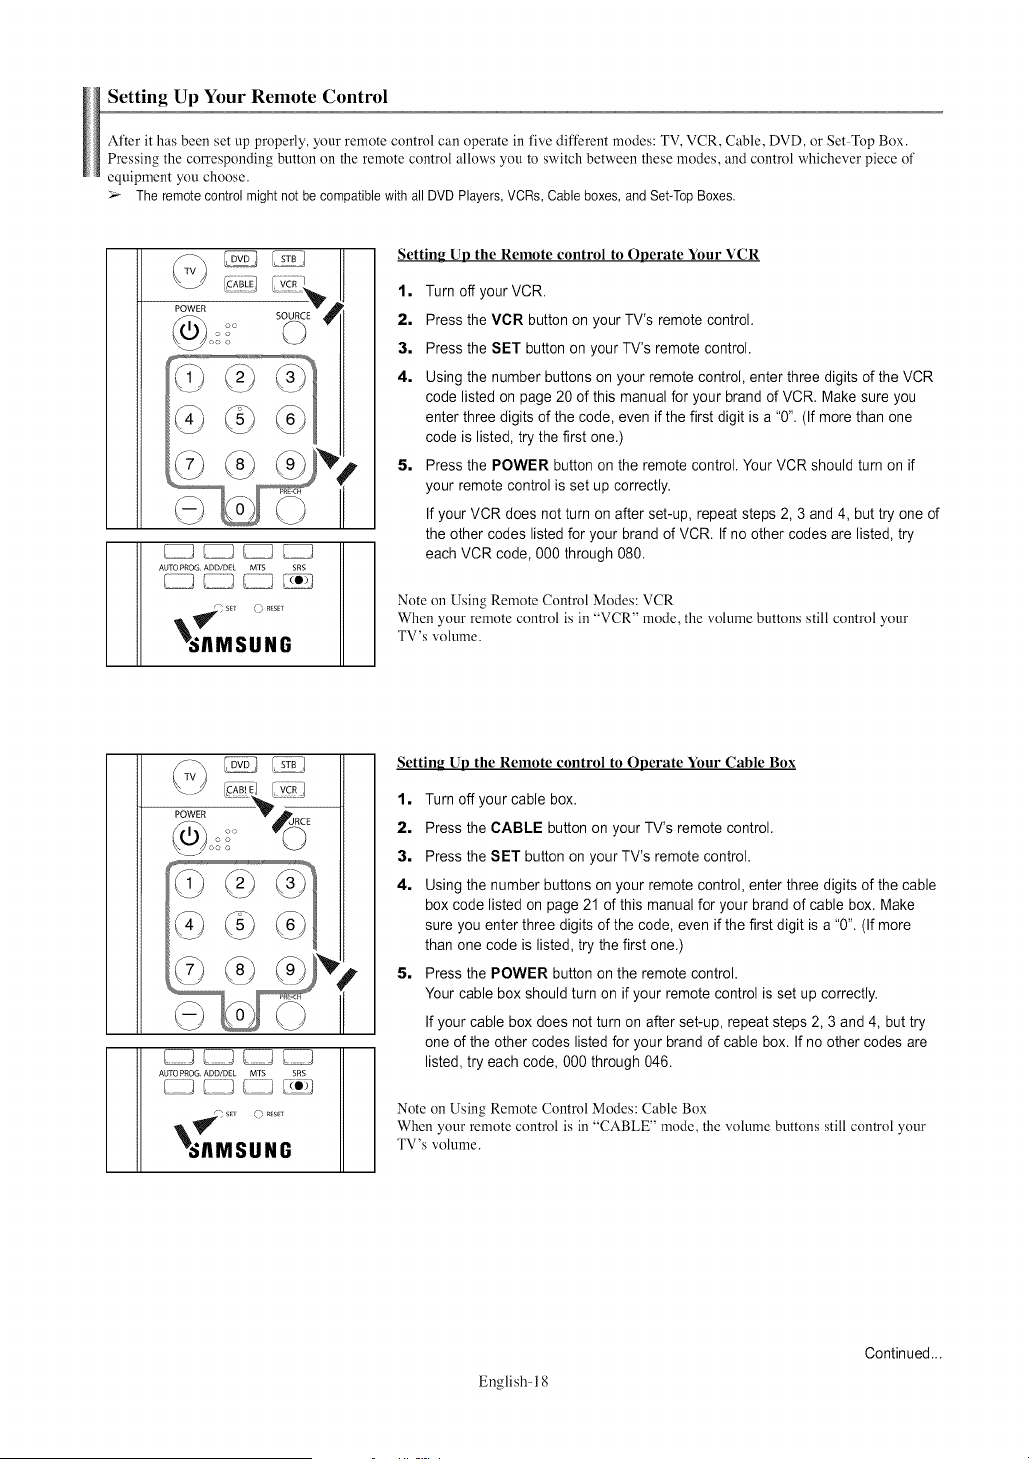
Setting Up the Remote control to Operate Your VCR
1, Turn off your VCR.
2, Press the VCR button on your TV's remote control.
3, Press the SET button on your TV's remote control.
4, Using the number buttons on your remote control, enter three digits of the VCR
code listed on page 20 of this manual for your brand of VCR. Make sure you
enter three digits of the code, even if the first digit is a "0". (If more than one
code is listed, try the first one.)
5, Press the POWER button on the remote control. Your VCR should turn on if
your remote control is set up correctly.
If your VCR does not turn on after set-up, repeat steps 2, 3 and 4, but try one of
the other codes listed for your brand of VCR. If no other codes are listed, try
each VCR code, 000 through 080.
Note on Using Remote Control Modes: VCR
When your remote control is in "VCR" mode, the volume buttons still control your
TV's volume.
AUTO PROG ADD/DEL MTS SRS
_;AMSUNG
Setting Up the Remote control to Operate Your Cable Box
1, Turn off your cable box.
2, Press the CABLE button on your TV's remote control.
3, Press the SET button on your TV's remote control.
4, Using the number buttons on your remote control, enter three digits of the cable
box code listed on page 21 of this manual for your brand of cable box. Make
sure you enter three digits of the code, even if the first digit is a "0". (If more
than one code is listed, try the first one.)
5, Press the POWER button on the remote control.
Your cable box should turn on if your remote control is set up correctly.
If your cable box does not turn on after set-up, repeat steps 2, 3 and 4, but try
one of the other codes listed for your brand of cable box. If no other codes are
listed, try each code, 000 through 046.
Note on Using Remote Control Modes: Cable Box
When your remote control is in "CABLE" mode, the volume buttons still control your
TV's volume.
English- 18
Continued...
POWER
AUTO PROG ADD/DEL MTS SRS
_ sE_ O r_ESET
_JIMSUNG
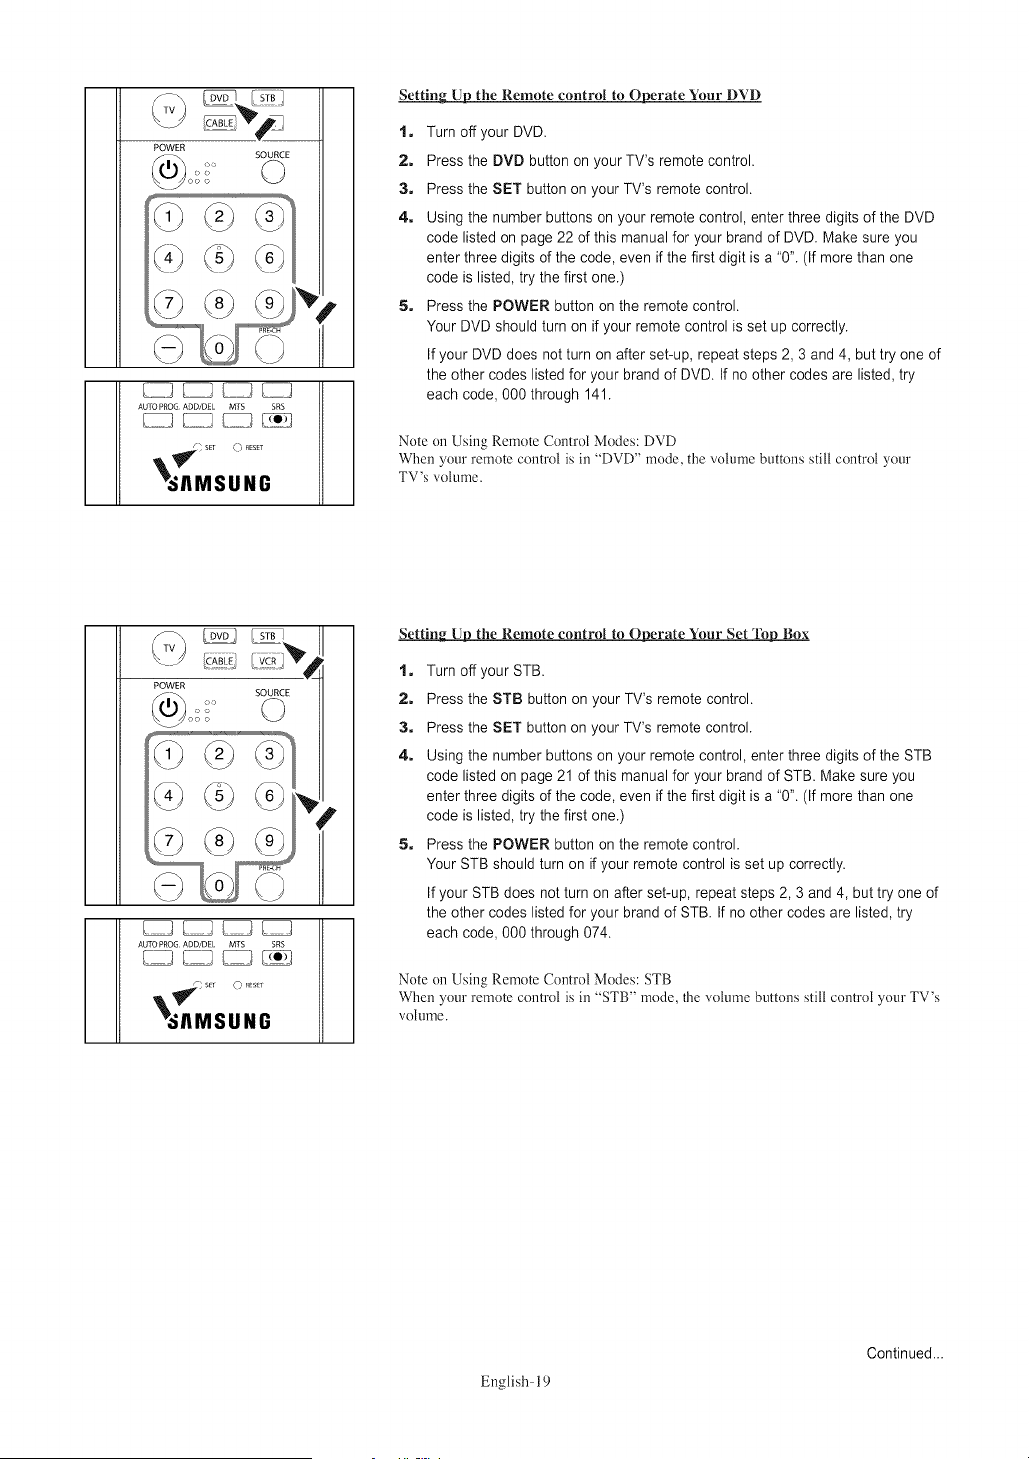
Setting Up the Remote control to Operate Your DVD
1. Turn off your DVD.
2. Press the DVD button on your TV's remote control.
3. Press the SET button on your TV's remote control.
4. Using the number buttons on your remote control, enter three digits of the DVD
code listed on page 22 of this manual for your brand of DVD. Make sure you
enter three digits of the code, even if the first digit is a "0". (If more than one
code is listed, try the first one.)
5. Press the POWER button on the remote control.
Your DVD should turn on if your remote control is set up correctly.
If your DVD does not turn on after set-up, repeat steps 2, 3 and 4, but try one of
the other codes listed for your brand of DVD. If no other codes are listed, try
each code, 000 through 141.
Note on Using Remote Control Modes: DVD
When your remote control is in "DVD" mode, the volume buttons still control your
TV's volume.
AUTO PROG ADD/DEI MTS SRS
_AMSUNG
Settinu_DUUthe Remote control to Operate Your Set _ Box
1. Turn off your STB.
2. Press the STB button on your TV's remote control.
3. Press the SET button on your TV's remote control.
4. Using the number buttons on your remote control, enter three digits of the STB
code listed on page 21 of this manual for your brand of STB. Make sure you
enter three digits of the code, even if the first digit is a "0". (If more than one
code is listed, try the first one.)
5. Press the POWER button on the remote control.
Your STB should turn on if your remote control is set up correctly.
If your STB does not turn on after set-up, repeat steps 2, 3 and 4, but try one of
the other codes listed for your brand of STB. If no other codes are listed, try
each code, 000 through 074.
Note on Using Remote Control Modes: STB
When your remote control is in "STB" mode, the volume buttons still control your TV's
volume.
English- 19
Continued...
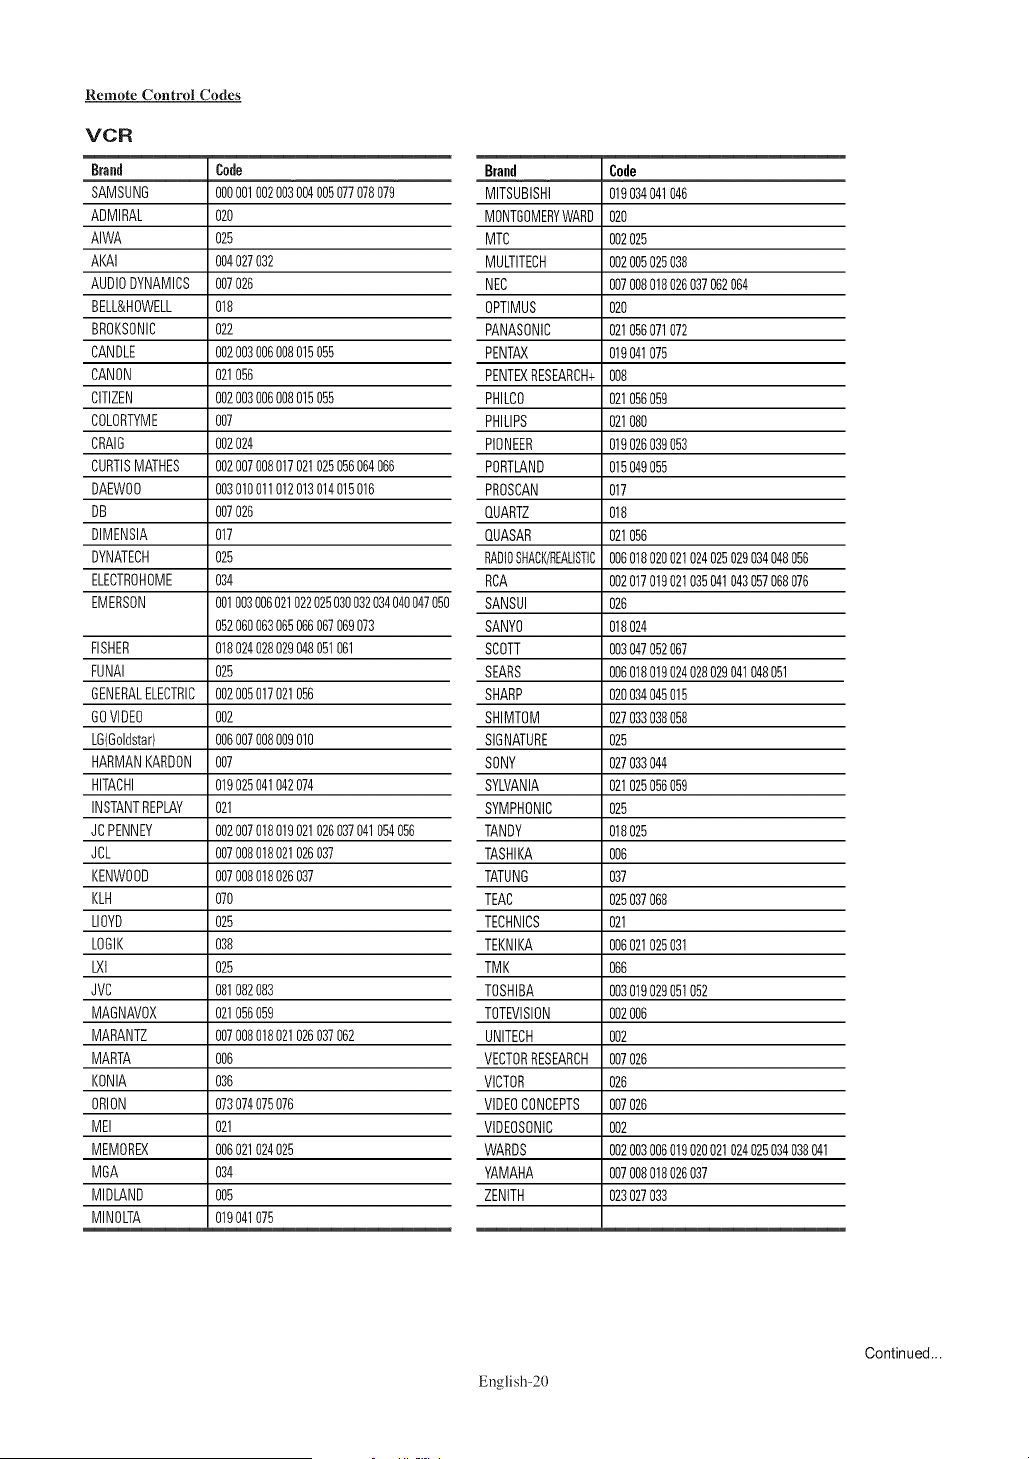
Remote Control Codes
VCR
Brand Code
SAMSUNG 0O0001002003004005077078079
ADMIRAL 020
AIWA 025
AKAI 004027032
AUDIODYNAMICS 007026
BELL&H0WELL 018
BROKSONIC 022
CANDLE 002003006008015055
CANON 021056
CITIZEN 002003006008015055
COLORTYME 007
0RAIG 002024
CURTISMATHES 002007008017021025056064066
DAEWOO 003010011012013014015016
DB 007026
DIMENSIA 017
DYNATECH 025
ELECTROHOME 034
EMERSON 001003006021022025030032034040047050
052060063065066067069073
FISHER 018024028029048051061
FUNAI 025
GENERALELECTRIC 002005017021056
GOVIDEO 002
LG(Goldstar) 006007008009010
HARMANKARDON 007
HITACHI 019025041042074
INSTANTREPLAY 021
JCPENNEY 002007018019021026037041054056
JCL 007008018021026037
KENWOOD 007008018026037
KLH 070
LLOYD 025
LOGIK 038
LXl 025
JVO 081082083
MAGNAVOX 021056059
MARANTZ 007008018021026037062
MARTA 006
KONIA 036
ORION 073074075076
MEI 021
MEMOREX 006021024025
MGA 034
MIDLAND 005
MINOLTA 019041075
Brand Code
MITSUBISHi 019034041046
MONTGOMERYWARD020
MTC 002025
MULTITECH 002005025038
NEC 007008018026037062064
0PTIMUS 020
PANASONIC 021056071072
PENTAX 019041075
PENTEXRESEARCH+008
PHILCO 021056059
PHILIPS 021080
PIONEER 019026039053
PORTLAND 015049056
PROSCAN 017
QUARTZ 018
QUASAR 021056
RADI0SHAOK/REAUSTIC006018020021024025029034048056
RCA 002017019021035041043057068076
SANSUI 026
SANYO 018024
SCOTT 003047052067
SEARS 006018019024028029041048051
SHARP 020034045015
SHIMTOM 027033038058
SIGNATURE 025
SONY 027033044
SYLVANIA 021025056059
SYMPHONIC 025
TANDY 018025
TASHIKA 006
TATUNG 037
TEAC 025037068
TECHNICS 021
TEKNIKA 006021025031
TMK 066
TOSHIBA 003019029051052
TOTEVISION 002006
UNITECH 002
VECTORRESEARCH 007026
VICTOR 026
VIDEOCONCEPTS 007026
VIDEOSONIC 002
WARDS 002003006019020021024025034038041
YAMAHA 007008018026037
ZENITH 023027033
English-20
Continued...

CABLE BOX
Brand Cede
SAMSUNG 000001002003004006006007
GI 041
HAMLIN 003024031
HITACHI 025030
JERROLD 038039
MACOM 025030
NAGNAVOX 019023028
OAK 026
PANASONIC 003022027037044
PHILIPS 019021023028
PIONEER 004018020044
RCA 014022040
REGAL 003
SAMSUNG SET-TOP BOX
Product Code
GroundwaveSTB 001002
SatelliteSTB 003
CABLESTB 004
STBDVDCOMBO 008
SatelliteSTBHDDCOMBOStandard 009
Brand Code
REGENCY 015023
SA 042043
SCIENTIFICATLAN 042043
SPRUCER 022
STARGATE2000 036
SYLVANIA 016
TEXSCAN 016
TOCOM 032
UNIVERSAL 033034
VIEWSTAR 019021023028
WAMERAMEX 046
ZENITH 017029035037045
Product Code
SatelliteSTBHDDCOMBOPremium 010
CABLESTBHDDCOMBOStandard 011
CABLESTBHDDCOMBOPremium 012
GroundwaveSTBHDDCOMBOStandard013
GroundwaveSTBHDDCOMBOPremium014
SET-TOP BOX
Brand Code
ALPHASTAR 023
ANAM 043
CHANNELMASTER 018034
CROSSDIGITAL 019
CHAPARRAL 035
DIRECTTV 015016017019022045060061062065066067
068
DAEWO0 074
DISHNETW0RKSYSTEM069070
DISHPR0 069
DRAKE 018024032
DXANTENNA 027
ECHOSTAR 025069070071
EXPRESSVU 069
G01 069
GE 065
GENERALINSTRUMENT046047048063064
HTS 069
HOMECABLE 056
HITACHI 022
HUGHESNETWORK 015017
IQ 020
IQPRISM 020
JANEIL 059
JERROID 063
JVC 069070
Brand Code
LG(Goldstar) 044073
MAGNAVOX 016021036038039040041042
MEMOREX 016
MOTOROLA 064
MACON 018
MITSUBISHI 015
NEXTLEVEL 047048064
PHILIPS 015016017021033036038039040041042067
PRIMESTAR 046049050063
PANASONIC 058059061062
PAYSAT 016
PROSCAN 065066
RCA 051052053065066
RADIOSHACK 064
REALISTIC 057
STS 020027
STARTRAK 026
SKY 031
SKYLIFE 005006007
SHACK 064
STARCHOICE 064
SONY 054060
TOSHIBA 015017028029030072
ULTIMATETV 060066
UNIDEN 016021037055056057
ZENITH 024031068
English-2l
Continued...
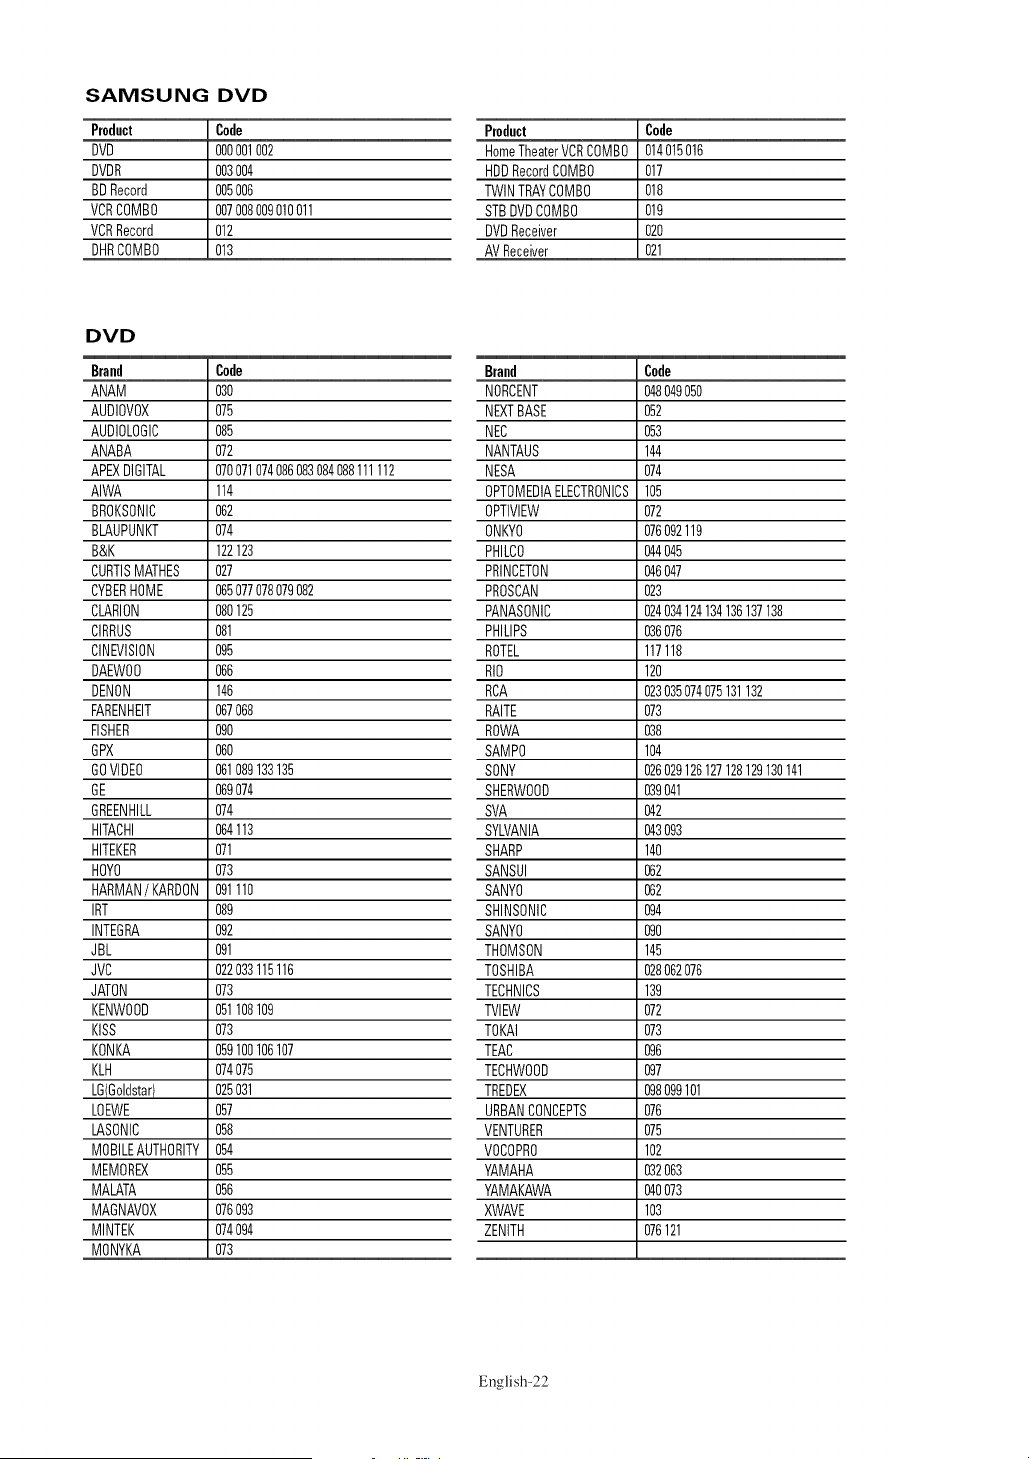
SAMSUNG DVD
Product Code
DVD 000001002
DVDR 003004
BDRecord 005006
VCRCOMBO 007008009010011
VCRRecord 012
DHRCOMBO 013
DVD
Brand Code
ANAM 030
AUDIOVOX 075
AUDIOLOGIC 085
ANABA 072
APEXDIGITAL 070071074086083084088111112
AIWA 114
BROKSONIC 062
BLAUPUNKT 074
B&K 122123
CURTISMATHES 027
CYBERHOME 065077078079082
CLARION 080125
CIRRUS 081
CINEVISION 095
DAEWO0 066
DENON 146
FARENHEIT 067068
FISHER 090
GPX 060
GOVIDEO 061089133135
GE 069074
GREENHILL 074
HITACHI 064113
HITEKER 071
HOY0 073
HARMAN/KARDON091110
IRT 089
INTEGRA 092
JBL 091
JVC 022033115116
JATON 073
KENWOOD 051108109
KISS 073
KONKA 059100106107
KLH 074075
LB{Goldstar) 025031
LOEWE 057
LASONIC 058
MOBILEAUTHORITY054
MEMOREX 055
MALATA 056
MAGNAVOX 076093
MINTEK 074094
MONYKA 073
Product Code
HomeTheaterVCRCOMBO 014015016
HDDRecordCOMBO 017
TWINTRAYCOMBO 018
STBDVDCOMBO 019
DVDReceiver 020
AVReceiver 021
Bra.d Code
NORCENT 048049050
NEXTBASE 052
NEC 053
NANTAUS 144
NESA 074
0PTOMEDIAELECTRONICS105
0PTIVIEW 072
0NKY0 076092119
PHILCO 044045
PRINCETON 046047
PROSCAN 023
PANASONIC 024034124134136137138
PHILIPS 036076
ROTEL 117118
RI0 120
RCA 023035074075131132
RAITE 073
ROWA 038
SAMP0 104
SONY 026029126127128129130141
SHERWOOD 039041
SVA 042
SYLVANIA 043093
SHARP 140
SANSUI 062
SANY0 062
SHINSONIC 094
SANY0 090
THOMSON 145
TOSHIBA 028062076
TECHNICS 139
TVlEW 072
TOKAI 073
TEAC 096
TECHWOOD 097
TREDEX 098099101
URBANCONCEPTS 076
VENTURER 075
VOCOPR0 102
YAMAHA 032063
YAMAKAWA 040073
XWAVE 103
ZENITH 076121
English-22
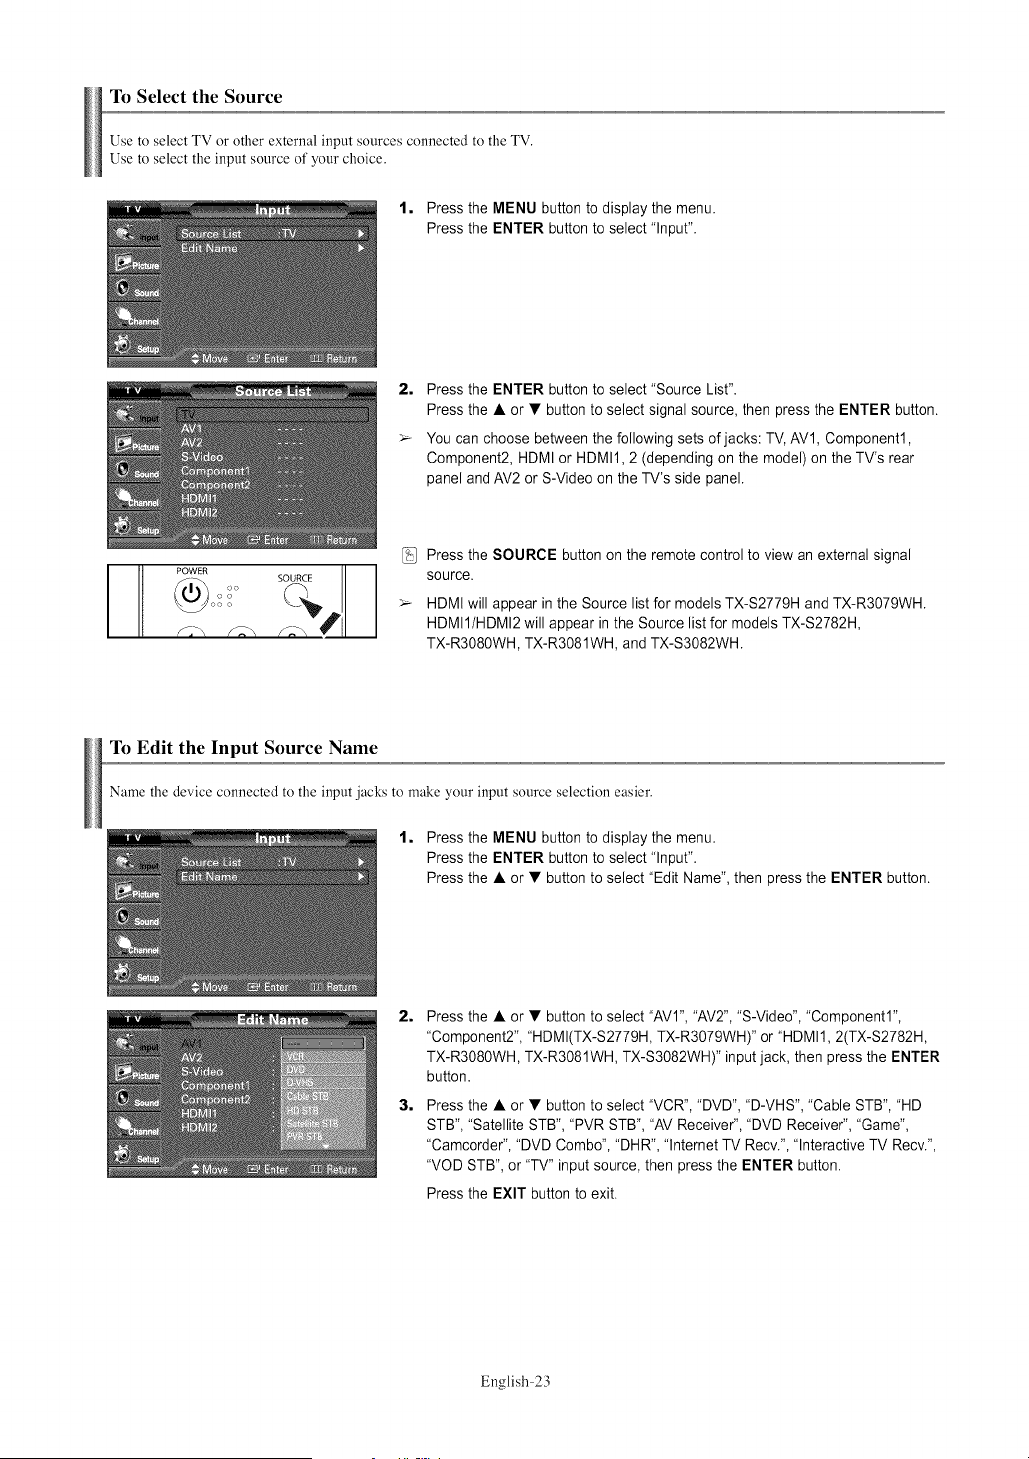
To Select the Source
Use to select TV or other external input sources connected to the TV.
Use to select the input source of your choice.
1, Press the MENU button to display the menu.
Press the ENTER button to select "Input".
2, Press the ENTER button to select "Source List".
Press the • or • button to select signal source, then press the ENTER button.
> You can choose between the following sets of jacks: TV, AV1, Component1,
Component2, HDMI or HDMI1,2 (depending on the model) on the TV's rear
panel and AV2 or S-Video on the TV's side panel.
PowEoo., so !iEii i
Press the SOURCE button on the remote control to view an external signal
source.
HDMI will appear in the Source list for models TX-S2779H and TX-R3079WH.
HDMII/HDMI2 will appear in the Source list for models TX-S2782H,
TX-R3080WH, TX-R3081WH, and TX-S3082WH.
To Edit the Input Source Name
Name the device connected to the input jacks to make your input source selection easier.
1, Press the MENU button to display the menu.
Press the ENTER button to select "Input".
Press the • or • button to select "Edit Name", then press the ENTER button.
2,
3,
Press the • or • button to select "AVl", "AV2", "S-Video", "Component1",
"Component2", "HDMI(TX-S2779H, TX-R3079WH)" or "HDMI1,2(TX-S2782H,
TX-R3080WH, TX-R3081WH, TX-S3082WH)" input jack, then press the ENTER
button.
Press the • or • button to select "VCR", "DVD", "D-VHS", "Cable STB", "HD
STB", "Satellite STB", "PVR STB", "AV Receiver", "DVD Receiver", "Game",
"Camcorder", "DVD Combo", "DHR", "lnternet TV Recv.", "Interactive TV Recv.",
"VOD STB", or "TV" input source, then press the ENTER button.
Press the EXIT button to exit.
English-23
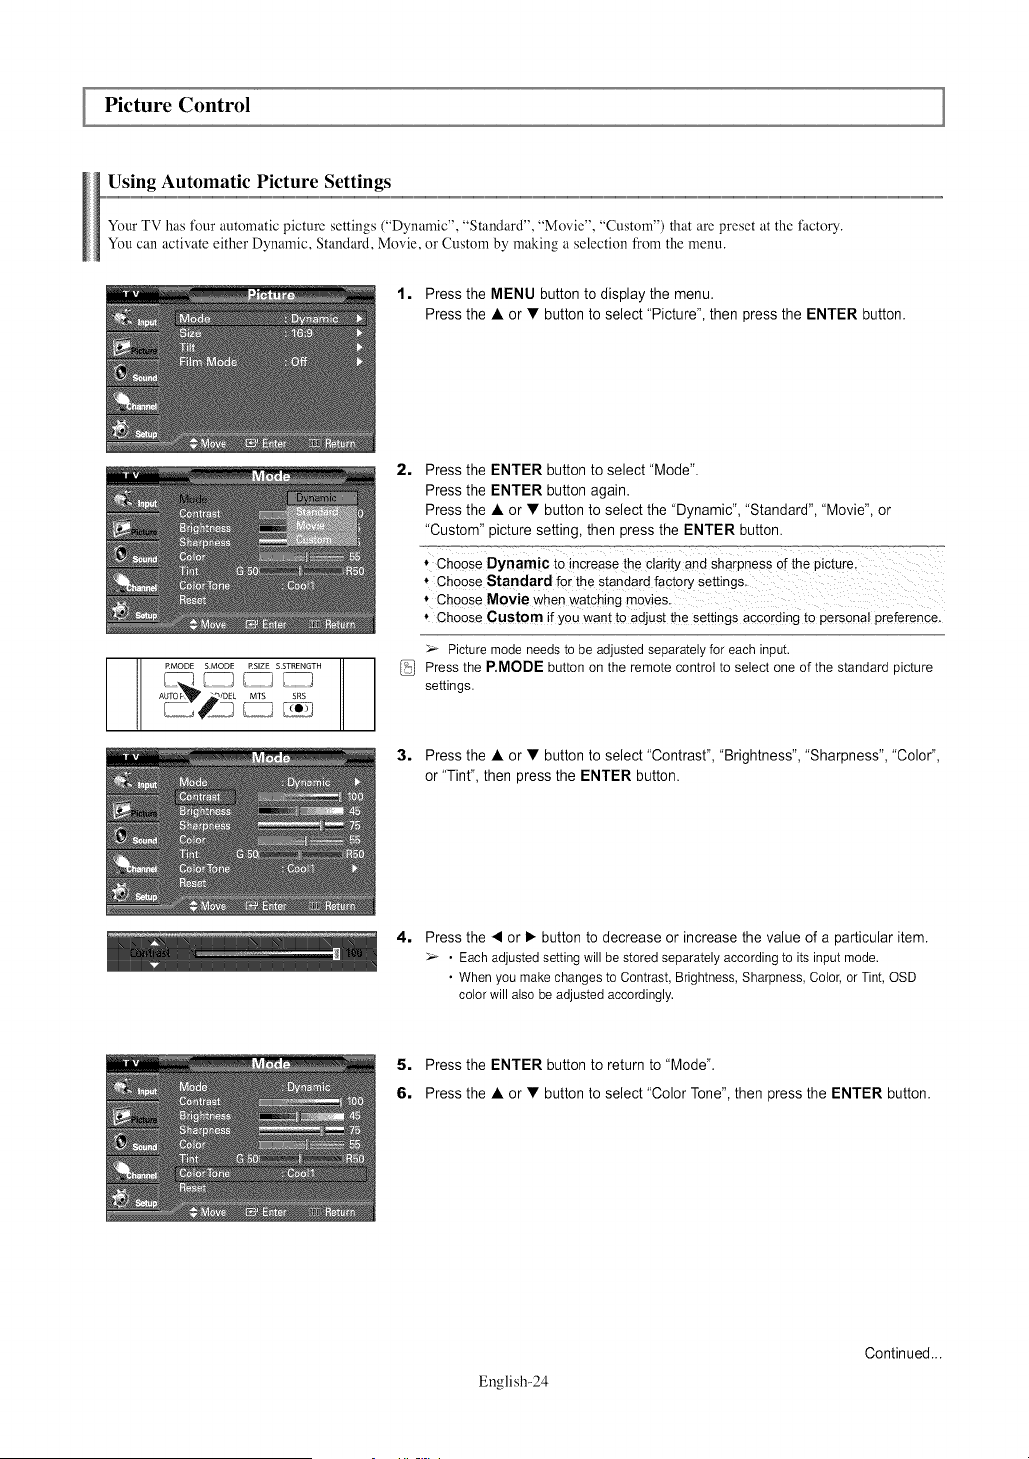
Picture Control
Using Automatic Picture Settings
Your TV has fl)ur automatic picture settings ("Dynamic", "Standard", "Movie", "Custom") that are preset at the factory.
You can activate either Dynamic, Standard, Movie, or Custom by making a selection from the menu.
1. Press the MENU button to display the menu.
Press the • or • button to select "Picture", then press the ENTER button.
RMODE SMODE ESIZE SSTRENGTH
AUFO F, "_ DEE MTS SRS
2, Press the ENTER button to select "Mode".
Press the ENTER button again.
Press the • or • button to select the "Dynamic", "Standard", "Movie", or
"Custom" picture setting, then press the ENTER button.
_=_ ........ _,_=,=,,T_,o,_=,:=..... o_=,_7,:=,_,,_=
* Choose Dynamic to increasethe Clarityand sharpnessOfthe Picture,
* choose Starldard for the Standardfactory Settings,
, choose Movie WhenWatchingmovies,
* Choose custom if you want to adjust the settings accordingto persona!preference.
> Picture mode needs to be adjusted separately for each input,
Press the P.MODE button on the remote control to select one of the standard picture
settings.
3. Press the • or • button to select "Contrast", "Brightness", "Sharpness", "Color",
or "Tint", then press the ENTER button.
4,
Press the < or • button to decrease or increase the value of a particular item.
• Each adjusted setting will be stored separately according to its input mode.
• When you make changes to Contrast, Brightness, Sharpness, Color, or Tint, OSD
color will also be adjusted accordingly.
5. Press the ENTER button to return to "Mode".
6. Press the • or • button to select "Color Tone", then press the ENTER button.
English-24
Continued...
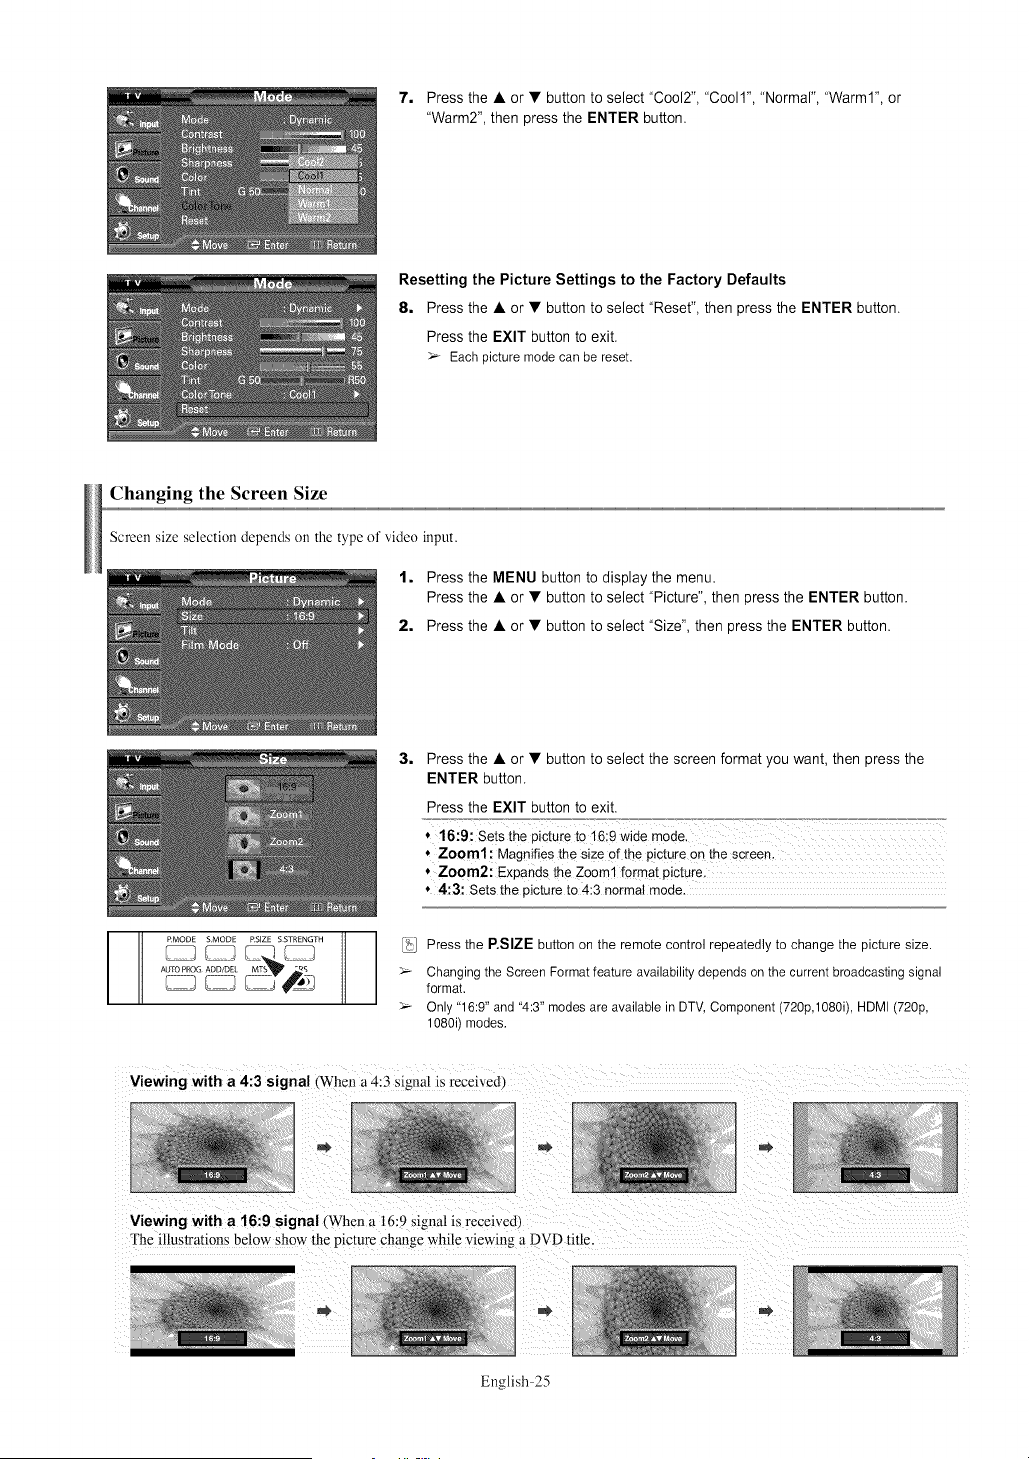
7. Press the • or • button to select "Cool2", "Coo11","Normal", "Warm1", or
"Warm2", then press the ENTER button.
Resetting the Picture Settings to the Factory Defaults
8, Press the • or • button to select "Reset", then press the ENTER button.
Press the EXIT button to exit.
_r- Eachpicturemodecan bereset.
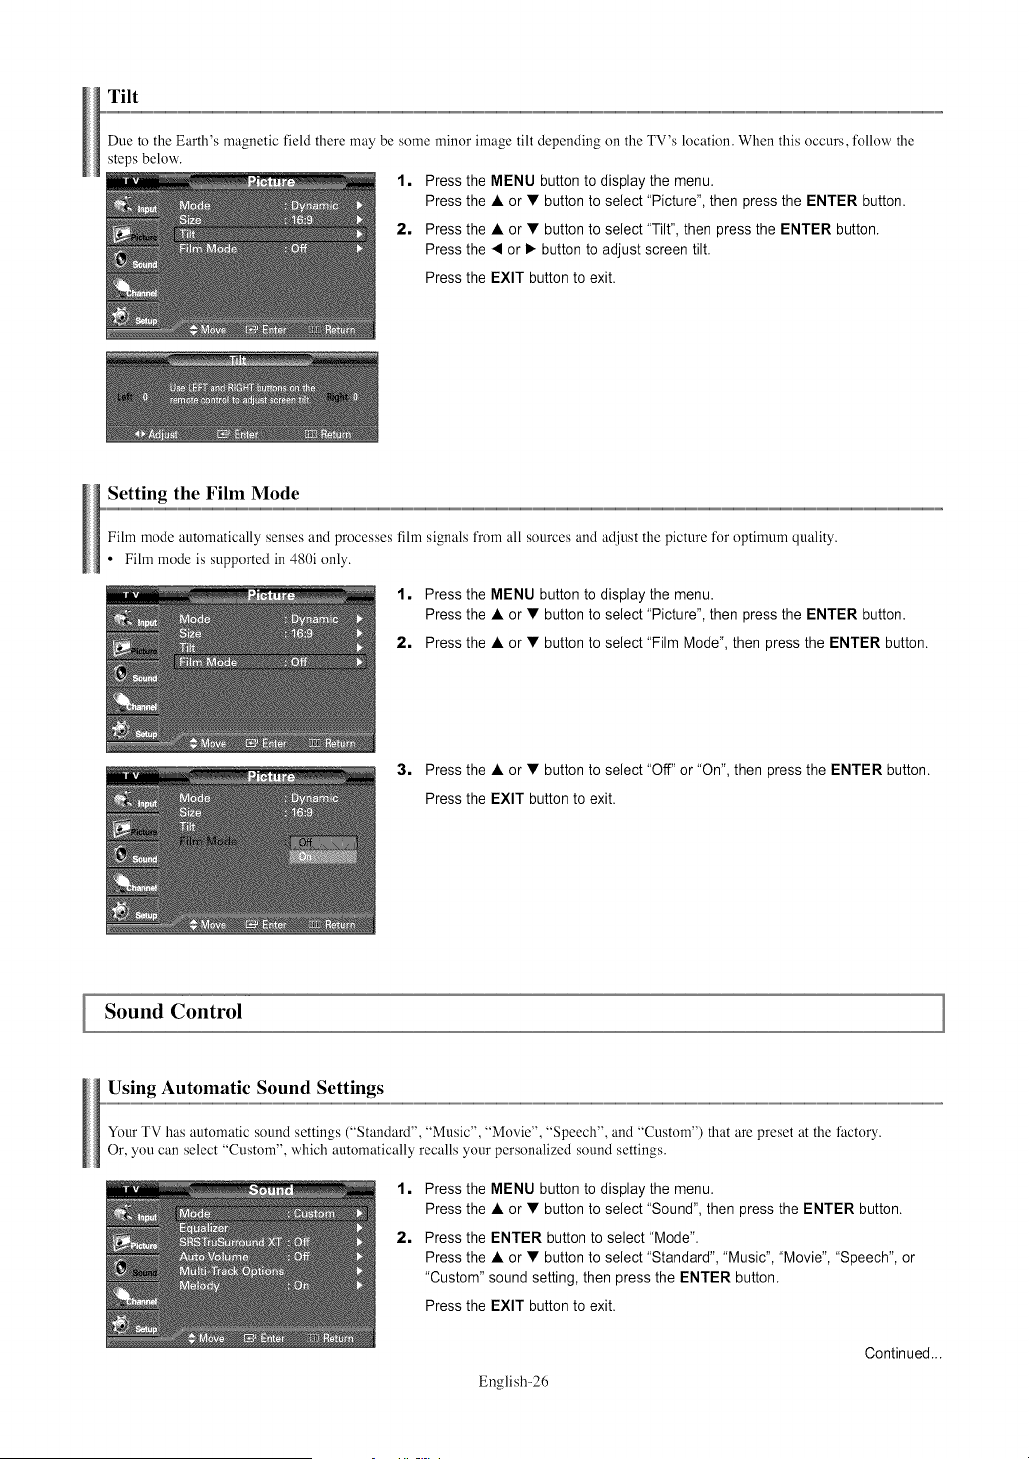
Changing the Screen Size
Screen size selection depends oi1 the type of video input.
1, Press the MENU button to display the menu.
Press the • or • button to select "Picture", then press the ENTER button.
2, Press the • or • button to select "Size", then press the ENTER button.
3=
Press the • or • button to select the screen format you want, then press the
ENTER button.
Press the EXIT button to exit.
16:9: Sets the piCture to i6:9 Wide mode.
Zoom1: Magnifies the size of the picture on the screen.
Zoom2: Expands the Zoom1 format picture,
4:3: Sets the picture to 4:3 normal mode.
RMODE SMODE RSIZE SSTRENGTH
AUTO PROG ADD/DEL MTS _Qq _.
5_
Press the P.SIZE button on the remote control repeatedly to change the picture size.
Changing the Screen Format feature availability depends on the current broadcasting signal
format.
Only "16:9" and "4:3" modes are available in DTV, Component (720p,1080i), HDMI (720p,
1080i) modes.
Viewing with a 4:3 signal (When a 4:3 signal is received_
Viewing with a 16:9 signal (When a 16:9 signal is received,
The illustrations below show the picture change while viewing a DVD title.
English-25
Tilt
Due to the Earth's magnetic field there may be some minor image tilt depending on the TV's location. When this occurs, fl)llow the
steps below.
1, Press the MENU button to display the menu.
Press the • or • button to select "Picture", then press the ENTER button.
2, Press the • or • button to select "Tilt", then press the ENTER button.
Press the • or • button to adjust screen tilt.
Press the EXIT button to exit.
Setting the Film Mode
Fihn mode automatically senses and processes fihn signals from all sources and adjust the picture for optimum quality.
• Film mode is supported in 480i only.
1, Press the MENU button to display the menu.
Press the • or • button to select "Picture", then press the ENTER button.
2, Press the • or • button to select "Film Mode", then press the ENTER button.
3, Press the • or • button to select "Off" or "On", then press the ENTER button.
Press the EXIT button to exit.
Sound Control
Using Automatic Sound Settings
Your TV has automatic sound settings ("Standard", "Music", "Movie", "Speech", and "Custom") that are preset at the factory.
Or, you can select "Custom", which automatically recalls your personalized sound settings.
1, Press the MENU button to display the menu.
Press the • or • button to select "Sound", then press the ENTER button.
2, Press the ENTER button to select "Mode".
Press the • or • button to select "Standard", "Music", "Movie", "Speech", or
"Custom" sound setting, then press the ENTER button.
Press the EXIT button to exit.
English-26
Continued...

* Choose Music when watching rnusic videos or concerts.
* Choose Movie when watching movies.
* choose Speech When watching a Show that is moslY dialog (Le.; news).
, Choose Custom to recall your personalized settings (see _'Customizing the
Sound!!),
PMODE SMODE RSIZE $STRENGTH
_[_ _ _ _ Press the S,MODE buttonon the remotecontrol repeatedlyto selectone of the
A_OG _'_ SRS standardsound settings.
Customizing the Sound
The sound settings can be adjusted to suit your personal preference. (Alternatively, you can use one of the "automatic" settings.)
1, Press the MENU button to display the menu.
Press the • or • button to select "Sound", then press the ENTER button.
2, Press the • or • button to select "Equalizer", then press the ENTER button.
3=
Press the • or • button to select a particular frequency to adjust.
Press the • or • button to increase or decrease the level of the particular
frequency, then press the ENTER button.
Press the EXIT button to exit.
> • L/R Sound Balance Adjustment:
Toadjustthe soundbalanceof the L/R speakers.
• Bandwidth Adjustment (lOOHz, 300Hz, 1KHz, 3KHz, IOKHz):
Toadjustthe levelof differentbandwidthfrequencies.
> If you makeanychangesto the equalizersettings,thesound modeis automatically
switchedto the "Custom"mode.
Setting the SRS TruSurround XT
TruSurround XT is a patented SRS technology that solves the problem of playing 5.1 multichannel content over two speakers.
TruSurround delivers a compelling, virtual surround sound experience through any two speaker playback system, including internal
television speakers. It is flllly compatible with all multichannel formats.
1, Press the MENU button to display the menu.
Press the • or • button to select "Sound", then press the ENTER button.
2, Press the • or • button to select "SRS TruSurround XT", then press the
ENTER button.
3, Press the • or • button to select "On" or "Off", then press the ENTER button.
Press the EXIT button to exit.
English-27
Continued...
,._)SET ,_?_ESE B
wll
Press the SRS button on the remote control to select "On" or "Off".
TruSurround XT technology is incorporated under license
from SRS Labs, !nc;
Automatic Volume Control
Reduces the differences in volume level among broadcasters.
1, Press the MENU button to display the menu.
Press the • or • button to select "Sound", then press the ENTER button.
2, Press the • or • button to select "Auto Volume", then press the ENTER
button.
3, Press the • or • button to select "On" or "Off", then press the ENTER button.
Press the EXIT button to exit.
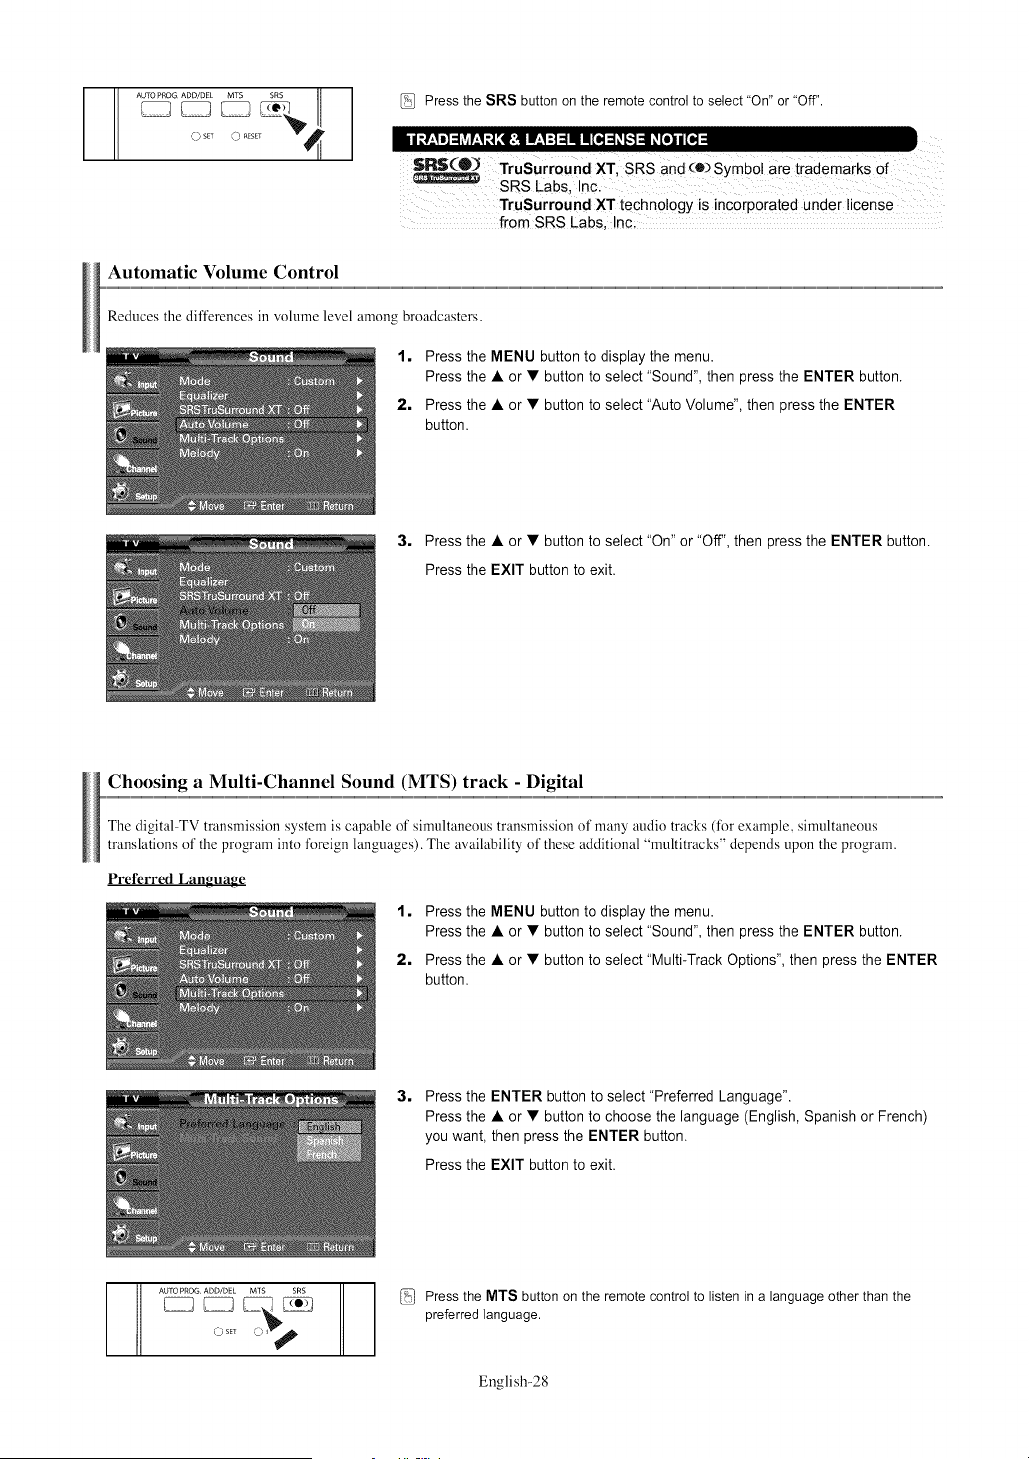
Choosing a Multi-Channel Sound (MTS) track - Digital
The digital TV transmission system is capable of simultaneous transmission of many audio tracks (fk)r example, simultaneous
translations of the program into fk_rcign languages). The availability of these additional "multitracks" depends upon the program.
Preferred Language
1, Press the MENU button to display the menu.
Press the • or • button to select "Sound", then press the ENTER button.
2, Press the • or • button to select "Multi-Track Options", then press the ENTER
button.
3,
Press the ENTER button to select "Preferred Language".
Press the • or • button to choose the language (English, Spanish or French)
you want, then press the ENTER button.
Press the EXIT button to exit.
Abq'O PROG ADD/DEL M1S SRS
0 SET _
(:_',_Press the MTS button on the remote control to listen in a language other than the
preferred language.
English-28
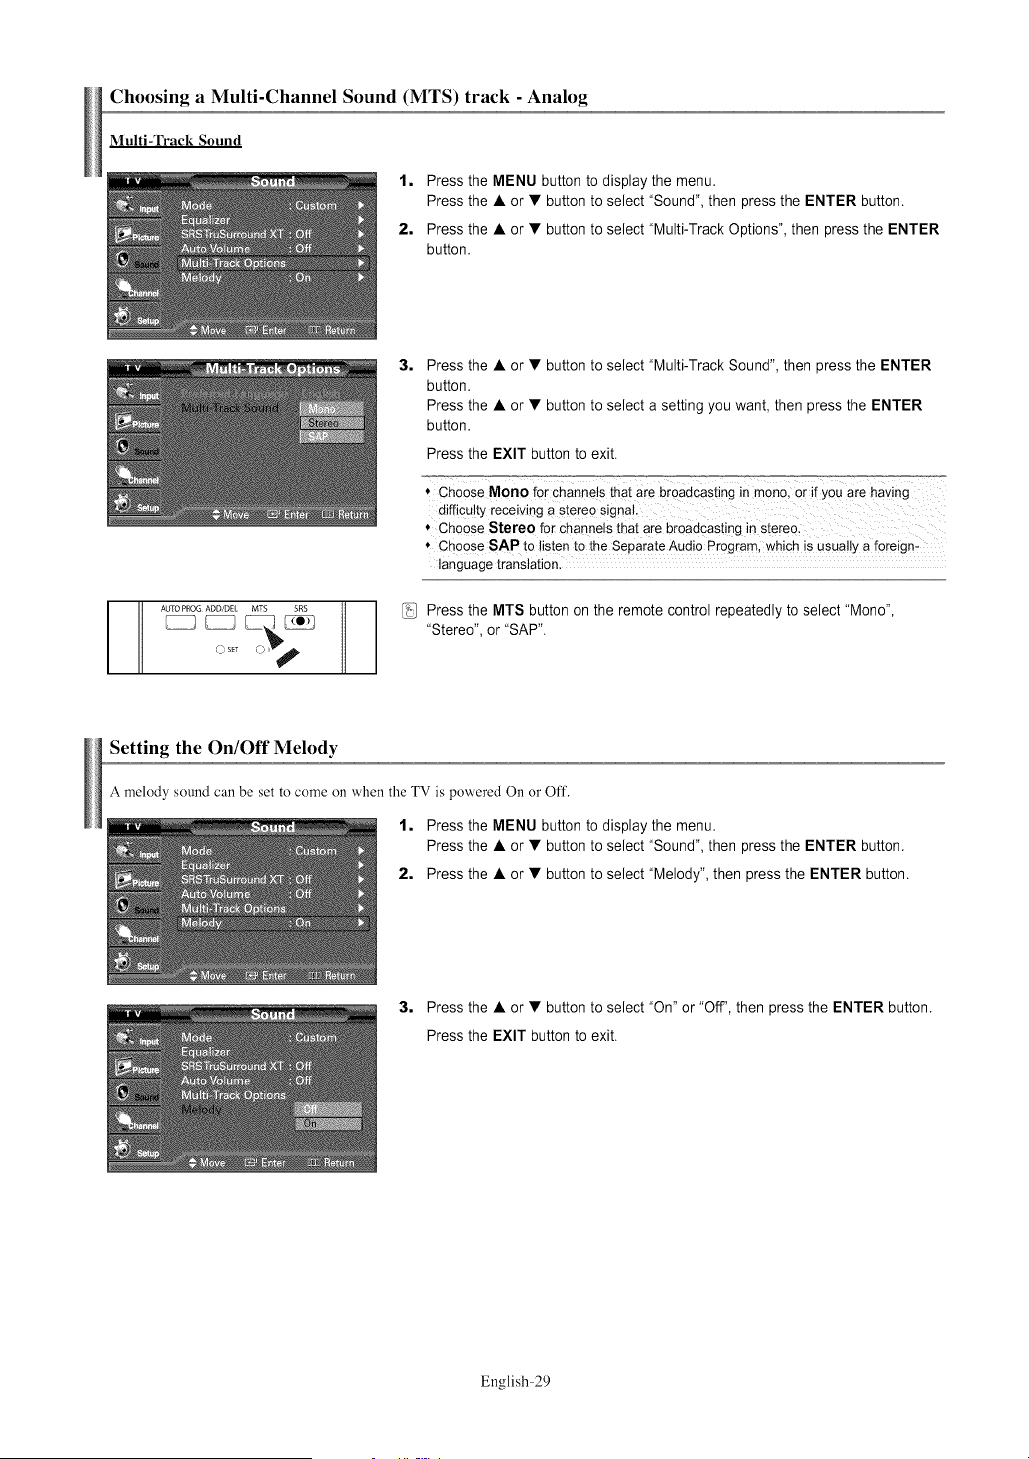
Choosing a Multi-Channel Sound (MTS) track - Analog
Multi-Track Sound
1, Press the MENU button to display the menu.
Press the • or • button to select "Sound", then press the ENTER button.
2, Press the • or • button to select "Multi-Track Options", then press the ENTER
button.
AUTO PROG ADD/DEL MTS SRS
O set
3,
Press the • or • button to select "Multi-Track Sound", then press the ENTER
button.
Press the • or • button to select a setting you want, then press the ENTER
button.
Press the EXIT button to exit.
* Choose MOBOfor channelsthat are broadcastingin mono,Or if YOUare having
difficu!tyreceMng a steree signal.
* Choose Stereo for channelsthat are broadcastingin Stereol
* ChooseSAP to listen to the SeparateAudio Program,which is usually a foreign:
language translation.
Press the MTS button on the remote control repeatedly to select "Mono",
"Stereo", or "SAP".
Setting the On/Off Melody
A melody sound can be set to come oi1when the TV is powered On or Off.
1, Press the MENU button to display the menu.
Press the • or • button to select "Sound", then press the ENTER button.
2, Press the • or • button to select "Melody", then press the ENTER button.
3, Press the • or • button to select "On" or "Off', then press the ENTER button.
Press the EXIT button to exit.
English-29
Channel Control
Selecting the Antenna
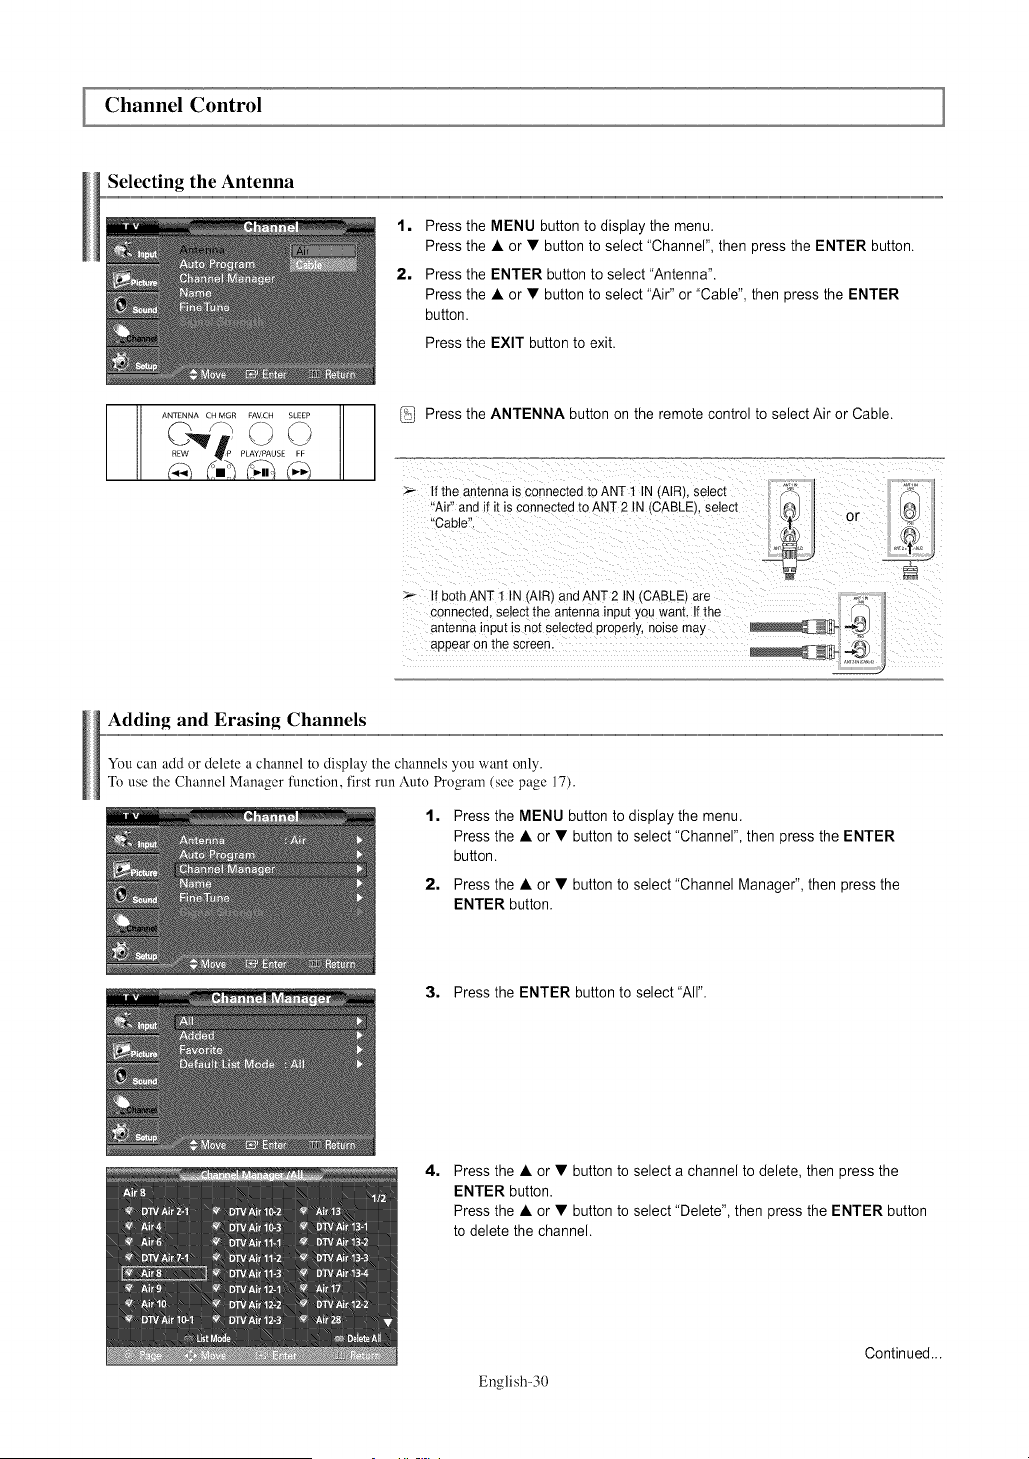
1, Press the MENU button to display the menu.
Press the • or • button to select "Channel", then press the ENTER button.
2, Press the ENTER button to select "Antenna".
Press the • or • button to select "Air" or "Cable", then press the ENTER
button.
Press the EXIT button to exit.
ANTENNA CH MGR FAVCH SLEEP
Press the ANTENNA button on the remote control to select Air or Cable.
If the antenna is connected to ANT 1 IN (AIRt. selecl
"Air" and if it is connected to ANT 2 IN (CABLE}, selecl
"Cable".
If both ANT 1 IN (AIR} and ANT 2 tN (CABLE) are
connected, select the antenna inpul you want. If the
antenna input is not selected propeny, noise may
appear on the screen
...................................j
Adding and Erasing Channels
You can add or delete a channel to display the channels you want only.
To use the Channel Manager fimction, first run Auto Program (see page 17).
1,
2,
Press the MENU button to display the menu.
Press the • or • button to select "Channel", then press the ENTER
button.
Press the • or • button to select "Channel Manager", then press the
ENTER button.
3, Press the ENTER button to select "All".
4,
Press the • or • button to select a channel to delete, then press the
ENTER button.
Press the • or • button to select "Delete", then press the ENTER button
to delete the channel.
English-30
Continued...
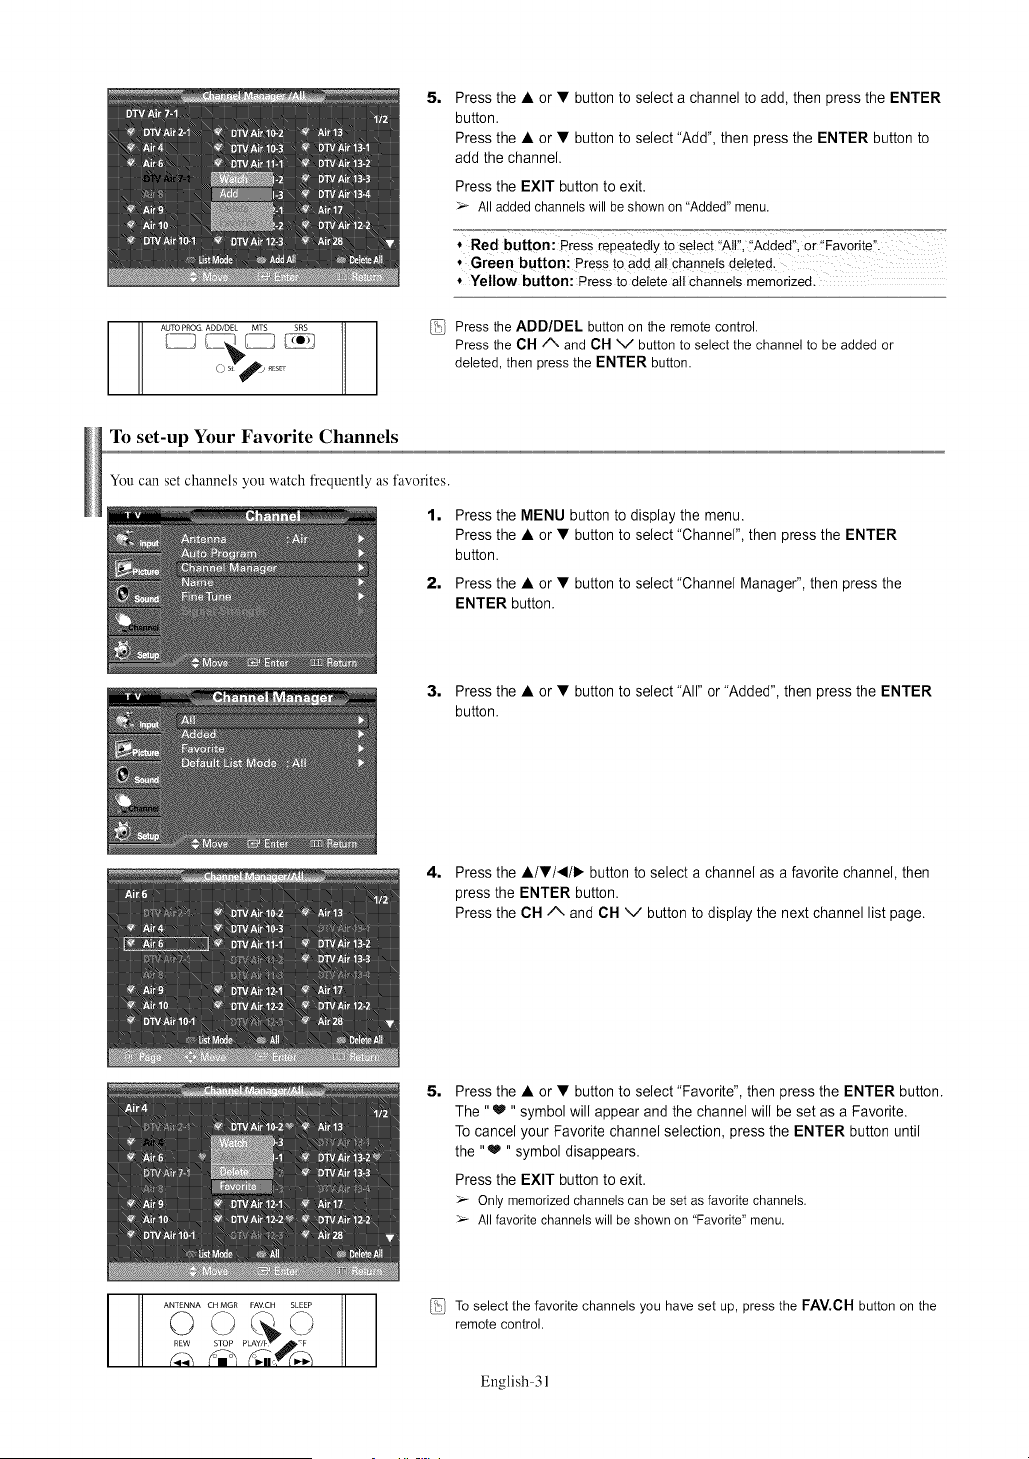
5=
Press the • or • button to select a channel to add, then press the ENTER
button.
Press the • or • button to select "Add", then press the ENTER button to
add the channel.
Press the EXIT button to exit.
All addedchannelswill be shownon "Added"menu.
* Red button: Press repeatedlyto select !'All!!"Added" or ,Favorite".
", Green button: Pressto add ali Channelsdeleted.
* Yellow button: Press to delete all Channelsmemorized.
Press the ADD/DEL button on the remote control.
Press the CH/N and CH V button to select the channel to be added or
deleted, then press the ENTER button.
To set-up Your Favorite Channels
You can set channels you watch frequently as favorites.
1,
2=
Press the MENU button to display the menu.
Press the • or • button to select "Channel", then press the ENTER
button.
Press the • or • button to select "Channel Manager", then press the
ENTER button.
3, Press the • or • button to select "All" or "Added", then press the ENTER
button.
4, Press the •/•/4/I,- button to select a channel as a favorite channel, then
press the ENTER button.
Press the CH/% and CH v button to display the next channel list page.
5=
Press the • or • button to select "Favorite", then press the ENTER button.
The "_ "symbol will appear and the channel will be set as a Favorite.
To cancel your Favorite channel selection, press the ENTER button until
the "_ "symbol disappears.
Press the EXIT button to exit.
Onlymemorizedchannelscan be setas favoritechannels.
Allfavoritechannelswill be shownon "Favorite"menu.
I-IT..................
PLAY/f _1.!_ F
To select the favorite channels you have set up, press the FAV.CH button on the
remote control.
English-31
Viewing the Channel Lists
You can display a list of all channels, added channels or your favorite channels.
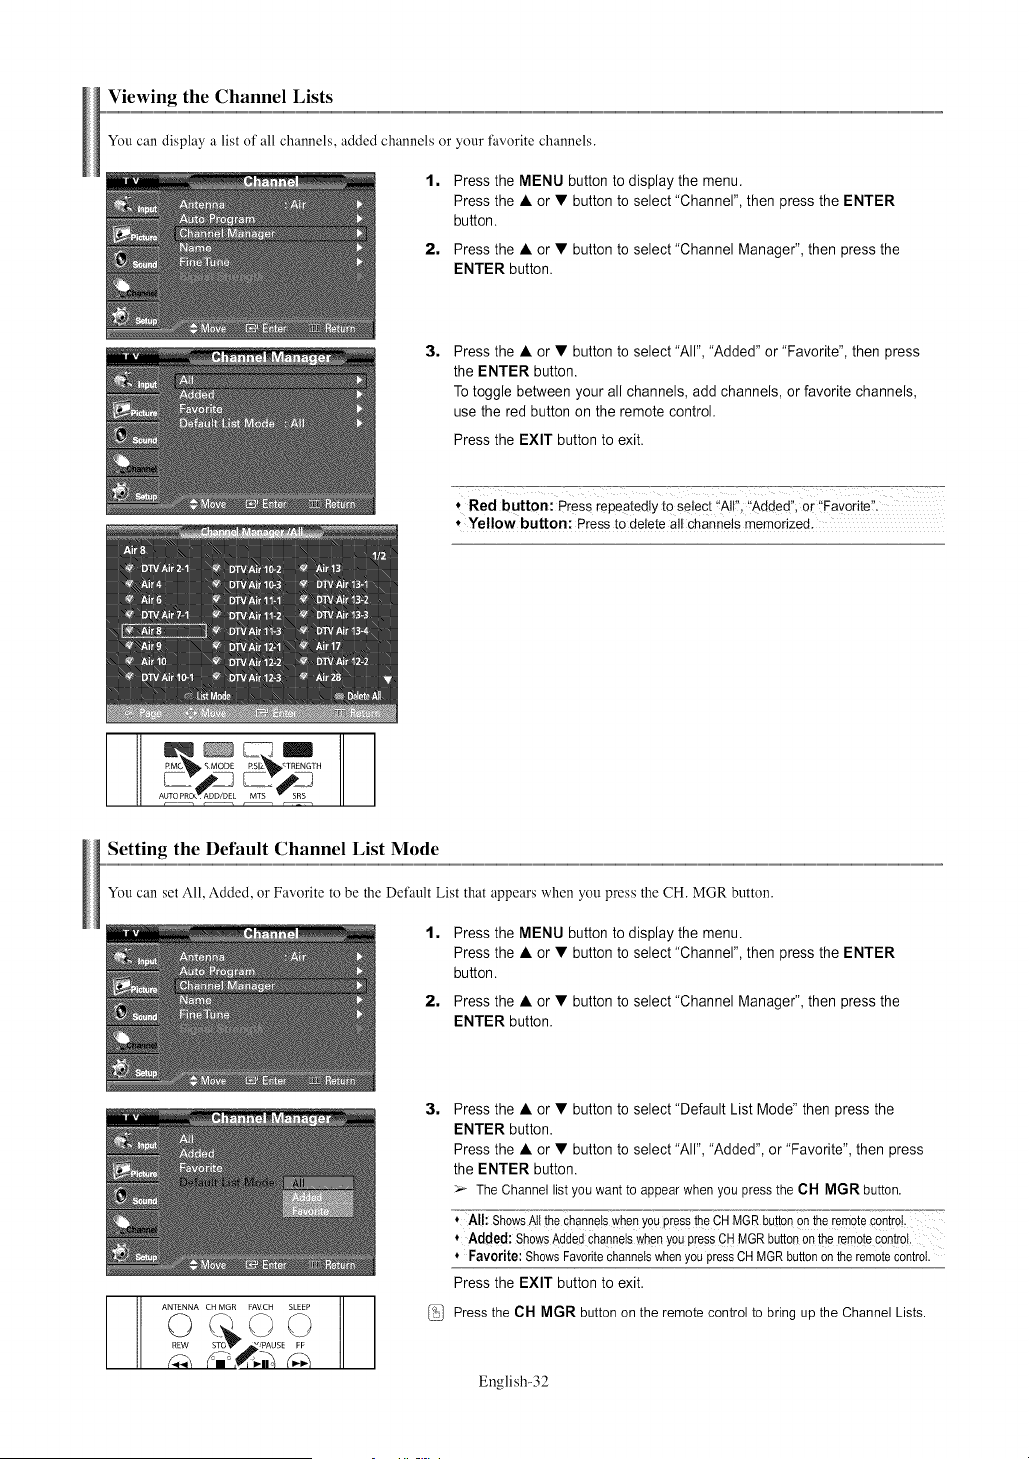
1,
2,
Press the MENU button to display the menu.
Press the • or • button to select "Channel", then press the ENTER
button.
Press the • or • button to select "Channel Manager", then press the
ENTER button.
3,
Press the • or • button to select "All", "Added" or "Favorite", then press
the ENTER button.
Totoggle between your all channels, add channels, or favorite channels,
use the red button on the remote control.
Press the EXIT button to exit.
* Red button: Press repeated!y to se!ect '!AIF, "Added,; or iFavorite:i:
, Yellow button: Press to delete a!t channels memorized,
AUTO PRCX'T ADD/DEL MTS SSRS
r ..........................1 • ........................._ r .......................• r
Setting the Default Channel List Mode
You can set All, Added, or Favorite to be the Default List that appears when you press the CH. MGR button.
1,
2,
Press the MENU button to display the menu.
Press the • or • button to select "Channel", then press the ENTER
button.
Press the • or • button to select "Channel Manager", then press the
ENTER button.
ANTENNA CH MGR FAVCH SLEEP
_./PAUSE FF
3,
Press the • or • button to select "Default List Mode" then press the
ENTER button.
Press the • or • button to select "All", "Added", or "Favorite", then press
the ENTER button.
_r- The Channellist you wantto appearwhenyou pressthe OH M(3R button.
, Al!: ShowsAlltheChannelswhenYOUpresstheC'H_M°GR°but[on'°o°n'tl_e'r_em_e-contr_'_:"=:'
* Added: ShowsAddedchannelswhenyoupressCHMGRbuttononthe remotecon!rol.
* Favorite: ShowsFavoritechannelswhenyoupressOHMGRbuttonontheremotecontrol.
Press the EXIT button to exit.
Press the CH MGR button on the remote control to bring up the Channel Lists.
English-32
Labeling Channels
1,
2,
3,
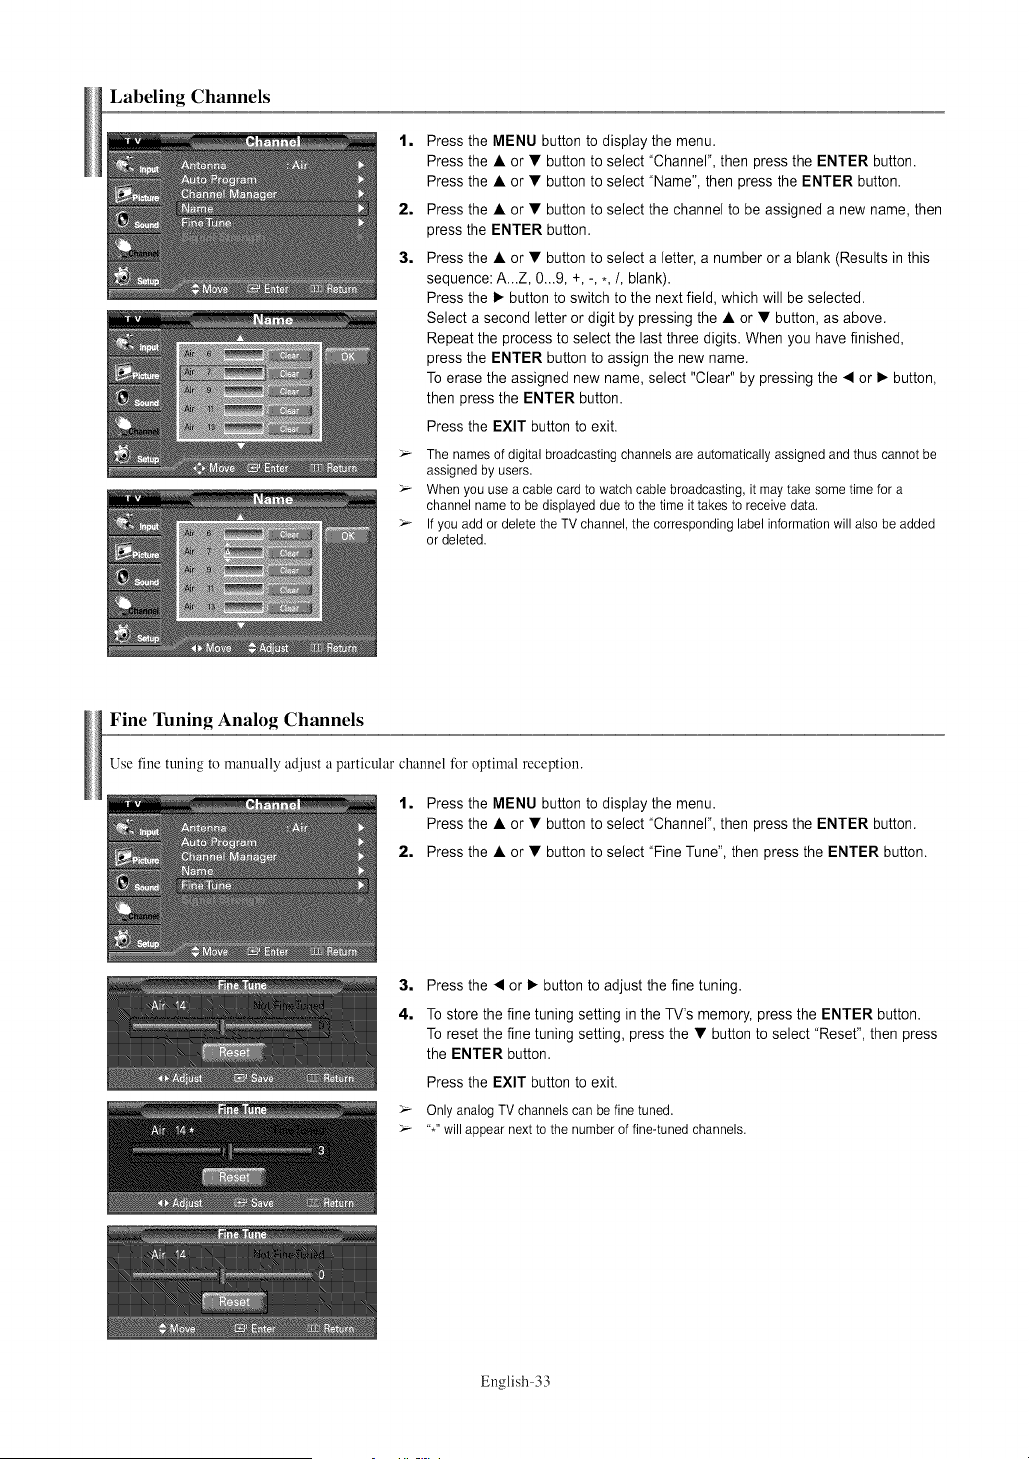
Press the MENU button to display the menu.
Press the • or • button to select "Channel", then press the ENTER button.
Press the • or • button to select "Name", then press the ENTER button.
Press the • or • button to select the channel to be assigned a new name, then
press the ENTER button.
Press the • or • button to select a letter, a number or a blank (Results in this
sequence: A...Z, 0...9, +, -, ,,/, blank).
Press the • button to switch to the next field, which will be selected.
Select a second letter or digit by pressing the • or • button, as above.
Repeat the process to select the last three digits. When you have finished,
press the ENTER button to assign the new name.
To erase the assigned new name, select "Clear" by pressing the • or • button,
then press the ENTER button.
Press the EXIT button to exit.
_- The names of digital broadcasting channels are automatically assigned and thus cannot be
assigned by users.
_- When you use a cable card to watch cable broadcasting, it may take some time for a
channel name to be displayed due to the time it takes to receive data.
_- If you add or delete the TV channel, the corresponding label information will also be added
or deleted.
Fine Tuning Analog Channels
Use fine tuning to manually adjust a particular channel for optimal reception.
1. Press the MENU button to display the menu.
Press the • or • button to select "Channel", then press the ENTER button.
2. Press the • or • button to select "Fine Tune", then press the ENTER button.
3. Press the • or • button to adjust the fine tuning.
4. To store the fine tuning setting in the TV's memory, press the ENTER button.
To reset the fine tuning setting, press the • button to select "Reset", then press
the ENTER button.
Press the EXIT button to exit.
_- Only analog TV channels can be fine tuned.
_- "*" will appear next to the number of fine-tuned channels.
English-33
Checking the Digital-Signal Strength
Unlike analog channels, which can vary in reception quality from "snowy" to clear, digital (HDTV) channels have either perfect
reception quality or you will not receive them at all. So, unlike analog channels, you cannot fine tune a digital channel. You can,
however, adjust your antenna to improve the reception of available digital channels.
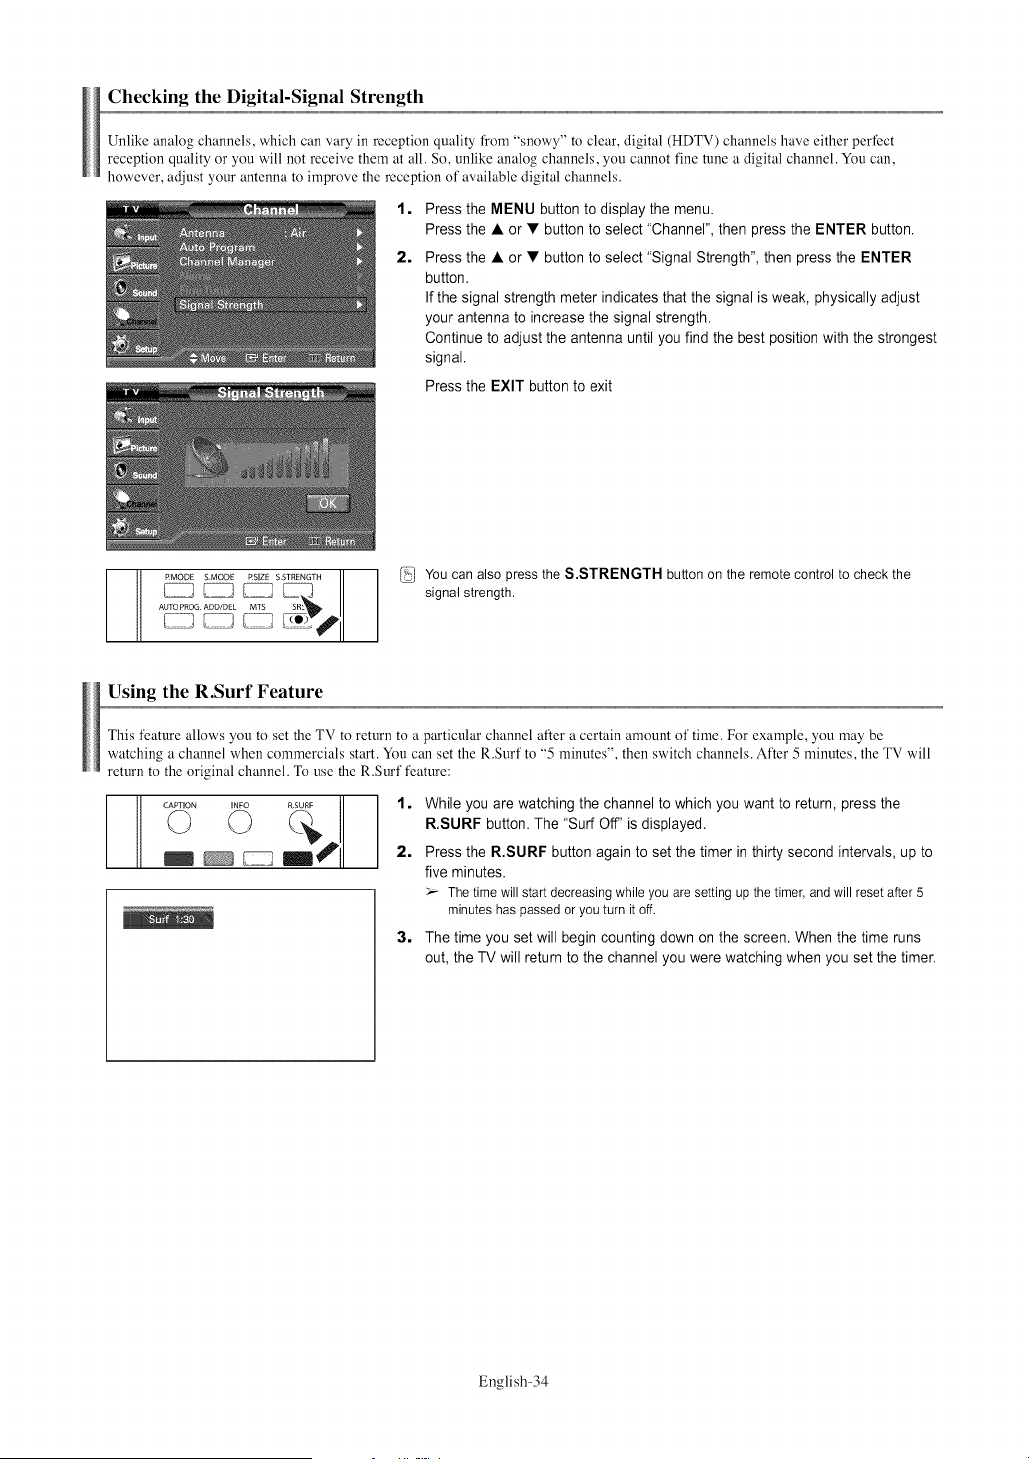
1=
2,
Press the MENU button to display the menu.
Press the • or • button to select "Channel", then press the ENTER button.
Press the • or • button to select "Signal Strength", then press the ENTER
button.
If the signal strength meter indicates that the signal is weak, physically adjust
your antenna to increase the signal strength.
Continue to adjust the antenna until you find the best position with the strongest
signal.
Press the EXIT button to exit
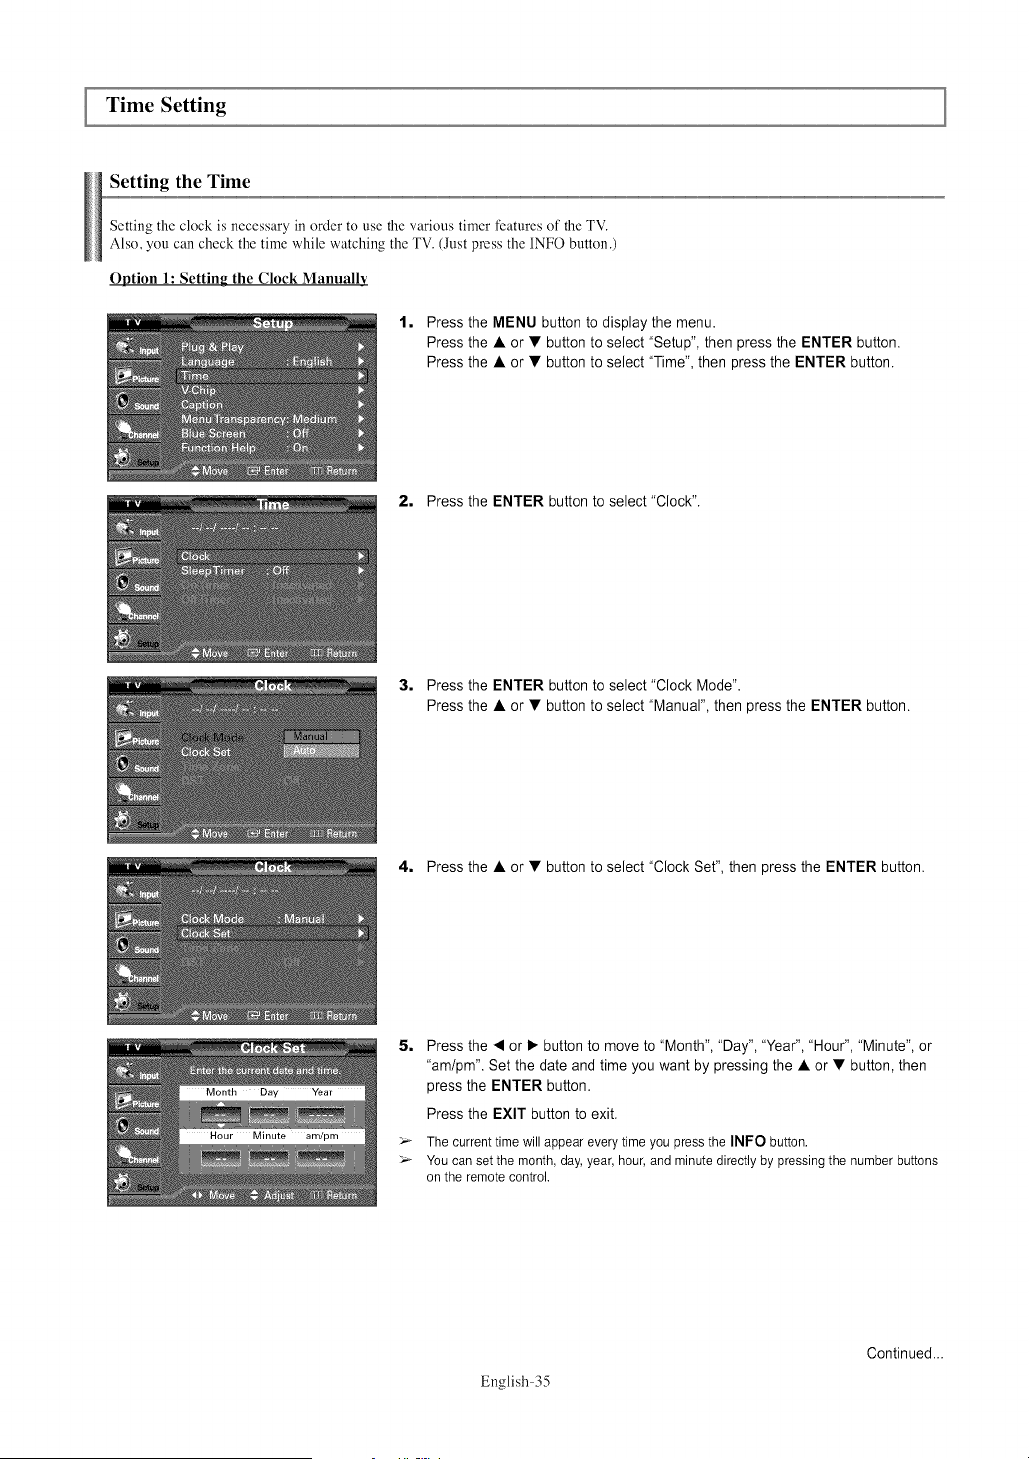
You canalso press the S.STRENGTH button on the remotecontrol to checktheRMODE SMODE S STRENGTH
.... M_ signal strength
A_OG_L _ _ ,
............; { rSI
Using the R.Surf Feature
This feature alk)ws you to set the TV to return to a particular channel after a certain amount of time. For example, you may be
watching a channel when commercials start. You can set the R.Surf to "5 minutes", then switch channels. After 5 minutes, the TV will
return to the original channel. To use the R.Surf feature:
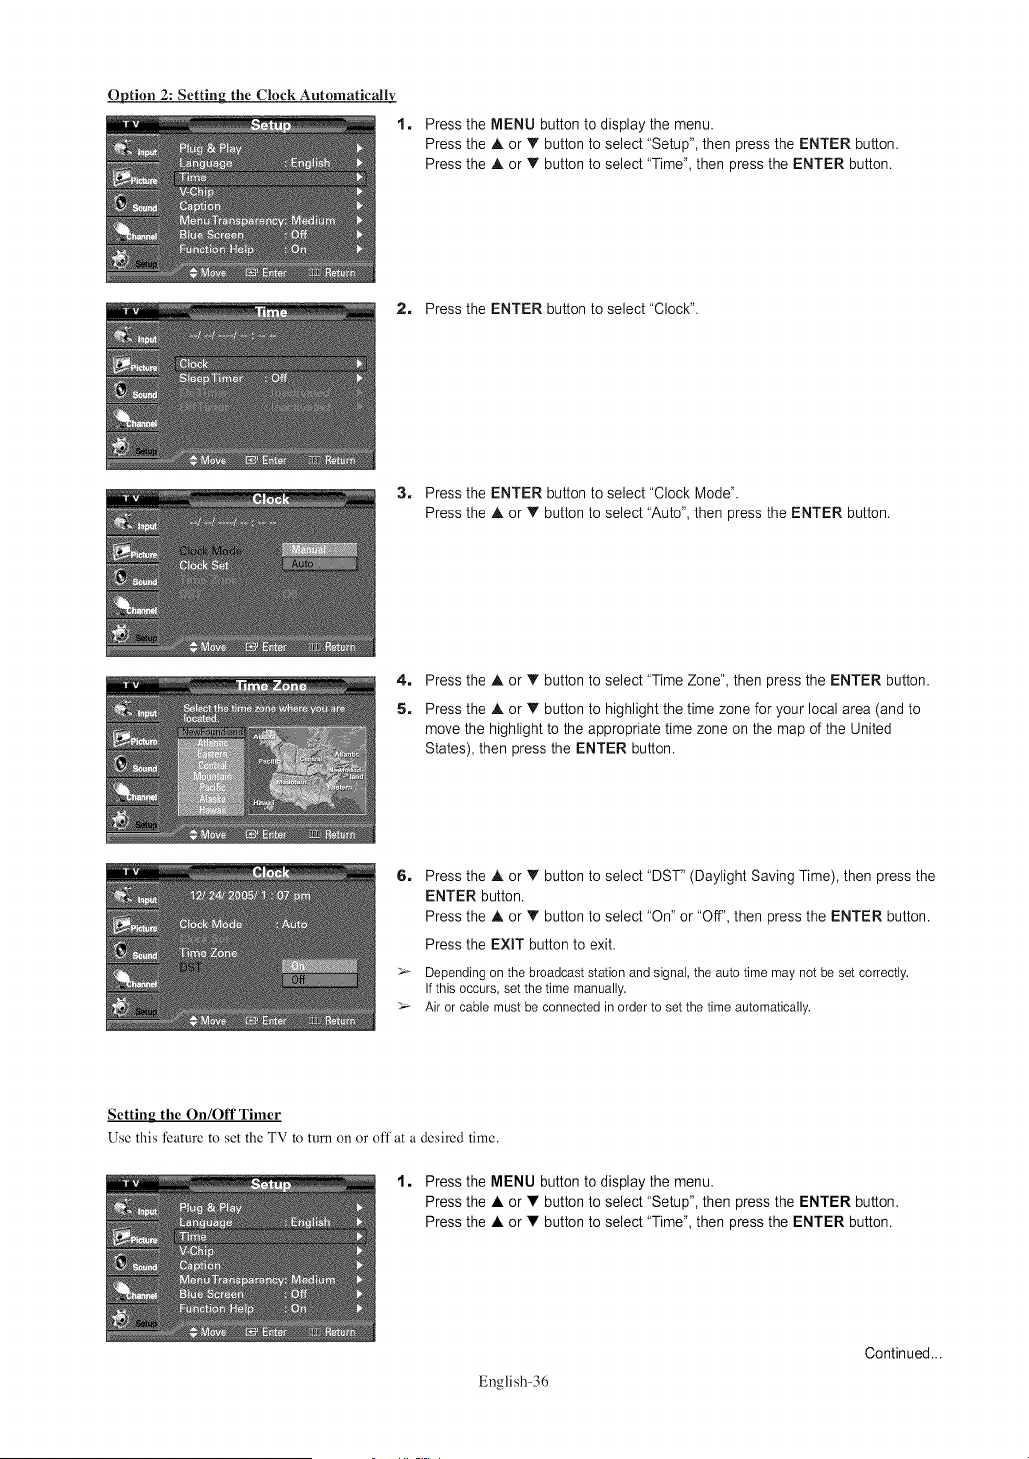
CAPTIONo oINFO
1, While you are watching the channel to which you want to return, press the
R.SURF button. The "Surf Off' is displayed.
2, Press the R.SURF button again to set the timer in thirty second intervals, up to
five minutes.
_-- Thetimewill startdecreasingwhileyouare settingupthe timer,andwill resetafter5
minuteshas passedoryouturn itoff.
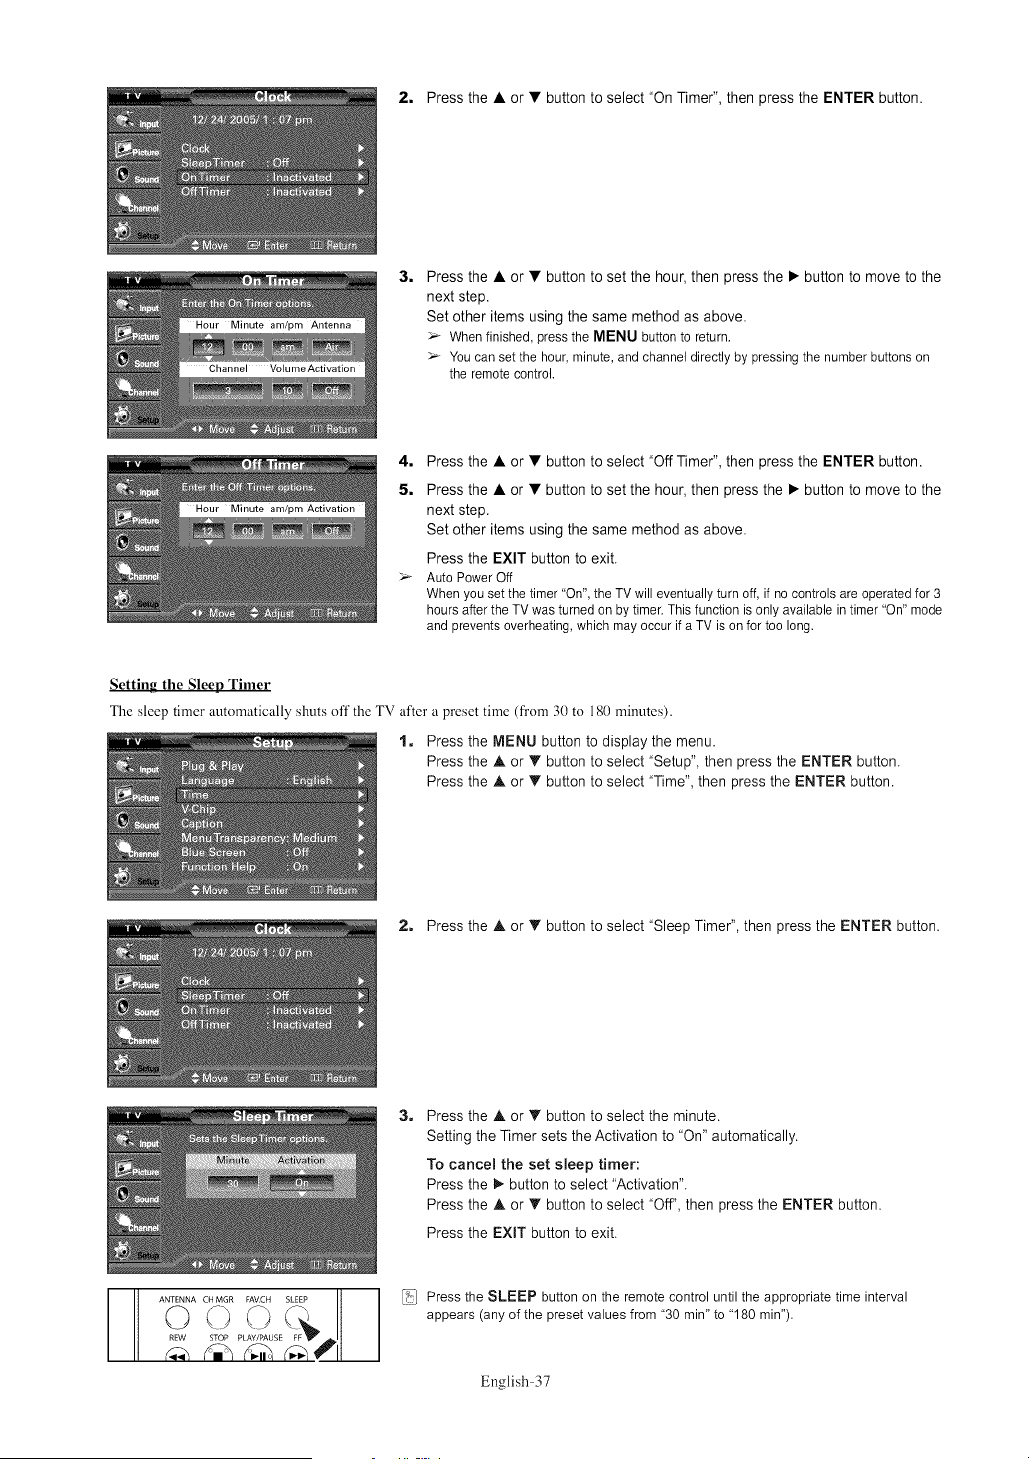
3, The time you set will begin counting down on the screen. When the time runs
out, the TV will return to the channel you were watching when you set the timer.
English-34
Time Setting
Setting the Time
Setting the clock is necessary in order to use the various timer features of the TV.
Also, you can check the time while watching the TV. (Just press the INFO button.)
Option 1: Setting the Clock Manually
1, Press the MENU button to display the menu.
Press the • or • button to select "Setup", then press the ENTER button.
Press the • or • button to select "Time", then press the ENTER button.
2, Press the ENTER button to select "Clock".
3, Press the ENTER button to select "Clock Mode".
Press the • or • button to select "Manual", then press the ENTER button.
4, Press the • or • button to select "Clock Set", then press the ENTER button.
5,
Press the • or • button to move to "Month", "Day", "Year", "Hour", "Minute", or
"am/pm". Set the date and time you want by pressing the • or • button, then
press the ENTER button.
Press the EXIT button to exit.
The current time will appear every time you press the INFO button.
You can set the month, day, year, hour, and minute directly by pressing the number buttons
on the remote control.
English-35
Continued...
Option 2: Setting the Clock Automatically
1.
Press the MENU button to display the menu.
Press the • or • button to select "Setup", then press the ENTER button.
Press the • or • button to select "Time", then press the ENTER button.
2. Press the ENTER button to select "Clock".
3, Press the ENTER button to select "Clock Mode".
Press the • or • button to select "Auto", then press the ENTER button.
4_
5,
Press the • or T button to select "Time Zone", then press the ENTER button.
Press the A. or • button to highlight the time zone for your local area (and to
move the highlight to the appropriate time zone on the map of the United
States), then press the ENTER button.
6_
Press the A or • button to select "DST" (Daylight Saving Time), then press the
ENTER button.
Press the A or T button to select "On" or "Off", then press the ENTER button.
Press the EXIT button to exit.
Depending on the broadcast station and signal, the auto time may not be set correctly,
Ifthis occurs, set the time manually,
Air or cable must be connected in order to set the time automatically,
Setting the On/Off Timer
Use this feature to set the TV to turn on or off at a desired time.
1, Press the MENU button to display the menu.
Press the • or • button to select "Setup", then press the ENTER button.
Press the • or • button to select "Time", then press the ENTER button.
English-36
Continued...
2. Pressthe• or• button to select "On Timer", then press the ENTER button.
3,
Press the • or • button to set the hour, then press the • button to move to the
next step.
Set other items using the same method as above.
>_ Whenfinished,pressthe MENU buttonto return.
Youcan setthe hour,minute,andchanneldirectlyby pressingthe numberbuttonson
the remotecontrol.
4. Press the • or • button to select "Off Timer", then press the ENTER button.
5. Press the • or • button to set the hour, then press the • button to move to the
next step.
Set other items using the same method as above.
Press the EXIT button to exit.
AutoPowerOff
Whenyousetthetimer "On",theTV will eventuallyturn off, if no controlsare operatedfor 3
hoursafterthe TV wasturnedon bytimer.Thisfunctionis onlyavailablein timer"On"mode
and preventsoverheating,whichmay occur ifa TV is on for too long.
Setting the Sleep Timer
The sleep timer automatically shuts off the TV after a preset time (from 30 to 180 minutes).
1. Press the MENU button to display the menu.
Press the • or • button to select "Setup", then press the ENTER button.
Press the • or • button to select "Time", then press the ENTER button.
2. Press the • or • button to select "Sleep Timer", then press the ENTER button.
3_ Press the • or • button to select the minute.
Setting the Timer sets the Activation to "On" automatically.
To cancel the set sleep timer:
Press the • button to select "Activation".
Press the • or • button to select "Off', then press the ENTER button.
Press the EXIT button to exit.
ANTENNA CH MGR _ SLEEP
oo 2"t
%P ,E i
Press the SLEEP button on the remote control until the appropriate time interval
appears (any of the preset values from '30 min" to '180 min").
English-37
Function Description
Selecting a Menu Language
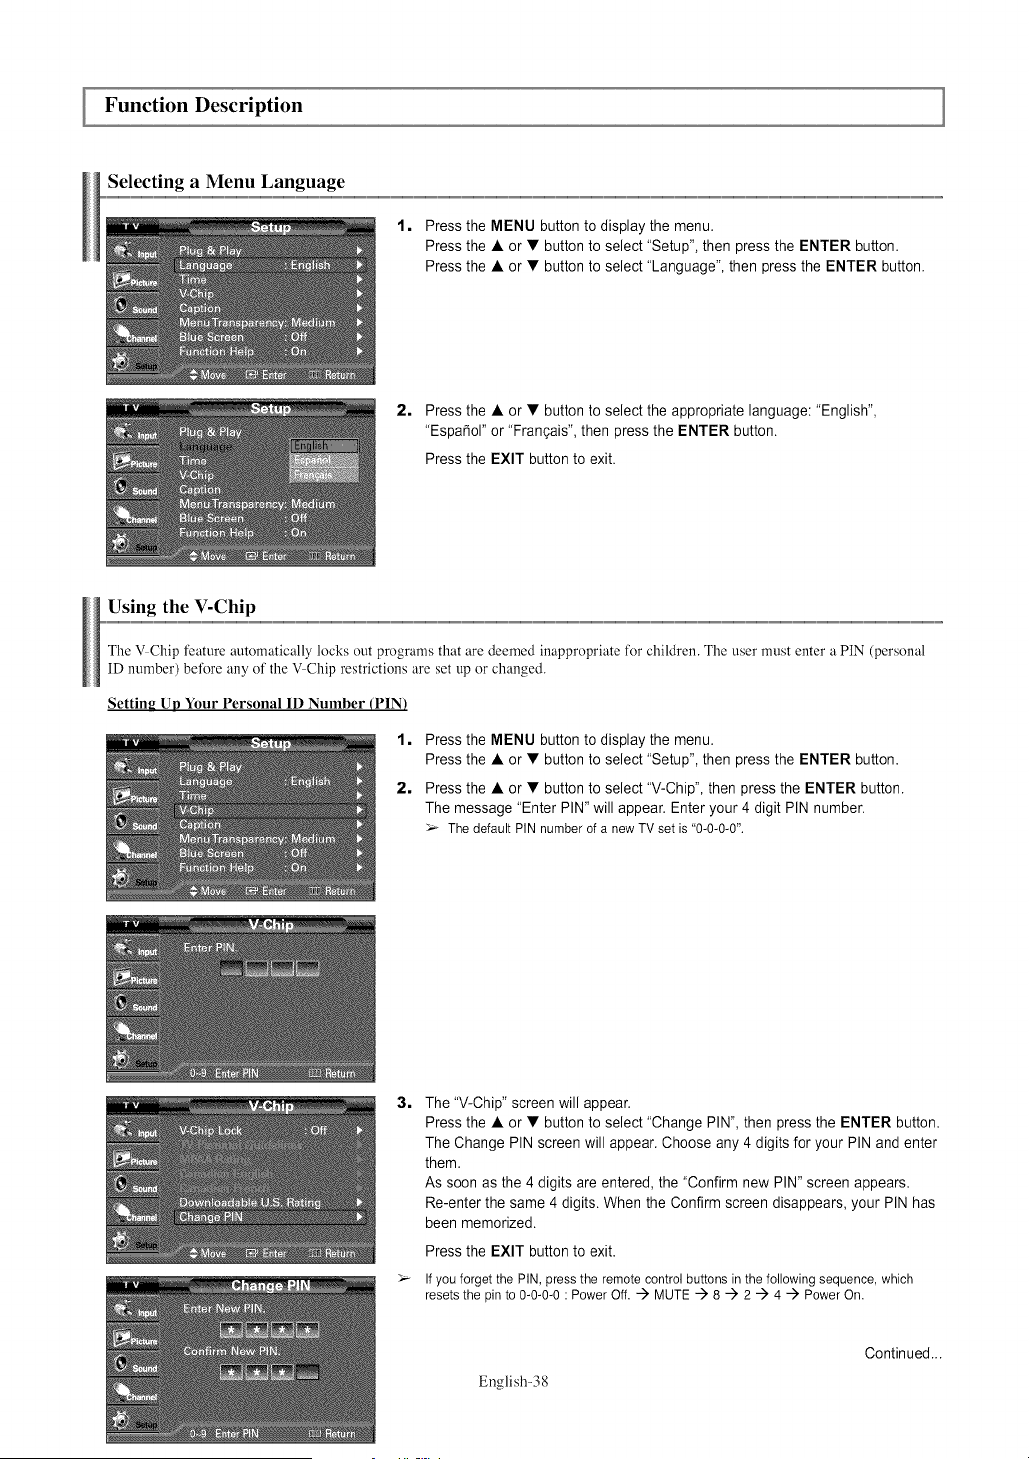
1,
Press the MENU button to display the menu.
Press the • or • button to select "Setup", then press the ENTER button.
Press the • or • button to select "Language", then press the ENTER button.
2, Press the • or • button to select the appropriate language: "English",
"Espat5ol"or "Frangais", then press the ENTER button.
Press the EXIT button to exit.
Using the V-Chip
The ',!Chip feature automatically locks out programs that are deemed inappropriate for children. The user must enter a PIN (personal
ID number) before any of the ',!Chip restrictions are set up or changed.
Setting Up Your Personal 1D Number (PIN)
1, Press the MENU button to display the menu.
Press the • or • button to select "Setup", then press the ENTER button.
2, Press the • or • button to select "V-Chip", then press the ENTER button.
The message "Enter PIN" will appear. Enter your 4 digit PIN number.
_-- Thedefault PINnumberof a newTV setis "0-0-0-0".
3,
The "V-Chip" screen will appear.
Press the • or • button to select "Change PIN", then press the ENTER button.
The Change PIN screen will appear. Choose any 4 digits for your PIN and enter
them.
As soon as the 4 digits are entered, the "Confirm new PIN" screen appears.
Re-enter the same 4 digits. When the Confirm screen disappears, your PIN has
been memorized.
Press the EXIT button to exit.
If you forget the PIN, press the remote control buttons in the following sequence, which
resets the pin to 0-0-0-0 : Power Off...i) MUTE ..i) 8 ..i) 2 ..i) 4 ..i) Power On.
English-38
Continued...
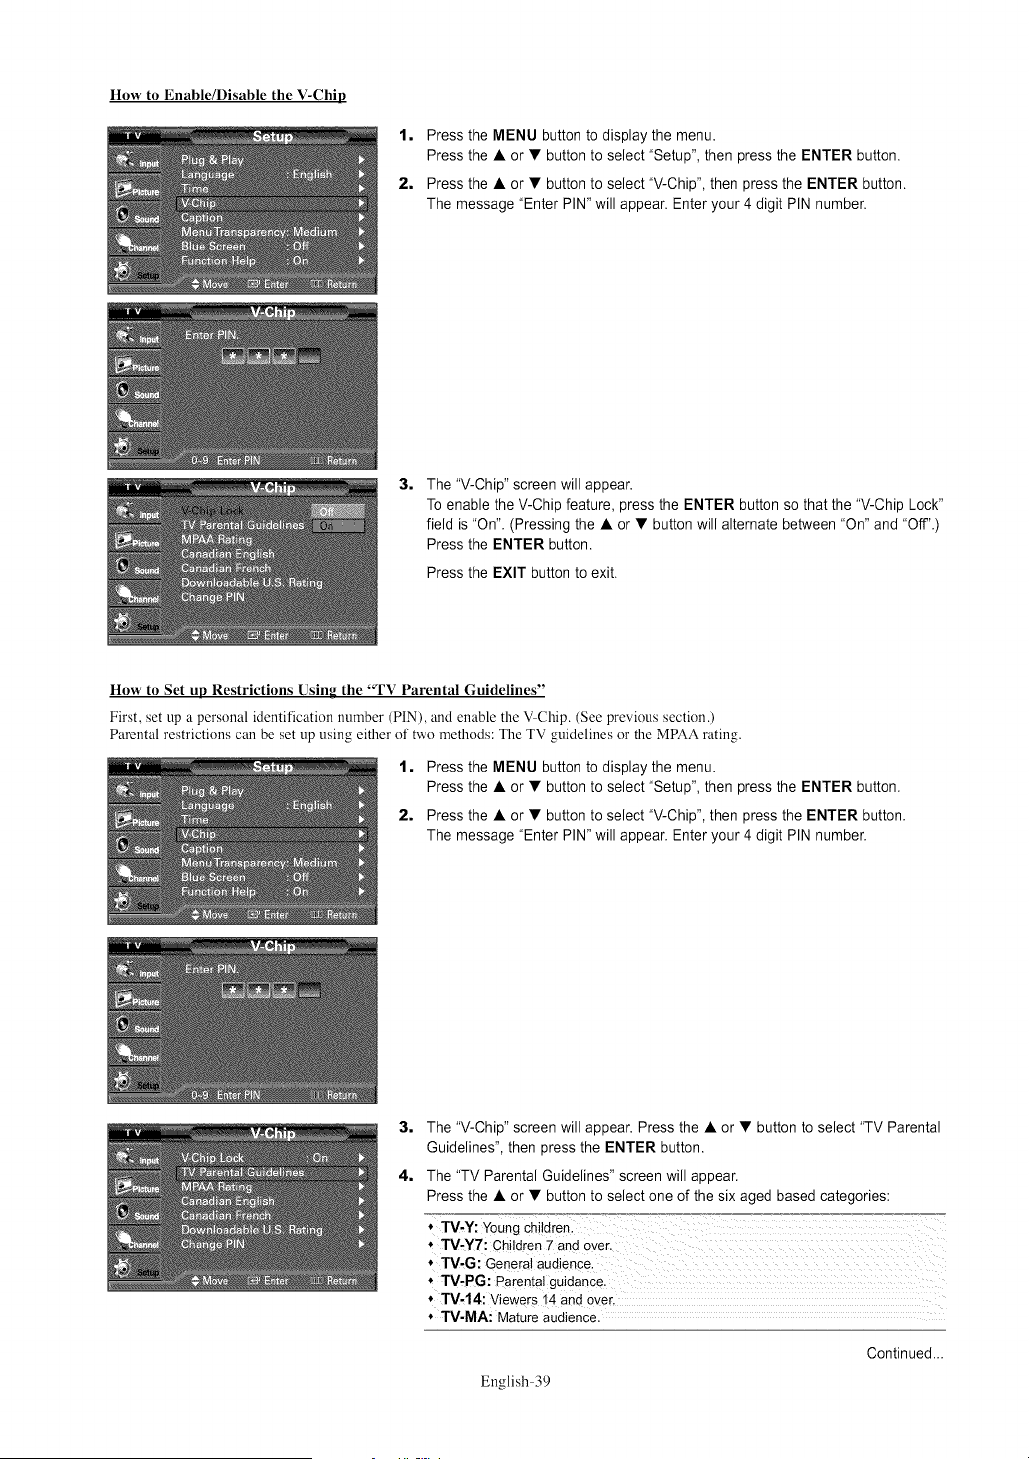
How to Enable/Disable the V-Chip
1, Press the MENU button to display the menu.
Press the • or • button to select "Setup", then press the ENTER button.
2, Press the • or • button to select "V-Chip", then press the ENTER button.
The message "Enter PIN" will appear. Enter your 4 digit PIN number.
3,
The "V-Chip" screen will appear.
To enable the V-Chip feature, press the ENTER button so that the "V-Chip Lock"
field is "On". (Pressing the • or • button will alternate between "On" and "Off'.)
Press the ENTER button.
Press the EXIT button to exit.
How to Set up Restrictions Using the "TV Parental Guidelines"
First, set up a personal identification number (PIN), and enable the V Chip. (See previous section.)
Parental restrictions can be set up using either of two methods: The TV guidelines or the MPAA rating.
1, Press the MENU button to display the menu.
Press the • or • button to select "Setup", then press the ENTER button.
2, Press the • or • button to select "V-Chip", then press the ENTER button.
The message "Enter PIN" will appear. Enter your 4 digit PIN number.
3, The "V-Chip" screen will appear. Press the • or • button to select "TV Parental
Guidelines", then press the ENTER button.
4, The "TV Parental Guidelines" screen will appear.
Press the • or • button to select one of the six aged based categories:
* TV-Y7: Children 7 and over, :
* TV,G: General audience.
* TV-PG: Parental guidanc e,
* TV,14: Viewers i4 and over,
* TV-MA: Mature audience,
English-39
Continued...
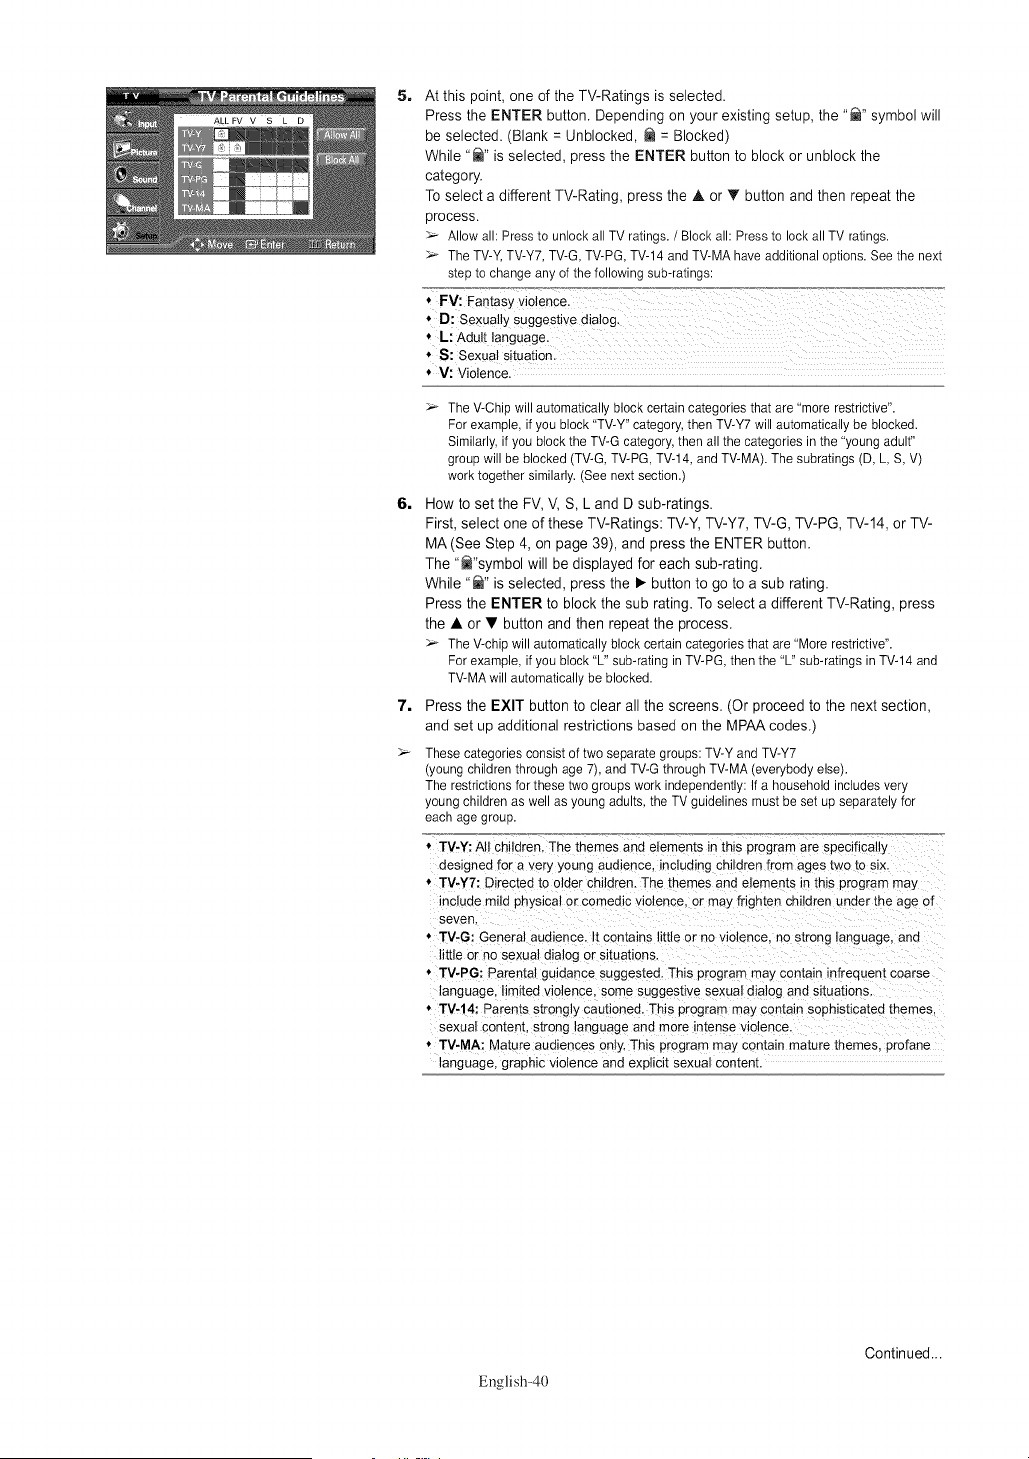
5. At this point, one of the TV-Ratings is selected.
Press the ENTER button. Depending on your existing setup, the "_" symbol will
be selected. (Blank = Unblocked, _ = Blocked)
While "_" is selected, press the ENTER button to block or unblock the
category.
To select a different TV-Rating, press the • or • button and then repeat the
process.
Allowall: Pressto unlockall TV ratings./ Blockall: Pressto lockall TV ratings.
TheTV-Y,TV-Y7,TV-G,TV-PG,TV-14andTV-MAhaveadditionaloptions.Seethe next
stepto changeanyof the followingsub-ratings:
6,
7,
* V: Violence.
The V-Chip will automatically block certain categories that are "more restrictive".
For example, if you block "TV-Y" category, then TV-Y7 will automatically be blocked.
Similarly, if you block the TV-G category, then all the categories in the "young adult"
group will be blocked (TV-G, TV-PG, TV-14, and TV-MA). The subratings (D, L, S, V)
work together similarly. (See next section.)
How to set the FV, V, S, L and D sub-ratings.
First, select one of these TV-Ratings: TV-Y, TV-Y7, TV-G, TV-PG, TV-14, or TV-
MA (See Step 4, on page 39), and press the ENTER button.
The "_"symbol will be displayed for each sub-rating.
While "_" is selected, press the • button to go to a sub rating.
Press the ENTER to block the sub rating. To select a different TV-Rating, press
the • or • button and then repeat the process.
The V-chip will automatically block certain categories that are "More restrictive".
For example, if you block "L" sub-rating in TV-PG, then the "L" sub-ratings in TV-14 and
TV-MA will automatically be blocked.
Press the EXIT button to clear all the screens. (Or proceed to the next section,
and set up additional restrictions based on the MPAA codes.)
These categories consist of two separate groups: TV-Y and TV-Y7
(young children through age 7), and TV-G through TV-MA (everybody else).
The restrictions for these two groups work independently: If a household includes very
young children as well as young adults, the TV guidelines must be set up separately for
each age group.
* TV-Y: All children. The themes and elements in this program are spec %ally
designed for a very young audience, including children from ages two to six.
* TV-Y7: Directed to older children. The themes and elements in this program may
include mild physical or comedic violence, or may frighten children under the age of
seven
* TV-G: General audience. It contains little or no violence, no strong anguage, and
little or no sexual dialog or situations.
* TV-PG: Parental guidance suggested. This program may contain infrequent coarse
language, limited violence, some suggestive sexual dialog and situations.
* TV-14: Parents strongly cautioned. This prograrr may contain sophisticated themes.
sexual content, strong language and more intense violence.
* TV-MA: Mature audiences only. This program rray contain mature themes, profane
language, graphic violence and exphclt sexual content.
English-40
Continued...
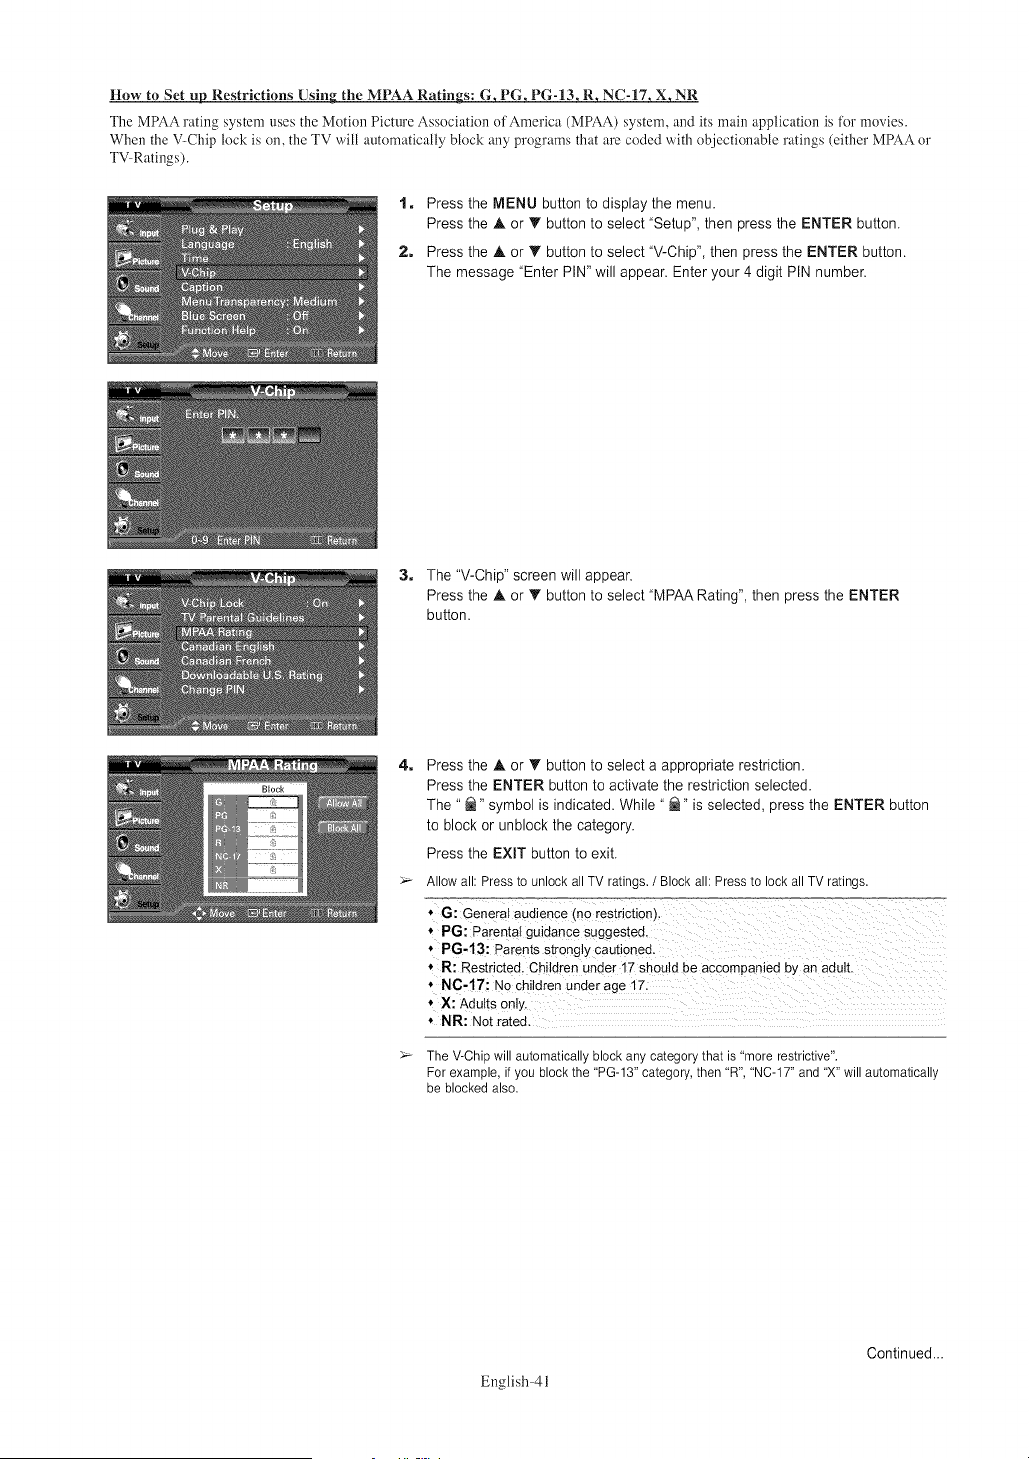
How to Set up Restrictions Using the MPAA Ratings: G, PG, PG-13, R, NC-17, X, NR
The MPAA rating system uses the Motion Picture Association of America (MPAA) system, and its main application is tiJr movies.
When the V-Chip lock is on, the TV will automatically block any programs that are coded with objectionable ratings (either MPAA or
TV Ratings).
1, Press the MENU button to display the menu.
Press the A or T button to select "Setup", then press the ENTER button.
2, Press the A or T button to select "V-Chip", then press the ENTER button.
The message "Enter PIN" will appear. Enter your 4 digit PIN number.
3. The "V-Chip" screen will appear.
Press the A or T button to select "MPAA Rating", then press the ENTER
button.
4_
5_
Press the A or T button to select a appropriate restriction.
Press the ENTER button to activate the restriction selected.
The " _" symbol is indicated. While " @" is selected, press the ENTER button
to block or unblock the category.
Press the EXIT button to exit.
Allow all: Press to unlock all TV ratings. / Block all: Press to lock all TV ratings.
* 6: General audience (no restriction).
* PG: Parental guidanCe Suggested,
* P6-13i Parents Str0ng y Cauti0ned.
* R: Restricted, Children under 17 should be accompanied by an adulL
5_
NR: Not rated.
The V-Chip will automatically block any category that is 'more restrictive".
For example, if you block the 'PG-13" category, then 'R", 'NC-17" and 'X" will automatically
be blocked also.
English-4l
Continued...
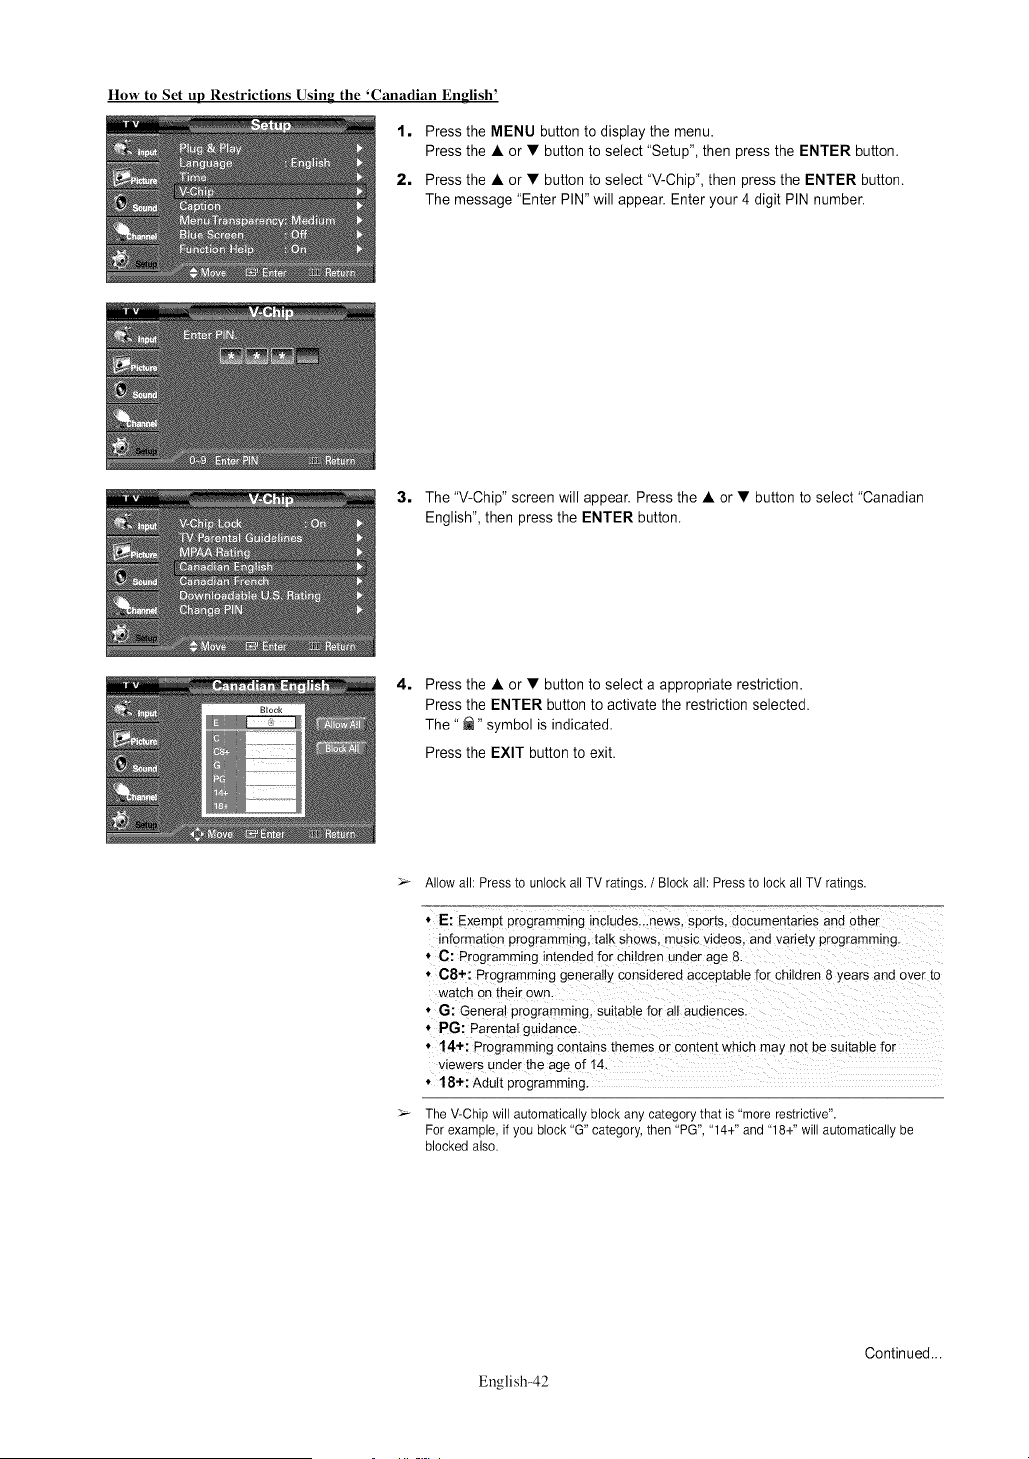
How to Set up Restrictions Using the 'Canadian English'
1, Press the MENU button to display the menu.
Press the • or • button to select "Setup", then press the ENTER button.
2, Press the • or • button to select "V-Chip", then press the ENTER button.
The message "Enter PIN" will appear. Enter your 4 digit PIN number.
3, The "V-Chip" screen will appear. Press the • or • button to select "Canadian
English", then press the ENTER button.
4,
Press the • or • button to select a appropriate restriction.
Press the ENTER button to activate the restriction selected.
The" _" symbol is indicated.
Press the EXIT button to exit.
_- Allow all: Press to unlock all TV ratings. / Block all: Press to lock all TV ratings.
* E: Exempt programming includes...news, sports, documentaries and other
information programming, talk shows, music videos, and variety programming.
* C: Programming intended for children under age 8
* C8+: Programming generally considered acceptable for children 8 years and over to
watch on their own.
* G: General programming, suitable for all audiences.
* PG: Parental guidance.
* 14+: Programming contains themes or content which may not be suitable for
viewers under the age of 14
* 18+: AduIt programming.
The V-Chip will automatically block any category that is "more restrictive".
For example, if you block "G" category, then "PG", "14+" and "18+" will automatically be
blocked also.
English-42
Continued...
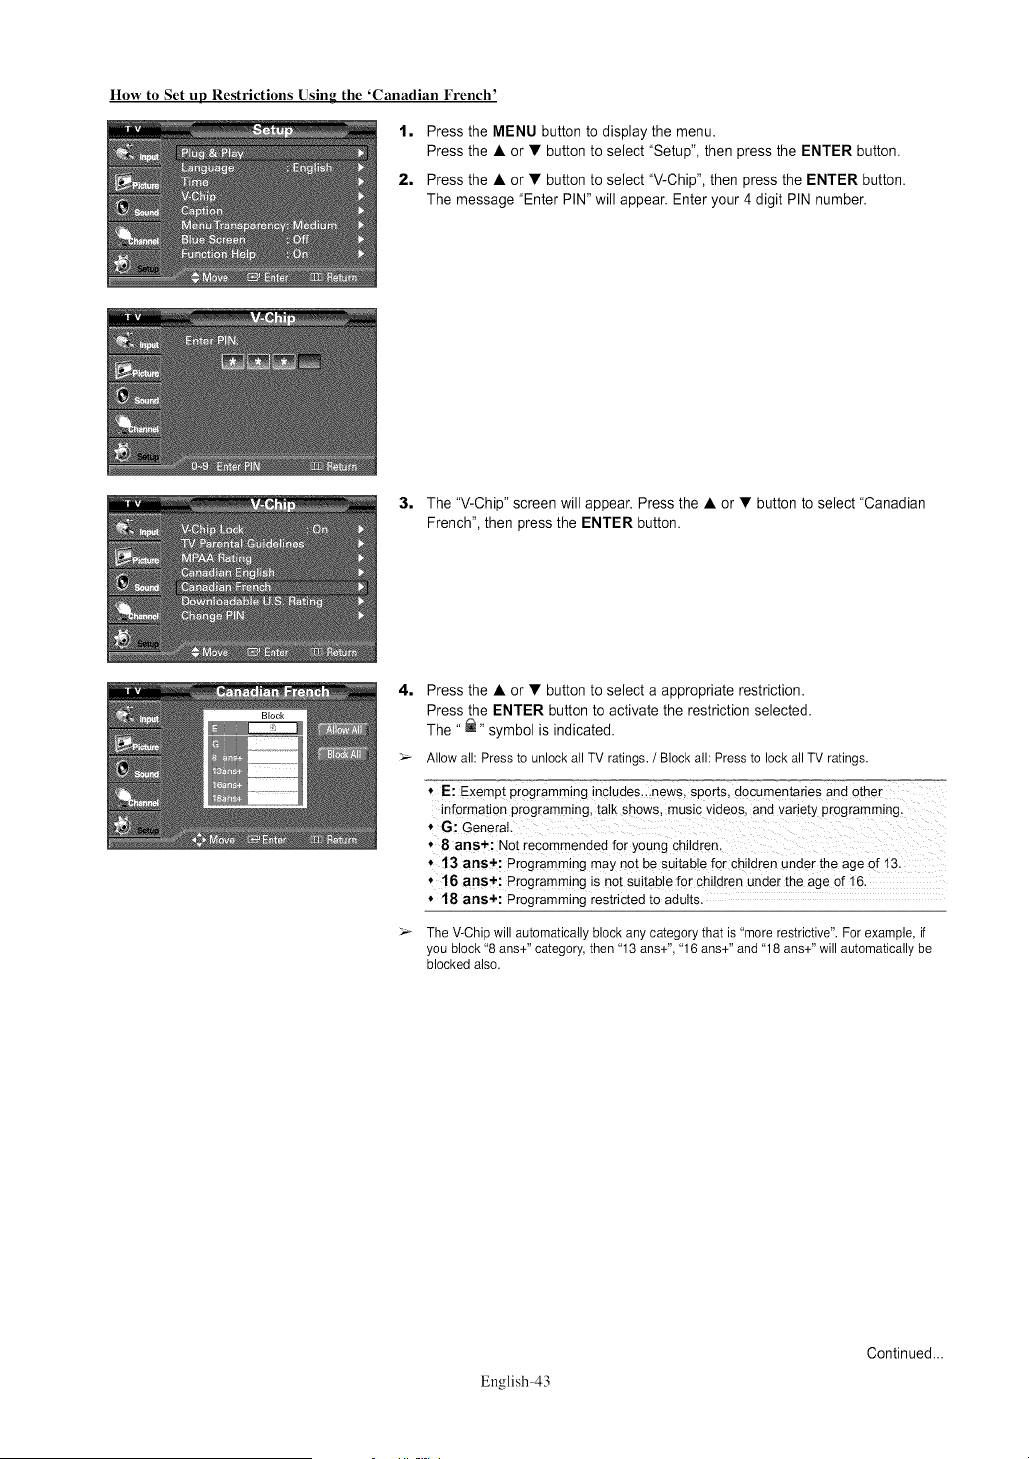
How to Set up Restrictions Using the 'Canadian French'
1, Press the MENU button to display the menu.
Press the • or • button to select "Setup", then press the ENTER button.
2, Press the • or • button to select "V-Chip", then press the ENTER button.
The message "Enter PIN" will appear. Enter your 4 digit PIN number.
3, The "V-Chip" screen will appear. Press the • or • button to select "Canadian
French", then press the ENTER button.
4, Press the • or • button to select a appropriate restriction.
Press the ENTER button to activate the restriction selected.
The "_" symbol is indicated.
Allowall: Pressto unlockall TV ratings./ Blockall:Pressto lockallTV ratings.
* E: Exempt programming !ndudes,.,news, sports, decumentaries and other
information programming, ta!k shows, music videos, and variety programming,
* G:General.
'8 ans+: a0t rec0mmended for young Children,
'13 ans+; Programming may not be suitable for children under the age of !3:
* 16 ans+; Programming is not suitab!e for children under the age of 16,
.18 ntis+: Programming restricted to adults.
The V-Chip will automatically block any category that is "more restrictive". For example, if
you block "8 ans+" category, then "13 ans+", "16 ans+" and "18 ans+" will automatically be
blocked also.
English-43
Continued...
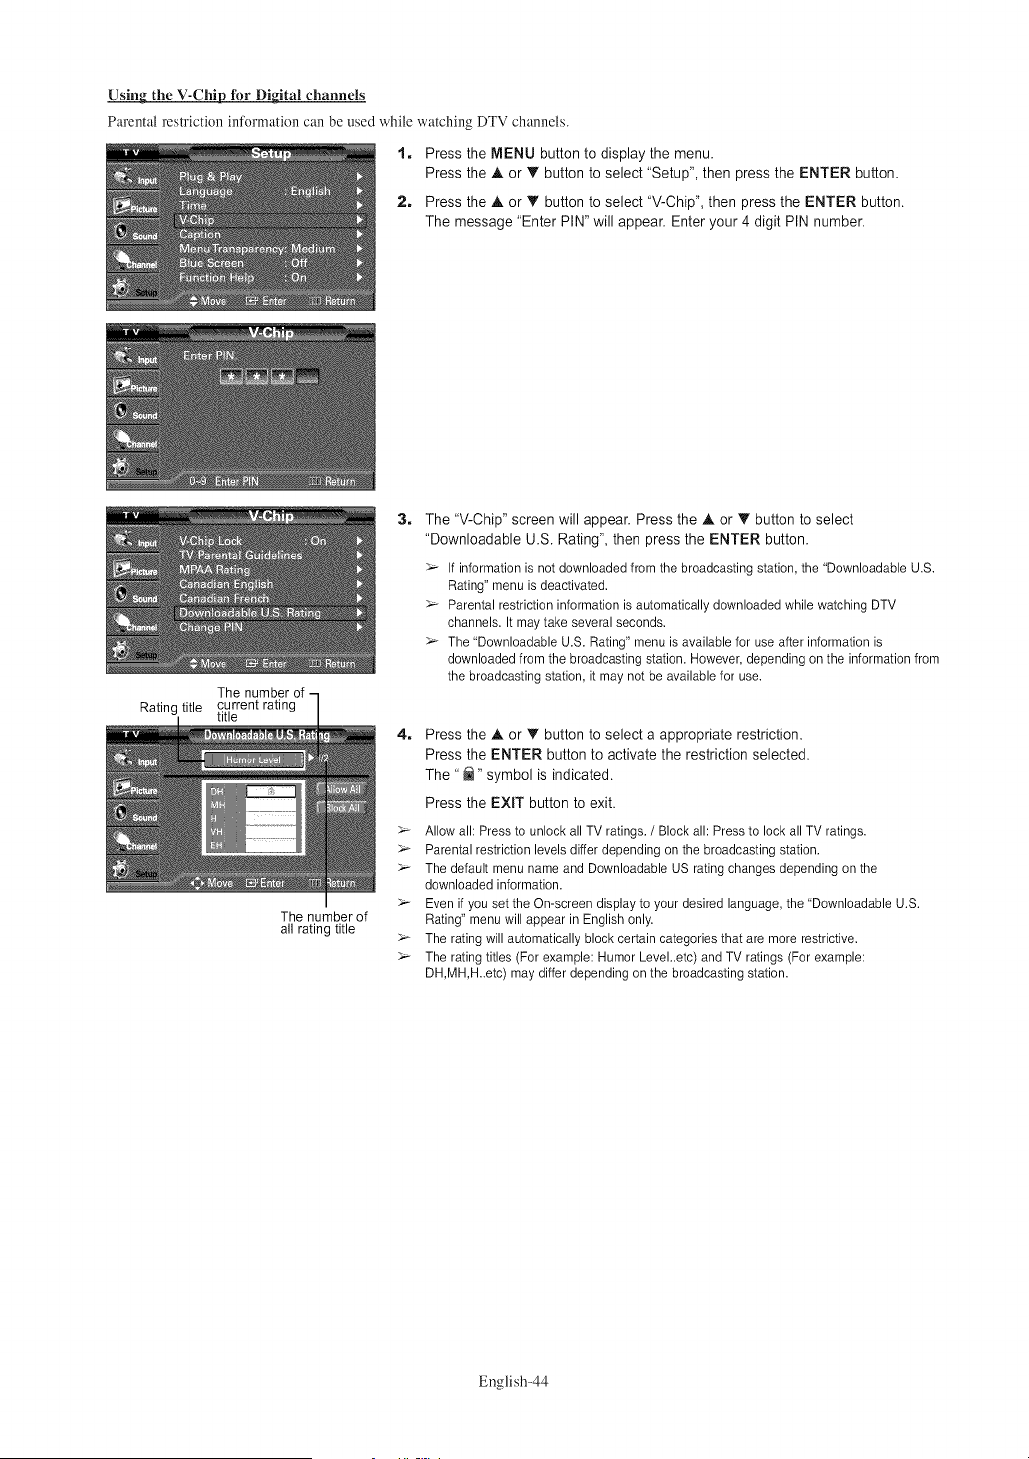
Using the V-Chip for Digital channels
Parental restriction intk)rmation can be used while watching DTV channels.
1. Press the MENU button to display the menu.
Press the ,_ or IP' button to select "Setup", then press the ENTER button.
2. Press the A or _' button to select "V-Chip", then press the ENTER button.
The message "Enter PIN" will appear. Enter your 4 digit PIN number.
The number of -
Rating title current rating
title
The number of
all rating title
3. The "V-Chip" screen will appear. Press the A or T button to select
"Downloadable U.S. Rating", then press the ENTER button.
If information is not downloaded from the broadcasting station, the 'Downloadable U.S.
Rating" menu is deactivated.
Parental restriction information is automatically downloaded while watching DTV
channels. It may take several seconds.
The 'Downloadable U.S. Rating" menu is available for use after information is
downloaded from the broadcasting station. However, depending on the information from
the broadcasting station, it may not be available for use.
4_
Press the A or _' button to select a appropriate restriction.
Press the ENTER button to activate the restriction selected.
The "_" symbol is indicated.
Press the EXIT button to exit.
Allow all: Press to unlock all TV ratings. / Block all: Press to lock all TV ratings.
Parental restriction levels differ depending on the broadcasting station.
The default menu name and Downloadable US rating changes depending on the
downloaded information.
Even if you set the On-screen display to your desired language, the 'Downloadable U.S.
Rating" menu will appear in English only.
The rating will automatically block certain categories that are more restrictive.
The rating titles (For example: Humor Level..etc) and TV ratings (For example:
DH,MH,H..etc) may differ depending on the broadcasting station.
English-44
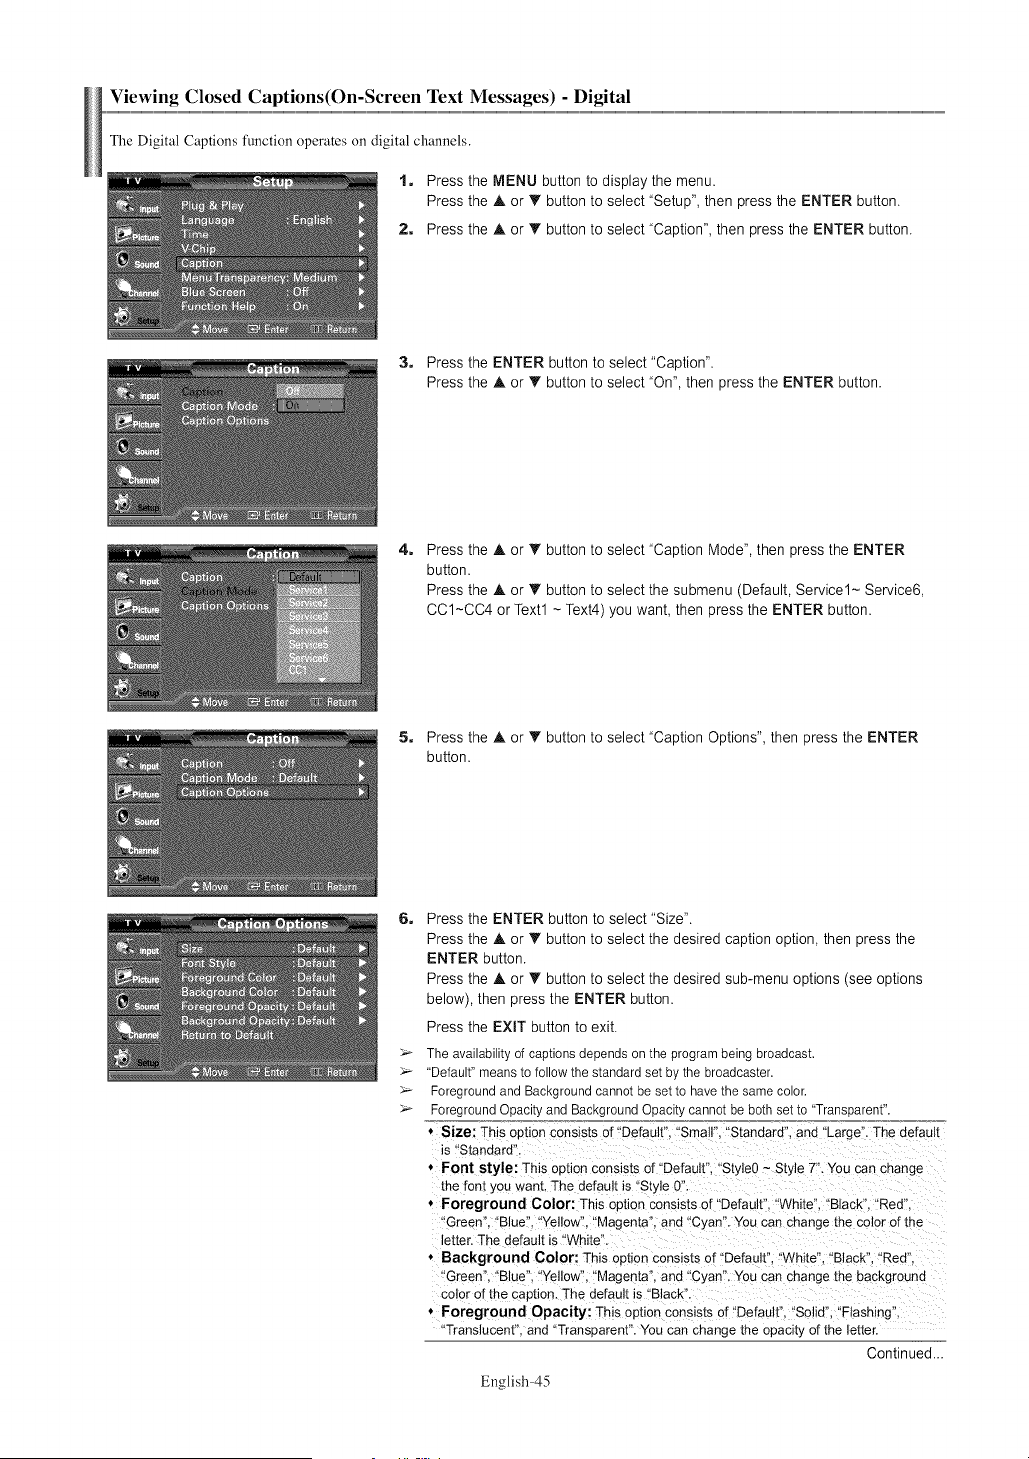
ViewingClosedCaptions(On-ScreenTextMessages) - Digital
The Digital Captions function operates oi1 digital channels.
1. Press the MENU button to display the menu.
Press the A or T button to select "Setup", then press the ENTER button.
2. Press the A or T button to select "Caption", then press the ENTER button.
3. Press the ENTER button to select "Caption".
Press the A or T button to select "On", then press the ENTER button.
4.
Press the A or • button to select "Caption Mode", then press the ENTER
button.
Press the A or T button to select the submenu (Default, Service1~ Service6,
CC1~CC4 or Text1 ~ Text4) you want, then press the ENTER button.
5. Press the A or T button to select "Caption Options", then press the ENTER
button.
6.
5_
5_
5_
5_
Press the ENTER button to select "Size".
Press the A. or T button to select the desired caption option, then press the
ENTER button.
Press the ,_.or T button to select the desired sub-menu options (see options
below), then press the ENTER button.
Press the EXIT button to exit.
The availabilityof captionsdependsonthe programbeing broadcast.
"Default"meansto followthe standardset bythe broadcaster.
ForegroundandBackgroundcannotbe set to havethe samecolor.
ForegroundOpacityand BackgroundOpacitycannotbe bothsetto "Transparent".
, Size: This optionconsists of "Default". "Small"."Standard".and "Large".The default
is "Standard".
, Font style: This optionconsistsof"Default". "Style0- Style 7". You san change
the font youwant. The default is "Style 0"
* Foreground Color: This option consistsof "Default"."White". "Black"."Red",
"Green"."Blue", "Yellow","Magenta".and "Cyan'. Youcan change the color of the
letter.The default is "White"
• Background Color: This optionconsists of "Default"."White"."Black". "Red".
"Green"."Blue". "Yellow","Magenta",and "Cyan'. Youcan change the background
color of the caption.The default is "Black".
* Foreground Opacity: This optionconsists of "Default". "Solid"."Flashing"
"Translucent".and "Transparent".Youcan change the opacityof the letter.
Continued...
English-45
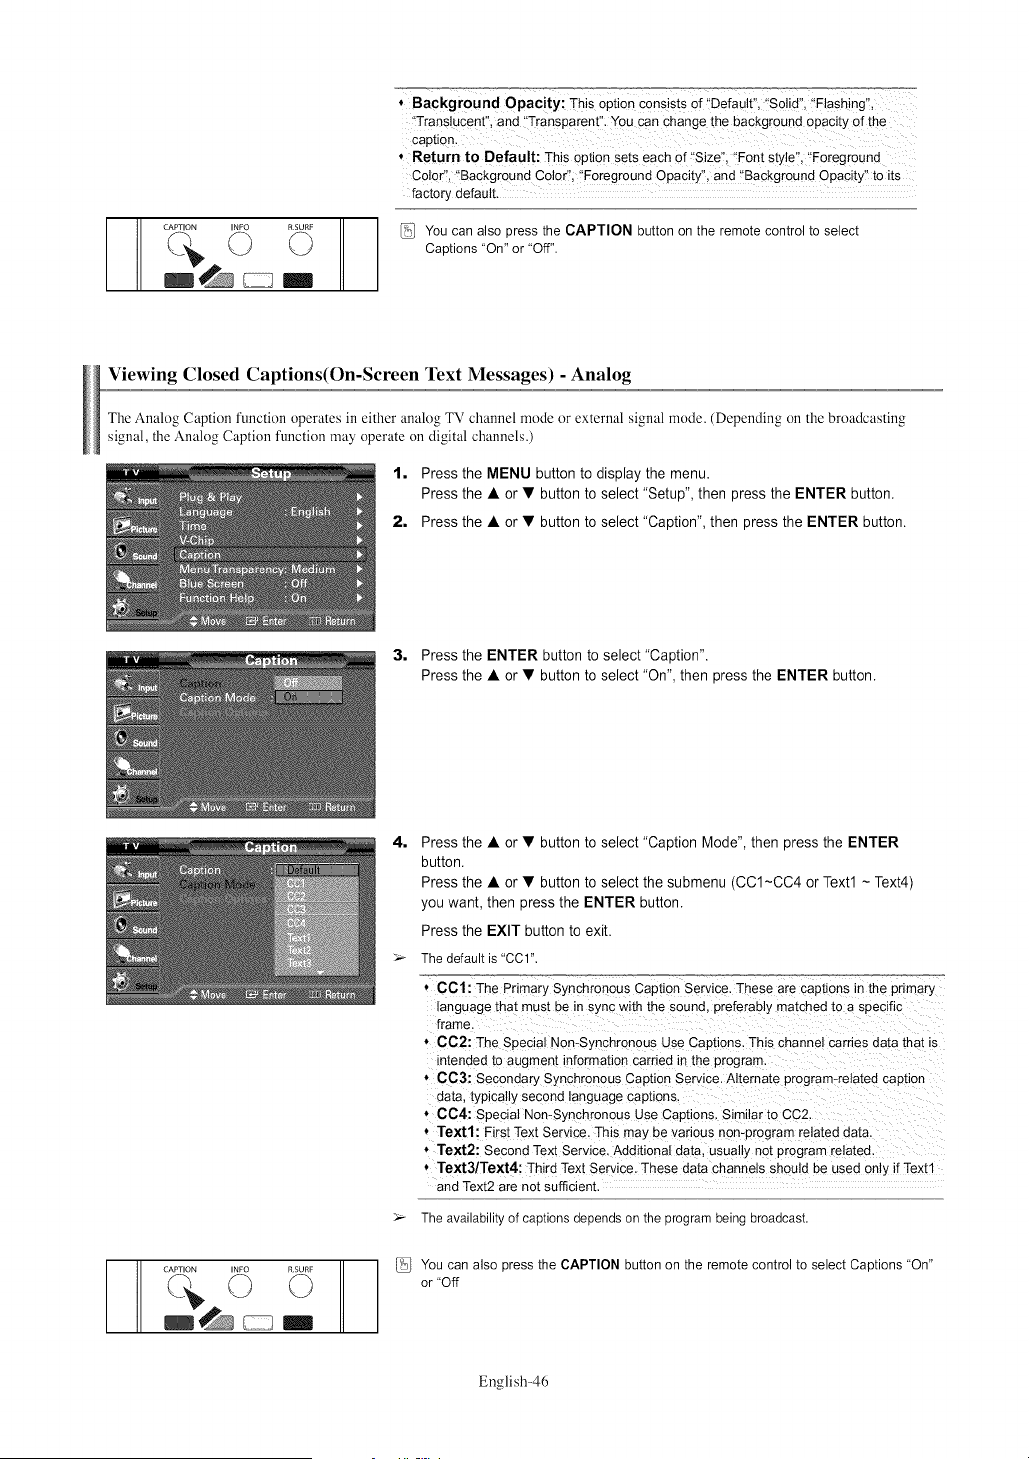
_" _,_ RSURF
CAPTION INFO Q
, Background OpacitY; ThiS oPtiOn _nsists of i!Default,, i'S01id,, 'Flashing",
,Trans!ucent", and ,Transparent": You can change the background opacity of the
Capti0nl
* Return to Default: This option sets each of !!Size'!i 'Font styW!, "Foreground
Color'!, ,Background Color", i'Foreground Opacity", and _'Background Opacity, to its
factory default.
You can also press the CAPTION button on the remote control to select
Captions "On" or "Off".
Viewing Closed Captions(On-Screen Text Messages) - Analog
The Analog Caption function operates in either analog TV channel mode or external signal mode. (Depending on the broadcasting
signal, the Analog Caption function may operate on digital channels.)
1, Press the MENU button to display the menu.
Press the • or • button to select "Setup", then press the ENTER button.
2, Press the • or • button to select "Caption", then press the ENTER button.
3, Press the ENTER button to select "Caption".
Press the • or • button to select "On", then press the ENTER button.
CAPTION INFO RSURF
4,
Press the • or • button to select "Caption Mode", then press the ENTER
button.
Press the • or • button to select the submenu (CC1~CC4 or Text1 ~ Text4)
you want, then press the ENTER button.
Press the EXIT button to exit.
The default is "CCI".
CCl: The Primary Synchronous Caption Service. These are captions in the primary
language that must be in sync with the sound, preferably matched to a specific
frame
CC2: The Special Non-Synchronous Use Captions. This channel carries data that is
intended to augment information carried in the program.
• CC3: Secondary Synchronous Caption Service. Alternate program-related caption
data typically second language captions.
* CC4: Special Non-Synchronous Use Captions. Similar to CC2
* Textl: First Text Service. This may be various non-program related data.
Text2: Second Text Service. Additional data. usually not program related.
* Text3/Text4: Third Text Service. These data channels should be used only if Text1
and Text2 are not sufficient.
The availability of captions depends on the program being broadcast.
You can also press the CAPTION button on the remote control to select Captions "On"
or "Off
English-46
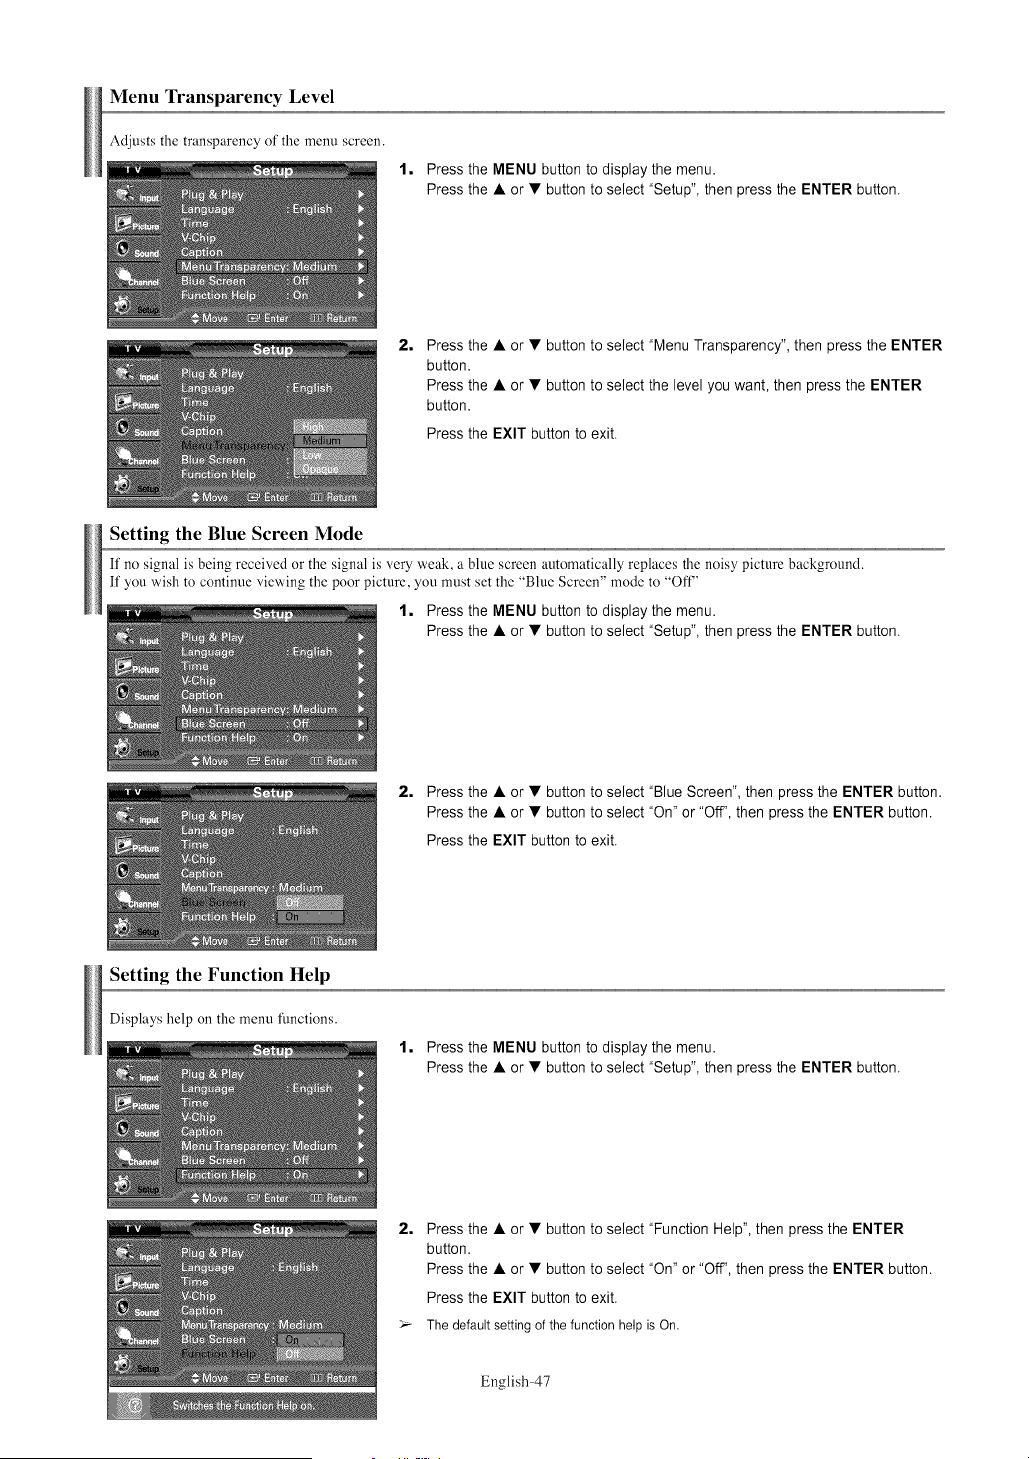
Menu Transparency Level
Adjusts the transparency of the menu screen.
1, Press the MENU button to display the menu.
Press the • or • button to select "Setup", then press the ENTER button.
2,
Press the • or • button to select "Menu Transparency", then press the ENTER
button.
Press the • or • button to select the level you want, then press the ENTER
button.
Press the EXIT button to exit.
Setting the Blue Screen Mode
If no signal is being received or the signal is very weak, a blue screen automatically replaces the noisy picture background.
If you wish to continue viewing the poor picture, you must set the "Blue Screen" mode to "Of't"
1, Press the MENU button to display the menu.
Press the • or • button to select "Setup", then press the ENTER button.
Setting the Function Help
2, Press the • or • button to select "Blue Screen", then press the ENTER button.
Press the • or • button to select "On" or "Off", then press the ENTER button.
Press the EXIT button to exit.
Displays help on the menu flmctions.
1, Press the MENU button to display the menu.
Press the • or • button to select "Setup", then press the ENTER button.
2,
Press the • or • button to select "Function Help", then press the ENTER
button.
Press the • or • button to select "On" or "Off", then press the ENTER button.
Press the EXIT button to exit.
_- The default setting of the function help is On.
English-47
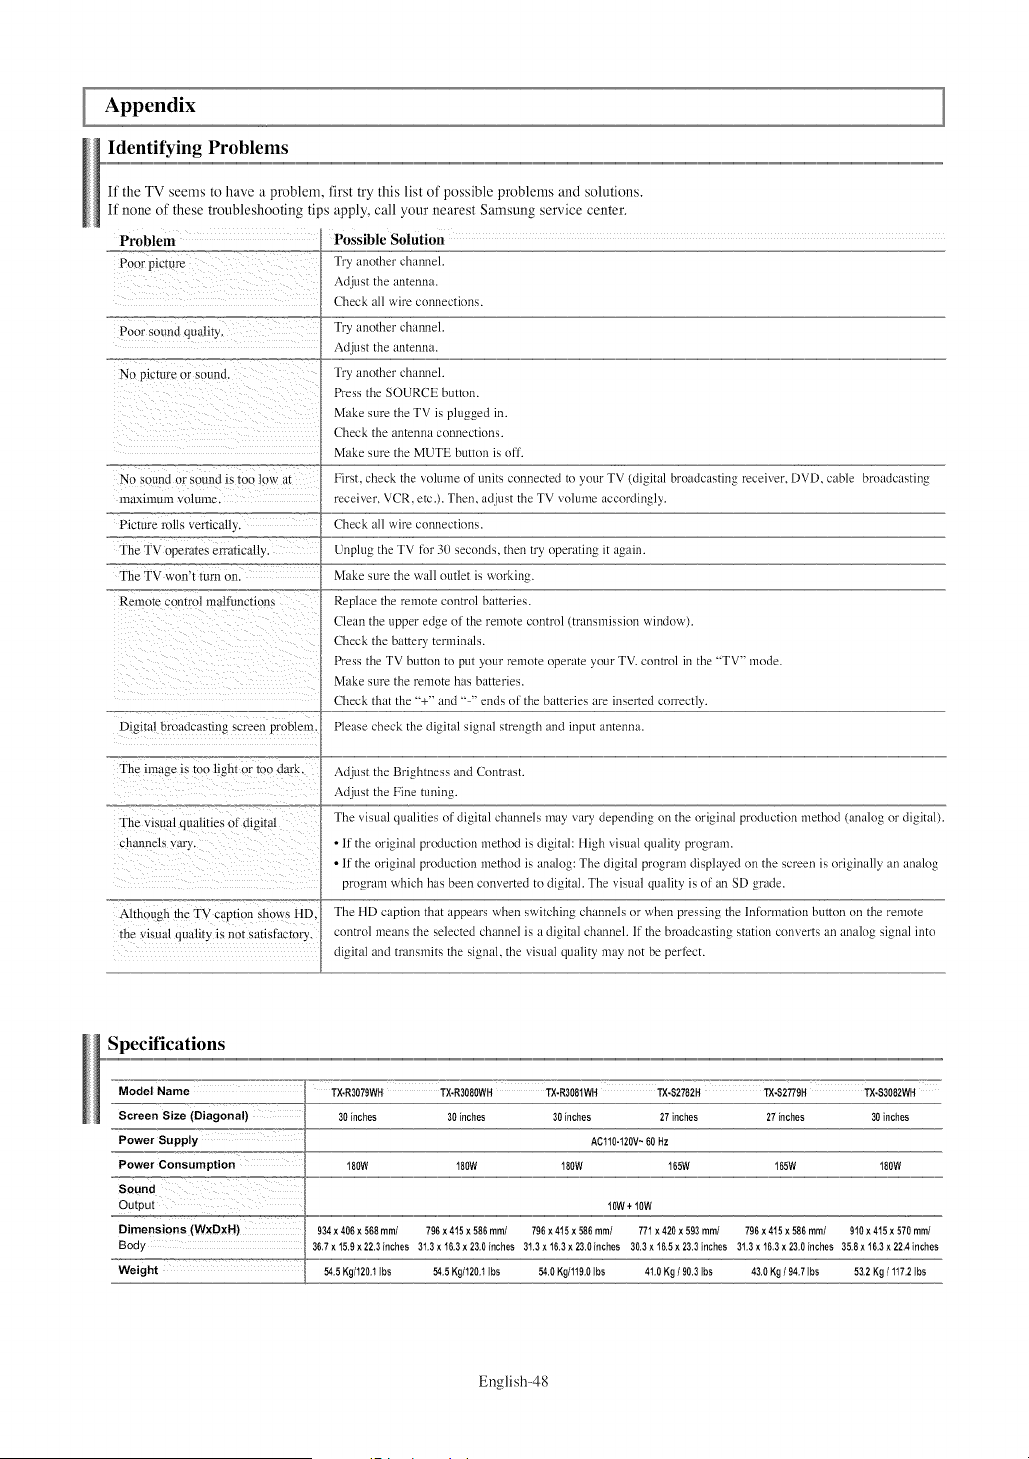
Appendix
Identifying Problems
If the TV seems to have a problem, first try this list of possible problems and solutions.
If none of these troubleshooting tips apply, call your nearest Samsung service center.
Problem Possible Solution
Poor pictm'e Try another channel.
Adjust the antenna.
Check all aqre connections.
Poor sound qual@. Try another channel.
Adjust the antenna.
Nu picture or sound. Try another channeh
Press the SOURCE button.
Make sure the TV is plugged in.
Check the an[enna connections.
Make sure the MUTE button is oil
First check the xolume of units connected to your TV (digital broadcasting receiver, DVD, cable broadcasting
receiver. VCR, etc.). Then, adjust the TV volume accordingly.
Check all a,lre connections.
Unplug the TV for 30 seconds, then try operating it again.
Make sure the wall outlet is working.
Replace the remote control batteries.
Clean the upper edge of the remote control (transmission window).
Check the battery ternfinals.
Press the TV button to put your remote operate your TV. control in the -TV" mode.
Make sure the remote has batteries.
Check that the "'+" and .... ends of the batteries are inserted correctly.
Digital broadcasting screen problem. Please check the digital signal strength and input antenna.
No sonnd or SoLnldis to, low at
nlaxinlLUll volLune.
Picture rolls vertically.
The TV operates errancally.
The TV won't turn on.
Renlote control nl_tll]lnctions
The mmge Is too light or too dark.
The visual qualities of digital
channels wiry.
Although the TV captmn shows ftD
the visual quality is not satisfhctory.
Adjust the Brightness and Contrast.
Adjust the Fine tuning.
The visual qualities of digital channels may wiry depending on the original production method (analog or digital).
• 11the original production method is digital: fligh visual quality progrmn.
• 11the original production method is analog: The digital program displayed on the scI_en is originally an analog
program which has been converted to digital. The visual quality is of an SD grade.
The flD caption that appears when switching channels or when pressing the lnfi_rmation button on the remote
control means the selected channel is a digital channeh If the broadcasting station converts an analog signal into
digital and transmits the signal, the visual quality may not be perfect.
Specifications
Model Name TX-R3079WH TX-R3080WH TX-R3081WH TX-S2782H TX-S2779H TX-S3082WH
Screen Size (Diagonal) 30 inches 30 inches 30inches 27inches 27inches 30inches
Power Supply AClt0-t20V~ 60Hz
Power Consumption 100W 100W 100W 165W 165W 180W
=S_ound "==7=_7_=_:"=7_7 ......................................................................................................................................................................................................................................................................................................................................................................................................................................................................................................................................................................................................................................................................................
OutPut ......................................................................................................................................................................................................................................................................................................................!,,!W,,,,+,,,!,,!,
Dimensions (WxDxH) 934x 406x 568mini 796x415 x586 mm/ 796x415x 586ram/ 771x 420x 593mini 796x 415x 586ram/ 910x415x 570mini
Body 36,7x15,gx22,3inches 31,3x16,3x23,0inches 31,3x16,3x23,0inches 30,3x16,5x23,3inches 31,3x16,3x23,0inches 35,8x16,3x22Ainches
Weight 54,5Kg/t20,3Ibs 54,5Kg/t20,3Ibs 54,0Kg/t19,0Ibs 4t,0 Kg/ 90,3Ibs 43,0Kg/ 94,7Ibs 53,2Kg/ 117,2Ibs
English-48
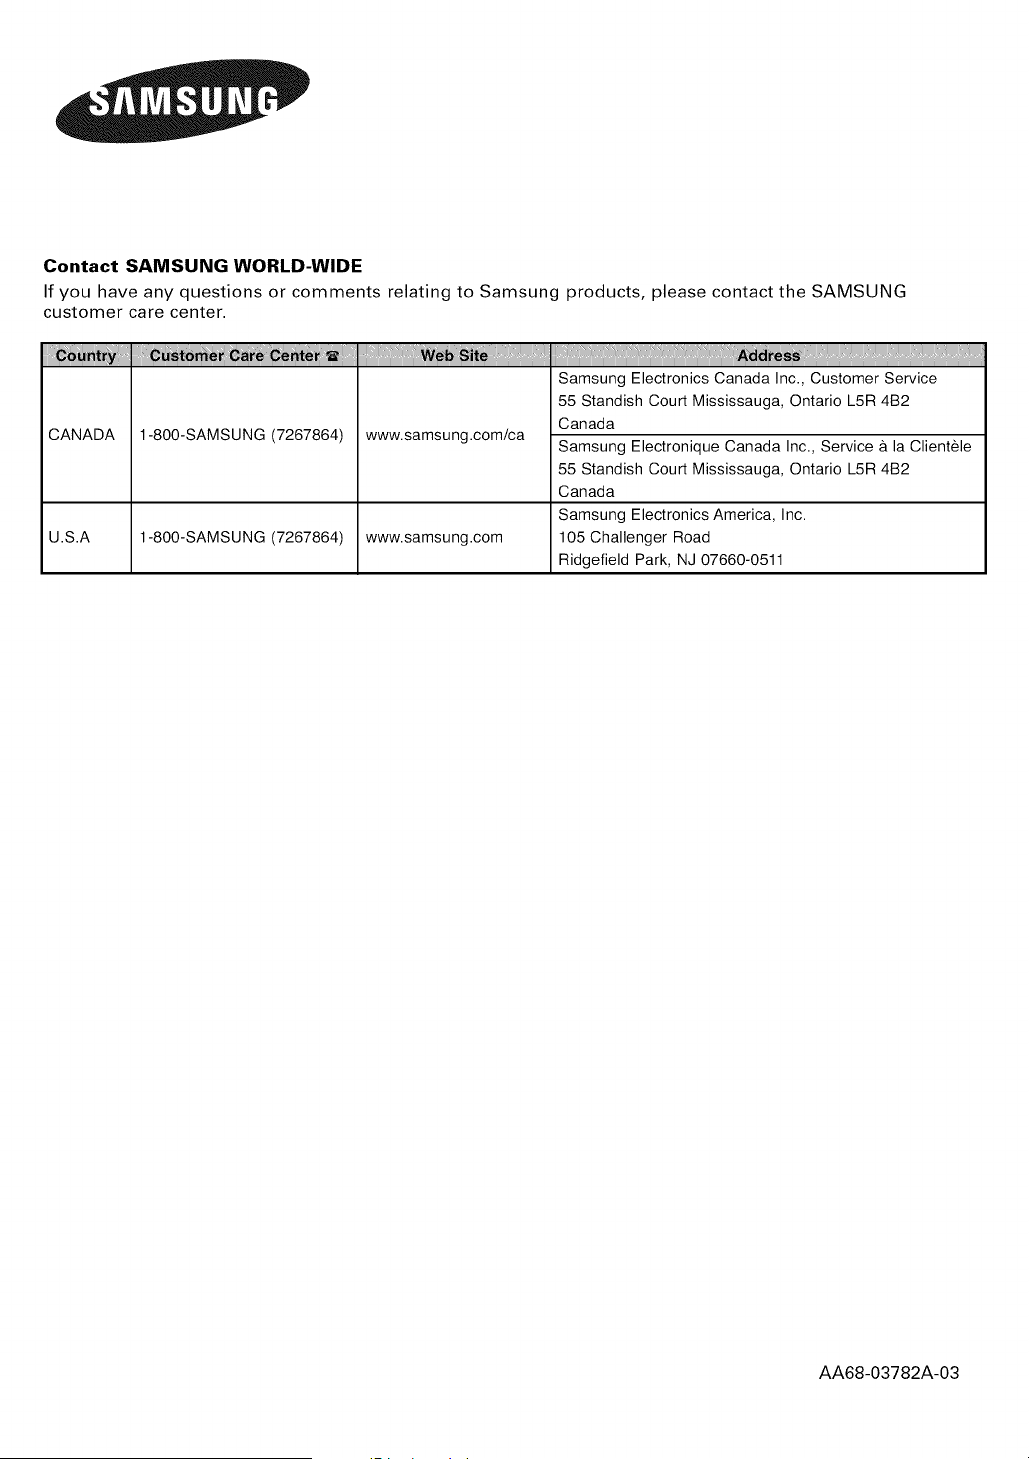
Contact SAMSUNG WORLD-WIDE
If you have any questions or comments relating to Samsung products, please contact the SAMSUNG
customer care center.
CANADA
U.S.A
1-800-SAMSUNG (7267864) www.samsung.com/ca
www.samsung.com1-800-SAMSUNG (7267864)
Samsung Electronics Canada Inc., Customer Service
55 Standish Court Mississauga, Ontario L5R 4B2
Canada
Samsung Electronique Canada Inc., Service & la Clientele
55 Standish Court Mississauga, Ontario L5R 4B2
Canada
Samsung Electronics America, Inc.
105 Challenger Road
Ridgefield Park, NJ 07660-0511
AA68-03782A-03