Loading ...
Loading ...
Loading ...
Installation
Page 25Page 8
Cabinet Preparation
Choose a place near the sink to facilitate the
Ÿ
installation of inlet and drain hoses.
Cabinet dimensions less than 5mm between the
Ÿ
top of dishwasher and cabinet and the outer door
aligned to cabinet.
90°90°
820mm
580mm
80
100
600mm
Electrical, drain
and water supply
line entrances
Space between cabinet
bottom and floor
Cabinet
Dishwasher
Dishwasher
Door
Min. space
of 50mm
Aesthetic Fascia Panel Dimensions and
installation
The aesthetic fascia panel should be processed
Ÿ
according to the diagram below.
Minimum space between the door and adjacent
Ÿ
cabinet when the door is opened is 50mm.
Side View
589
595(MAX)
195
Front View
207
12
566
220
41
135.5
220
Fit the condensation strip under the work surface of
Ÿ
the cabinet. Ensure that the strip is flush with the
edge of the work surface.
Condensation Strip
Open
Care and Cleaning
Filtering System
The filter prevents larger remnants of food or other
objects from getting inside the pump.
The residue may block the filter, in this case they must
be removed.
The filter system consists of a coarse filter, a flat (Main
filter) and a microfilter (Fine filter).
3
2
1
MAIN FILTER: Food and soil particles trapped
in this filter are pulverized by a special jet on the
lower spray arm and washed down the drain.
COARSE FILTER: Larger items, such as
pieces of bones or glass, that could clog the
drain are trapped in the coarse filter. To
remove an item caught in this filter, gently
squeeze the taps on the top of this filter and
lift it out.
FINE FILTER: This filter holds soil and food
residues in the sump area and prevents it from
being redeposit on the dishes during a cycle.
1
2
3
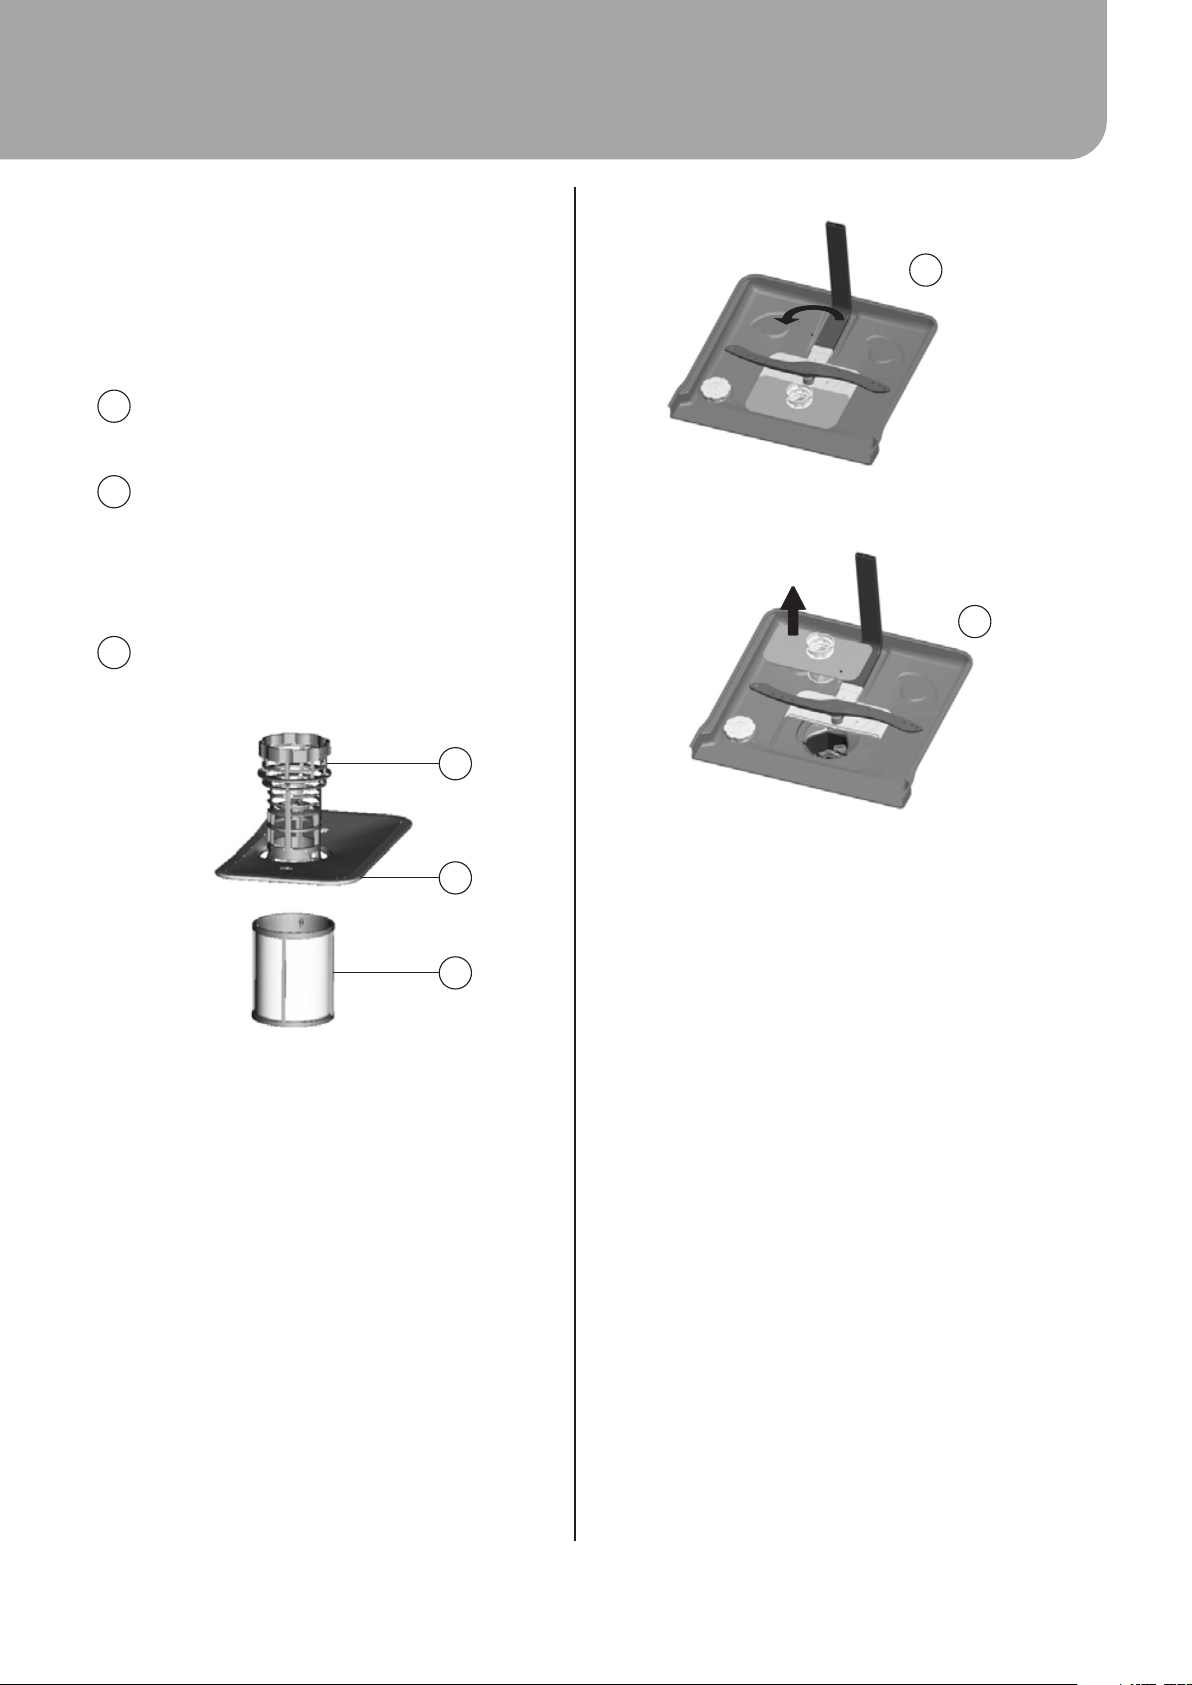
Filter Assembly
The filter efficiently removes food particles from the
wash water, allowing it to be recycled during the cycle.
For best performance and results, the filter must be
cleaned regularly. For this reason, it is a good idea to
remove the larger food particles trapped in the filter
after each wash cycle by rinsing the semicircular filter
and cup under running water.
To remove the filter device, pull the cup handle in the
upward direction.
WARNING!
The dishwasher must never be used without the
Ÿ
filters.
Improper replacement of the filter may reduce the
Ÿ
performance level of the appliance and damage
dishes and utensils.
1
2
STEP 1: Turn the filter in anti-clockwise direction.
STEP 2: Lift the filter assembly up.
NOTES:
When following this procedure from step 1 to step
Ÿ
2, the filter system will be removed; when following
it from Step 2 to Step 1, the filter system will be
installed.
Inspect the filters for blocking after every time the
Ÿ
dishwasher has been used.
By unscrewing the coarse filter, you can remove the
Ÿ
filter system. Remove any food remnants and clean
the filters under running water.
The entire filter assembly should be cleaned once a
Ÿ
week.
Cleaning the Filter
To clean the coarse filter and the fine filter, use a
cleaning brush. Reassemble the filter parts as shown
in the figures above and reinsert the entire assembly in
the dishwasher, positioning it in its seat and pressing
downwards.
WARNING!
When cleaning the filters, do not knock on them.
Ÿ
Otherwise, the filters could be contorted and the
performance of the dishwasher could be
decreased.
Loading ...
Loading ...
Loading ...