Loading ...
Loading ...
Loading ...
FEATUREGUIDE
This manual covers several models. Your model may have some or all of the items listed. Refer to this manual or Frequently Asked
Questions (FAQs) section of our website at www.maytag.com for more detailed instructions. In Canada, reference the Customer Service
section at www.maytag.ca.
Food Poisoning Hazard
Do not let food sit in oven more than one hour before
or after cooking.
Doing so can result in food poisoning or sickness.
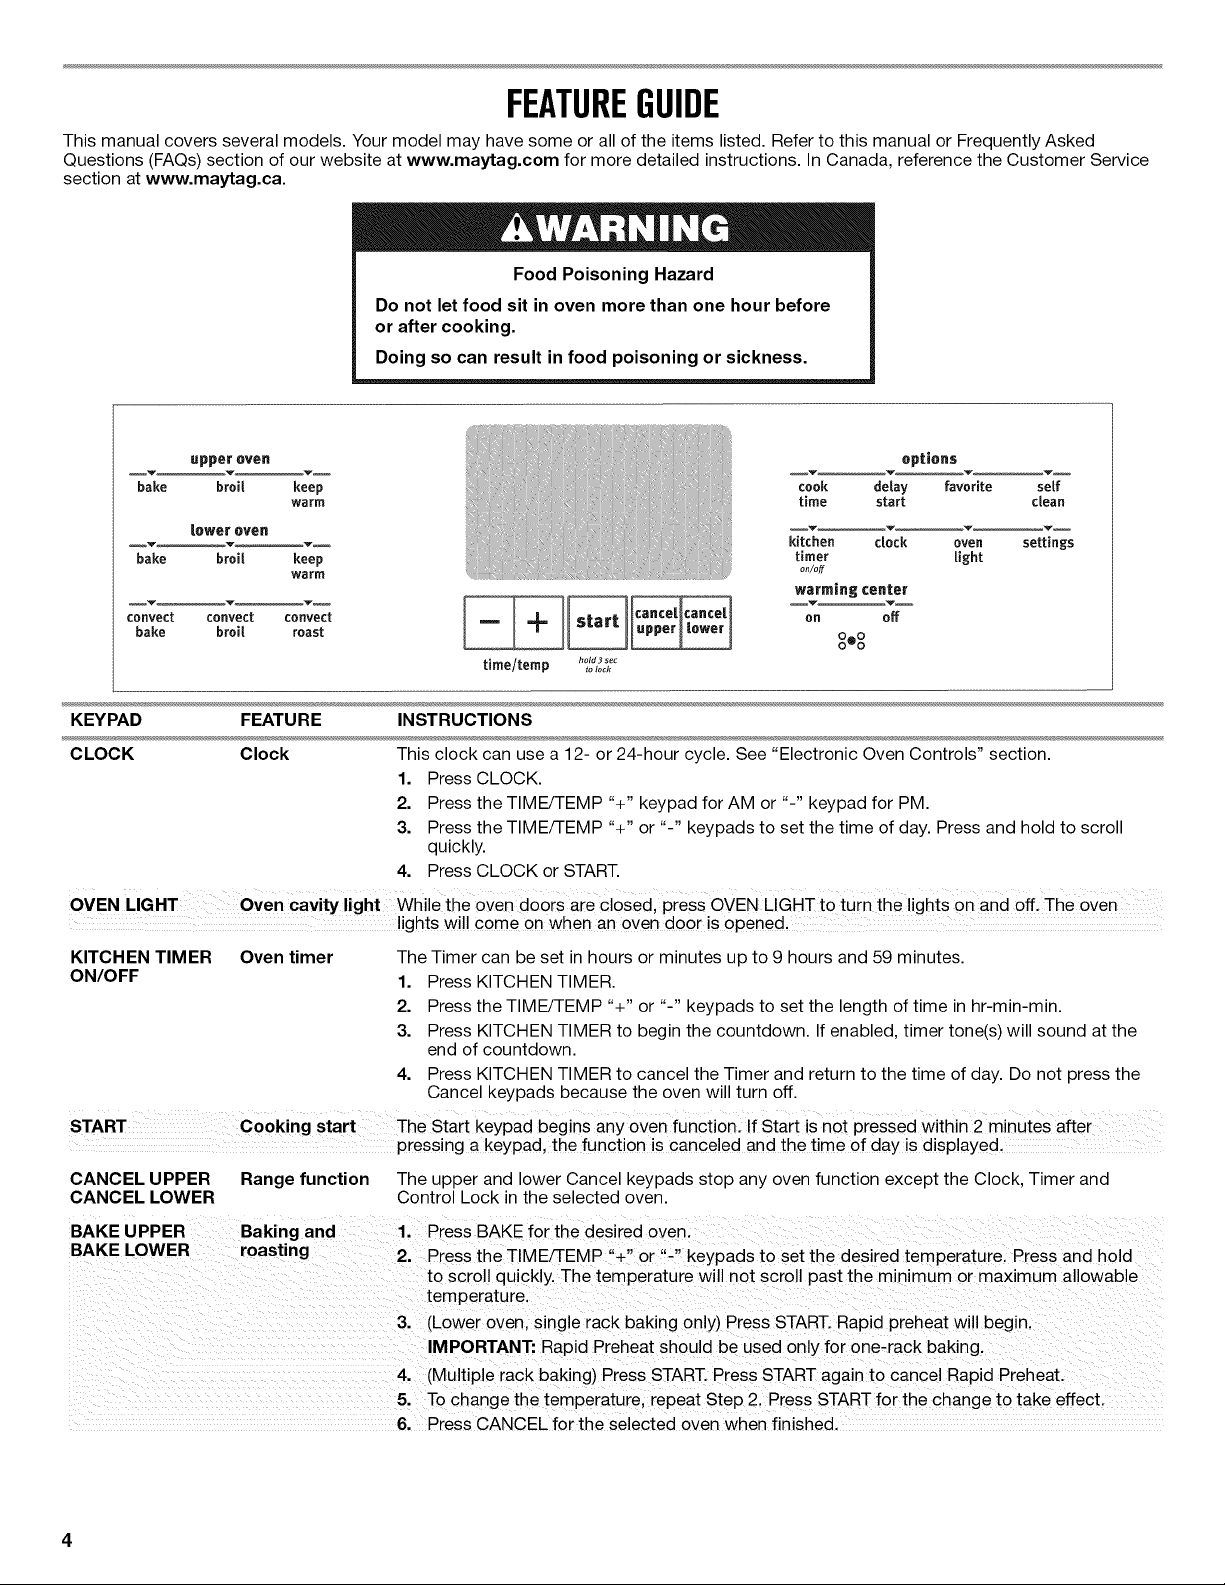
upperovon
bake broil keep
warm
Lower oven
bake broil keep
warm
convect convect convect
bake broi_ roast
time/romp hold 3 sectolock
options
cook delay favorite self
time start clean
kitchen clock oven settings
timer light
on/off
warming center
on off
o o
0o0
KEYPAD FEATURE INSTRUCTIONS
CLOCK Clock This clock can use a 12- or 24-hour cycle. See "Electronic Oven Controls" section.
1. Press CLOCK.
2. Press the TIME/TEMP "+" keypad for AM or "-" keypad for PM.
3. Press the TIME/TEMP "+" or "-" keypads to set the time of day. Press and hold to scroll
quickly.
4. Press CLOCK or START.
OVEN LIGHT Oven cavity light While the o_en doors aid cloSed, press OVEN EIGHT to turn the lights on and off, The oven
lights wi!! come on when an oven door is oPened,
KITCHEN TIMER Oven timer
ON/OFF
The Timer can be set in hours or minutes up to 9 hours and 59 minutes.
1. Press KITCHEN TIMER.
2. Press the TIME/TEMP "+" or "-" keypads to set the length of time in hr-min-min.
3. Press KITCHEN TIMER to begin the countdown. If enabled, timer tone(s) will sound at the
end of countdown.
4. Press KITCHEN TIMER to cancel the Timer and return to the time of day. Do not press the
Cancel keypads because the oven will turn off.
START Cooking start The Start keypad begins any oven function. If Start is not pressed within 2 minutes after
pressing a keypad, the function is cance!ed and the time of day is disp!ayed.
CANCEL UPPER Range function The upper and lower Cancel keypads stop any oven function except the Clock, Timer and
CANCEL LOWER Control Lock in the selected oven.
BAKE UPPER
BAKE LOWER
6,
Baking and 1. Press BAKE for the desired oven.
roasting 2. Press the TIME/TEMP "+" or "-" keypads to set the desired temperature. Press and hold
to scroll quickly. The temperature will not scroll past the minimum or maximum allowable
temperature.
3. (Lower oven, single rack baking only) Press START. Rapid preheat will begin,
IMPORTANT: Rapid Preheat should be used only for one-rack baking.
4. (Multiple rack baking) Press START. Press START again to cancel Rapid Preheat.
5. To change the temperature, repeat Step 2. Press START for the change to take effect.
Press CANCEL for the selected oven when finished.
Loading ...
Loading ...
Loading ...