Loading ...
Loading ...
Loading ...
4
| P a g e
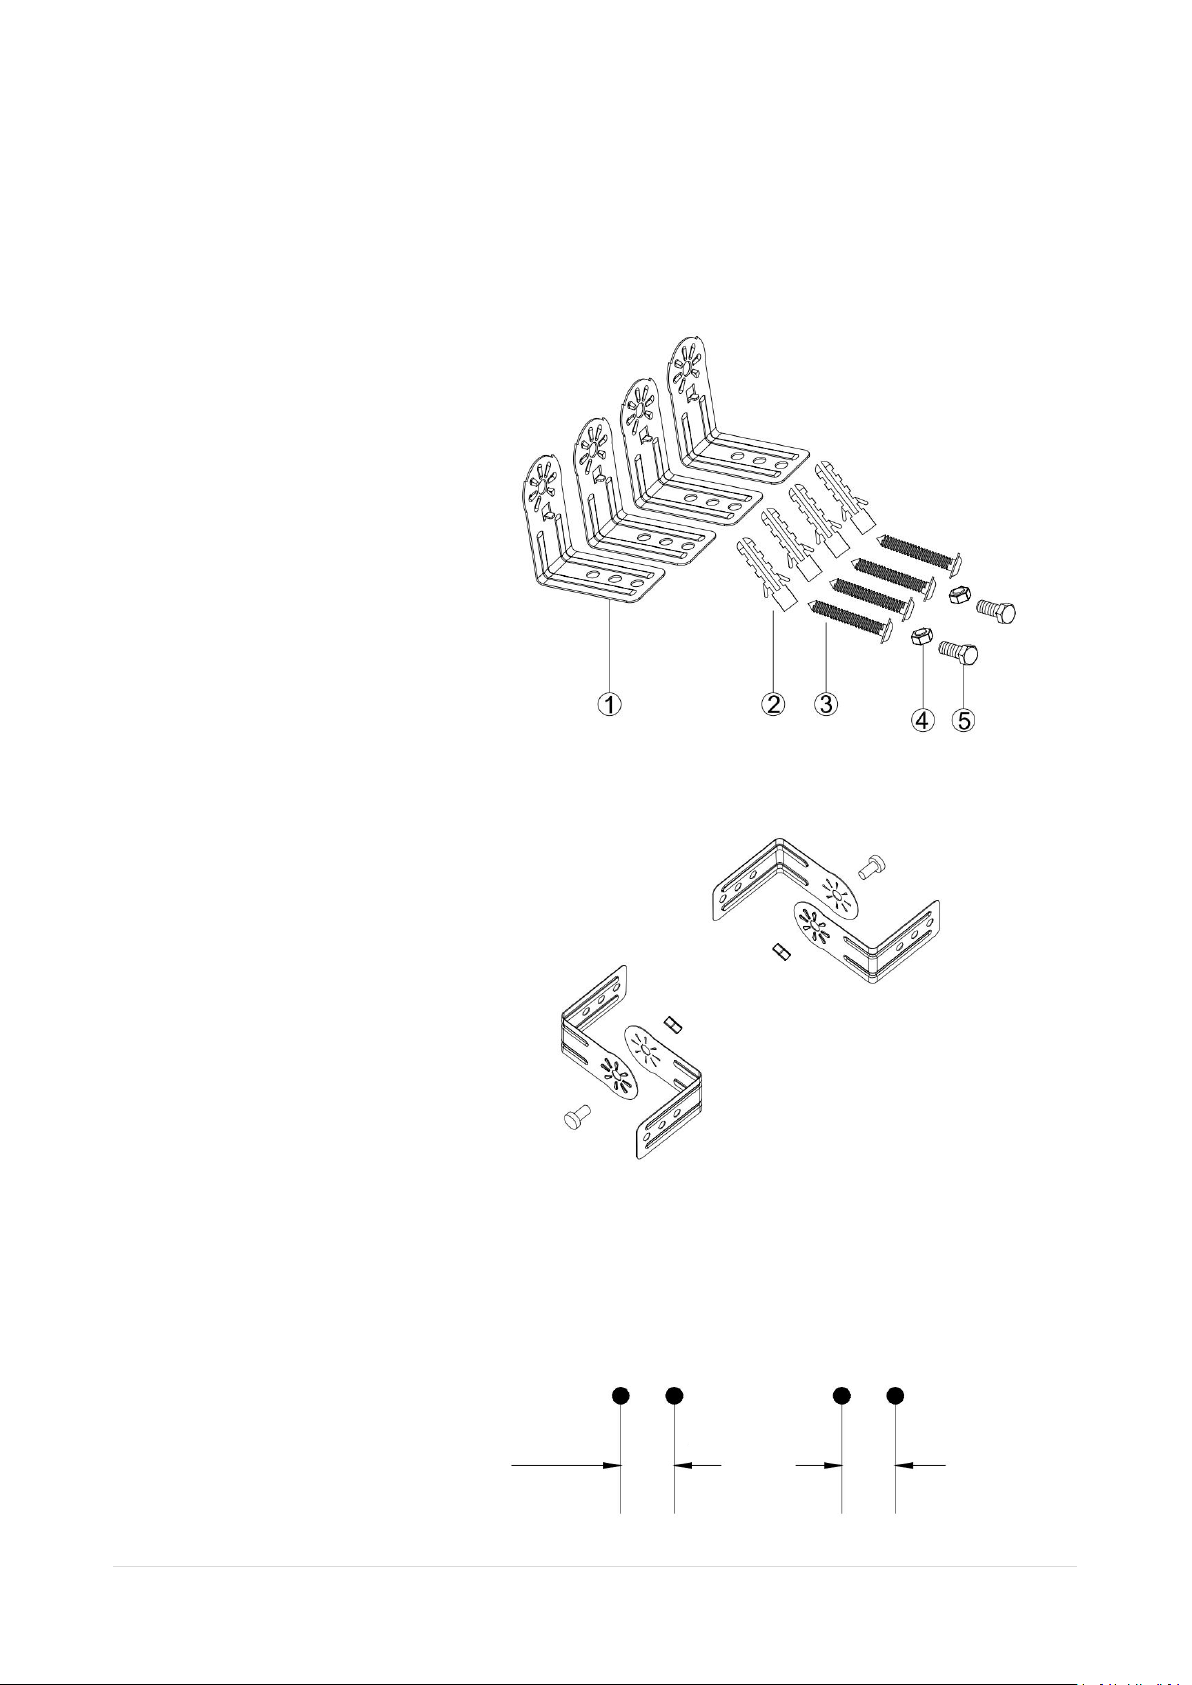
20. Fasten the brackets securely to the mounting surface and the backside of the heater using the
nuts and screws supplied.
21. Fasten the heater securely on the brackets using the nuts and bolts supplied.
22. The brackets can be used to adjust the direction of the heater, adjust the heater angle by
loosening the two bolts on the wall mounting bracket, tighten the bolts again when the
desired angle is reached.
Installation
Accessories parts
1. L shaped bracket 4pcs
2. Plastic anchor 4pcs
3. Screw M5*25mm 4pcs
4. Nut M6 2pcs
5. Screw M6*12mm 2pcs
Mounting step
1. L shaped Bracket installation
Fasten the L shaped braket using the screws and nuts provided (no.4 and no.5)
2. Mark holes on the place where the heater to be mounted with a pencil
1.1 "
1.1 "
11.8"-15.7”
Loading ...
Loading ...
Loading ...