Loading ...
Loading ...
Loading ...
NOTE: Do not rest the HassHe-Free IWM Cutting Head on
the ground whiHe the unit is running.
Some Hinebreakage will occur from:
• EntangHement with foreign matter
Attempting to cut thick, staHkyweeds
Forcing the Hineinto objects such as walls or fence
posts
WARN mNG: DonotremoveoraUter
the Hinecutting Made
assemMy. Excessive HineHengthwill make the
dutch overheat. This may Headto serious
personal injury or damage to the unit.
TraPS FOR BEST TRmMMmNG RESULTS
• Keep the cutting attachment paraHeHto the ground.
• Do not force the cutting attachment. AHow the tip of
the Hineto do the cutting, especially along walls.
Cutting with more than the tip will reduce cutting
efficiency and may overload the engine.
• Cut grass over 8 inches (200 mm) by working from
top to bottom in small increments to avoid
premature line wear or engine drag.
• Cut from left to right whenever possible, Cutting to
the right improves the unit's cutting efficiency,
Clippings are thrown away from the operator,
• Slowly move the trimmer in and out of the cutting
area at the desired height. Move either in a forward-
backward or side-to-side motion. Cutting shorter
lengths produces the best results.
• Trim only when grass and weeds are dry,
• The life of your cutting line is dependent upon:
• Following the trimming techniques
• What vegetation is being cut
• Where vegetation is cut
For example, the line will wear faster when trimming
against a foundation wall as opposed to trimming
around a tree,
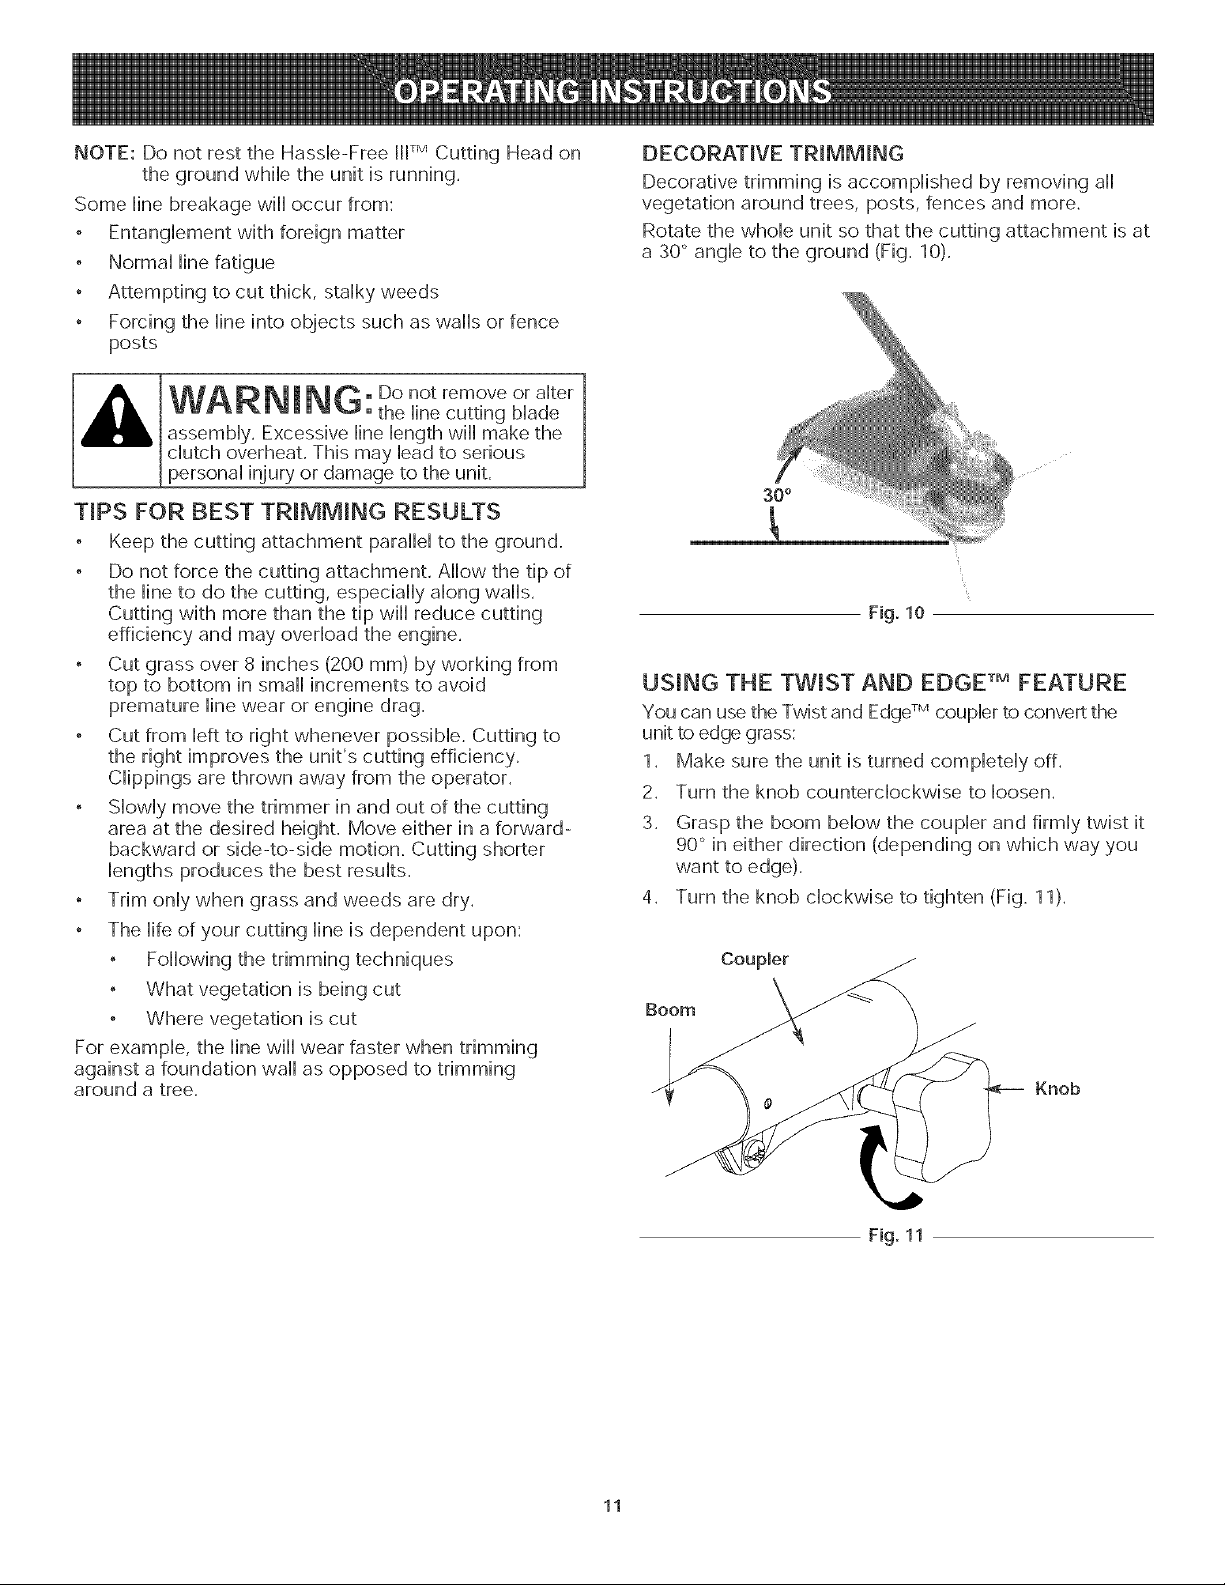
DECORATIVE TR_MM_NG
Decorative trimming is accomplished by removing all
vegetation around trees, posts, fences and more,
Rotate the whole unit so that the cutting attachment is at
a 30" angle to the ground (Fig, 10),
Fig. 10
USING THE TWIST AND EDGE TM FEATURE
You can use the Twist and Edge TM coupler to convert the
unit to edge grass:
1, Make sure the unit is turned completely off,
2, Turn the knob counterclockwise to loosen,
3, Grasp the boom below the coupler and firmly twist it
90" in either direction (depending on which way you
want to edge).
4, Turn the knob clockwise to tighten (Fig. 11),
Coupler
Boom
Knob
Fig. 11
11
Loading ...
Loading ...
Loading ...