Loading ...
Loading ...
Loading ...
HOLDING THE TRmMMER
WARNmNG: Always wear eye,
hearing,footand
body protectionto reduce theriskofinjury
when operating this unit.
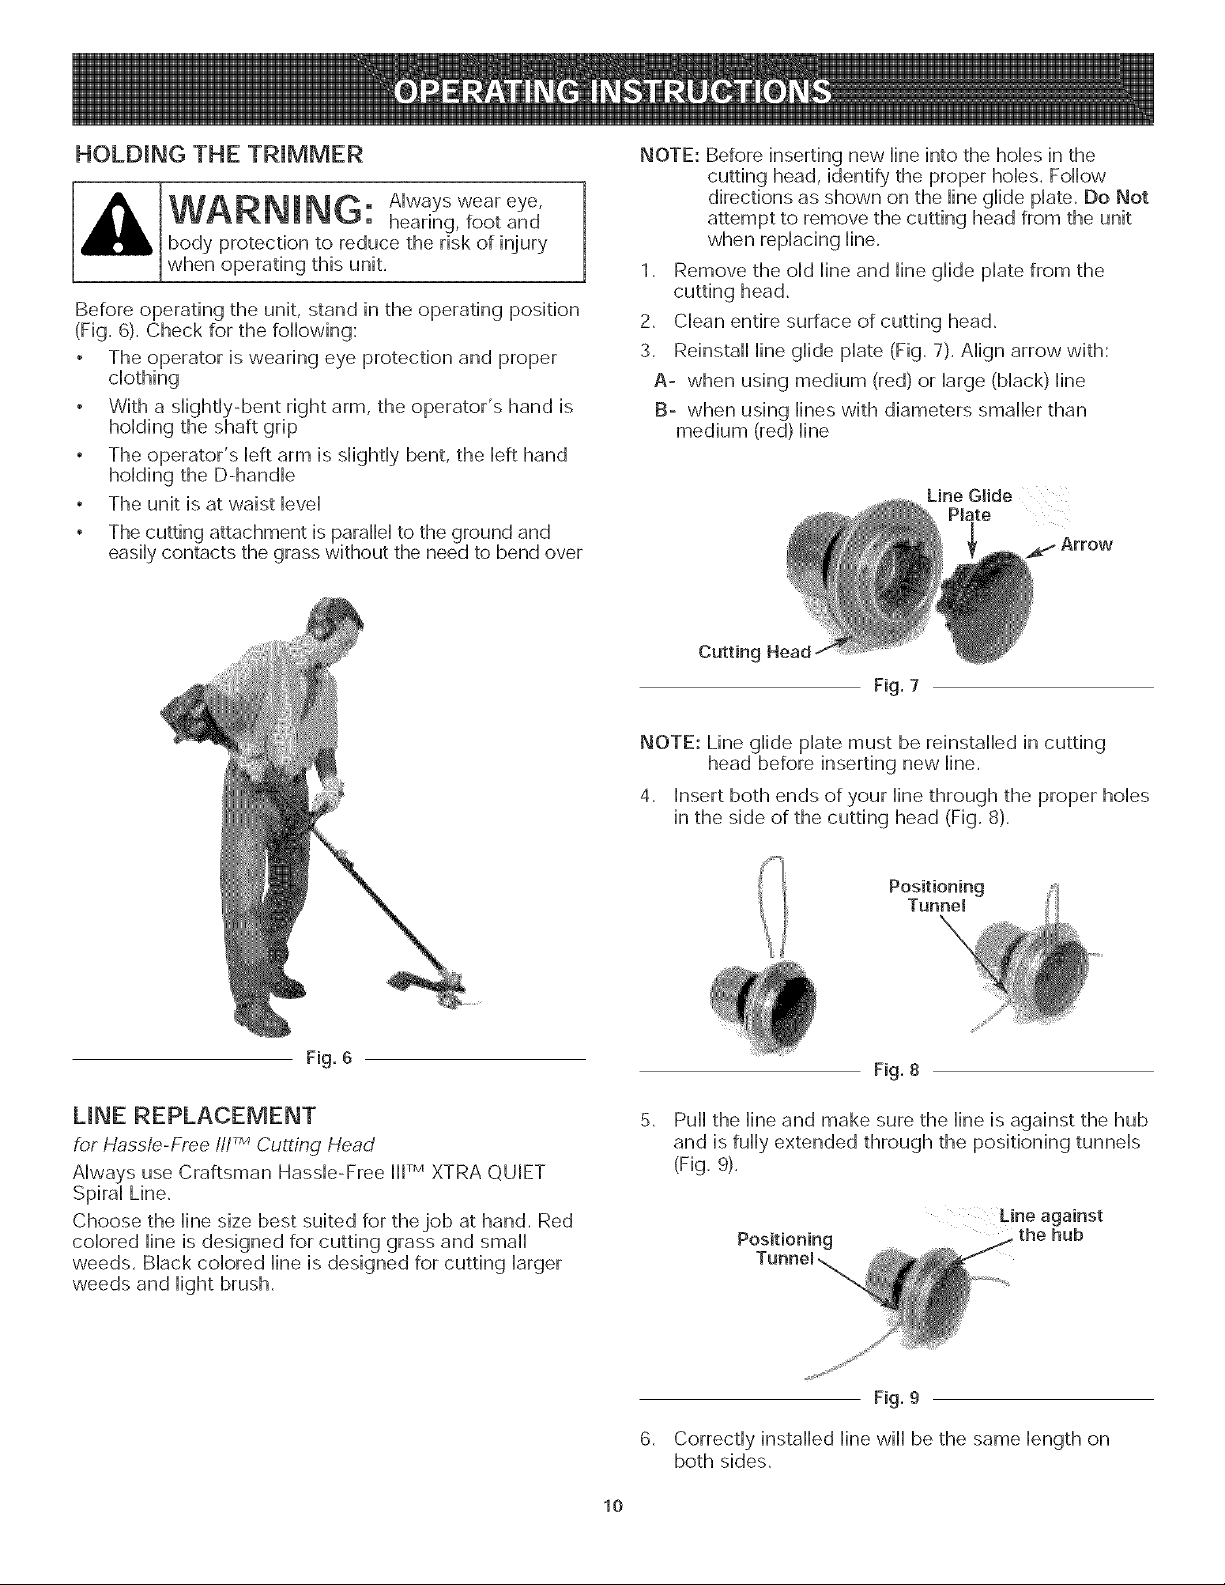
Before operating the unit, stand in the operating position
(Fig. 6). Check for the following:
The operator is wearing eye protection and proper
dotMng
• With a siighdy-bent right arm, the operator's hand is
hoiding the shaft grip
• The operator's Heftarm is siightiy bent, the Hefthand
hoiding the D-handb
The unit is at waist bvei
• The cutting attachment is paraHei to the ground and
easiiy contacts the grass without the need to bend over
NOTE: Before inserting new line into the holes in the
cutting head, identify the proper holes. Follow
directions as shown on the line glide plate. Do Not
attempt to remove the cutting head from the unit
when replacing line.
1. Remove the old line and line glide plate from the
cutting head.
2. Clean entire surface of cutting head.
3. Reinstall line glide plate (Fig. 7). Align arrow with:
A- when using medium (red) or large (black) line
B- when using lines with diameters smaller than
medium (red)line
Line Glide
Plate
Cutting Head
F_g. 7
NOTE: Line glide plate must be reinstalled in cutting
head before inserting new line.
4. Insert both ends of your line through the proper holes
in the side of the cutting head (Fig. 8).
Positioning
Tunnel
\
F_g. 6
UNE REPLACEMENT
for Hassle-Free III TMCutting Head
Always use Craftsman Hassb-Free IIFM XTRA QUIET
Spiral Line.
Choose the line size best suited for thejob at hand. Red
colored line is designed for cutting grass and small
weeds. Black colored line is designed for cutting larger
weeds and light brush.
F_g. 8
5. Pull the line and make sure the line is against the hub
and is fully extended through the positioning tunnels
(Fig, 9).
Positioning
Line against
the hub
F_g.9
6. Correctly installed line will be the same length on
both sides.
10
Loading ...
Loading ...
Loading ...