Loading ...
Loading ...
Loading ...
MOUNTING REMOTE FANS ON ROOF OR OUTSIDE WALL
To prepare for mounting a remote fan, inspect the blower wheel to ensure it turns freely. Do not replace the
top unit to the remote fan until the installation has been completed. A remote fan cannot be installed in a
condition where the exhaust/discharge opening is less than 15” from the ground level. NOTE: There may be
some local codes that will not permit this kind of installation. Heavy snow will prevent the damper from
opening due to snow blockage. The installer must check all local codes for outdoor wall installation of the
remote fan.
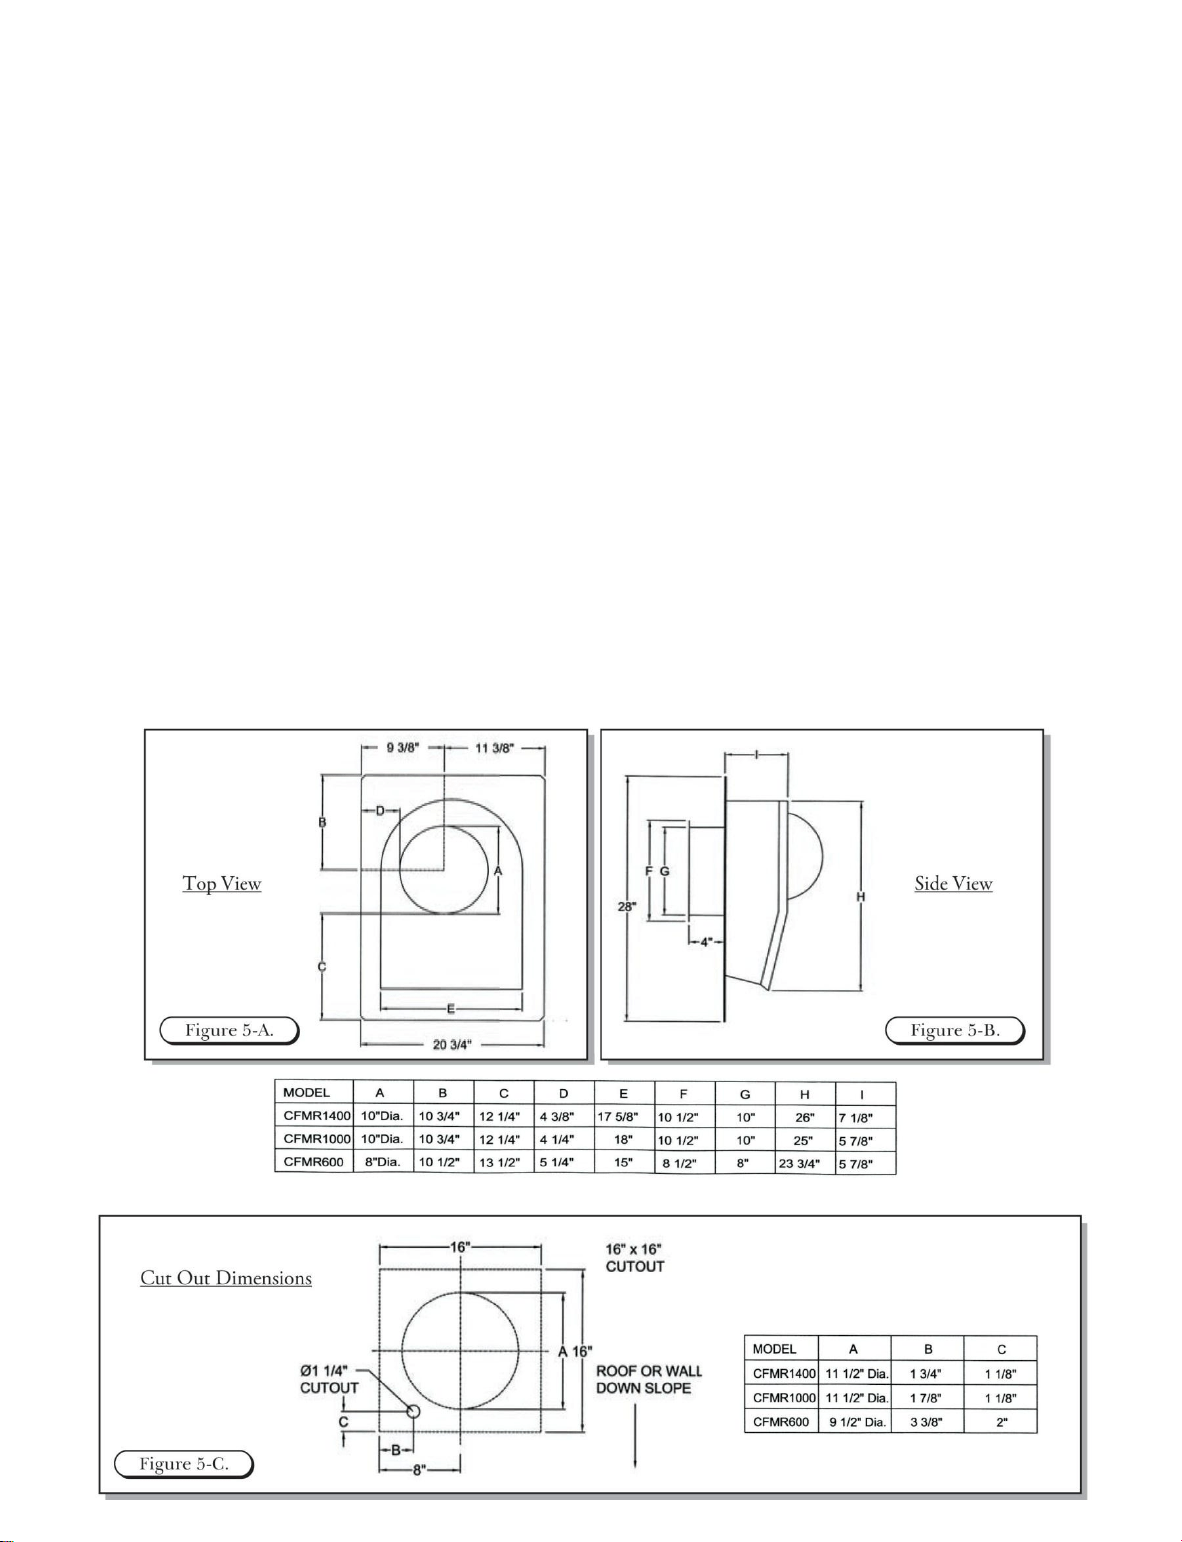
1. Cut out a round hole to accommodate the size ducting you will be using. Cut a second hole for the
electrical conduit. (see Figure 5-C)
2. When installing a remote fan on a flat roof or a roof with a pitch less than 1 ½” in 12 inches, install the
remote fan in such a way that the discharge (the lowest portion of the curb) is directed away from any
prevailing winds.
3. When installing a remote fan on a roof or outside wall, direct the discharge (the lowest portion of the
curb) pointing down the slope as this is in accordance with the Standard Roofing Procedures: front
discharge edge should be on the top of the shingles and the rear edge underneath the shingles.
• NOTE: The remote fan unit must be sealed between the roof (or outside wall) and the underside
of the flange with roofing mastic to prevent leaks.
4. Connect the remote fan (CFMR1000 & CFMR1400) to the exhaust system’s round duct. Use an
adjustable elbow to attach to the roof angle.
5. Using duct tape, seal all joints to prevent air leaks.
6. NOTE: Clearance to combustible materials is 0”.
Loading ...
Loading ...
Loading ...