Loading ...
Loading ...
Loading ...

8
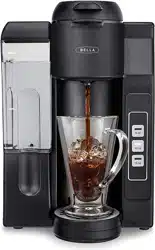
Setting Up your Single Serve Coffee Maker with Water Tank Using the Ground
Coffee Adaptor
The ground coffee adaptor allows you to create your own favorite blend of coffee. Personalize your blends
by
adding a dash of cinnamon, orange peel, cardamom or vanilla bean for avoring, to name a few options.
NOTE: For best results, use medium ground coffee.
WARNING: Before brewing, it is recommended the water tank be lled at least to the MIN indicator line.
To avoid damage to your Coffee Maker, never operate your Single Serve Coffee Maker when the water tank is empty.
1. Grasp the removable water tank using the designated grips. Lift the water tank upandremove it from the
base of the unit. (See Figure 1)
2. Remove the lid and ll the water tank to the MAX indicator line with cold water.
NOTE: Never ll the water tank past the MAX indicator line and ensure water level isabove the MIN
indicator line.
IMPORTANT: For optimal avor, distilled or ltered water is preferred.
3. Put the lid back and put the water tank back into place. Place down rmly to make sure itissecurely in
place.
4. Select the desired height for the drip tray, depending on the size of the cup, mug, ortumbler being used.
5. Place the empty cup, mug, or tumbler in position on the drip tray cover.
6. Pull the adaptor compartment’s front tab up to unlock and lift the lid.
7. Choose the ground coffee adapter and ll it with medium size ground coffee. Thereareindicator lines
inside the lter for 6-oz, 10-oz and 15-oz servings. Addthedesired amount of coffee to the line of your
choice. DO NOT EXCEED the 15-oz line. Oncethecoffee has been added, close the ground coffee adapter
lid.
8. With the handle facing front, place the ground coffee adaptor into the adaptor compartment. Slide the
adaptor handle into the grooves at the front of the Coffee Maker.
9. Press the adaptor compartment’s lid down rmly. An audible click can be heard asthelid is locked rmly
into position.
10. Plug the Coffee Maker into a 120V AC electrical wall outlet.
11. To select the brew size press either the 6-oz, 10-oz or 15-oz button, and the brew cycle willbegin.
12. The indicator light will begin to ash as the Coffee Maker begins heating the water.
13. When the water has reached the optimum temperature, the light on the button will illuminate solid.
14. The pump will then activate and coffee will begin to stream through the nozzle.
15. To interrupt the brewing cycle at any time, press the same size button you had originally selected. Then
remove the plug from the wall outlet.
16. At the end of the cycle, the Coffee Maker and all indicator light will automatically turn OFF.
17. Unplug the Coffee Maker when not in use.
Setting Up your Single Serve Coffee Maker with Water Tank to Boil Water
Heating plain water in your Single Serve Coffee Maker is quick and easy. Water is dispensed at the perfect
temperature for preparing single cups of bagged teas, instant soups, quick cooking oats, packaged hot
chocolate, hot apple cider or anything that requires boiling water.
WARNING: Before brewing, it is recommended the water tank be lled at least to the MIN indicator line.
To avoid damage to your Coffee Maker, never operate your Single Serve Coffee Maker when the water
tank is empty.
IMPORTANT: To prevent tainted or “off” avors when changing hot beverages, while the unit is OFF,
use a damp paper towel to completely remove any residue from the adaptor compartment.
1. Follow detailed brewing instructions described previously.
2. Prepare your cup, mug, or tumbler by placing the item of your choice into the mug
3. Select either adaptor. With the handle facing front, place the adaptor of choice into the adaptor
compartment. Slide the adaptor handle into the grooves at the front ofthecoffee maker.
4. Following detailed instructions described previously, adjust the drip tray toaccommodate your
cup, mug, or tumbler.
5. Center the cup under the nozzle
Loading ...
Loading ...
Loading ...