Loading ...
Loading ...
Loading ...
5
CAUTION
To allow door to close and seal properly, DO
NOT let food packages extend past the front
of shelves.
To Level Upright Units:
After discarding crating screws, use a
carpenter’s level to level the appliance from
front-to-back. Adjust the plastic leveling feet in
front, ½ bubble higher, so that the door closes
easily when left halfway open.
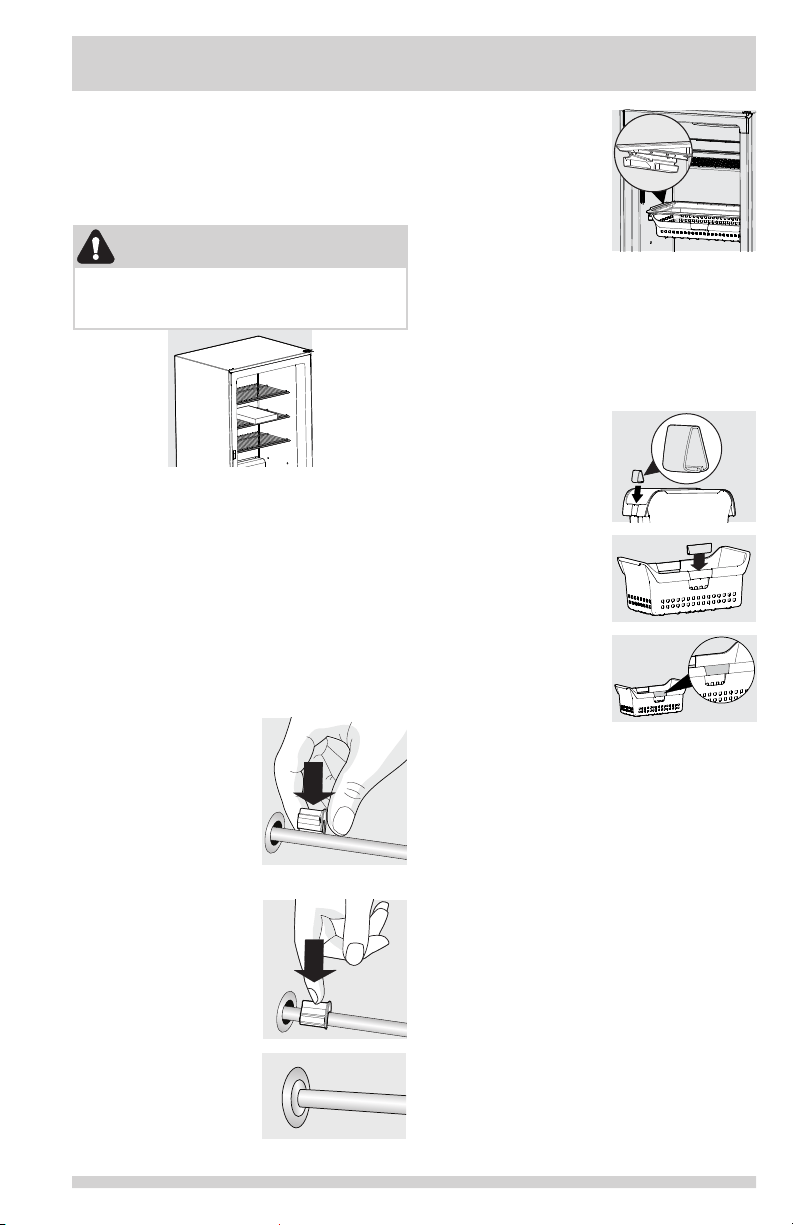
Repositioning the Mid-Level Basket
(some models):
1. To remove the support-hanging basket,
press upward on underside of front of
support to release from shelf rod.
2. Rotate front under the shelf, and then
slide support-hanging basket forward to
remove from back shelf rod.
3. To remove shelf grommet, slide away
from wall, then pull from rod.
4. Repeat steps 1-3 for other side.
5. With the shelf
installed, press the
2 shelf grommets
down onto the rod
that is anchored
into the appliance
wall (located in the
back only). Be sure
to keep the larger
end of the shelf grommets away from
the wall.
6. Push the shelf
grommets onto the
shelf rod until rmly
seated.
7. Slide the shelf
grommets into the
wall grommets
already in the unit
wall until they
are ush.
8. Guide the support-
hanging basket
underneath the
shelf, inserting the
slotted end of the
support onto the
rear shelf rod.
9. Rotate the support-
hanging basket up to bring the front end
over the front shelf rod. Slide forward to
locate front of support-hanging basket
over front of shelf rod. Push down on
support until it snaps into place.
FIRST STEPS
To install the handle clips to the basket
(some models):
1. Place the basket on
a rm, at surface.
2. With the narrow
side of the handle
clip on the inside of
the basket, snap the
handle clip to the
recessed area in
the basket.
3. Once the inside
surface snaps in
place, continue the
process by rolling
the handle clip
slightly outward and
pressing down rmly
to snap onto the
outside surface. If
installed incorrectly,
the handle clip will not lay at.
Loading ...
Loading ...
Loading ...