Loading ...
Loading ...
Loading ...
6
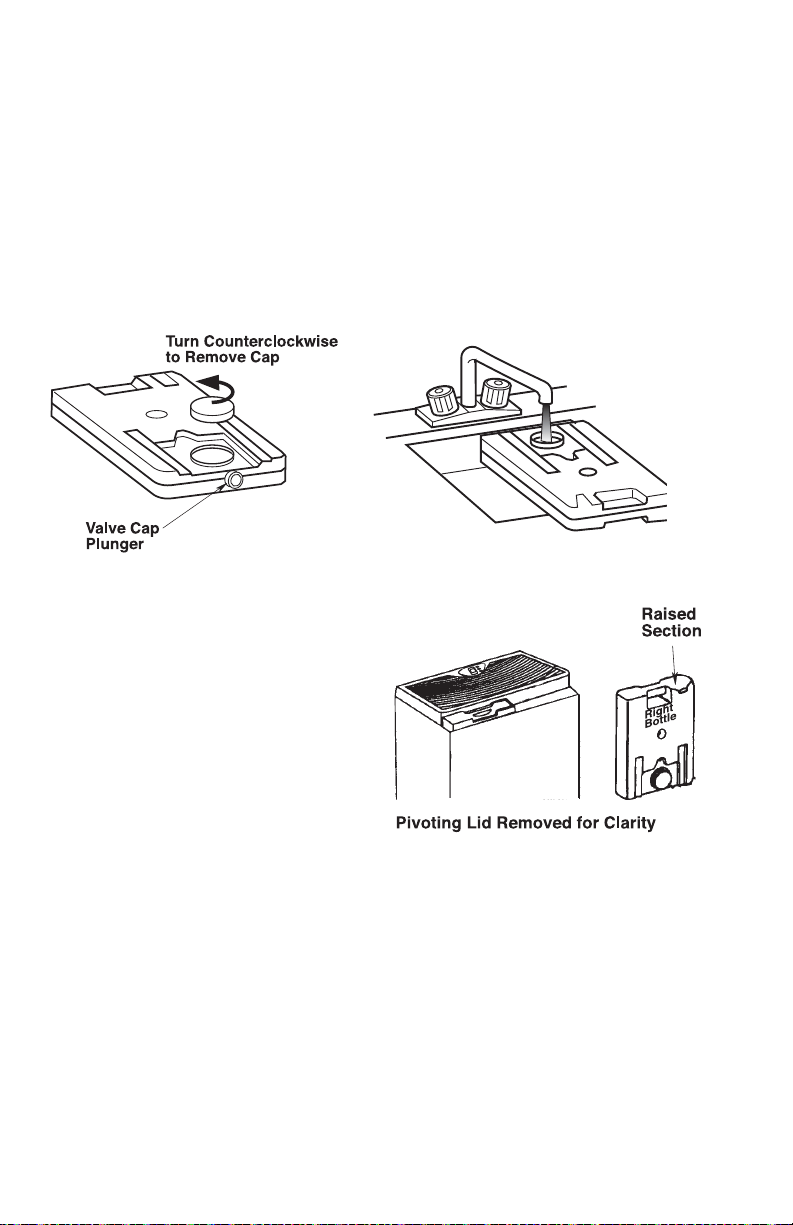
2. To fill, remove the “Side-Fill Cap” and place the opening under a water faucet (the
bottle should fit under a four-inch clearance faucet). Fill with recommended mixture
of cold water and Bacteriostat (if necessary) only. Solid debris could make the valve
leak. Install the “Side-Fill Cap” by twisting clockwise. Hand tighten only.
NOTE: Both bottle caps have rubber washers in them. Do Not Remove.
3. Check for possible leaks by performing the following:
a. Grasp bottle handle and hold the bottle upright over a sink.
b. Inspect the bottom valve for leaks.
c. Press up on the valve cap plunger for about one second to let out a little water.
d. Release the plunger.
e. Listen for air bubbles. Look for leaks around the“Side-Fill Cap”.
f. If you hear air bubbles or see leaks, retighten the “Side-Fill Cap” and repeat Steps a-e.
4. Wipe off excess water from the bottle.
5. Position the water bottle back into the
unit by grasping the water bottle
handle and lowering it gently into the
cabinet until the bottle sits on pads at
bottom of cabinet. The “Side-Fill Cap”
must be facing the rear of the cabinet.
When positioned properly, the plunger
will open and water will flow into the
cabinet. The water level will
automatically remain at approximately
1/2” until the bottles are empty. Allow
the wick to saturate for 30 minutes
before operation.
ABOUT HUMIDITY
Where you set your desired humidity levels depends on your personal comfort level,
the outside temperature and the inside temperature.
NOTE: Recent CDC tests show that the chances of flu transmission are greatly
reduced at levels of 43% humidity or higher.
You may wish to purchase a hygrometer* to measure the humidity level in your
home. The following is a chart of recommended humidity settings.
*Model 1990 digital hygrometer is available for purchase by calling 1-800-547-3888.
NOTE: External hygrometer readings and humidistat readings may differ. Humidity
levels can vary significantly even in one room.
Loading ...
Loading ...
Loading ...