Loading ...
Loading ...
Loading ...
10
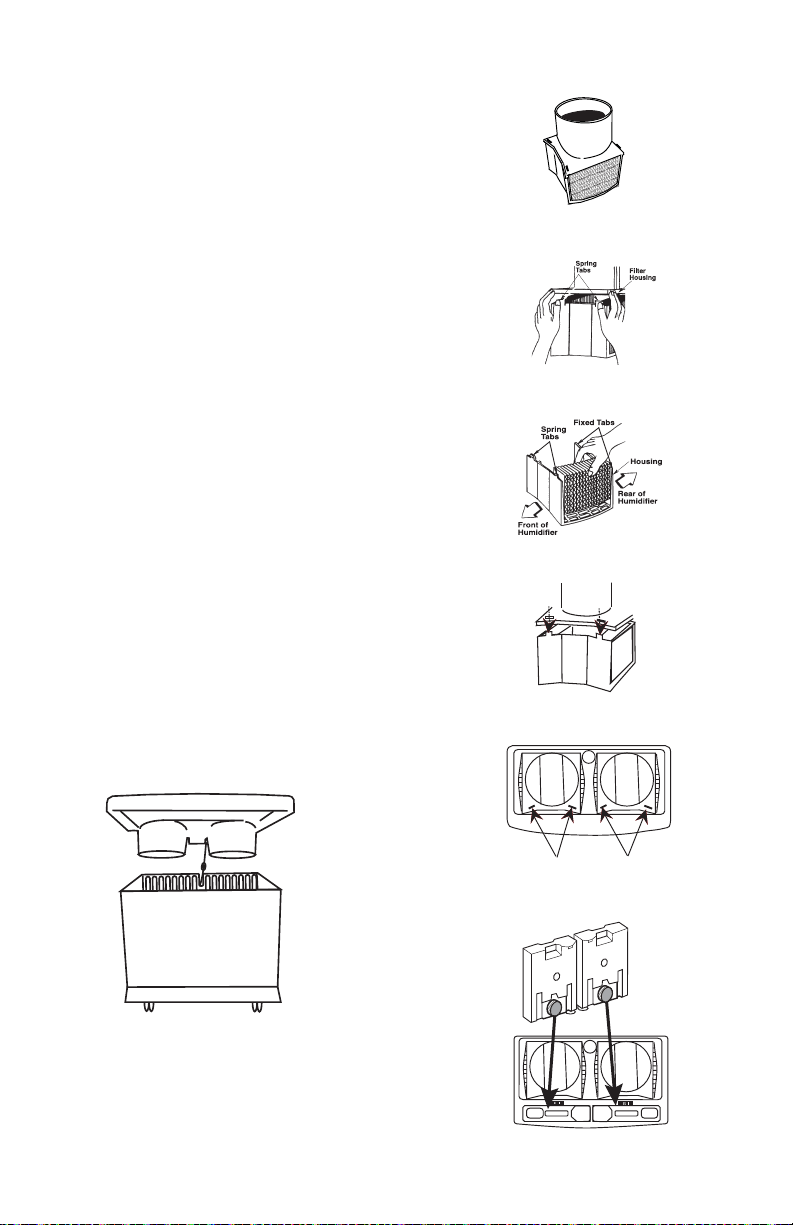
4. To open wick housing for easy access to wciks:
a. Deflect the two spring tabs on top of wick
housing. Lift top cover off of the wick
housing and set aside.
b. Remove the two wicks and dispose of
properly. Clean internal parts of humidifier
per the “Care and Maintenance” section
(page 11-12) of your operator’s manual.
c. Install new wicks in the wick housing track
with the glue beads of the wicking pad to the
inside of the wick housing.
d. Return the top cover of the wick housing by
installing cover over the fixed tabs on the
rear of the lower wick housing and pivoting
the cover down over the top of the wicks.
Snap the cover over the two spring tabs.
e. Replace the wick housing in the cabinet.
NOTE: There is a front and back orientation.
To position the wick housings correctly:
• Be sure that the spring tabs of wick
housings are towards front of cabinet.
• Align the lower portion of the wick
assembly over the six ribs located at the
bottom rear of the humidifier cabinet.
f. Position fan assembly onto the cabinet.
Make sure the fan venturi (lowest cylinder
section below the fan) is placed inside the
wick housing.
g. Replace water bottles.
h. Close the pivoting lid.
i. The unit is ready for use or to be stored
away for next season.
Wick
FR
O
N
T
Reassemble Wick Housing
Separate Upper and Front
Wick Housings
Wick Housing Assembly
Remove Used Wicks and
Replace with New Wicks
FR
O
N
T
F
R
O
N
T
FRONT
F
R
O
N
T
Left
Right
FRONT
FRONT
Flat Portion of Wick Housing
Towards Back of Cabinet
Spring Tabs Toward Front of Cabinet
Water Bottle Placement
Reinstall Top Onto Cabinet
Loading ...
Loading ...
Loading ...