Loading ...
Loading ...
Loading ...
,
9.
10.
5. Remove the pulley screw in the center of the
pulley. Figure 45.
6. Lift the pulley carefu//y while gently twisting it
counterclockwise _ , and remove the
old rope.
7. Move away from the fuel tank and burn the
end of the new rope to go into the pulley.
Pull the burnt end while hot through a rag to
smooth it.
Feedthe ropethrough thefanhousingand the round
starterhole. Figure 45.
Snakeropeinsidepulley, then through the topside
pulley holebypushing the ropefrom the underside
hole with a small roundobject such as a Phillips
screwdriver.See insert, Figure45.
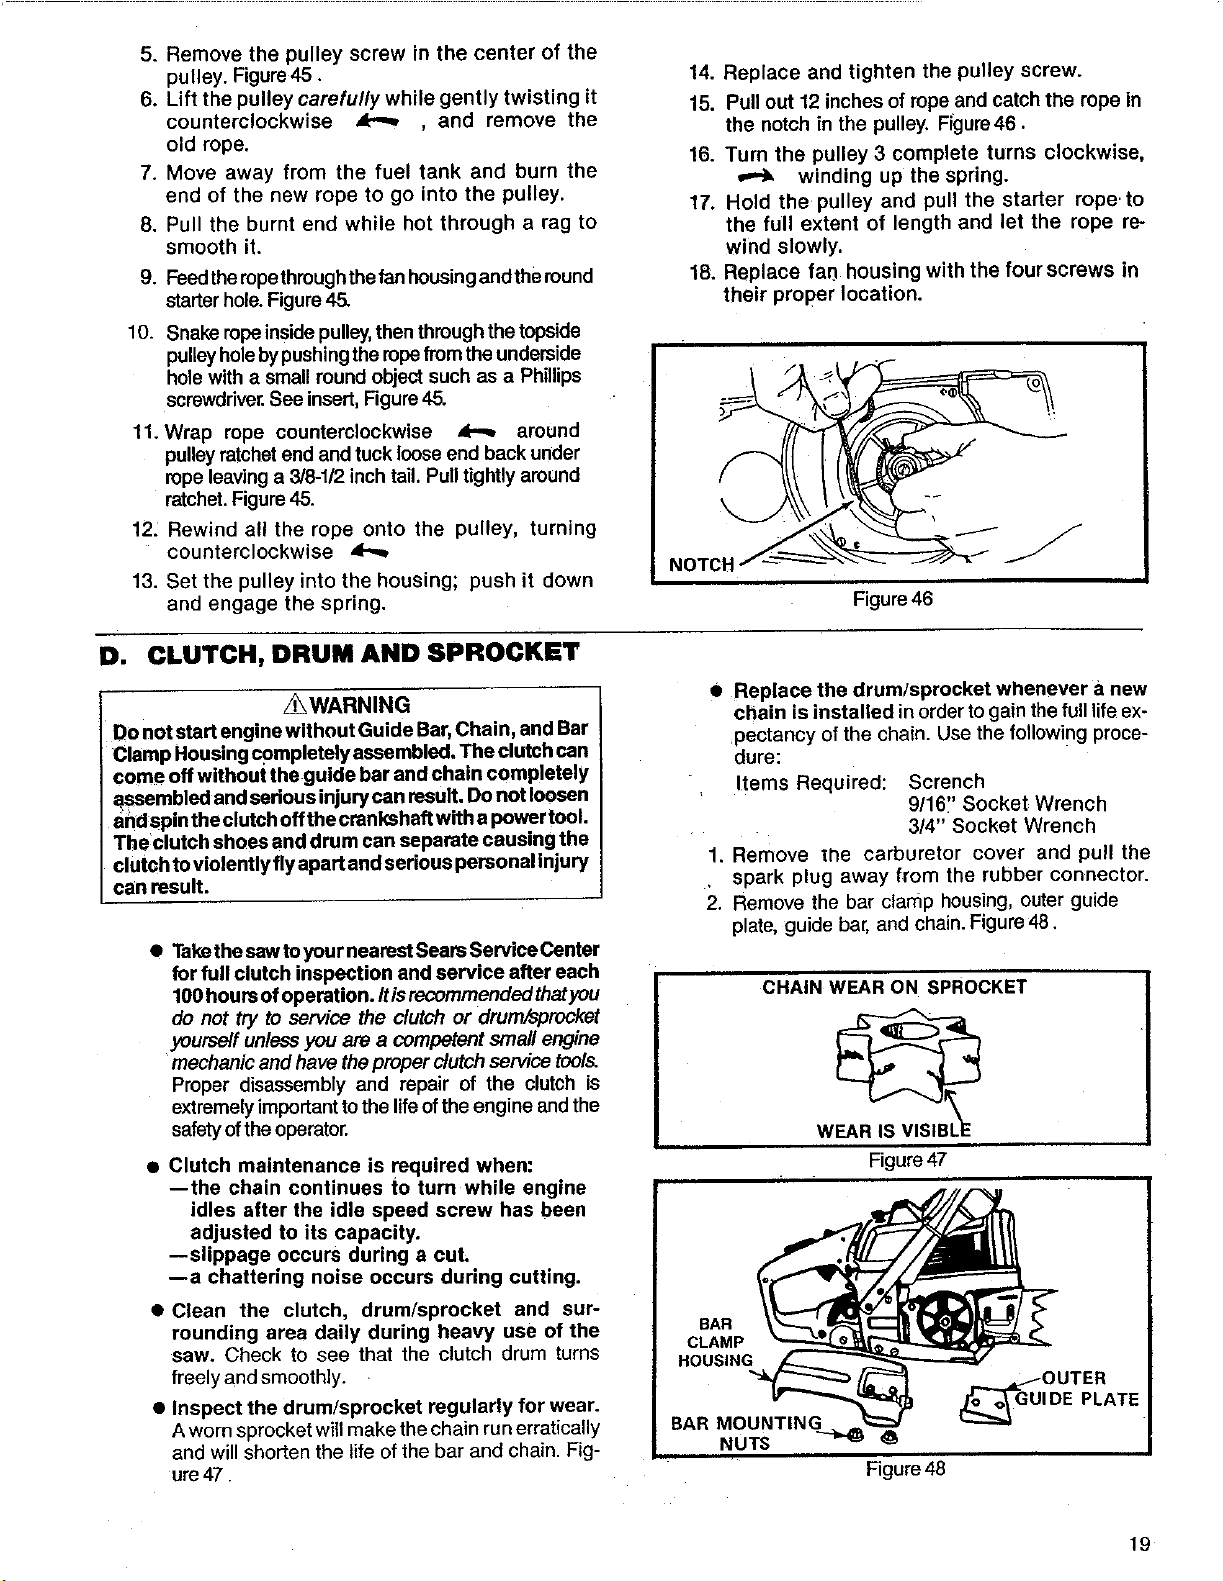
14. Replace and tighten the pulley screw.
15. Pull out 12 inches of rope and catch the rope in
the notch in the pulley. Figure46.
16. Turn the pulley 3 complete turns clockwise,
winding up the spring.
17. Hold the pulley and pull the starter rope.to
the full extent of length and let the rope re-
wind slowly.
18. Replace far] housing with the four screws in
their proper location.
11. Wrap rope counterclockwise _ around
pulley ratchet end and tuck looseend back under
rope leavinga 3/8-112inch tail. Pulltightly around
ratchet.Figure45.
12: Rewind all the rope onto the pulley, turning
counterclockwise
13. Set the pulley into the housing; push it down
and engage the spring.
D. CLUTCH, DRUM AND SPROCKET
_WARNING
Do not start engine without Guide Bar,Chain, and Bar
Clamp Housing completely assembled, The clutch can
Figure 46
• Replace the drum/sprocket whenever a new
chain is installed in orderto gain thefull life ex-
pectancy of the chain. Use the following proce-
dure:
come off without the guide bar and chain completely
assembled and sedous injurycan result. Do not loosen
andspin the clutch offthe crankshaft with a powertool.
The clutch shoes and drum can separate causing the
clutch toviolently fly apart and serious personallnjury
can result.
• Taksthe ssw tc your nearest Seara Servlee Center
for full clutch inspection and service after each
tOOhours ofoperation, ltisrecemmended thatyou
do not try to service the clutch or drum/sprocket
yourself unlessyou are a competent small engine
mechanic and have theproper dutch serwce tcol_
Proper disassembly and repair of the clutch is
extremely importanttothe lifeofthe engine and the
safetyoftheoperator.
• Clutch maintenance is required when:
--the chain continues to turn while engine
idles after the idle speed screw has been
adjusted to its capacity.
--slippage occurs during a cut.
--a chattering noise occurs during cutting.
• Clean the clutch, drum/sprocket and sur-
rounding area daily during heavy use of the
saw. Check to see that the clutch drum turns
freely and smoothly.
• Inspect the drum/sprocket regularly for wear.
A worn sprocketwillmake the chain runerratically
and will shorten the life ofthe bar and chain. Fig-
ure47.
BAR
CLAMP
HOUSING
Items Required: Scrench
9/16_' Socket Wrench
3/4" Socket Wrench
1. Remove li_e carburetor cover and pull the
spark plug away from the rubber connector.
2. Remove the bar clamp housing, outer guide
plate, guide bar, and chain. Figure 48.
CHAIN WEAR ON SPROCKET
WEAR IS VISIBL
Figure47
BAR MOUNTING
NUTS
(_OUTER
IDE PLATE
Figure 48
19
Loading ...
Loading ...
Loading ...