Loading ...
Loading ...
Loading ...
14
( 18 Deep)
1. Remove existing rear grille as shown on Page
11 of this manual and replace with provided
louvered rear panel. Install as shown here.
NOTE: You may need to drill holes in flange of
existing sleeve to match new rear grille.
5
8
/
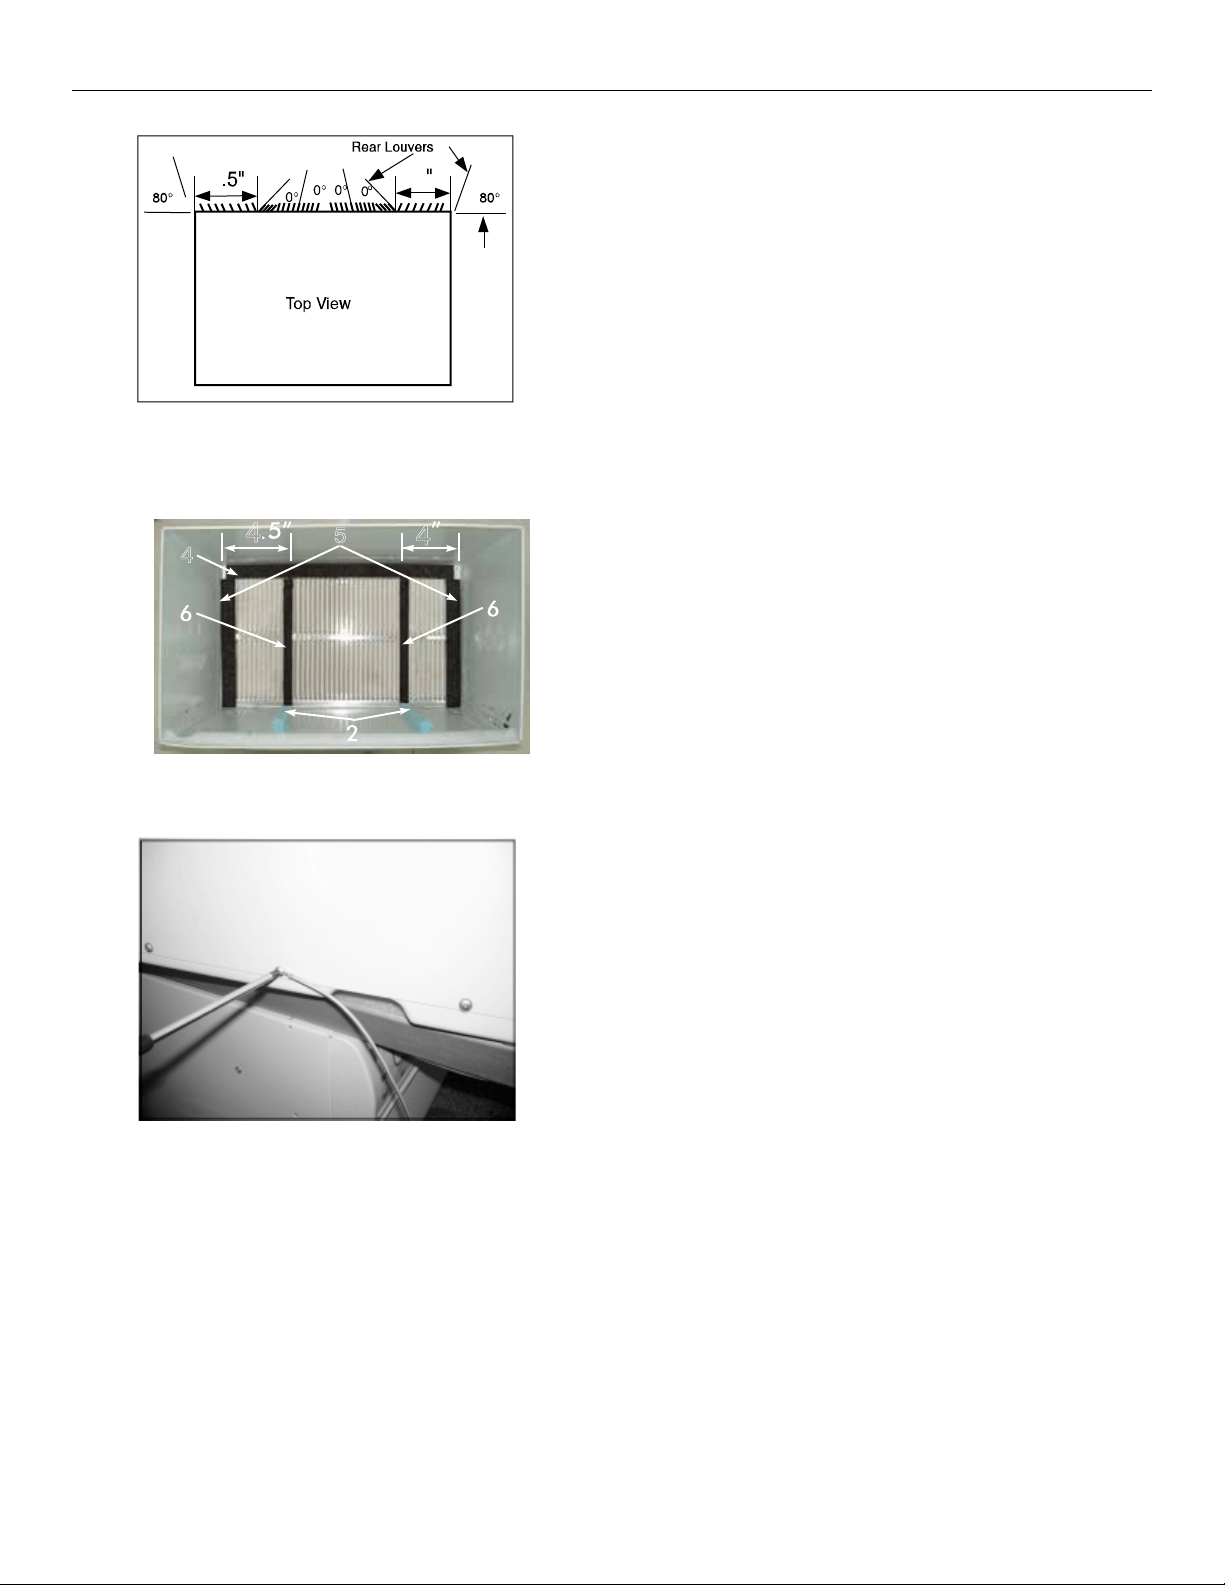
2. Install (2) tapered spacer blocks to the floor of
the sleeve as shown. This helps induce a
rearward slop on the unit.
3. Install as shown with the tapered end from
the back of the sleeve. This helps induce a
rearward slop on the unit.
4. Attach (1)1 x3/8 x25 long seal in the center
at the top of the sleeve. Remove the backing
paper and press into position.
5. Attach (2) 1 x3/8 x14 seals to the left and
right sides of the sleeve.
6. Cut (2) 1 x3/8 x25 long seals to 14 long
and attach it to the vertical sections of the rear
grille as shown.
7. Center unit and gently slide unit into sleeve.
8. Before sliding all-the-way back, remove 2nd
screw from front on left side of unit.
9. Remove the plastic washer from the screw.
10. Screw and attach the other end of the ground
wire to the unit as shown in picture. Make sure
that the toothed washer is against the cabinet.
11.Slide the unit completely to the rear to ensure
a good seal, making sure the ground wire does
not become tangled.
12.Seal & Frame the unit as described on page 22.
13. If you have difficulty with mounting the grill to
the sleeve, follow the instructions for direct
mounting on Page 21.
1
/
2
5
4
4
4
4
4
3
8
3
8
N° 5: SOPORTES DE PARED SEARSKENMORE/CARRIER 51S 18
⅝”
(18 5/8” De Profundidad)
1. Retire la parrilla posterior existente como se muestra en la pági-
na 9 de este manual y reemplácela con la rejilla de persianas que
vino con su unidad. Instale como se muestra aquí.
NOTA: Tal vez requiera perforar oricios en los rebordes de la
carcasa existente para coincidir con la nueva rejilla.
2. Instale (2) bloques espaciadores cónicos en el piso de la carcasa
como se muestra. Esto ayuda a inducir la pequeña inclinación
hacia atrás que requiere la unidad.
3. Instale como se muestra en la gura con la parte cínica de ½”
hacia el fondo de la carcasa. Esto ayuda a inducir la pequeña
inclinación hacia atrás que requiere la unidad.
4. Coloque (1) junta de 1”x3/8”x25” de largo en el centro en la
parte superior de la carcasa. Retire el papel protector y presione
para jar.
5. Coloque (2) juntas de 1”x3/8”x14” de largo a los lados izquierdo
y derecho de la carcasa.
6. Corte (2) juntas de 1”x3/8”x25” de largo a 14” de largo y je en
las secciones verticales de la rejilla como se muestra.
7. Centre la unidad y deslice suavemente dentro de la carcasa.
8. Antes de deslizar la unidad hasta el fondo retire el segundo
tronillo al frente del lado izquierdo de la unidad.
9. Retire la arandela de plástico del tornillo.
10. Atornille y je a la unidad el extremo suelto del cable para
tierra como se muestra en l la gura. Asegure que la arandela con
dientes este contra el gabinete.
11. Deslice completamente hasta atrás la unidad para asegurar un
buen sellado, asegurándose que el cable de tierra no se enrede.
12. Selle y enmarque la unidad como se describe en la página 20.
13. Si tiene dicultad al montar la rejilla en la carcasa siga las
instrucciones de montaje directo en la página no. 19.
Loading ...
Loading ...
Loading ...