Loading ...
Loading ...
Loading ...
NOTICE*
The stainless steel doors are provided with a high-quality
surface coating and must not be treated using the accompa-
nying care product.
Otherwise the surface coating will be affected.
u
Wipe the coated door surfaces using a soft, clean cloth
only.
u
Apply a stainless steel cleaner only to the stainless steel
side walls evenly, wiping with the grain. Subsequent
cleaning becomes easier as a result.
u
Wipe side walls with a paint finish using a soft, clean
cloth only.
u
Remove the protective film from the decorative trims.
u
Remove all transit supports.
u
Dispose of packaging material (see 4.5) .
NOTICE
Risk of damage due to condensate!
If your appliance is not a Side-by-Side (SBS) appliance:
u
do not install the appliance directly alongside a further refrig-
erator/freezer.
u
Align the appliance so that it
stands firmly and on a level by
applying the accompanying
spanner to the adjustable-
height feet (A) and using a
spirit level.
u
Then support the door: Extend
the adjustable foot at the turn
hinge (B) until it rests on the
floor and then make a further
90° turn.
When a Side-by-Side appliance (S…) is fitted together with
a second appliance (as a SBS combination):
u
Proceed according to the Side-by-Side combined fridge-
freezer installation instructions. (Accessories bag of the SBS
freezer/appliance with freezer compartment)
Note
u
Clean the appliance (see 6.1) .
If the appliance is installed in a very damp environment,
condensate may form on the outside of the appliance.
u
Always see to good ventilation at the installation site.
4.3 Changing over the door hinges
You can change over the door hinges if necessary.
NOTICE
Risk of damage to side-by-side appliances due to condensa-
tion!
When a side-by-side appliance (S…) is fitted together with a
second appliance (as a SBS combination), the door hinges
must remain as delivered.
u
Do not change over the door hinges.
Ensure that the following tools are to hand:
q
Torx® 25
q
Torx® 15
q
Screwdriver
q
Cordless screwdriver, if necessary
q
Second person for fitting work, if needed
q
Accompanying Allen key size 2*
4.3.1 Detaching the door
Note
u
Remove any food from the door racks before removing the
door, so that no food falls out.
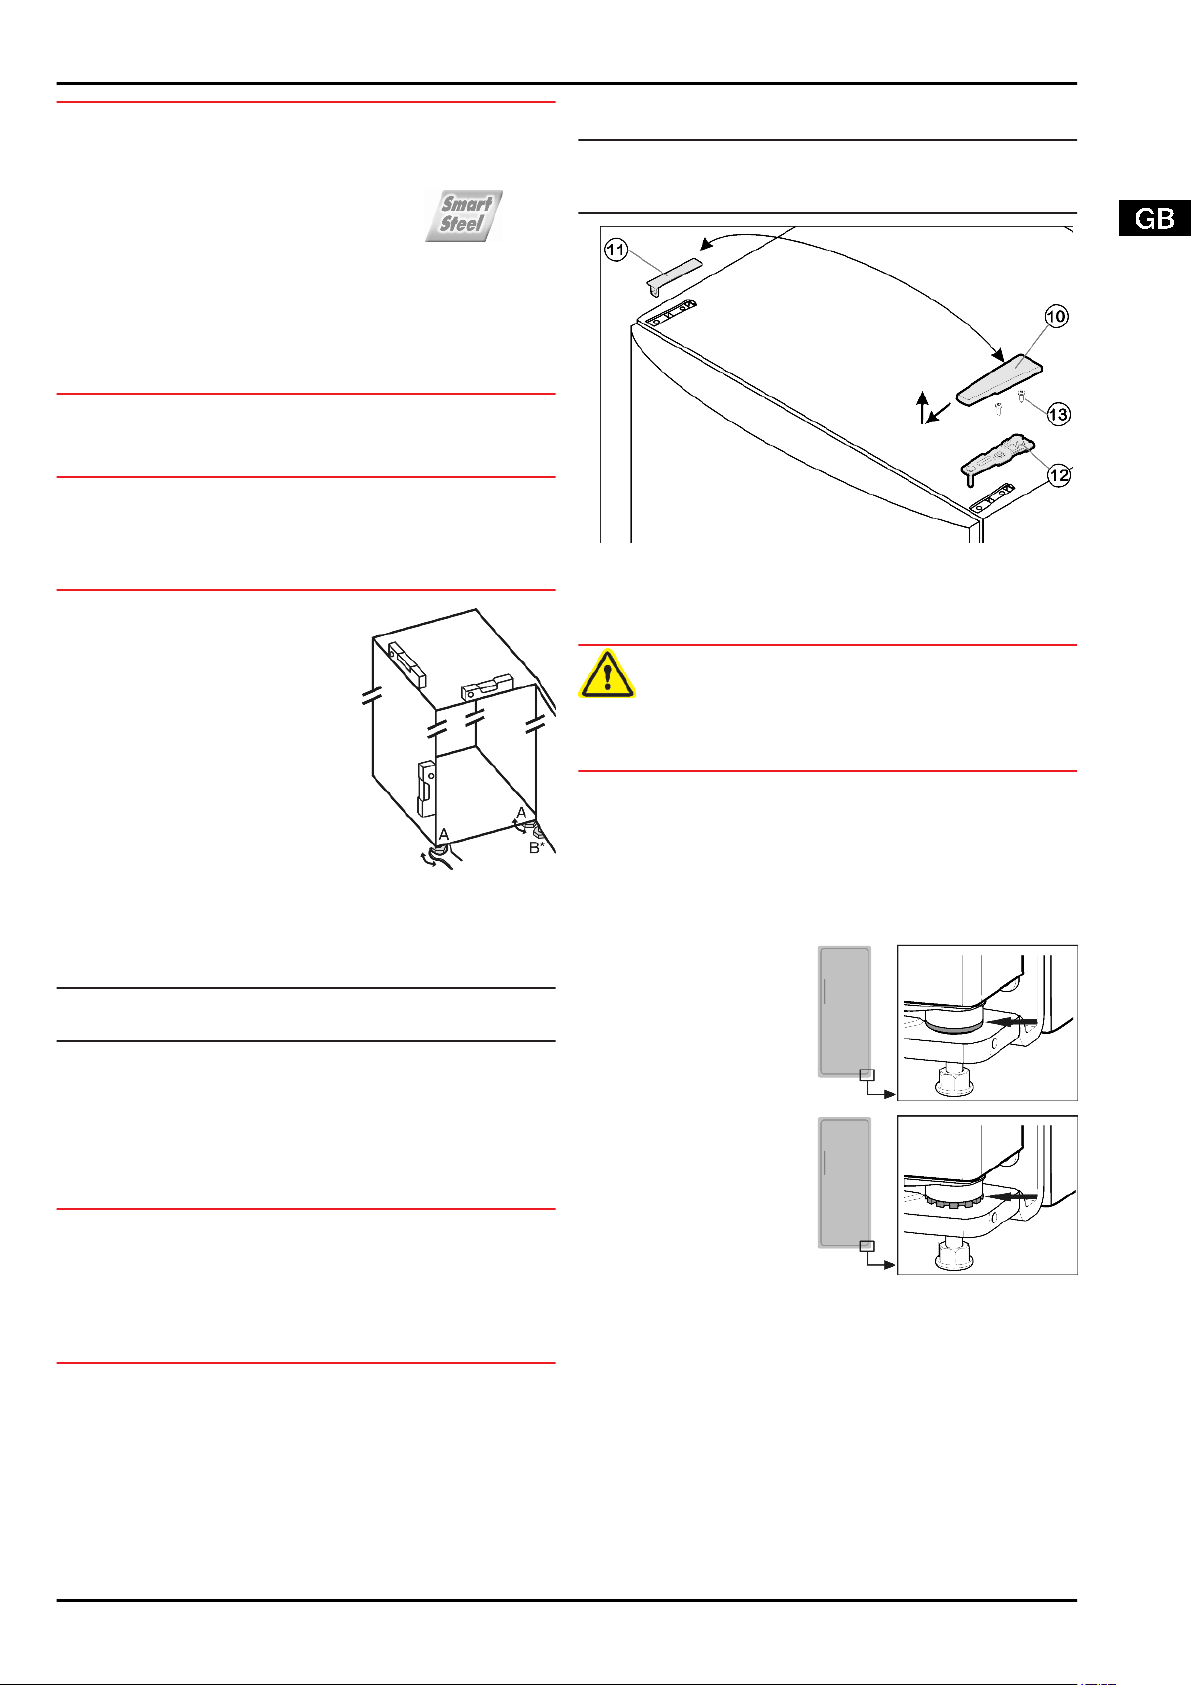
Fig. 4
u
Close the door.
u
Pull off the cover
Fig. 4 (10)
forwards and upwards.
u
Lift off the cover
Fig. 4 (11)
.
CAUTION
Risk of injury if the door tips!
u
Take good hold of the door.
u
Set down the door carefully.
u
Unscrew the upper turn hinge
Fig. 4 (12)
(2x Torx® 25)
Fig. 4 (13)
and lift it off.
u
Lift off the door and set it aside.
4.3.2 Distinguishing between bearing elements
Some appliances are height-adjustable, as can be noted from
the bearing pin in the lower turn hinge:
u
For appliances without
height adjustment,
continue with item
(see 4.3.3) .
u
For appliances with
height adjustment
continue with item .
(see 4.3.4)
4.3.3 Changing the bearing parts
for appliances without height adjustment
Putting into operation
5
Loading ...
Loading ...
Loading ...