Loading ...
Loading ...
Loading ...
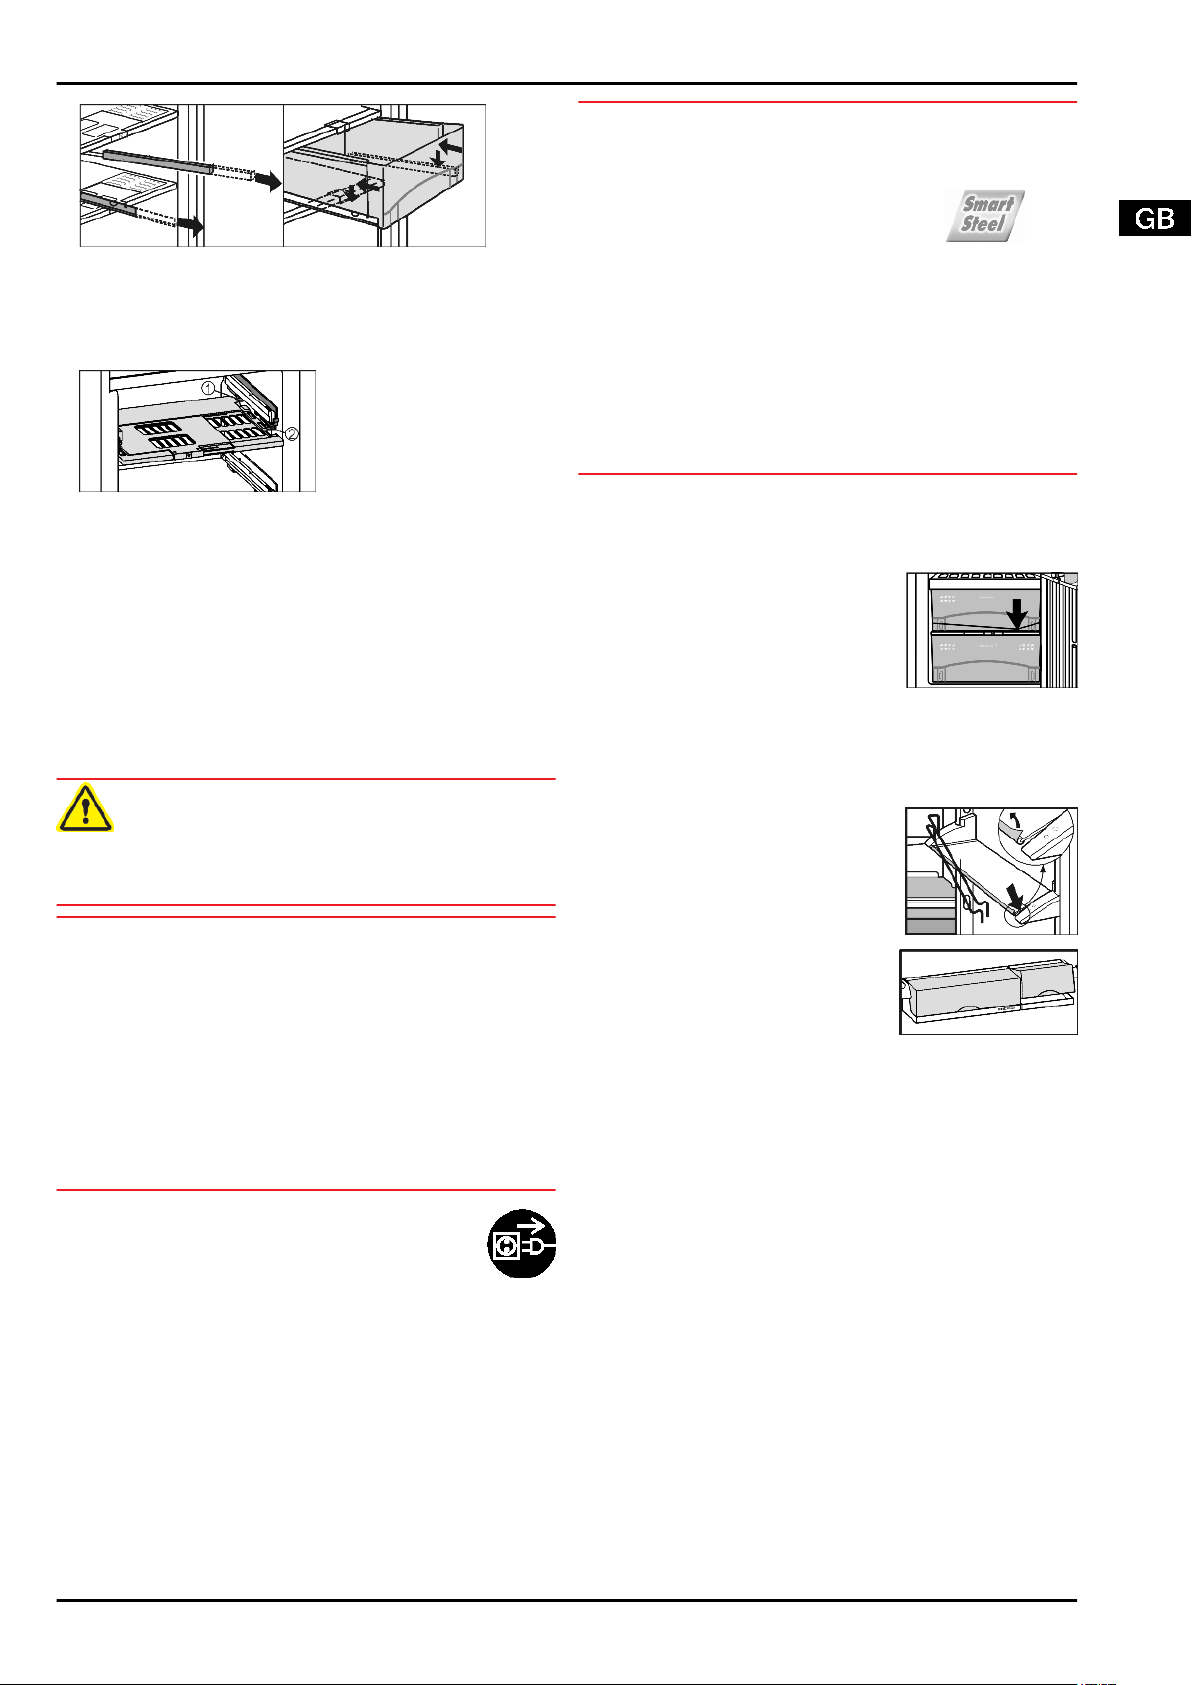
Fig. 12
u
Pull out the rails.
u
Attach the drawer to the rails and push it in until it engages
audibly at the back.
5.5.8 Humidity control plate
Fig. 13
u
To remove the humidity control plate: Having removed the
drawers, carefully draw the plate forwards and lower it for
removal.
u
To insert the humidity control plate: Insert the cover mould-
ings of the plate into the rear holder
Fig. 13 (1)
from under-
neath and engage them in the holder
Fig. 13 (2)
at the front.
6 Maintenance
6.1 Cleaning the appliance
Before cleaning:
CAUTION
Risk of injury and damage as a result of hot steam!
Hot steam may damage the surfaces and cause burns.
u
Do not use any steam cleaners!
NOTICE
Incorrect cleaning damages the appliance!
u
Do not use cleaning agents in concentrated form.
u
Do not use any scouring or abrasive sponges or steel wool.
u
Do not use any cleaning agents containing sand, chloride,
chemicals or acid.
u
Do not use chemical solvents.
u
Do not damage or remove the type plate on the inside of the
appliance. It is important for the customer service.
u
Do not pull off, bend or damage cables or other compo-
nents.
u
Do not allow any cleaning water to enter the drain channel,
ventilation grille or electrical parts.
u
Empty the appliance.
u
Pull out the plug.
- Use soft cleaning cloths and a multi-purpose
cleaning agent with neutral pH value.
- Only use food compatible cleaning and care
agents on the inside of the appliance.
Outside surfaces and interior:
u
Clean the plastic surfaces, outside and inside, by hand
using lukewarm water and a little washing-up liquid.
NOTICE*
The stainless steel doors are provided with a high-quality
surface coating and must not be treated using the accompa-
nying care product.
Otherwise the surface coating will be affected.
u
Wipe the coated door surfaces using a soft, clean cloth
only. In case of stubborn dirt, use a little water or a neutral
cleaning agent. A microfibre cloth can be optionally used.
u
If the stainless steel side walls are dirty, clean them using
a commercially available stainless steel cleaning agent.
Then evenly apply the accompanying stainless steel care
product, making strokes in the direction of the grain.
u
Wipe side walls with a paint finish using a soft, clean
cloth only. In case of stubborn dirt, use a little water or a
neutral cleaning agent. A microfibre cloth can be optionally
used.
Do not apply stainless steel cleaning agent to glass or plastic
surfaces to prevent them from being scratched. Darker areas at
the beginning and quite an intensive colour of the stainless
steel surface are normal.*
u
To clean the drain opening: remove
any deposits with a fine instrument,
e.g. a cotton bud.
Items of equipment:
u
Clean items of equipment by hand with lukewarm water and
a little washing-up liquid.
u
For cleaning, remove the support rails for the half-sized
glass shelves.
u
To dismantle the shelves: remove
the trims and side parts.
u
To dismantle the storage rack:
remove the protective film from the
decorative trims.
u
Lift out the boxes and lift the covers
for removal.
After cleaning:
u
Wipe dry the appliance and items of equipment.
u
Connect the appliance and switch it on again.
u
Put the food back inside.
6.2 Changing the interior light with
bulb*
Bulb data
T25 tube, Philips
max. 25 W
Fitting: E14
Type of current and voltage must conform with the details on
the type plate
Maintenance
11
Loading ...
Loading ...
Loading ...