Loading ...
Loading ...
Loading ...

4
Tighten both screws.
5
Apply one or two layers of the included adhesive mounting
tape to the back of the flat mounting bracket, near the bottom
(optional).
The mounting tape secures the back of the mounting bracket
to your vehicle using double-sided adhesive. This helps
reduce camera vibration, especially if your vehicle does not
provide mounting holes at the bottom of the license plate.
You can stack two layers of mounting tape if one layer is not
thick enough to stick to your vehicle.
NOTE: The mounting tape does not replace the license plate
screws. You must fasten the mount and license plate to the
vehicle using at least two license plate screws, whether or
not you attach the mounting tape.
Vehicle Mount Installation for Europe
Installing the Mount on Your Vehicle
1
Remove the rear license plate and license plate holder from
your vehicle, and retain the license plate screws to install the
camera mount.
2
Place the camera mount against your vehicle, and align the
holes in the mount with the license plate mounting holes in
your vehicle.
The camera mount provides a variety of holes and slots for
universal vehicle compatibility.
NOTE: You can install the mount in either orientation. If you
are installing the mount with the camera at the top of the
license plate, you must remove, rotate, and reattach the
camera clip (Installing the Camera at the Top of Your License
Plate, page 2).
3
Insert the license plate screws through the mount and into
the mounting holes in your vehicle.
4
Fully tighten the screws.
Installing the Camera at the Top of Your License Plate
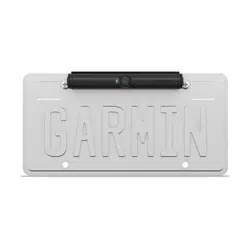
When the mount is installed on your vehicle, the Garmin logo on
the camera clip must be right-side up. Out of the box, the mount
is assembled for installing the camera at the bottom your license
plate. When installing the camera at the top of your license
plate, you must remove, rotate, and reattach the camera clip.
This allows you to properly adjust the camera angle.
1
If you have already installed the license plate fasteners,
remove them by prying up the end of each clip using the
notches and sliding them outward.
2
Using a Phillips screwdriver, fully loosen the two camera clip
screws .
3
Gently pry open the tabs along the outer edge of the
camera clip, and remove the camera clip from the mount.
4
Rotate the camera clip 180 degrees, so the Garmin logo is
facing right-side-up.
5
Snap the camera clip back into the mount, and tighten both
screws.
Installing Your License Plate into the Mount
The camera mount assembly comes with two sets of retainer
clips. You should use one set of retainer clips that match the
size of your license plate. The license plate size is printed on
each set of retainer clips.
1
Insert the edge of the license plate behind the tabs along the
narrow edge of the holder, and swing the bottom edge of the
plate into the mount.
2
Insert the two license plate retainer clips into the slots in the
holder, and slide them toward the middle.
3
Press the ends of the retainer clips until they click into the
holder.
2 Installation
Loading ...
Loading ...
Loading ...
