Loading ...
Loading ...
Loading ...
Introduction
WARNING
See the Important Safety and Product Information guide in the
product box for product warnings and other important
information.
These installation instructions do not apply to a specific vehicle
type, and are meant as a guide when installing this product on
your vehicle. For questions specific to your vehicle, you should
contact the vehicle manufacturer.
Installation
Vehicle Mount Installation for North America
Installing the Mount on Your Vehicle
1
Remove the license plate screws from the rear of your
vehicle, and remove the license plate, vanity frames, and
license plate covers.
NOTE: The camera mount is intended to be installed onto the
bare license plate, and it is not compatible with vanity frames
or license plate covers.
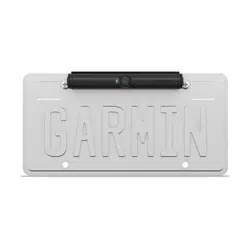
2
Slide the metal bracket over the top or bottom of the license
plate.
The flat metal plate on the bracket slides behind the
license plate.
NOTE: It is recommended to install the camera above the
license plate, if possible. If there is not enough room above
the license plate on your vehicle, you can configure the
mount for installation below the license plate (Installing the
Camera at the Bottom of Your License Plate, page 1).
3
Hold the license plate and mount up to the license plate area
on your vehicle, and slide the mount up or down to align one
set of mounting holes with the holes in the license plate.
You should use the mounting position that fits your vehicle
and covers the smallest portion of the license plate. You must
avoid covering any text or numbers on the license plate.
Some jurisdictions prohibit covering any portion of the license
plate. It is your responsibility to follow license plate mounting
regulations.
4
Insert the license plate screws through the top of the license
plate and mount, and into the license plate mounting holes on
your vehicle.
5
Fully tighten the license plate screws.
6
Install license plate screws through the bottom holes of the
license plate, and tighten (optional).
This option is not available for all vehicles or for all mounting
bracket positions.
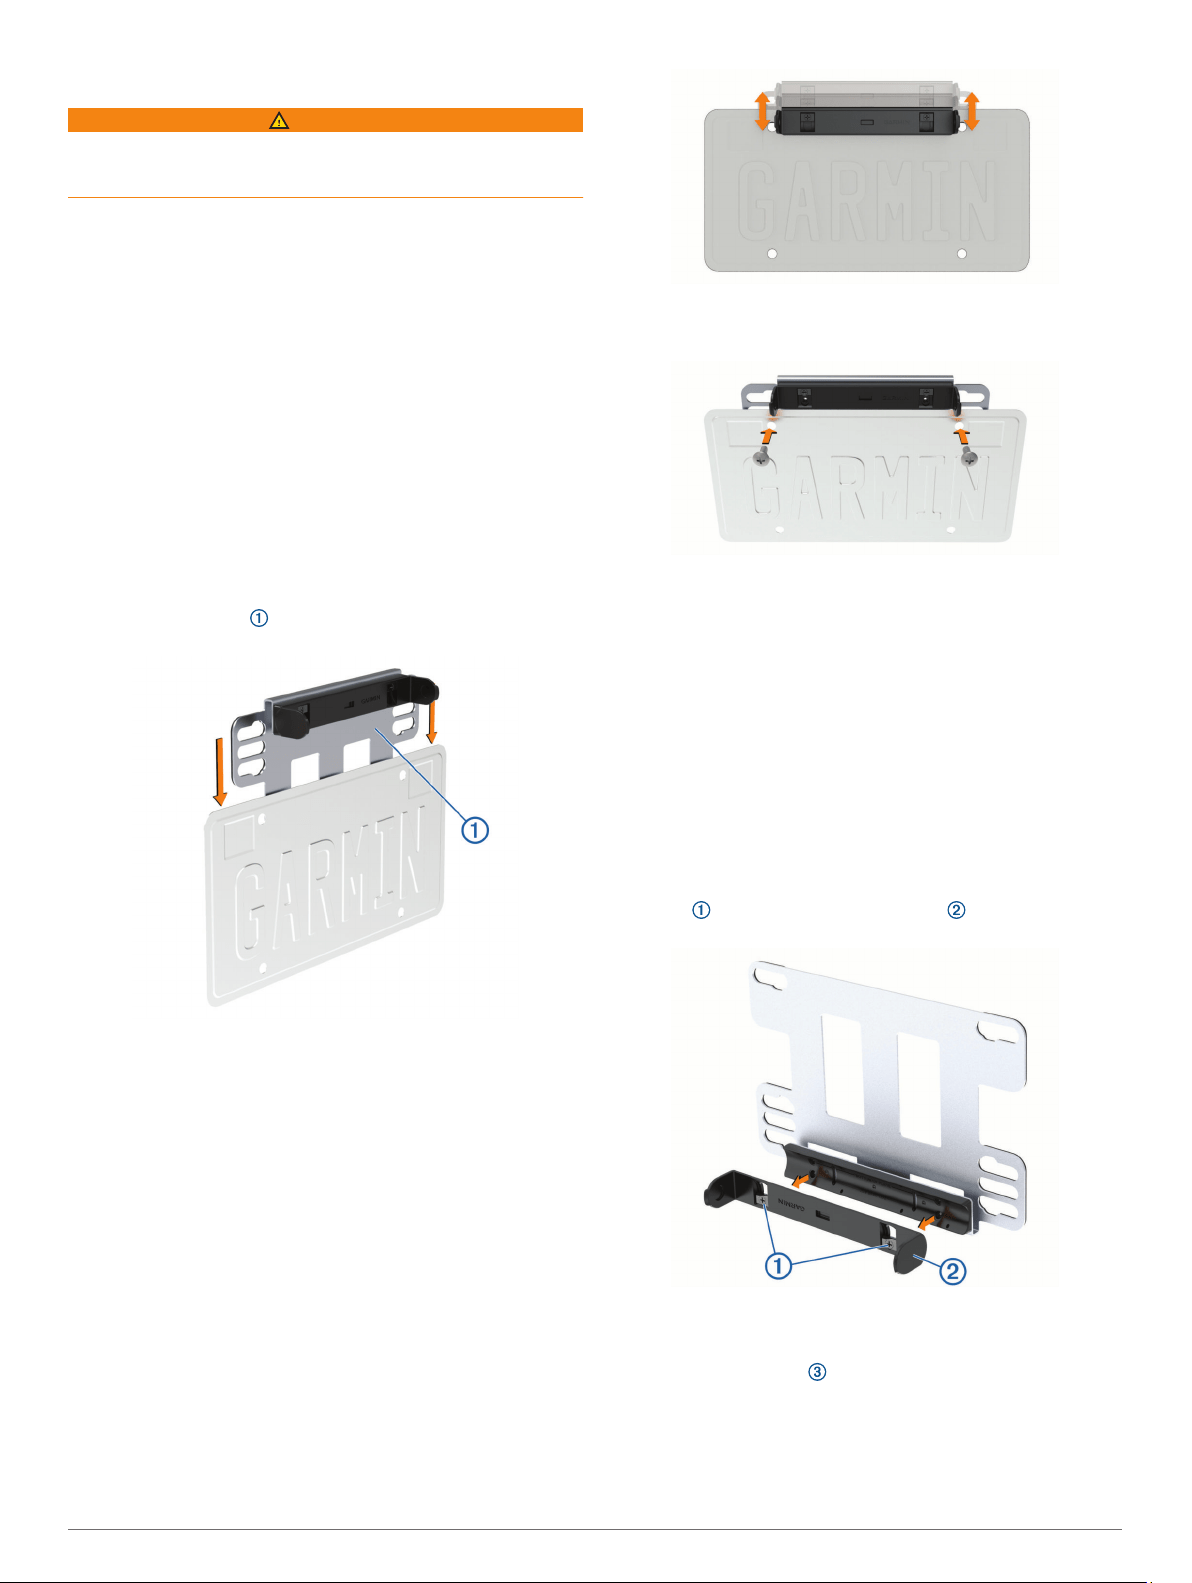
Installing the Camera at the Bottom of Your License
Plate
To allow for proper camera angle adjustment, the Garmin
®
logo
on the camera clip must be right-side up when the mount is
installed on your vehicle. Out of the box, the camera mount is
assembled for installing the camera at the top of your license
plate. When installing the camera at the bottom of your license
plate, you must remove, rotate, and reattach the camera clip.
This allows you to properly adjust the camera angle.
1
Using a Phillips screwdriver, fully loosen the two camera clip
screws , and remove the camera clip from the metal
bracket.
2
Rotate the camera clip 180 degrees, so the Garmin logo is
facing right-side-up.
3
Insert the two camera clip screws into the holes labeled
BOTTOM OF PLATE .
Introduction 1
Loading ...
Loading ...
Loading ...