
Loading ...
Loading ...
Loading ...
Rinnai 9 ORH OIM
3� The red operation indicator will ash to indicate the heater is in Standby mode.
4� Point the remote control towards the indicator light area of the heater to operate it.
Press “On” button on the remote control to turn on the heater and the heater will begin to radiate infrared heat. The
red operation indicator will light and a beep will be heard.
NOTE
The heater may take up to 15 minutes to reach maximum heat, depending on the area being
heated and the conditions.
5. Press “O” button to turn o the heater and the heater will be placed into standby. The red operation indicator
will ash and a beep will be heard.
6� Switch "OFF" the power at the isolating switch to turn o the heater. The operation indicator will go out.
NOTE
The heater may take up to 30 minutes to fully cool down, depending on the area being heated and
the conditions.
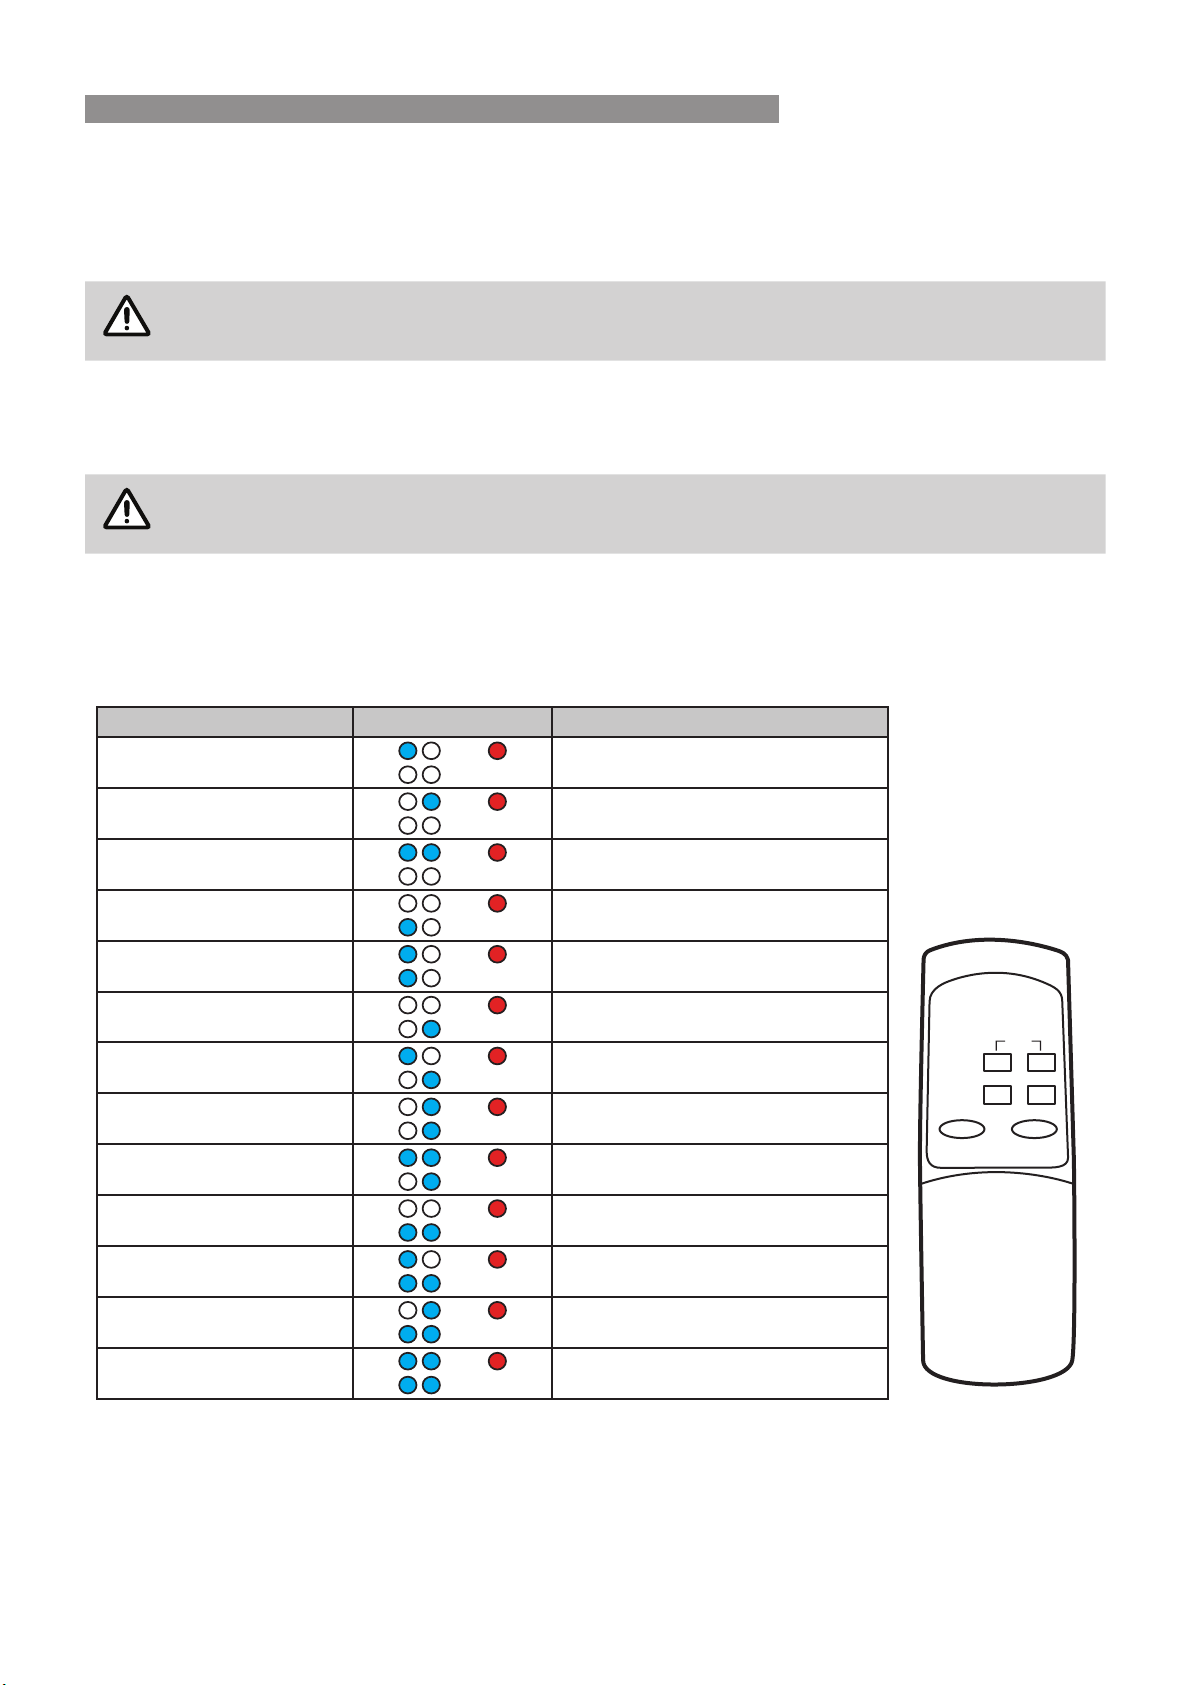
DELAY OFF TIMER
With the heater ‘ON’, press button “1” on the remote control, the blue indicator light will light, the heater will be o
in 1 hour. The heater will be placed into standby after 1 hour. The available time sets are indicated in table below.
Button on remote control Blue Indicator light Description Min time = 1hr
Max time = 13 hrs
To quit or cancel
delay o timer, press
the same buttons
you selected. Blue
indicator light should
be o.
1
The heater will be OFF in 1 hour
2
The heater will be OFF in 2 hours
1 and 2
The heater will be OFF in 3 hours
4
The heater will be OFF in 4 hours
1 and 4
The heater will be OFF in 5 hours
6
The heater will be OFF in 6 hours
1 and 6
The heater will be OFF in 7 hours
2 and 6
The heater will be OFF in 8 hours
1, 2 and 6
The heater will be OFF in 9 hours
4 and 6
The heater will be OFF in 10 hours
1, 4 and 6
The heater will be OFF in 11 hours
2, 4 and 6
The heater will be OFF in 12 hours
1, 2, 4 and 6
The heater will be OFF in 13 hours
REMOTE CONTROL BATTERIES
1� Insert batteries before using the remote control. The battery type used is AAA (1.5 V).
2� Remove the battery cover at the rear of the remote control.
3� Insert the new batteries and make sure that the + and - terminals of the batteries are installed correctly.
4� Reattach the battery cover.
hour
on off
1 2
64
INSTALLATION
Loading ...
Loading ...
Loading ...