Loading ...
Loading ...
Loading ...

SANTOS : Instruction and maintenance manual
98168 EN 1.3 - 05 2017 7 / 22 www.santos.fr
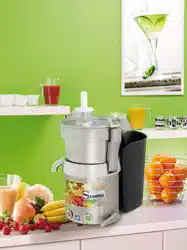
JUICE EXTRACTOR model # 28 & # 68
• Robust and very well-constructed (components made of cast aluminum,
engineered plastic and 18/10 stainless steel plate), this juice extractor is
particularly suitable for extracting juice and making coulis and sauce juices from
fruits or vegetables used by the professionals in:
Restaurants, Pizzerias, Snack Bars, Fast Food Outlets, Special Theme
Restaurants, etc.
• It has a powerful motor which drives a centrifugation basket.
• Centrifugation basket: The active, filtering part of the basket is made of stainless
steel.
• 18/10 press-drawn stainless steel bowl with stainless steel spout for collecting and
funneling the product juices.
USING THE APPLIANCE
USING:
Assembly and preparation:
1. Fit the bowl (4) on the bowl centering device (7) making sure that the juice run-off
spout is located in the indent provided for that purpose in the bowl centering
device (7) Fig.8
2. Model # 28: Place the basket assembly (5) in the bowl (4), making sure it is
correctly located on the motor shaft (8). The drive pin (19) needs to be in the
grooves in the basket assembly (5). Fig.11
Model #°68: Place the bowl (4) on the appliance. Hold the basket using 2 fingers
and fit it on to the motor shaft (8). Fig.9 and Fig.10
3. Model # 28: Using the spanner (18) insert the basket locking screw (15) and
screw it tight. During this operation, the basket shifts downwards a few millimeters.
During the locking operation the basket can be held with one hand.
4. Place the cover (2) on the bowl (4), turn the cover to engage the 2 lugs in the
catches on the locking rods. Fig.12
5. Model # 28: Rotate the clamping handle (1) by one half turn to block and lock
the cover in place (2), Fig.2
Model #°68: Rotate the clamping handle (1) by one quarter turn to block and
lock the cover in place (2). Fig.2
6. Place the fruit plunger (3) in the cover feed channel (2 Fig.13
7. Position the pulp container (6) correctly relative to the outlet of the discharge
channel (16).
8. Connect the supply cord plug (10) to your mains supply socket. Fig.14
9. Withdraw the fruit plunger (3) from the cover feed channel (2).
Loading ...
Loading ...
Loading ...
