Loading ...
Loading ...
Loading ...
12 www.dimplex.com
FLICKER ROD REPLACEMENT
WARNING: Disconnect power before attempting any
maintenance or cleaning to reduce the risk of electric
shock or damage to persons.
CAUTION: If unit was operating prior to servicing allow
at least 10 minutes for lights and heating elements to cool
off to avoid accidental burning of skin.
Tools required: Phillips head screwdriver
Short handled Phillips head screwdriver
CAUTION: Follow “Preparation for Service” instructions
before proceeding.
1. Remove the decorative acrylic ember-bed pieces from
the media tray, which lies along the bottom of the inte-
rior Partially Reective Glass. A medium sized con-
tainer such as a bucket or a box will be needed to keep
the acrylic ember-bed pieces together.
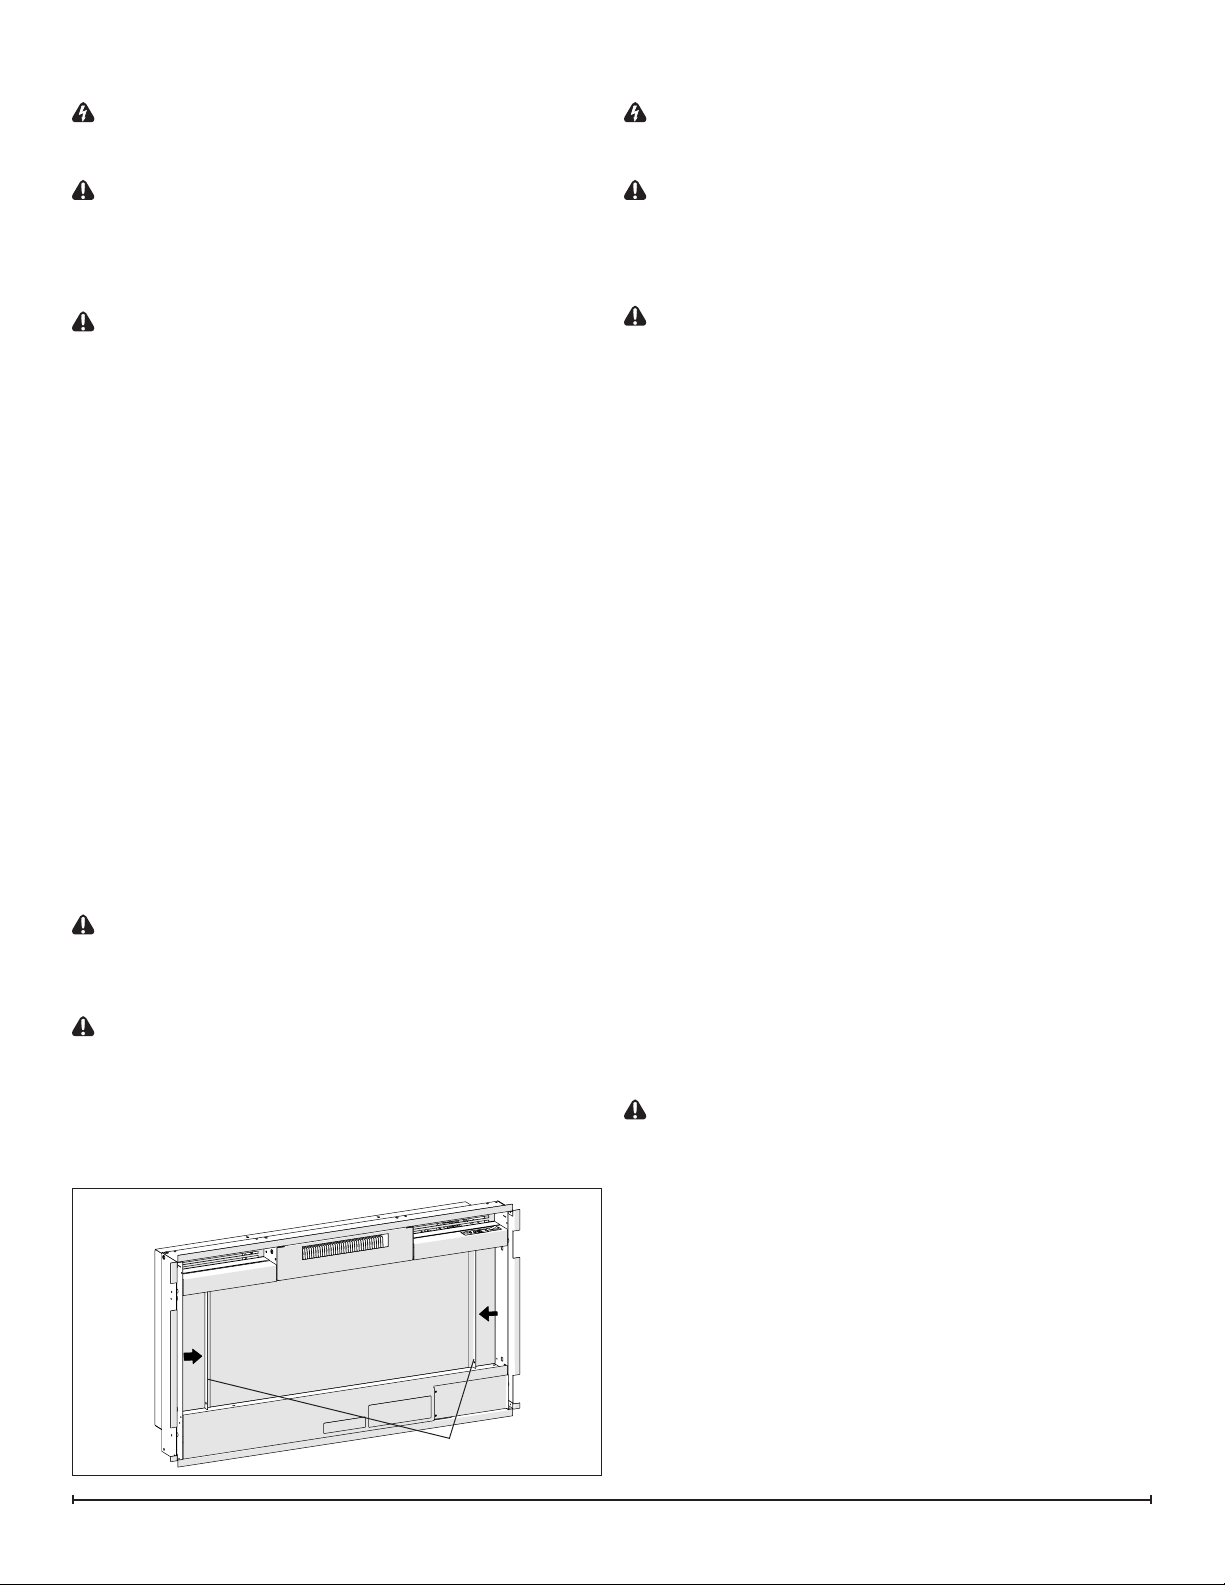
2. Remove the Partially Reective Glass retaining brack-
ets by removing the 3 screws on each brackets; (3
brackets in total), located on the left and right side of
the Partially Reective Glass. (Figure 13)
3. Remove the Partially Reective Glass. Carefully place
the glass assembly aside in a safe location.
4. In the bottom right hand of the unit, remove the two
screws and the front access cover. (Figure 11)
5. In the media tray, remove the two screws on either end
and the one on the side wall, to remove the clear media
tray and the front panel. (Figure 12)
!
NOTE: Tip the front panel forward then lift out of the unit.
6. Remove the icker rod by holding the gasket and slid-
ing it to the left. This will disengage it from the motor.
It will then be possible to remove it out of the opening.
7. Reassemble in the reverse order as above.
CAUTION: When removing and replacing the icker
motor try to keep any slight bending of the icker rod
minimal so as to not damage it. If icker rod is damaged, it
should be replaced to ensure proper operation.
CAUTION: When re-installing, be sure the wires are
guided and tucked into the proper openings along the right
side so they are not pinched and allows enough space to
reinstall the panels.
LED LIGHT STRIPS REPLACEMENT
WARNING: Disconnect power before attempting any
maintenance or cleaning to reduce the risk of electric
shock or damage to persons.
CAUTION: If unit was operating prior to servicing allow
at least 10 minutes for lights and heating elements to cool
off to avoid accidental burning of skin.
Tools required: Phillips head screwdriver
Wire Snips
CAUTION: Follow “Preparation for Service” instructions
before proceeding.
1. Remove the decorative acrylic ember-bed pieces from
the media tray, which lies along the bottom of the inte-
rior Partially Reective Glass. A medium sized con-
tainer such as a bucket or a box will be needed to keep
the acrylic ember-bed pieces together.
2. Remove the Partially Reective Glass retaining brack-
ets by removing the 3 screws on each brackets; (3
brackets in total), located on the left and right side of
the Partially Reective Glass. (Figure 13)
3. Remove the Partially Reective Glass. Carefully place
the glass assembly aside in a safe location.
4. In the bottom right hand of the unit, remove the two
screws and the front access cover. (Figure 11)
5. In the media tray, remove the two screws on either end
and the one on the side wall, to remove the clear media
tray and the front panel. (Figure 12)
6. Remove the icker rod. This can be done by sliding it
to the left which will disengage it from the icker motor.
7. Locate the LED strip that needs to be replaced.
8. Disconnect the wire from the board by pulling gently on
the connector at the end.
9. Remove the board from the mounting bracket by press-
ing in the center of the standoffs to release them.
10. Line up the holes on the board and gently press the
new board onto the mounts. Make sure the board is
secure.
11. Reconnect the wire.
12. Reassemble in the reverse order as above.
CAUTION: When removing and replacing the icker
motor try to keep any slight bending of the icker rod
minimal so as to not damage it. If icker rod is damaged, it
should be replaced to ensure proper operation.
Figure 13
Retaining Brackets
Loading ...
Loading ...
Loading ...