Loading ...
Loading ...
Loading ...
8 www.dimplex.com
Placement
This firebox is a zero clearance design,
with the exception of the top of the unit,
where any insulation and vapor barrier
should be placed a minimum of 2”
(5.1 cm) from the firebox.
DANGER!: High temperatures may
be generated under certain abnormal
conditions. Do not partially or fully cover or
obstruct the front of the rebox.
WARNING: All electrical heaters have
hot and arcing or sparking parts inside. Do
not use it in areas where gasoline, paint, or
flammable liquids are used or stored.
WARNING: The built-in electric firebox
must NOT be in direct contact with any
building vapor barrier or insulation.
1. Place the firebox into the framed
opening. Level with shims if
necessary.
2. From the inside of the unit, gently
remove the interior brick panels
(attached magnetically) and bent
out, up to 90°, to be flush with the
surrounding studs.
3. Attach the firebox to frame using
four mounting flanges on the sides
of firebox and suitable hardware.
Bathroom Installation
This built-in electric firebox must
be protected by a GFI circuit when
installed in an area where water is
present. If the unit is installed using
a receptacle, it must be readily
accessible.
This firebox is not watertight and must
be installed as to prevent water from
entering the unit. Install the unit away
from showers, tubs, etc. Keep towels
and other combustible materials 3 feet
(0.9 m) away from the front of the unit.
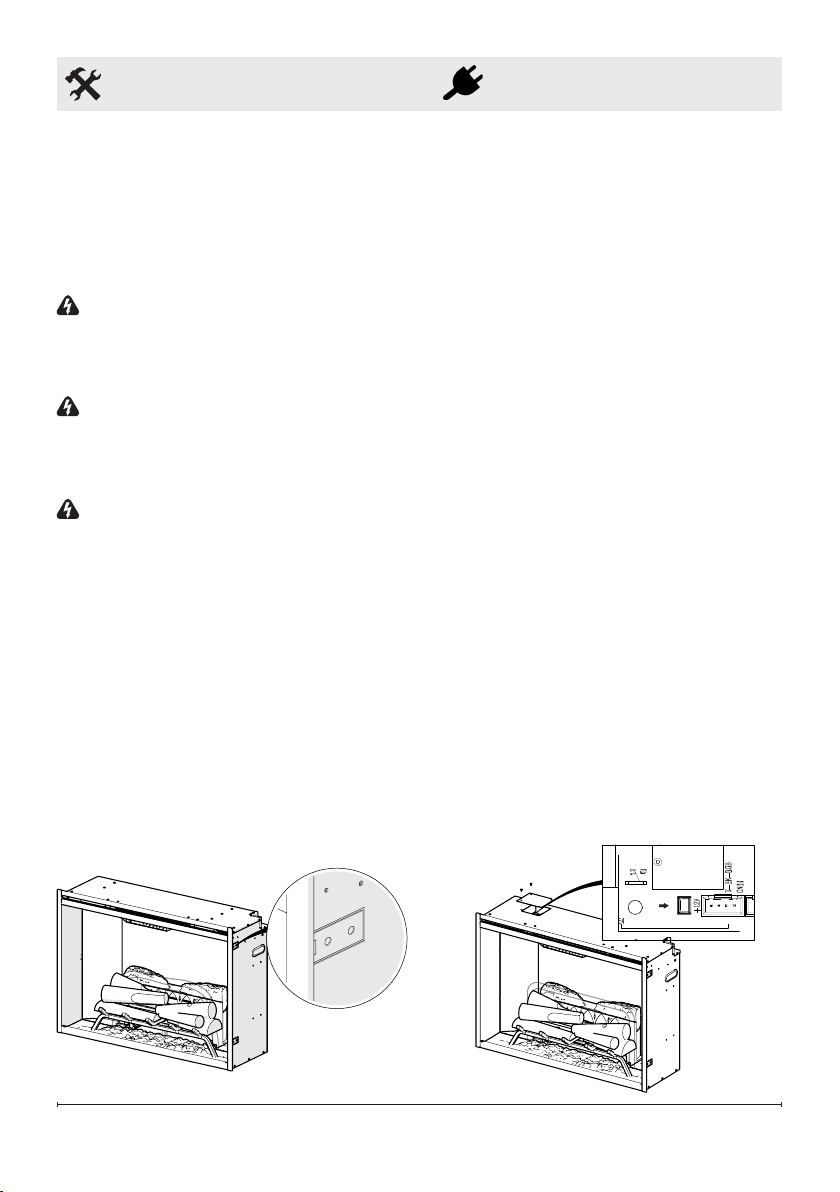
Permanent Heat Disable
The firebox heater can be permanently
disabled by removing the electronic
jumper on the main control board.
Disable the heater before any other
installation takes place.
To permanently disable the heater:
1. Locate and remove the panel on the
top left of the unit.
2. Pull out the electronic jumper
(shunt), on the on the left side of
the screw in the right corner of the
board. The label beside the jumper
is "HT EN".
3. Reinstall the previously removed
panel.
HT EN
Electrical
Installation
Loading ...
Loading ...
Loading ...