
PACKAGE CONTENTS
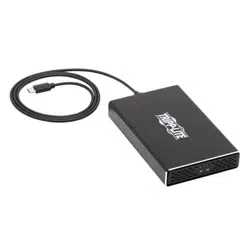
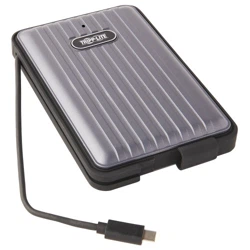
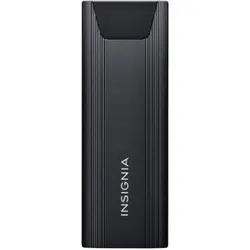
• NVMe M.2 SSD hard drive enclosure
• USB-C cable
• USB adapter
• Thermal pad
• Quick Setup Guide
COMPATIBILITY
• Supported SSD sizes: 30, 42, 60, and 80 mm
FEATURES
• Connects your M.2 NVMe SSD to your computer to back up
les, transfer data only
• Lightweight aluminum construction goes where you do
• Tool-free, plug-and-play design makes installation and
assembly simple
• USB-C to C cable and USB adapter included for wide-ranging
use
• LED indicators show the enclosure is powered and ready to
use
• Supports transfer speeds up to 10 Gbps, giving you fast
access to your data
• Works with USB 3.2 Gen 2 and is backwards compatible for
long-lasting use
• UASP support oers faster data speeds while reducing
processor requirements
• Fits most NVMe and PCIe drives up to 2 TB and sized 2230,
2242, 2260 and 2280
Before using your new product, please read these instructions to prevent any damage.
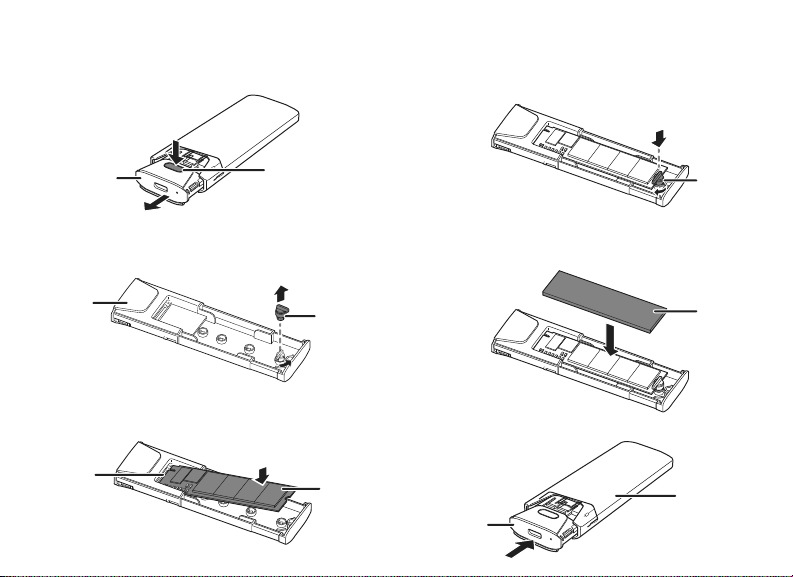
INSTALLING YOUR HARD DRIVE IN THE
ENCLOSURE
1 Press down on the lock button, then pull out the inner tray
of the enclosure.
2 Rotate the fastener about 60 degrees counterclockwise to
unlock it from the inner tray, then remove it.
3 Insert your drive (not included) rmly into the enclosure
slot on the inner tray.
4 Reinstall the fastener and rotate it about 60 degrees
clockwise to lock the drive into the tray.
5 Remove the PE paper from the back of the thermal pad
and place it on the drive.
6 Push the inner tray into the enclosure until it clicks into
place.
QUICK SETUP GUIDE
M.2 NVME to
USB-C SSD
Enclosure
NS-PCNVMEHDE / NS-PCNVMEHDE-C
Lock button
Inner tray
Inner tray
Fastener
Hard drive
Enclosure slot
Inner tray
Enclosure
Fastener
Thermal pad
PACKAGE CONTENTS
• NVMe M.2 SSD hard drive enclosure
• USB-C cable
• USB adapter
• Thermal pad
• Quick Setup Guide
COMPATIBILITY
• Supported SSD sizes: 30, 42, 60, and 80 mm
FEATURES
• Connects your M.2 NVMe SSD to your computer to back up
les, transfer data only
• Lightweight aluminum construction goes where you do
• Tool-free, plug-and-play design makes installation and
assembly simple
• USB-C to C cable and USB adapter included for wide-ranging
use
• LED indicators show the enclosure is powered and ready to
use
• Supports transfer speeds up to 10 Gbps, giving you fast
access to your data
• Works with USB 3.2 Gen 2 and is backwards compatible for
long-lasting use
• UASP support oers faster data speeds while reducing
processor requirements
• Fits most NVMe and PCIe drives up to 2 TB and sized 2230,
2242, 2260 and 2280
Before using your new product, please read these instructions to prevent any damage.
INSTALLING YOUR HARD DRIVE IN THE
ENCLOSURE
1 Press down on the lock button, then pull out the inner tray
of the enclosure.
2 Rotate the fastener about 60 degrees counterclockwise to
unlock it from the inner tray, then remove it.
3 Insert your drive (not included) rmly into the enclosure
slot on the inner tray.
4 Reinstall the fastener and rotate it about 60 degrees
clockwise to lock the drive into the tray.
5 Remove the PE paper from the back of the thermal pad
and place it on the drive.
6 Push the inner tray into the enclosure until it clicks into
place.
QUICK SETUP GUIDE
M.2 NVME to
USB-C SSD
Enclosure
NS-PCNVMEHDE / NS-PCNVMEHDE-C
Lock button
Inner tray
Inner tray
Fastener
Hard drive
Enclosure slot
Inner tray
Enclosure
Fastener
Thermal pad
TROUBLESHOOTING
Can’t nd the additional drive in my system
• Make sure that your drive is functioning. A drive that does
not work in a laptop will not work with this enclosure either.
• Make sure that the USB cable is connected rmly to your
enclosure and computer.
• Make sure that the USB cable is not damaged.
• Open the enclosure and make sure that all connections are
secure.
• Try using a dierent USB port.
• If it is a new drive, it may need to be formatted. Do not
format a drive that already has data on it.
• Do not use USB hubs without a separate power supply
because they may not provide enough power.
Data transfer is slow
• Make sure that your computer’s drivers are up-to-date.
• Try using a dierent USB port.
SPECIFICATIONS
Dimensions: 4.4 × 1.6 × .53 in. (112.2 × 39.7 × 13.4 mm)
Connection types: USB-C (USB 3.2 Gen 2)
Cable length: 3.3 ft. (1 m)
Data transfer speed: 10 Gbps (MAX)
* Transfer speeds are limited to the drive’s specications and
performance characteristics.
LEGAL NOTICES
FCC Information
This device complies with Part 15 of the FCC Rules. Operation is subject to the
following two conditions:
(1) this device may not cause harmful interference, and (2) this device must accept
any interference received, including interference that may cause undesired
operation.
This equipment has been tested and found to comply with the limits for a Class B
digital device, pursuant to part 15 of the FCC Rules. These limits are designed to
provide reasonable protection against harmful interference in a residential
installation. This equipment generates, uses, and can radiate radio frequency energy
and, if not installed and used in accordance with the instructions, may cause harmful
interference to radio communications. However, there is no guarantee that
interference will not occur in a particular installation. If this equipment does cause
harmful interference to radio or television reception, which can be determined by
turning the equipment o and on, the user is encouraged to try to correct the
interference by one or more of the following measures:
• Reorient or relocate the receiving antenna.
• Increase the separation between the equipment and receiver.
• Connect the equipment into an outlet on a circuit dierent from that to which the
receiver is connected.
• Consult the dealer or an experienced radio/TV technician for help.
Changes or modications not expressly approved by the party responsible for
compliance could void the user’s authority to operate the equipment.
ICES-003
This Class B digital apparatus complies with Canadian ICES-003;
Cet appareil numérique de la classe B est conforme à la norme NMB-003 du Canada.
ONE-YEAR LIMITED WARRANTY
Visit www.insigniaproducts.com for details.
CONTACT INSIGNIA:
1-877-467-4289 (U.S. and Canada)
www.insigniaproducts.com
INSIGNIA is a trademark of Best Buy and its aliated companies
Distributed by Best Buy Purchasing, LLC
7601 Penn Ave South, Richeld, MN 55423 U.S.A.
©2022 Best Buy. All rights reserved.
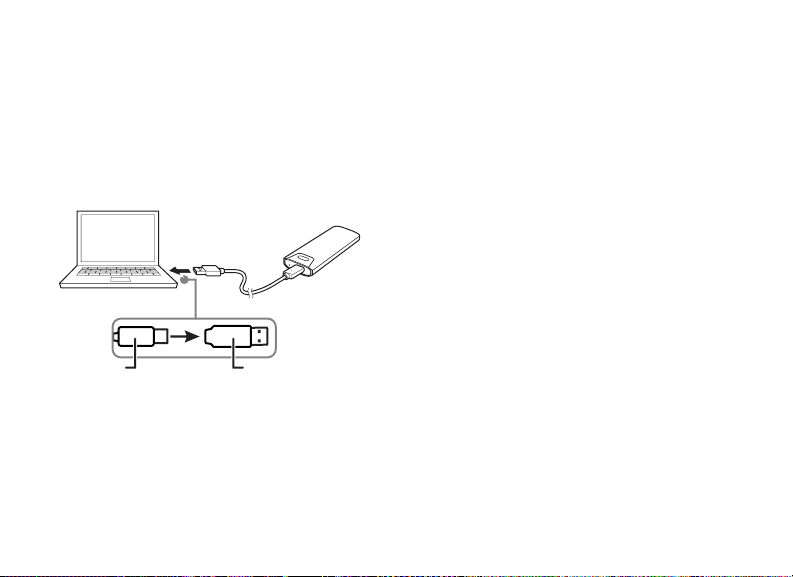
CONNECTING YOUR ENCLOSURE TO YOUR
COMPUTER
CAUTION: SSDs that have been used previously should already be
formatted. If your SSD is not new, and if you choose to format the
drive, all data/information on the drive will be lost.
1 Connect the USB-C cable into the port on the enclosure.
2 Plug the other end of the cable into a USB port on your
computer to access the drive.
Note: For laptops with no USB-C port, use the included USB-C to
USB adapter to connect to an open USB port.
3 If this is the rst time you are using your drive, follow
your computer’s operating system instructions to
format the drive.
4 Follow your computer’s operating system instructions
to transfer data to or from your computer.
V1 ENGLISH 21-1163
USB-C cable Optional USB adapterOR

TROUBLESHOOTING
Can’t nd the additional drive in my system
• Make sure that your drive is functioning. A drive that does
not work in a laptop will not work with this enclosure either.
• Make sure that the USB cable is connected rmly to your
enclosure and computer.
• Make sure that the USB cable is not damaged.
• Open the enclosure and make sure that all connections are
secure.
• Try using a dierent USB port.
• If it is a new drive, it may need to be formatted. Do not
format a drive that already has data on it.
• Do not use USB hubs without a separate power supply
because they may not provide enough power.
Data transfer is slow
• Make sure that your computer’s drivers are up-to-date.
• Try using a dierent USB port.
SPECIFICATIONS
Dimensions: 4.4 × 1.6 × .53 in. (112.2 × 39.7 × 13.4 mm)
Connection types: USB-C (USB 3.2 Gen 2)
Cable length: 3.3 ft. (1 m)
Data transfer speed: 10 Gbps (MAX)
* Transfer speeds are limited to the drive’s specications and
performance characteristics.
LEGAL NOTICES
FCC Information
This device complies with Part 15 of the FCC Rules. Operation is subject to the
following two conditions:
(1) this device may not cause harmful interference, and (2) this device must accept
any interference received, including interference that may cause undesired
operation.
This equipment has been tested and found to comply with the limits for a Class B
digital device, pursuant to part 15 of the FCC Rules. These limits are designed to
provide reasonable protection against harmful interference in a residential
installation. This equipment generates, uses, and can radiate radio frequency energy
and, if not installed and used in accordance with the instructions, may cause harmful
interference to radio communications. However, there is no guarantee that
interference will not occur in a particular installation. If this equipment does cause
harmful interference to radio or television reception, which can be determined by
turning the equipment o and on, the user is encouraged to try to correct the
interference by one or more of the following measures:
• Reorient or relocate the receiving antenna.
• Increase the separation between the equipment and receiver.
• Connect the equipment into an outlet on a circuit dierent from that to which the
receiver is connected.
• Consult the dealer or an experienced radio/TV technician for help.
Changes or modications not expressly approved by the party responsible for
compliance could void the user’s authority to operate the equipment.
ICES-003
This Class B digital apparatus complies with Canadian ICES-003;
Cet appareil numérique de la classe B est conforme à la norme NMB-003 du Canada.
ONE-YEAR LIMITED WARRANTY
Visit www.insigniaproducts.com for details.
CONTACT INSIGNIA:
1-877-467-4289 (U.S. and Canada)
www.insigniaproducts.com
INSIGNIA is a trademark of Best Buy and its aliated companies
Distributed by Best Buy Purchasing, LLC
7601 Penn Ave South, Richeld, MN 55423 U.S.A.
©2022 Best Buy. All rights reserved.
CONNECTING YOUR ENCLOSURE TO YOUR
COMPUTER
CAUTION: SSDs that have been used previously should already be
formatted. If your SSD is not new, and if you choose to format the
drive, all data/information on the drive will be lost.
1 Connect the USB-C cable into the port on the enclosure.
2 Plug the other end of the cable into a USB port on your
computer to access the drive.
Note: For laptops with no USB-C port, use the included USB-C to
USB adapter to connect to an open USB port.
3 If this is the rst time you are using your drive, follow
your computer’s operating system instructions to
format the drive.
4 Follow your computer’s operating system instructions
to transfer data to or from your computer.
V1 ENGLISH 21-1163
USB-C cable Optional USB adapterOR