Loading ...
Loading ...
Loading ...
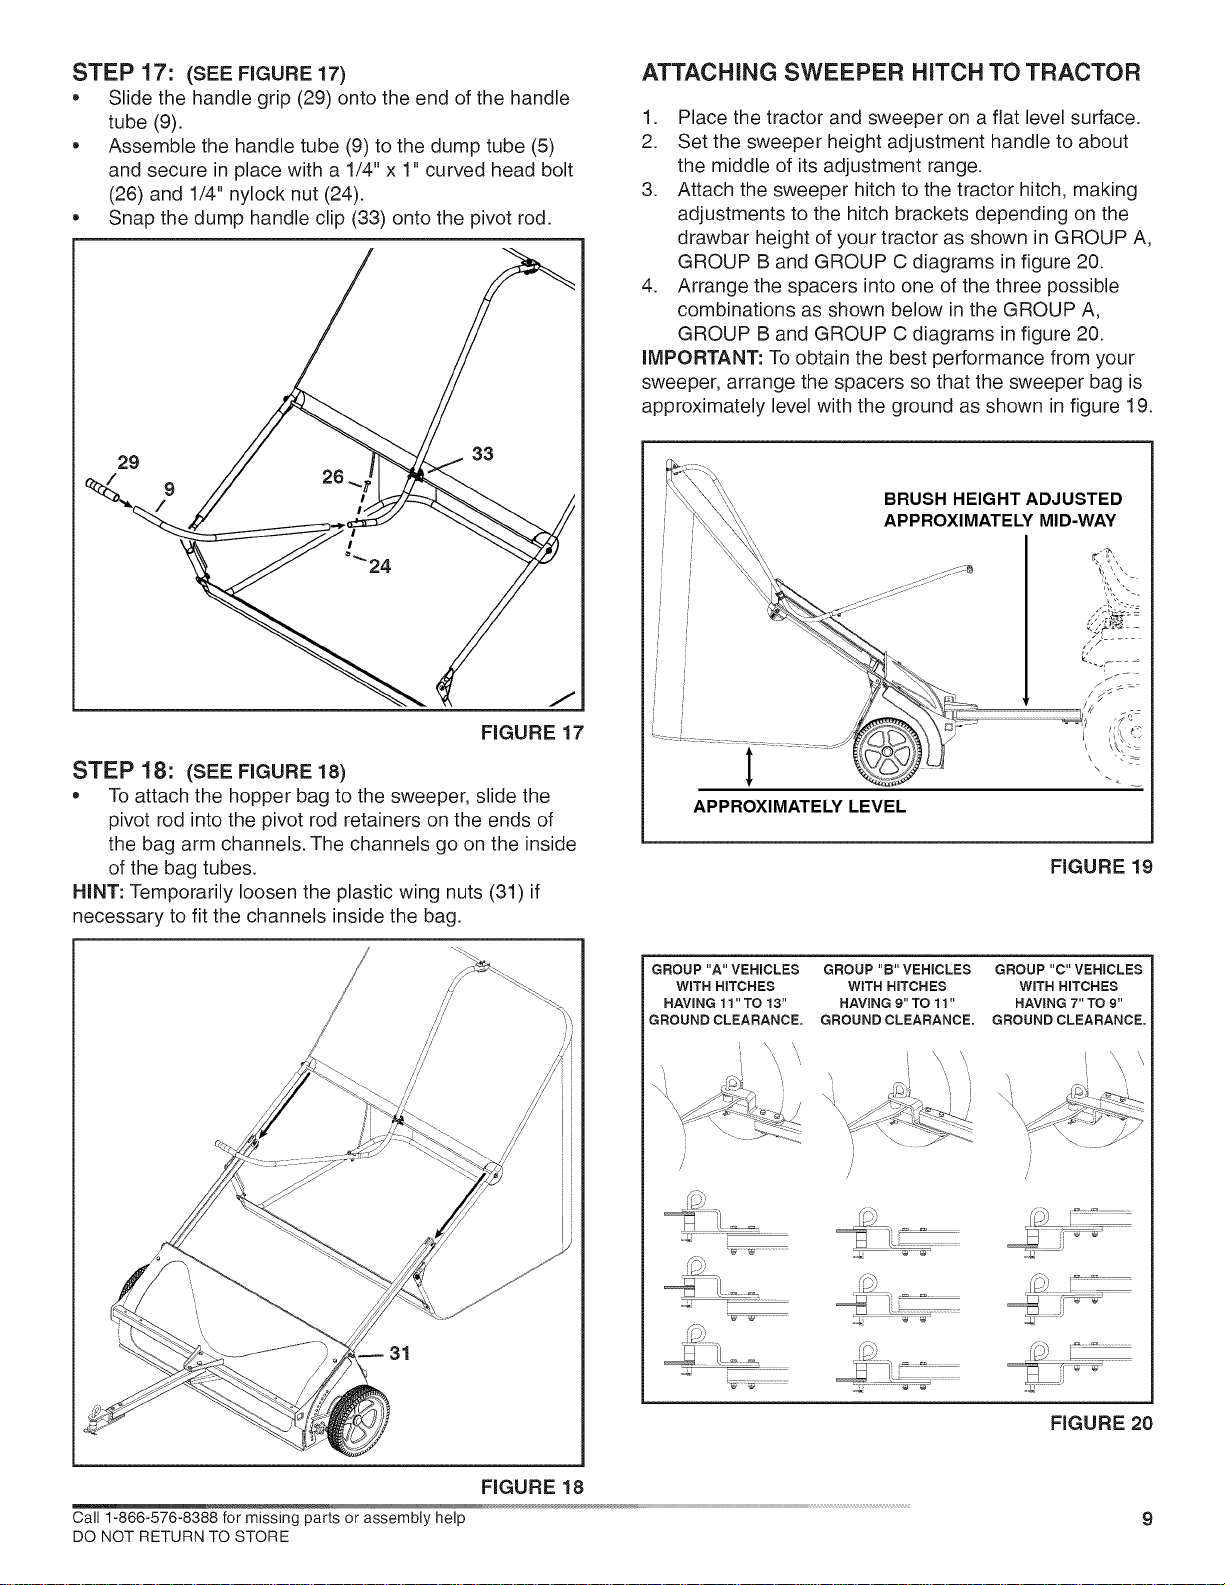
STEP 17: (SEE FIGURE 17)
* Slide the handle grip (29) onto the end of the handle
tube (9).
* Assemble the handle tube (9) to the dump tube (5)
and secure in place with a 1/4" x 1" curved head bolt
(26) and 1/4" nylock nut (24).
* Snap the dump handle clip (33) onto the pivot rod.
29
9
33
FIGURE 17
STEP 18: (SEE FIGURE 18)
• To attach the hopper bag to the sweeper, slide the
pivot rod into the pivot rod retainers on the ends of
the bag arm channels. The channels go on the inside
of the bag tubes.
HINT: Temporarily loosen the plastic wing nuts (31) if
necessary to fit the channels inside the bag.
//
FIGURE 18
Call 1-888-578-8388 for missing parts or assembly help
DO NOT RETURN TO STORE
ATTACHING SWEEPER HITCH TO TRACTOR
1. Place the tractor and sweeper on a flat level surface.
2. Set the sweeper height adjustment handle to about
the middle of its adjustment range.
3. Attach the sweeper hitch to the tractor hitch, making
adjustments to the hitch brackets depending on the
drawbar height of your tractor as shown in GROUP A,
GROUP B and GROUP C diagrams in figure 20.
4. Arrange the spacers into one of the three possible
combinations as shown below in the GROUP A,
GROUP B and GROUP C diagrams in figure 20.
iMPORTANT: To obtain the best performance from your
sweeper, arrange the spacers so that the sweeper bag is
approximately level with the ground as shown in figure 19.
BRUSH HEIGHT ADJUSTED
APPROXIMATELY MID-WAY
J
I
APPROXIMATELYLEVEL
/
\
FIGURE 19
GROUP "A" VEHICLES
WiTH HITCHES
HAVING 11"TO 13"
GROUND CLEARANCE.
GROUP "B" VEHICLES
WITH HITCHES
HAVING 9" TO 11"
GROUND CLEARANCE.
GROUP "C" VEHICLES
WiTH HITCHES
HAVING 7" TO 9"
GROUND CLEARANCE.
F
FIGURE 20
Loading ...
Loading ...
Loading ...