Loading ...
Loading ...
Loading ...
STEP 9: (SEE FIGURE 9)
* Slide the front flaps of the hopper bag up onto the
front of the lower hopper tubes. Secure the bag frame
tube to the lower hopper tubes using two clevis pins
(28) and hair pins (19).
NOTE: Be sure front flaps of hopper bag are positioned
above clevis pins.
* Snap the sides of the bag to the bottom of the bag at
the front corners.
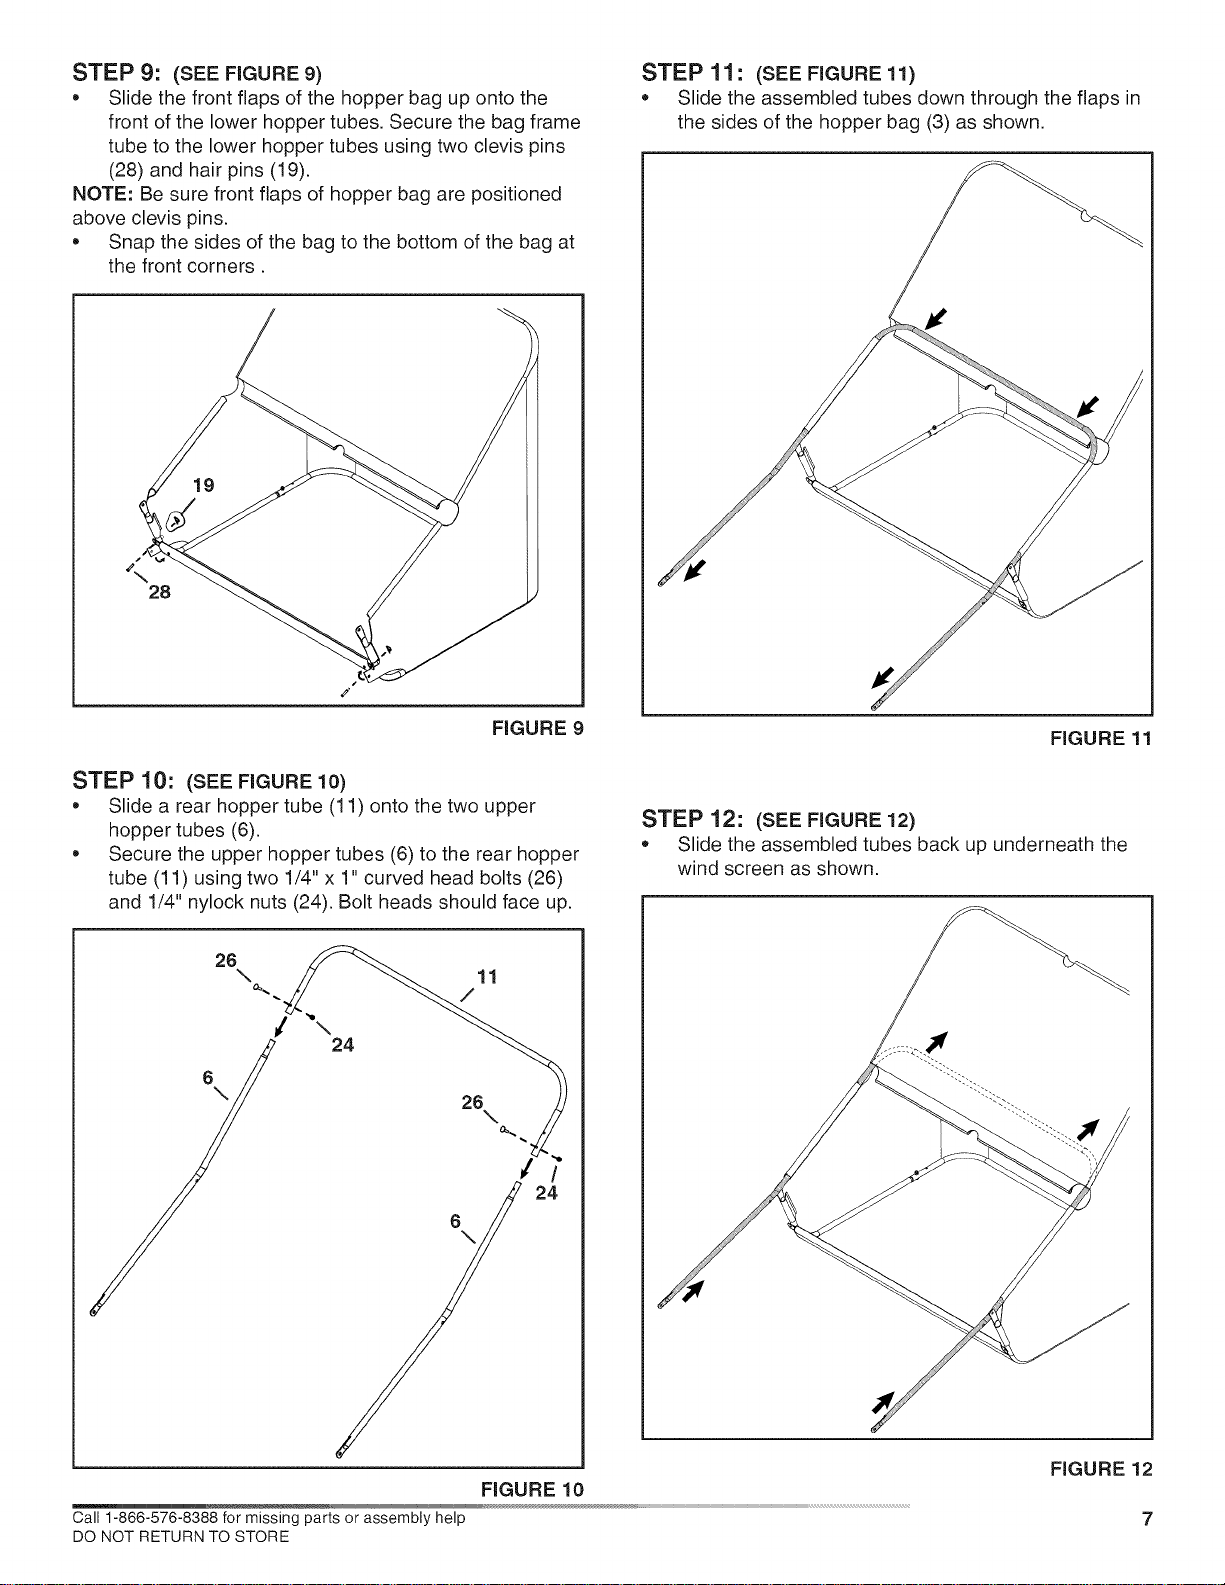
STEP 11" (SEE FIGURE 11)
* Slide the assembled tubes down through the flaps in
the sides of the hopper bag (3) as shown.
28
FIGURE 9
FIGURE 11
STEP 10:
e
(SEE FIGURE 10)
Slide a rear hopper tube (11) onto the two upper
hopper tubes (6).
Secure the upper hopper tubes (6) to the rear hopper
tube (11) using two 1/4"x 1" curved head bolts (26)
and 1/4" nylock nuts (24). Bolt heads should face up.
26\4.. ` _ /11
o//
\// 26 ))
/ "')4
Call 1-866-576-8388 for missing parts or assembly help
DO NOT RETURN TO STORE
FIGURE 10
STEP 12: (SEE FIGURE 12)
• Slide the assembled tubes back up underneath the
wind screen as shown.
FIGURE 12
7
Loading ...
Loading ...
Loading ...