Loading ...
Loading ...
Loading ...
isnotfactoryequippedwithasparkar-
restor;however, a spark arrestor is
available as an optional part. If a spark
arrestor isrequiredin your area, con-
tact Sears Service forthe correct kit.
The spark arrestor,blowertubes, and
nozzlesmust I_ assembled to unitto
be in full compliance with regulations.
SPECIAL NOTICE: Exposureto vibra-
tionsthrou9|l prolongeduse ofgasoline
poweredhand toolscouldcauseblood
vesselorne_e damage in the fingers,
hands,and jointsof peopleproneto cir-
culationdisordersor abnormalsweging.
Prolongeduse incoldweather hasbeen
linkedto bloodvesseldamage in other-
wisehealthypeople. Ifsymptomsoccur
suchas numbness, pain,lossof
strength,change in sldncolor ortexture,
or lossof feelinginthe fingers,hands,or
•joints,dscor_e the use of this tool
a_ ssek _ att_ An
an_tJon systemdoes notguarantee
the avoidanceofthese problems.Users
who operatepowertoolsona continual
and regularbasis mustmonitorclosely
their physicalcondition andthe condtion
ofthis tool.
CARTON CONTENTS
Check cartoncontents againstthe fol-
lowinglist.
Model 358.797320
• Blower
• Blowertube
• 2-Cycle Engine Oil
NOTE: Itis normalfor the fuel filterto
rattleinthe empty fuel tank.
ASSEMBLY
WARNING: If received assembled,
repeat all steps to ensure your unitis
properlyassembled and all fasteners
are secure.
• No tools are required forassembly.
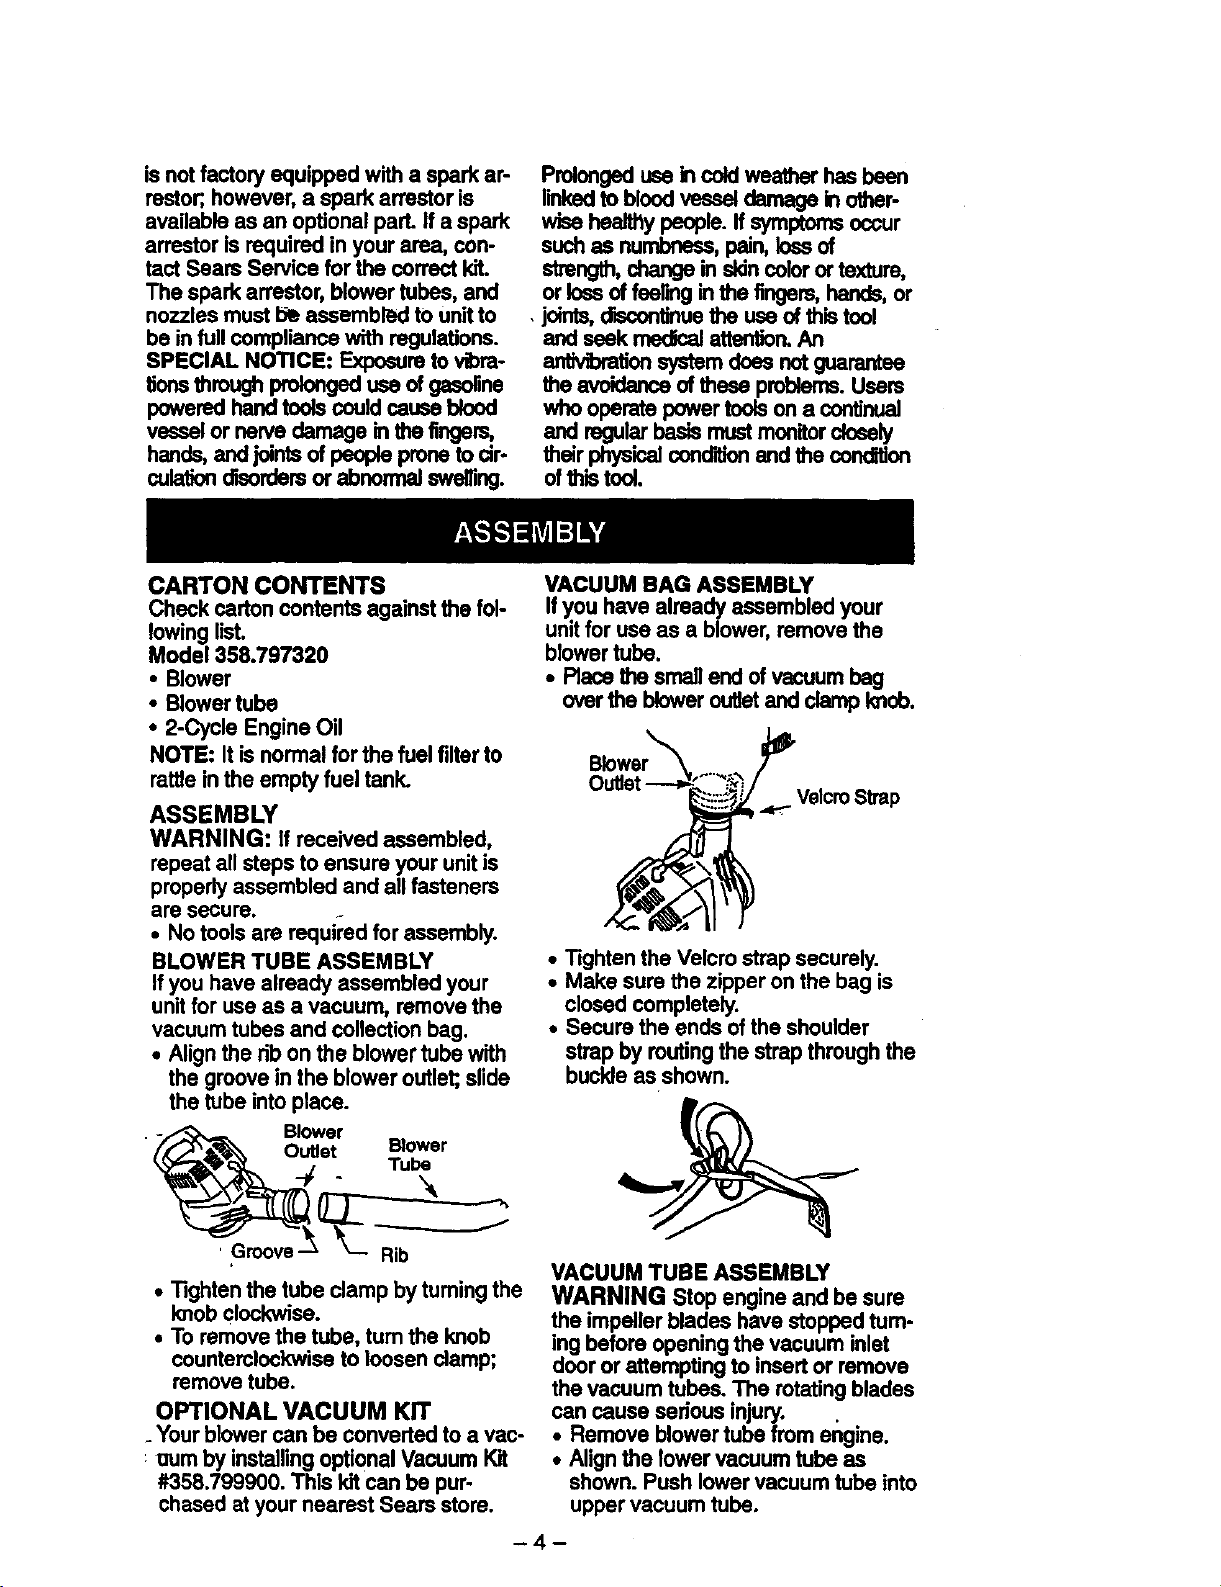
BLOWER TUBE ASSEMBLY
Ifyou have already assembled your
unitfor use as a vacuum, remove the
vacuum tubes and collectionbag.
• Alignthe rib on the blowertube with
the groovein the bloweroutlet;,slide
the tube intoplace.
- _ Blower
///"_ _'_ Outlet Blower
_3_ql_t,. _.; Tube
_ Rib
• Tighten the tube clamp by tuming the
knob clockwise.
• To remove the tube, turn the knob
counterclockwise to loosen clamp;
remove tube.
OPTIONAL VACUUM KIT
. Yourblowercan be converted to a vac-
uum by installingoptional Vacuum Kit
#358.799900. This kitcan be pur-
chased at your nearest Sears store.
VACUUM BAG ASSEMBLY
Ifyou have already assembled your
unitfor use as a blower,remove the
blowertube.
• Race the smallend ofvacuum bag
overthe bloweroutletand clamp knob.
Blower
Velcm Strap
• Tighten the Velcro strap securely.
• Make sure the zipper onthe bag is
closed completely.
• Secure the ends of the shoulder
strap by routingthe strap through the
buckle as shown.
VACUUM TUBE ASSEMBLY
WARNING Stop engine and be sure
the impeller blades have stopped tum-
ing before opening the vacuum inlet
door or attempting to insert or remove
the vacuum tubes. The rotating blades
can cause serious injury.
• Remove blower tube from engine.
• Align the lower vacuum tube as
shown. Push lower vacuum tube into
upper vacuum tube.
-4-
Loading ...
Loading ...
Loading ...