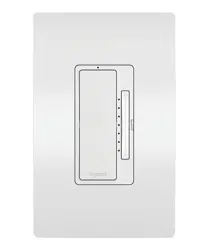
Smart Tru-Universal
Dimmer, Wi-Fi
before you start
Review this guide in its entirety. Consult an electrician with any questions or if
you are unsure of your abilities.
Warning: Incorrect installation could result in death, serious injury, and/or
damage to your home or devices.
Caution: To reduce the risk of injury and/or overheating and damage to
other equipment:
• For dry, indoor use only.
• Do not use to power medical
equipment.
• Use ONLY with dimmable lighting
loads.
• Do not use with loads exceeding
the device load rating.
what you need
REQUIRED:
Phillips-head screwdriver
Flat blade screwdriver
• Connect the smart dimmer to
a 120 VAC, 60 Hz power source
ONLY.
• Always use copper wire to install
the smart dimmer & follow
all applicable local & national
electrical codes.
Visit www.legrand.us/radiant/smart-lighting/support for support.
YOU MAY ALSO NEED:
Voltage tester, pliers, wire cutter, wire
stripper, electrical tape, fl ashlight, wiring
leads (included), and wire nuts (included)
installation & setup
1 | turn off power to device at circuit breaker
Flip existing light switch multiple times to confi rm power is off.
NOTE: Ensure power is off to all devices in electrical box.
OFF
ON
OFF
ON
OFF
ON
OFF
ON
OFF
ON
2 | remove existing device
Check for the following wires:
a
HOT or LINE: Receives power from the circuit box. Referred to as “hot” for the
purposes of this guide. Do not touch or let “hot” wires contact other wires.
b
LOAD: Directs power to your light(s).
c
NEUTRAL: Creates a path to return current to the power source when the
device is off. Required for your switch installation.
d
GROUND: Provides a safe path for electricity in the event of a short circuit.
e
TRAVELER: If more than one switch controls the light, an additional wire will
be in the box that “travels” to the other switch. Not used in single dimmer
applications. For multiple dimmer applications see 3b.
OFF
ON
OFF
ON
OFF
ON
VOLTAGE
TESTER
Load
Supply
“Hot”
3a | wire smart dimmer
Use the wire nuts provided to secure the wires together.
a
Connect the WHITE neutral wire on the dimmer to the neutral wires in the
box, using the red wire nut.
b
Connect the LOAD wire on the dimmer to the load wire in the box.
c
Connect the HOT wire on the dimmer to the hot wire(s) in the box.
d
Connect the GREEN ground wire on the dimmer to the ground wire(s) in the box.
e
If the light is controlled with only one switch, use a wire nut to cap the
YELLOW traveler wire on the device and proceed to step 4.
NOTE: If the light is controlled by two or more dimmers (multi-location),
connect the YELLOW wire to the remaining traveler wire in the box and see
3b for instructions on installing the HMR multi-location dimming remotes.
1-POLE
Ground
WHITE
3-WAY
HOT
OFF
ON
OFF
ON
OFF
ON
Load
Supply
“Hot”
4 | secure smart dimmer
a
Fold wires into electrical box, taking care not to pinch a wire.
b
Use included screws to secure smart dimmer to electrical box. Do not fully
tighten the screws.
5 | test the smart dimmer
NOTE: See getting to know your switch section for feature details.
Turn the power back on at the circuit breaker, press switch to turn light on/off
and use the dimmer paddle to adjust the level of your light(s).
TROUBLESHOOTING TIP:
If the device is not powering check wiring to determine if you have reversed the
“HOT” and “LOAD” wiring.
6 | attach wall plate
a
Use the sub-plate screws (provided) to secure the sub-plate to the
smart dimmer.
b
Tighten device screws to secure smart dimmer to the electrical box.
c
Angle the end of the wall plate over the top edge of the sub-plate.
Push the screwless wall plate down and in until it “snaps” into place over
the sub-plate.
NOTE: To remove the wall plate, place the tip of a fl at blade screwdriver into the slot
under the wall plate and twist gently.
7 | set up your system
a
Download and launch the Smart Lights, Wi-Fi app by Legrand. The app is
available on the App Store or on Google Play.
b
Connect your smart dimmer to your home network by following the step by
step instructions in the app.
c
Use the app to control your smart dimmer.
Google Play and the Google Play logo are trademarks of Google LLC.
App Store is a service mark of Apple Inc., registered in the U.S. and other countries.
Dimmer, Wi-Fi
3b (optional) | wire HMR multi-location dimmer
If you have multiple dimming locations, use the radiant HMR multi-location
dimming remotes. Install within 50 feet of the smart dimmer.
a
The HMR’s remote dimmer’s red screw is electrically connected to the
WWRL50 Smart Dimmer’s yellow traveler wire.
b
A neutral connection is connected to either of the HMR’s connections
labeled load.
c
Connect the GREEN ground wire on the switch to the ground wire(s) in the box.
NOTE: Use a wire nut to cap any extra wires.
Two different examples
are shown below.
1
2
SCAN TO WATCH THE
INSTALLATION VIDEO
SCAN TO WATCH THE
INSTALLATION VIDEO
SCAN TO WATCH HOW
TO SET UP THE APP
a
b
c
4
5
THIS SIDE OUT
MOUNT OVER DEVICE
THIS SIDE OUT
MOUNT OVER DEVICE
THIS SIDE OUT
MOUNT OVER DEVICE
SCAN TO DOWNLOAD
HOT
REMOTE
WHITE
LOAD
Ground
#14-#12
STRIP GAGE
LOAD
Made in China
USE 75ºC min.
supply wire
REMOTE
LOAD
Ground
AWG
OFF
ON
OFF
ON
OFF
ON
Supply
“Hot”
Load
WWRL50HMRW
REMOTE
LOAD
LOAD
STRIP GAGE
Ground
#14-#12
AWG
USE 75ºC min.
supply wire
Made in China
LOAD
Ground
WHITE
REMOTE
HOT
OFF
ON
OFF
ON
OFF
ON
Supply
“Hot”
Load
WWRL50 HMRW
Loading ...
