Loading ...
Loading ...
Loading ...
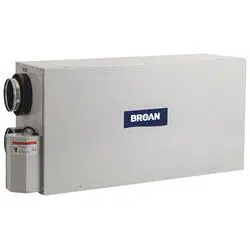
3.7 CONNECTING INSULATED DUCTS TO EXTERIOR PORTS
• For each exterior port, using a jig saw, cut a 5’’ diameter hole in the
exterior wall.
• From the outdoor, slide the exterior port in place and attach it to the
exterior wall, using 2 no. 8 x 1½” provided screws. Seal the outline with
silicone.
• From the inside, pull back the insulation to expose the flexible duct and,
using a tie wrap, attach it to the exterior port rigid duct. Carefully seal
with duct tape. Pull the insulation over the joint. Pull the vapor barrier
over the insulation and over the joint. Apply gently duct tape to the joint
making an airtight seal. See illustration at right.
VR0028
3. INSTALLATION (CONT’D)
11
3.8 INSTALLING TANDEM
®
TRANSITION* KIT
If desired, it is possible to perform insulated ducts connection with the outdoor
using the Tandem transition kit (purchase separately, part number VTYIK1). The
joist opening needed to install the Tandem transition must be 9¾” minimum. The
maximum height of the Tandem transition is 8¾”. To connect the insulated flexible
ducts to the Tandem transition (Exhaust air to outdoor and Fresh air from outdoor),
follow the instructions included with the kit.
*Patented.
VR0003
Tandem transition kit
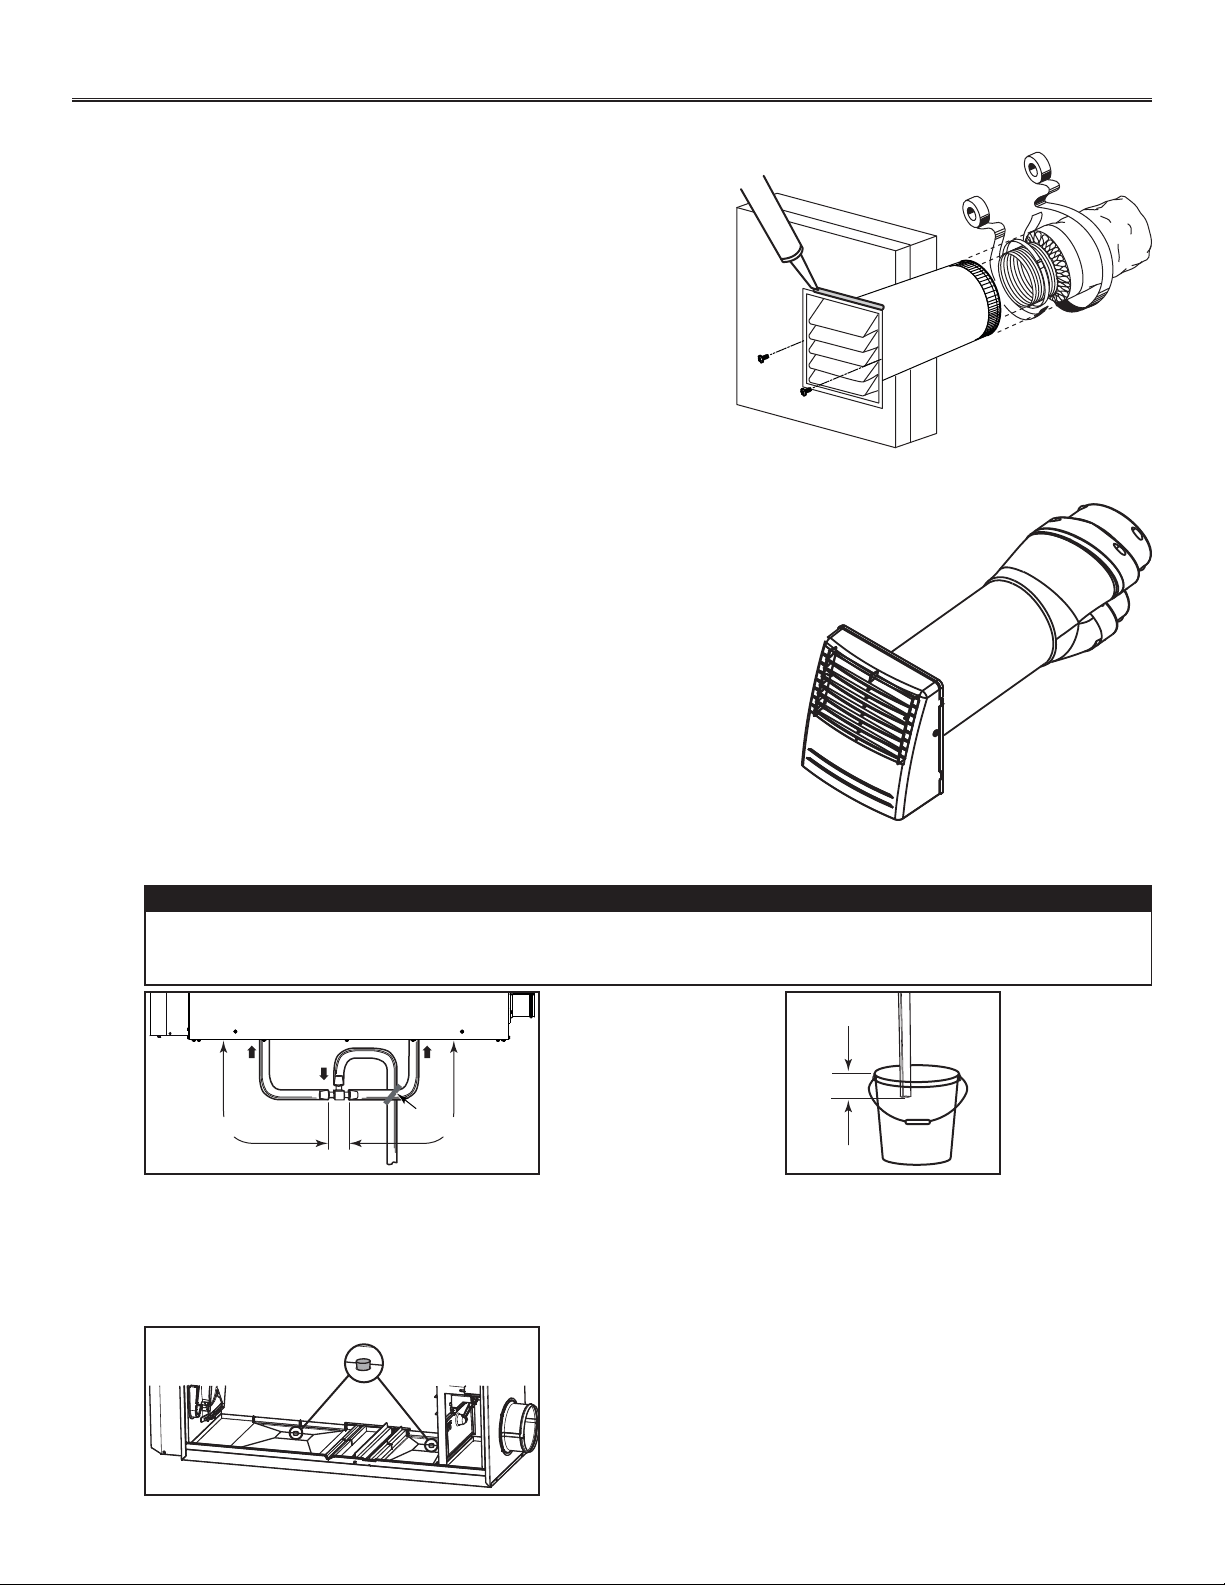
3.9 CONNECTING THE DRAIN
Cut two sections of plastic tubing, approximately
12” long, and connect each one to both inner drain
fittings located under the unit as shown.
Join these both sections to the “T” junction and
main tube as shown, to prevent the unit from
drawing unpleasant odors from the drain source.
VD0308A
± 1”
Run the tube to the floor drain or to an alternative
drain pipe or pail.
IMPORTANT
If using a pail to collect water, locate the tube end
approximately 1” from the top of the pail in order to
prevent water from being drawn back up into the unit.
VD0311A
± 12” ± 12”
TIE WRAP
A drain tubing (included) must be installed for all HRV units. For ERV units, it is not required, however, it is
recommended for climates where the outdoor temperature typically remains below -13°F, (over a 24-hour
period) for several days in a row, combined with an indoor humidity of 40% or higher.
CAUTION
NOTES: 1. For ERV unit, remove both drain plugs inside the unit prior to
install tubing.
2. ERV core and blower assembly removed from illustration to ease
understanding.
VD0323
Loading ...
Loading ...
Loading ...